
First engine start is very close now with only a few punch list items left to complete. The biggest and most important item is bleeding the brakes. Other builders seem to have mixed results with this process, some knock it out in 10 minutes and others just drag their feet while landing having completely given up on ever having effective braking abilities thanks to the ridiculousness of the task. It appeared as if I was going to join the latter group.
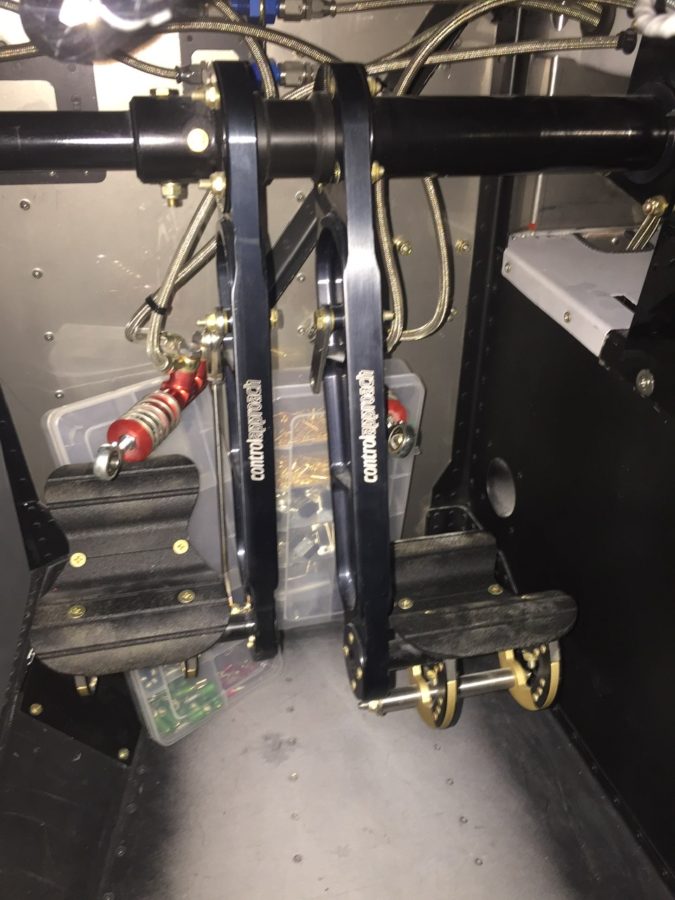
Kitplanes had a great article about bleeding from the calipers up. This makes sense as it forces all of the air out of the system as the fluid enters. One caveat for my system, however, are the Beringer master cylinders which prefer to be horizontal while bleeding to ensure the air actually escapes. That meant diving head first into the foot wells and disconnecting them from the rudder pedals. I had forgotten how many little washers and spacers were used in their assembly. Ugh.
Amazon Aircraft Supply Co, Inc, LLC, R with a little circle around it, delivered a brake bleeding tank that many people recommended vs. the small hand pump bottle that doesn’t quite deliver enough pressure to complete the job. I ran down to another popular aviation hardware distribution company, Lowes, and picked up some clear tubing and a few fittings and valves. The idea is to view the fluid, bubble free, entering the caliper and then exit into the brake reservoir on the firewall. The valve allows you to control the flow of brake fluid while tightening the bleeder screw in the caliper. Pretty easy to set up and I’d highly recommend it.
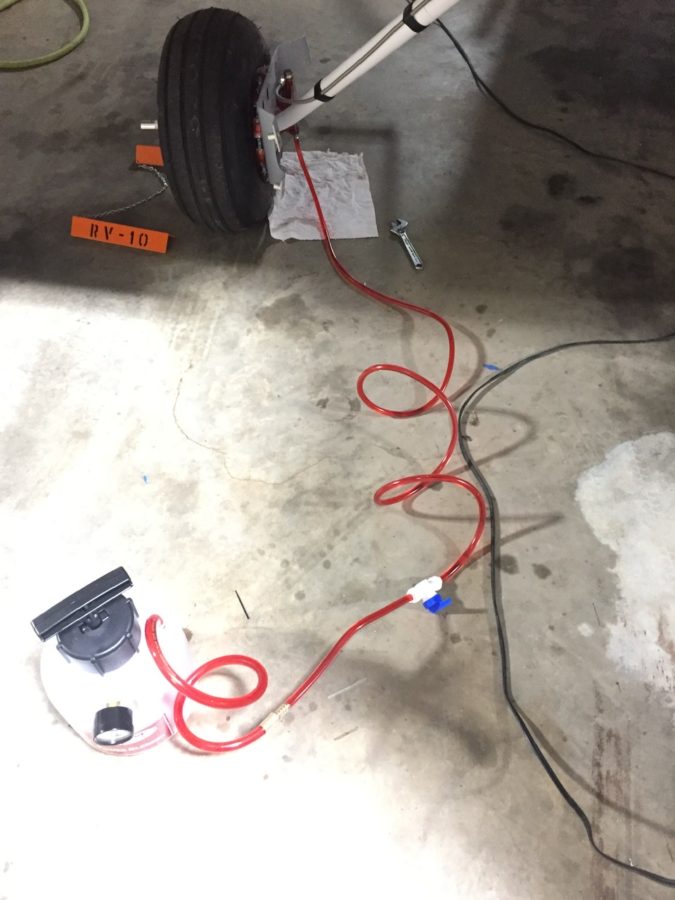
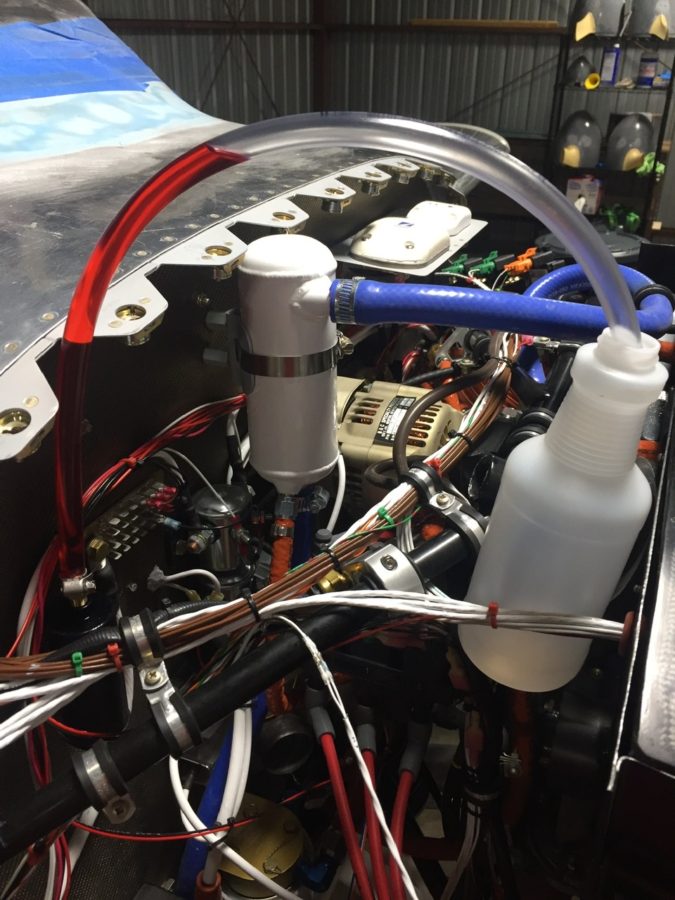
I also got a fitting to screw into the brake reservoir that accepted more of the clear tubing. When bleeding, you want to see the air come out of the reservoir followed by bubble free fluid. Once you see that, the system is bled and should have good pressure. Of course, it wasn’t that easy to get what you see below.
The right side of the system bled easily and took almost two and a half minutes. This led to a sense of cockiness and confidence that only I can exhibit while moving to the next and saying wow, this is going great! The left side brought me back to the humble earth by making a fool out of me. No matter what, we could not get the left side bled. Fluid would go in to a point but never show evidence of reaching the reservior. Likewise, we could not get adequate pressure using the master cylinder nor see any difference in the level of fluid in the reservoir. The master cylinders would also not force fluid out of the caliper as they should either. Something was wrong.
My buddy Dan, who was helping and hated the process as much as I started to, suggested breaking the seal on fittings moving up the line to see where the suspected blockage is. Fortunately, we were lucky and found it at the fitting on the bottom of the fuselage near the gear leg. Fluid moved easily up to that point but would go no further. So I disconnected the line from the tunnel to that fitting and took a closer look.
It seems that while building I neglected to cover those fittings and a little bastard insect built a fine home in that line. After taking my air hose with 100 psi set on the regulator to the hose, I wound up with this mess finally popping out of the brake line.
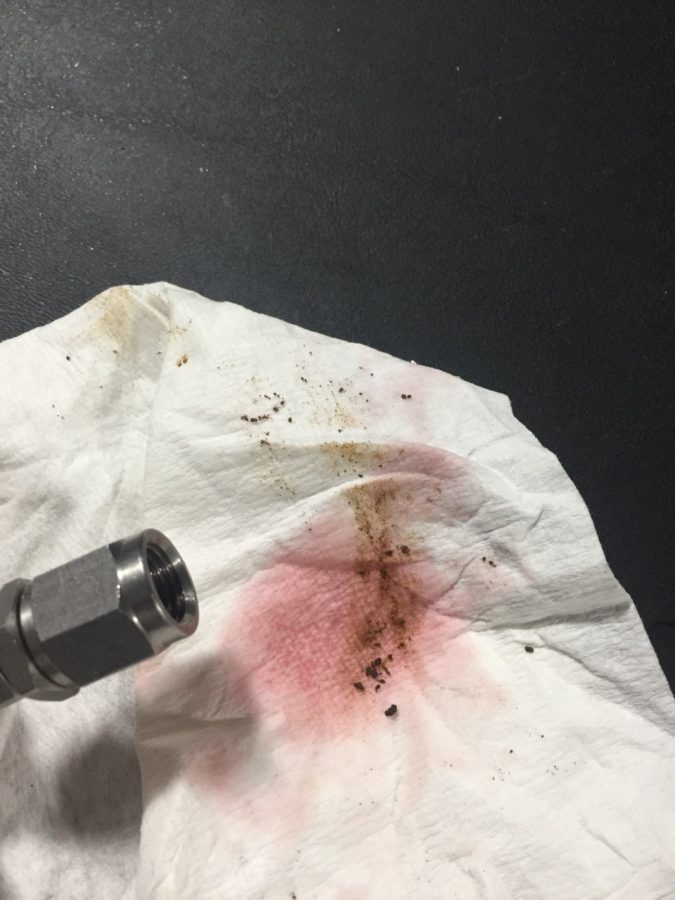
Well, that would explain why fluid would not move one way or another. After reassembling the line, it took almost two and a half minutes to bleed the left brake. This after about two hours of screwing around with it and a LOT of cussing. I also managed to piss of my hangar neighbor by telling him this wasn’t a good time for someone to come in and check out the project. Sorry dude, hope you get over me asking you for a rain check. Either way, air was replaced with fluid, the pedals were put back together with much grunting and back pain, and I could finally put the brakes on this build.