
It’s time to attach the tail cone to the fuselage which means a museum piece can be ceremoniously lowered from the ceiling and brought back into production. The last work was done over two years ago on the tail cone and it’s been in storage, basements, and garages since then. Unfortunately, moisture left its mark with some heavy filiform corrosion on the bulkhead and bottom skin.
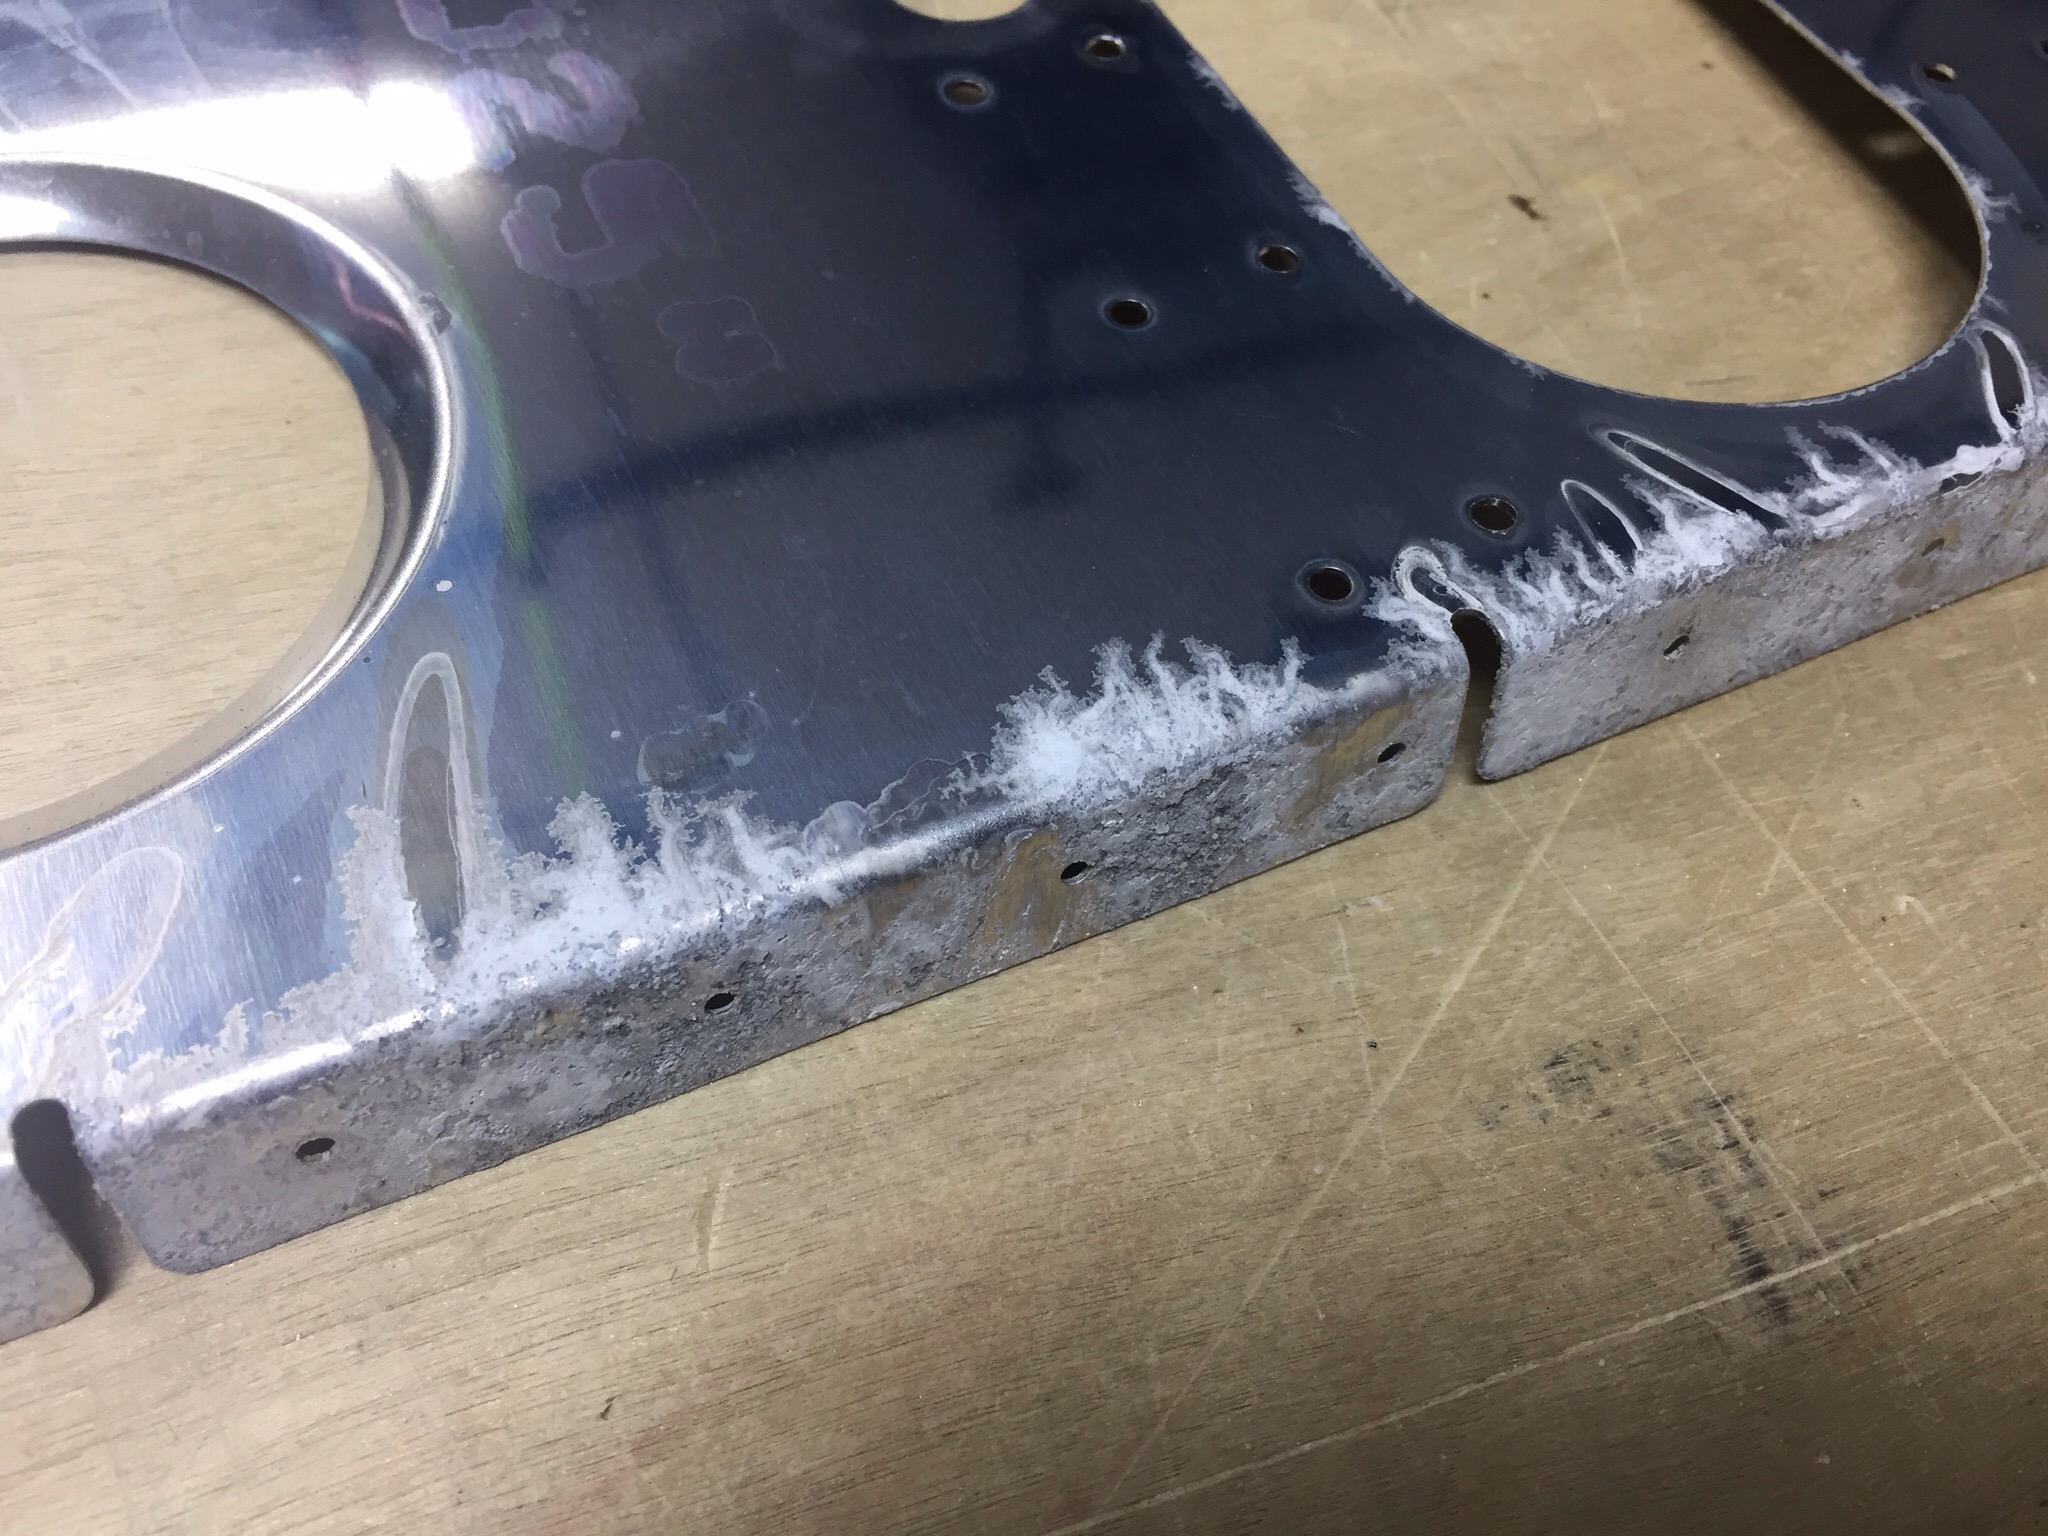
The tail kit components had this elsewhere when I purchased it, but never this bad. On the bulkhead, I dug in with the angle grinder and 3M pads and made quick work of the nasty stuff. Fortunately, it wasn’t too deep in the metal and it all came off easily. The bottom skin is a bit trickier with the DuPont primer on it. I didn’t do a great job priming this and did it after assembly so there were areas the corrosion was actually underneath the primer. I’m not quite done getting that part cleaned up, as evident in the picture.
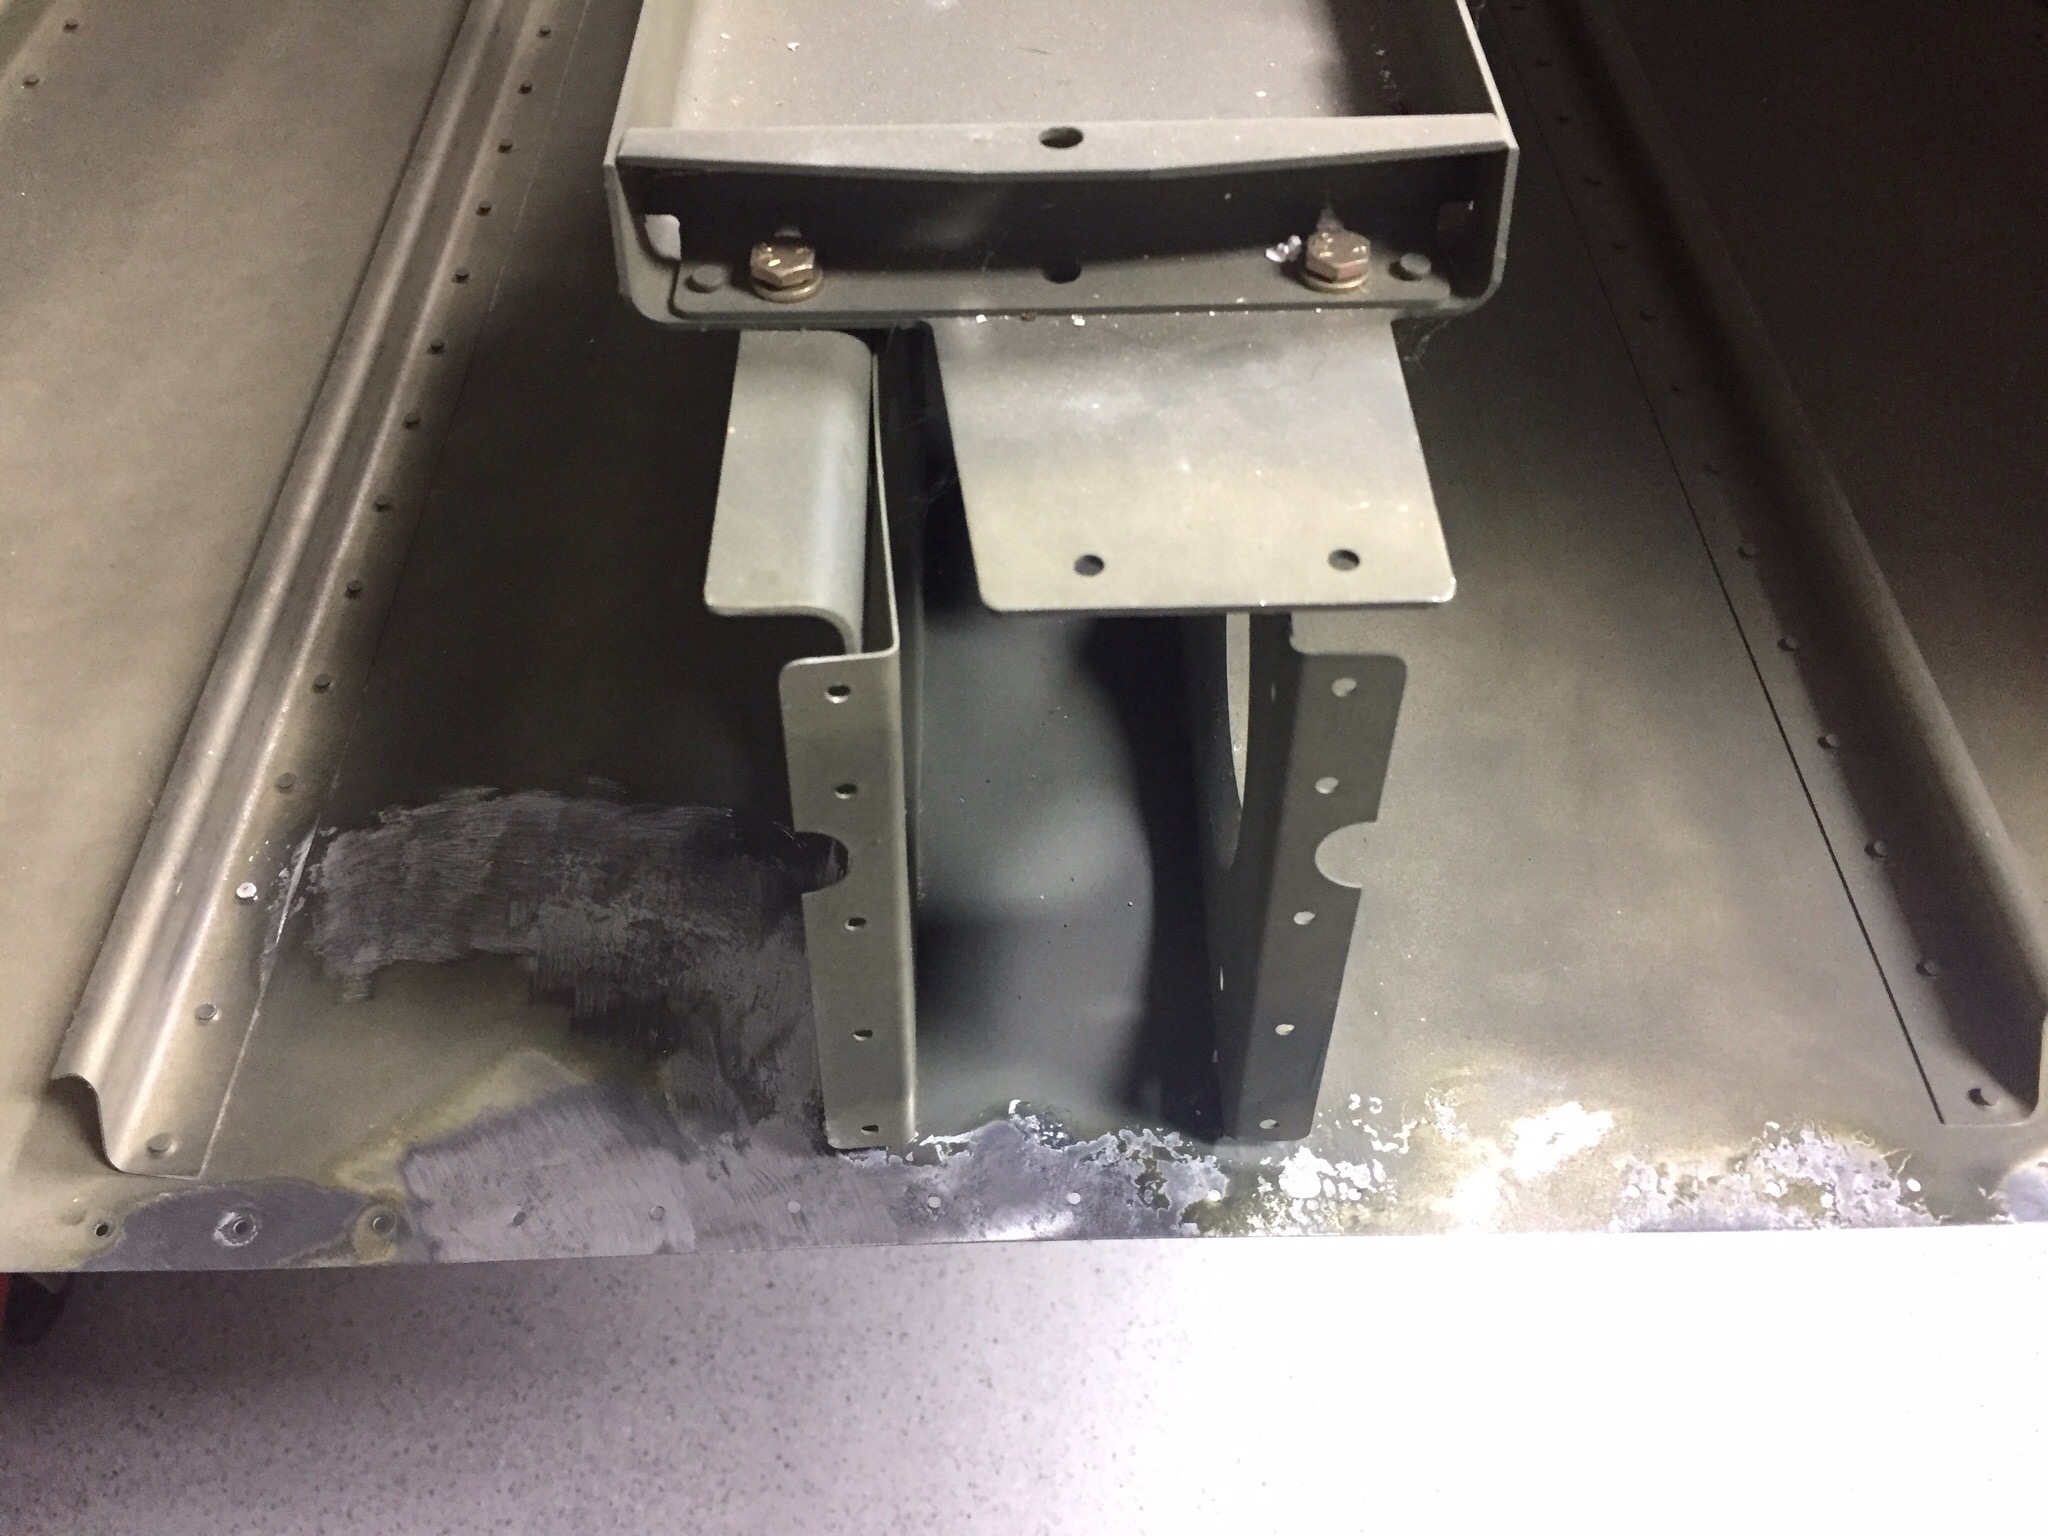
The biggest concern, out of it all, is the thin line of white corrosion along the ribs holding the battery tray (ignore the white flakes in the background, I haven’t finished vacuuming). The surfaces between those two parts aren’t primed and I’m suspicious that there is corrosion between the two.
I spent a good amount of time with a flash light and inspection mirror going over the rest of the tail cone. It’s the only area like this and I don’t want to risk long term issues. I concluded that the right thing to do is to drill out the rivets and clean these areas up properly. It’ll be easy to do now and I’ll combine this with the custom equipment tray that I’ll be putting in to replace the battery tray. Once this is complete, we’ll move on to attach the tail cone.