Quit staring at my glass

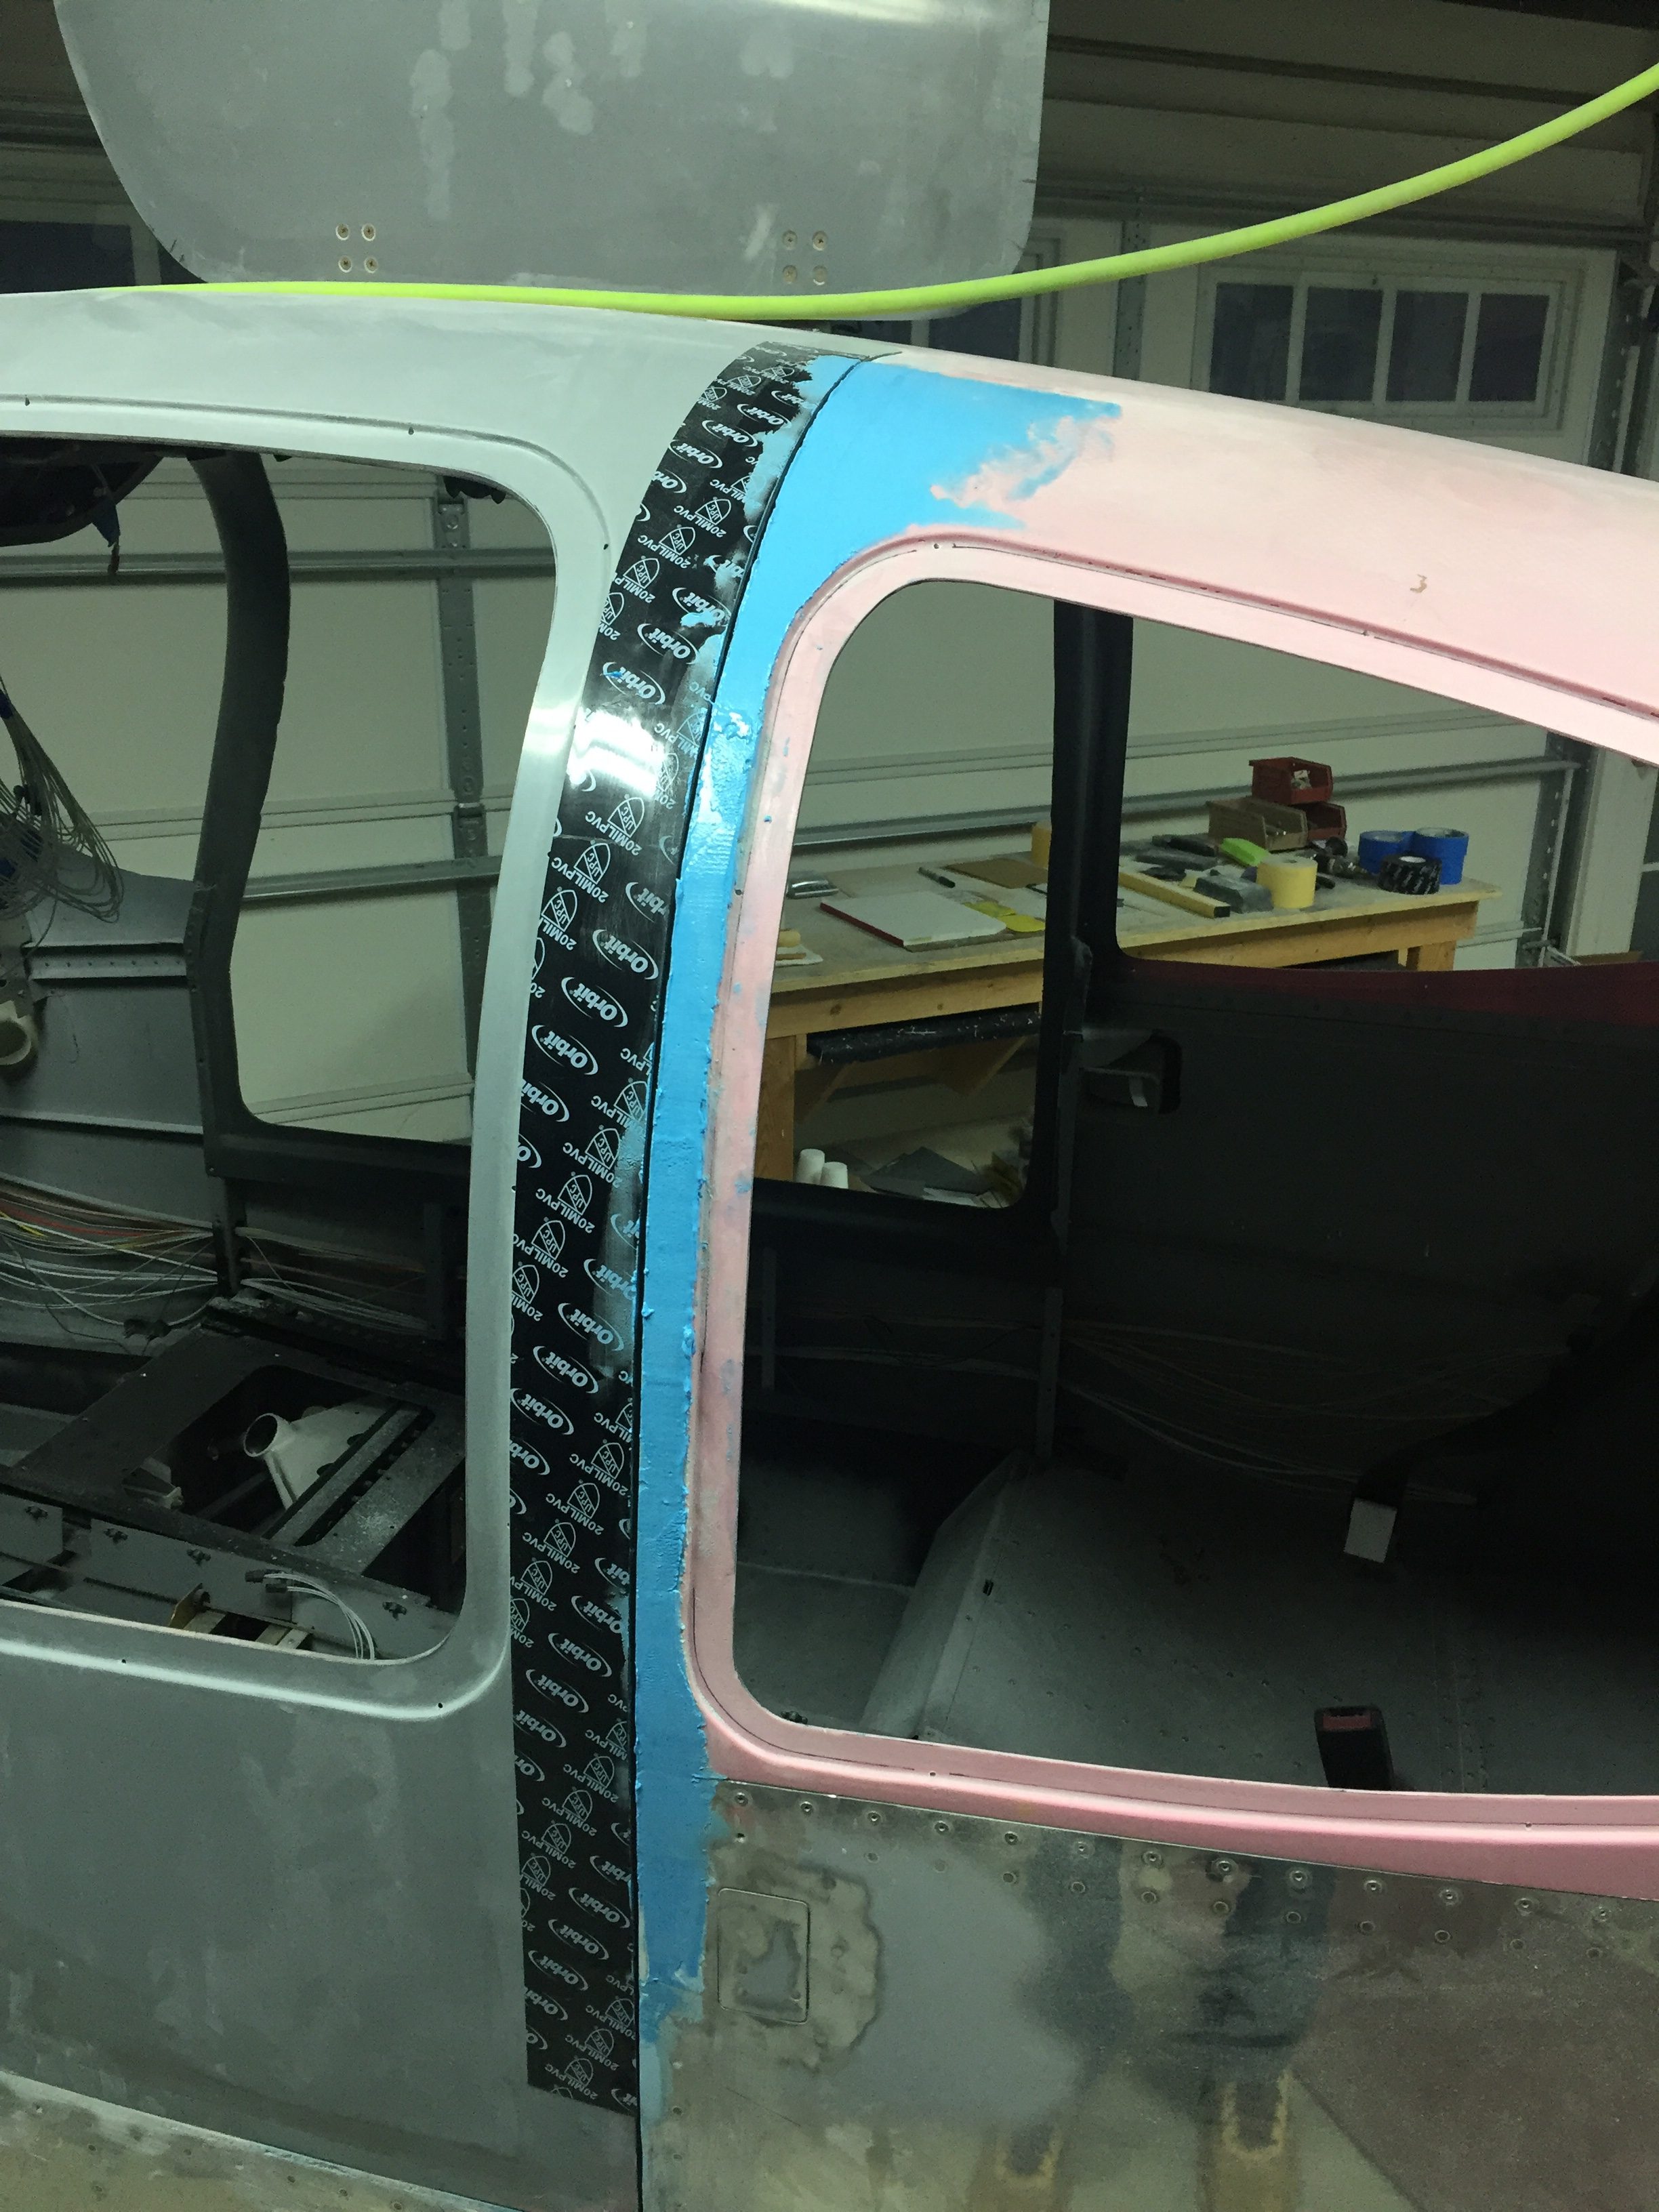
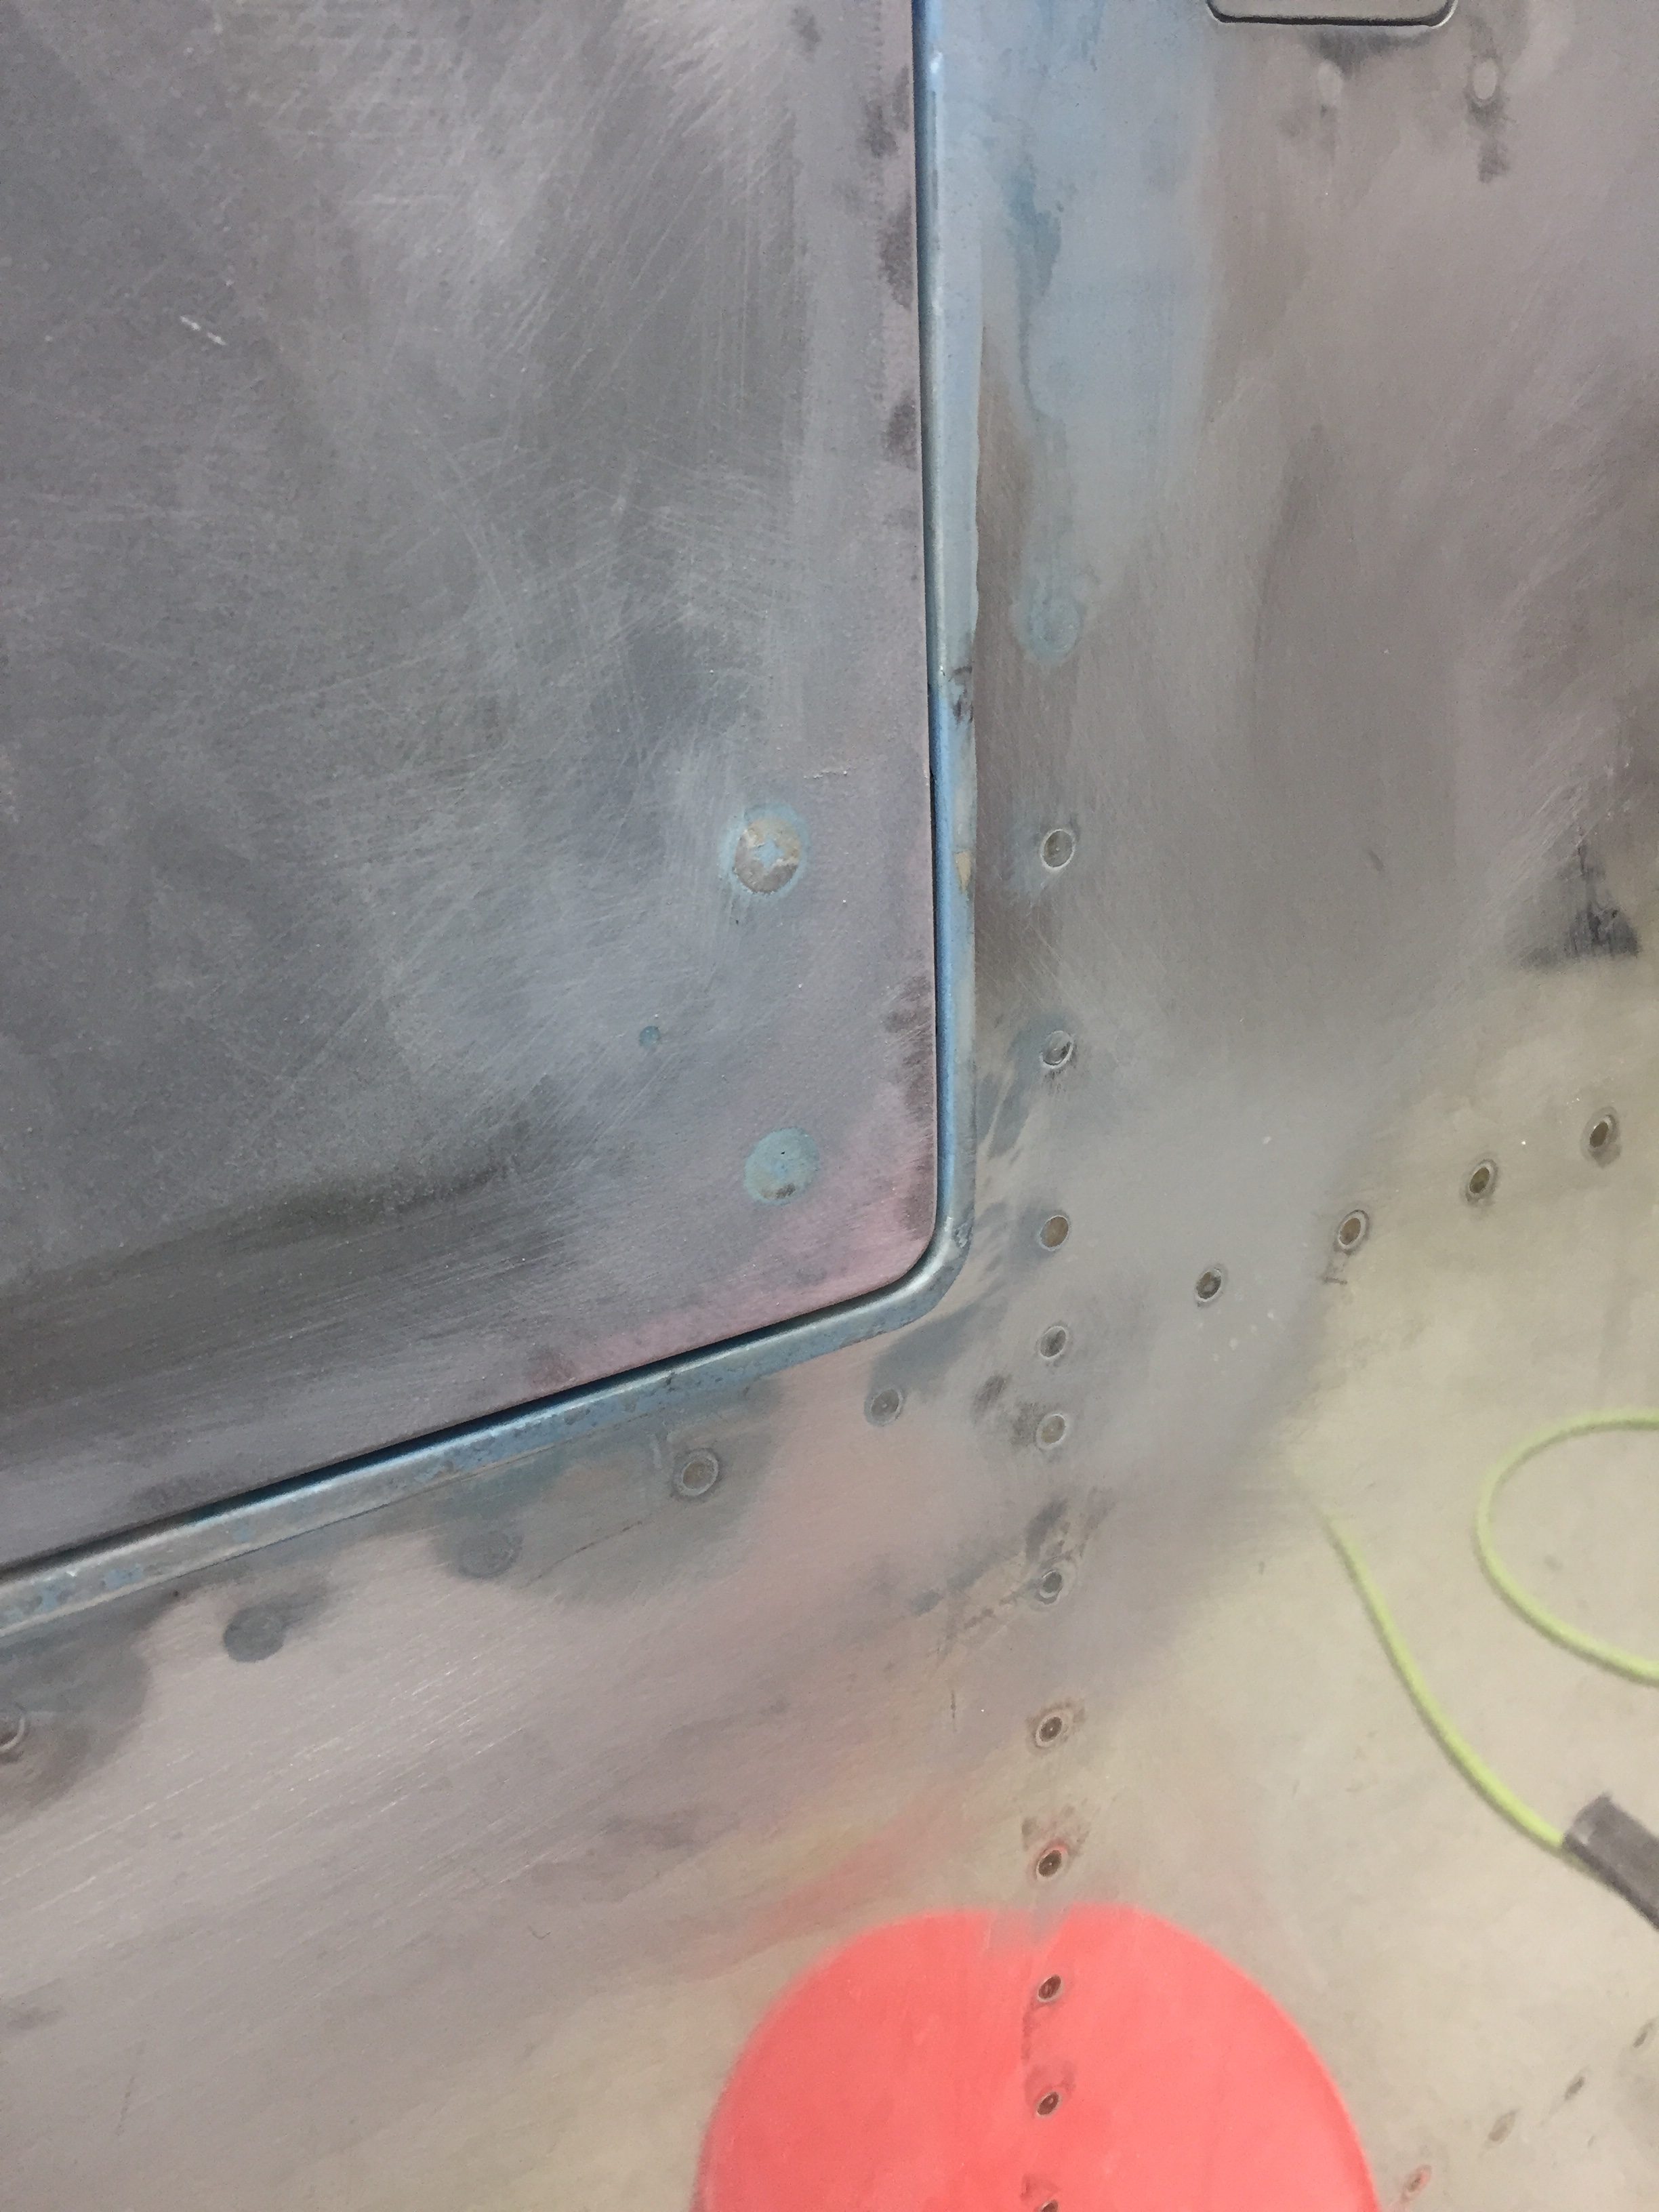
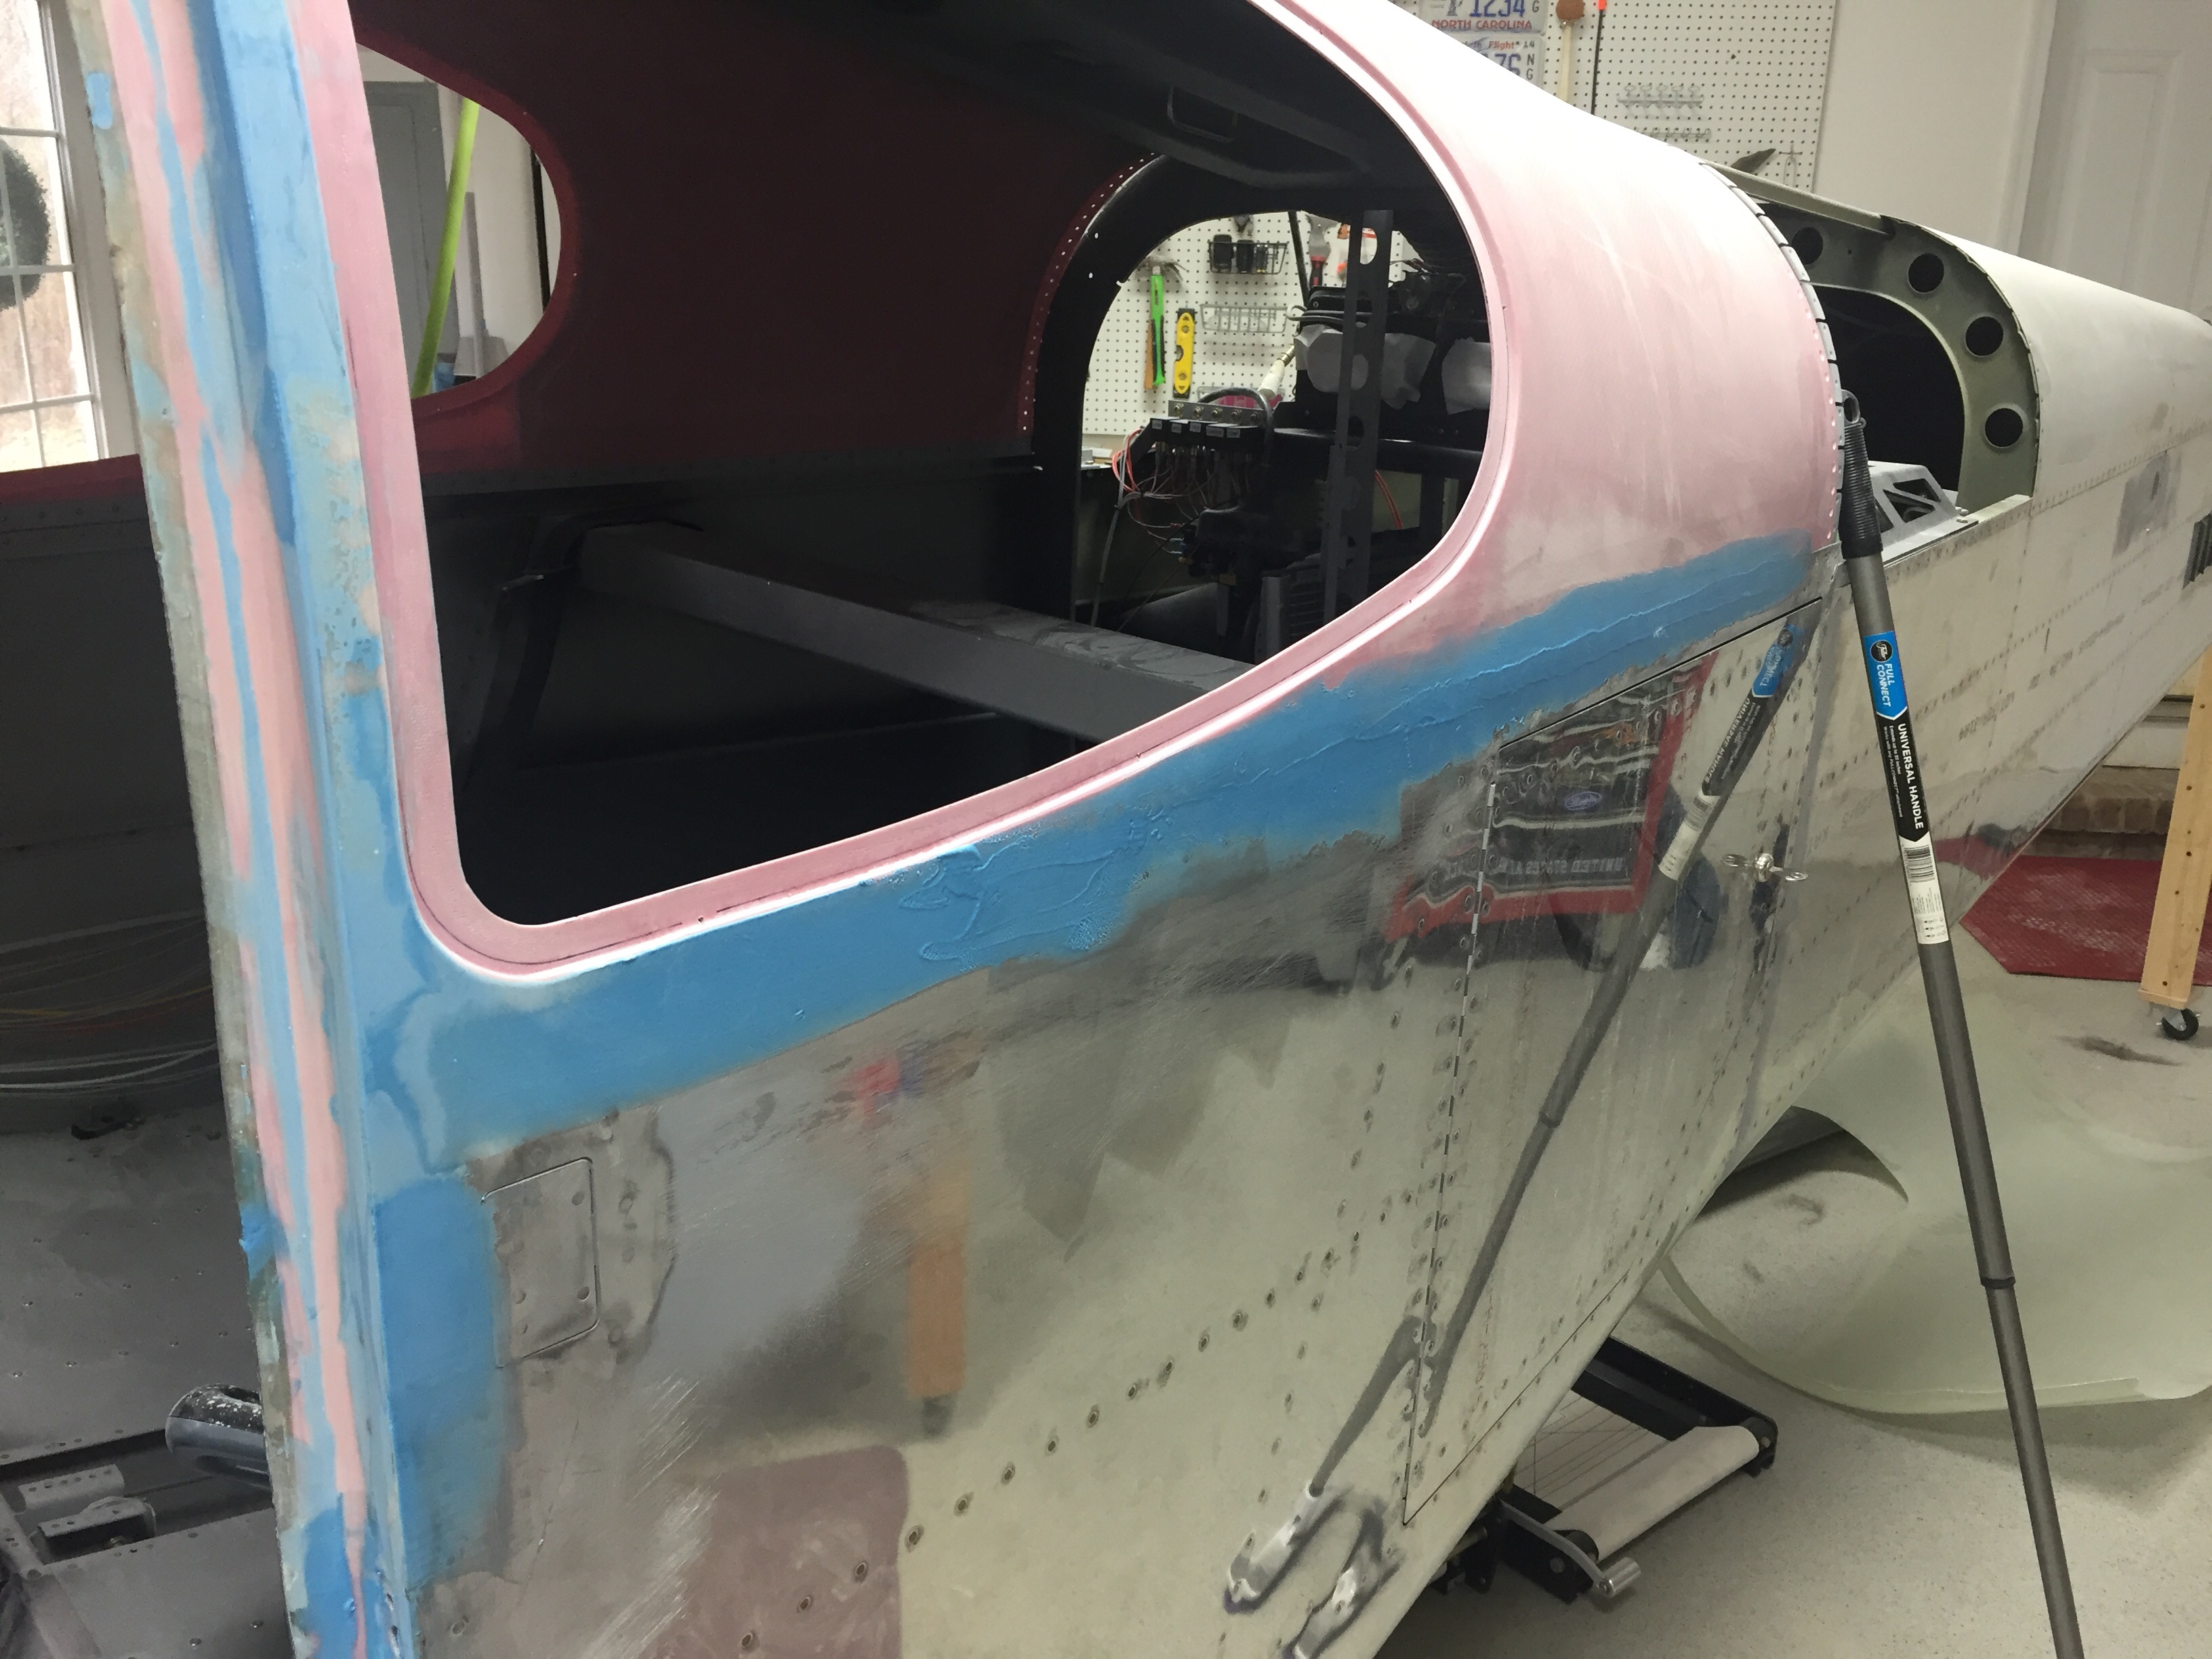
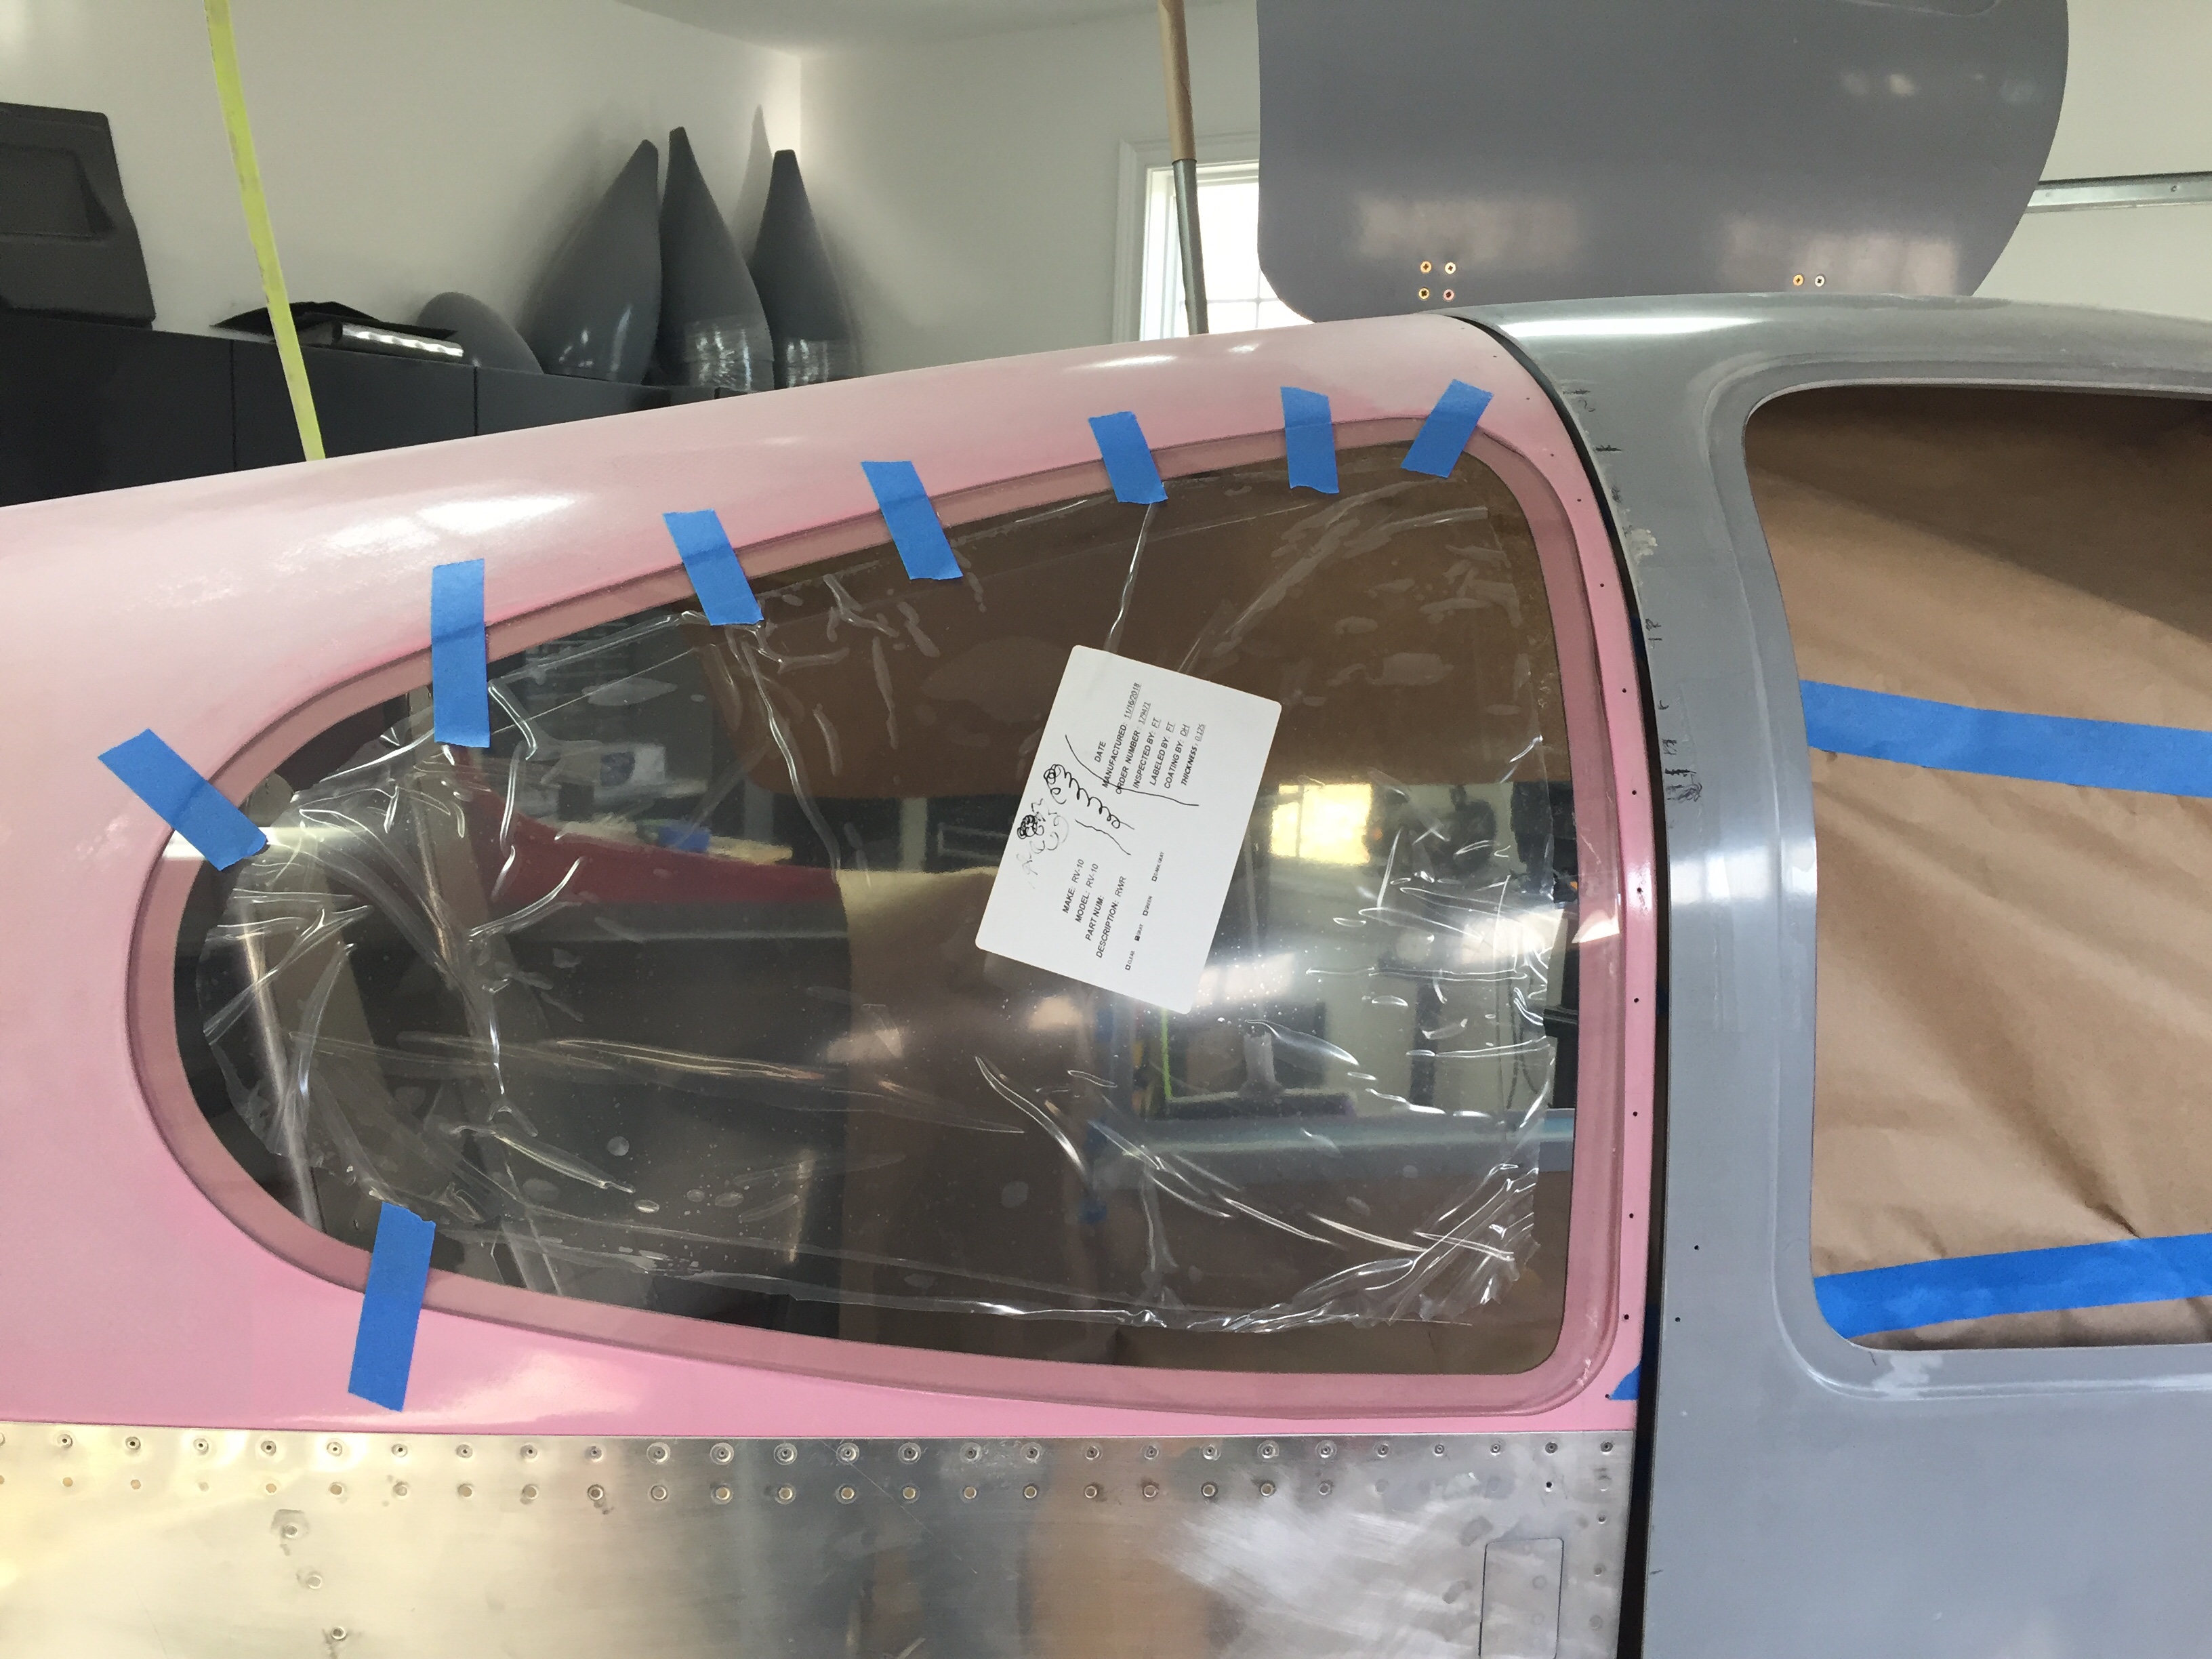
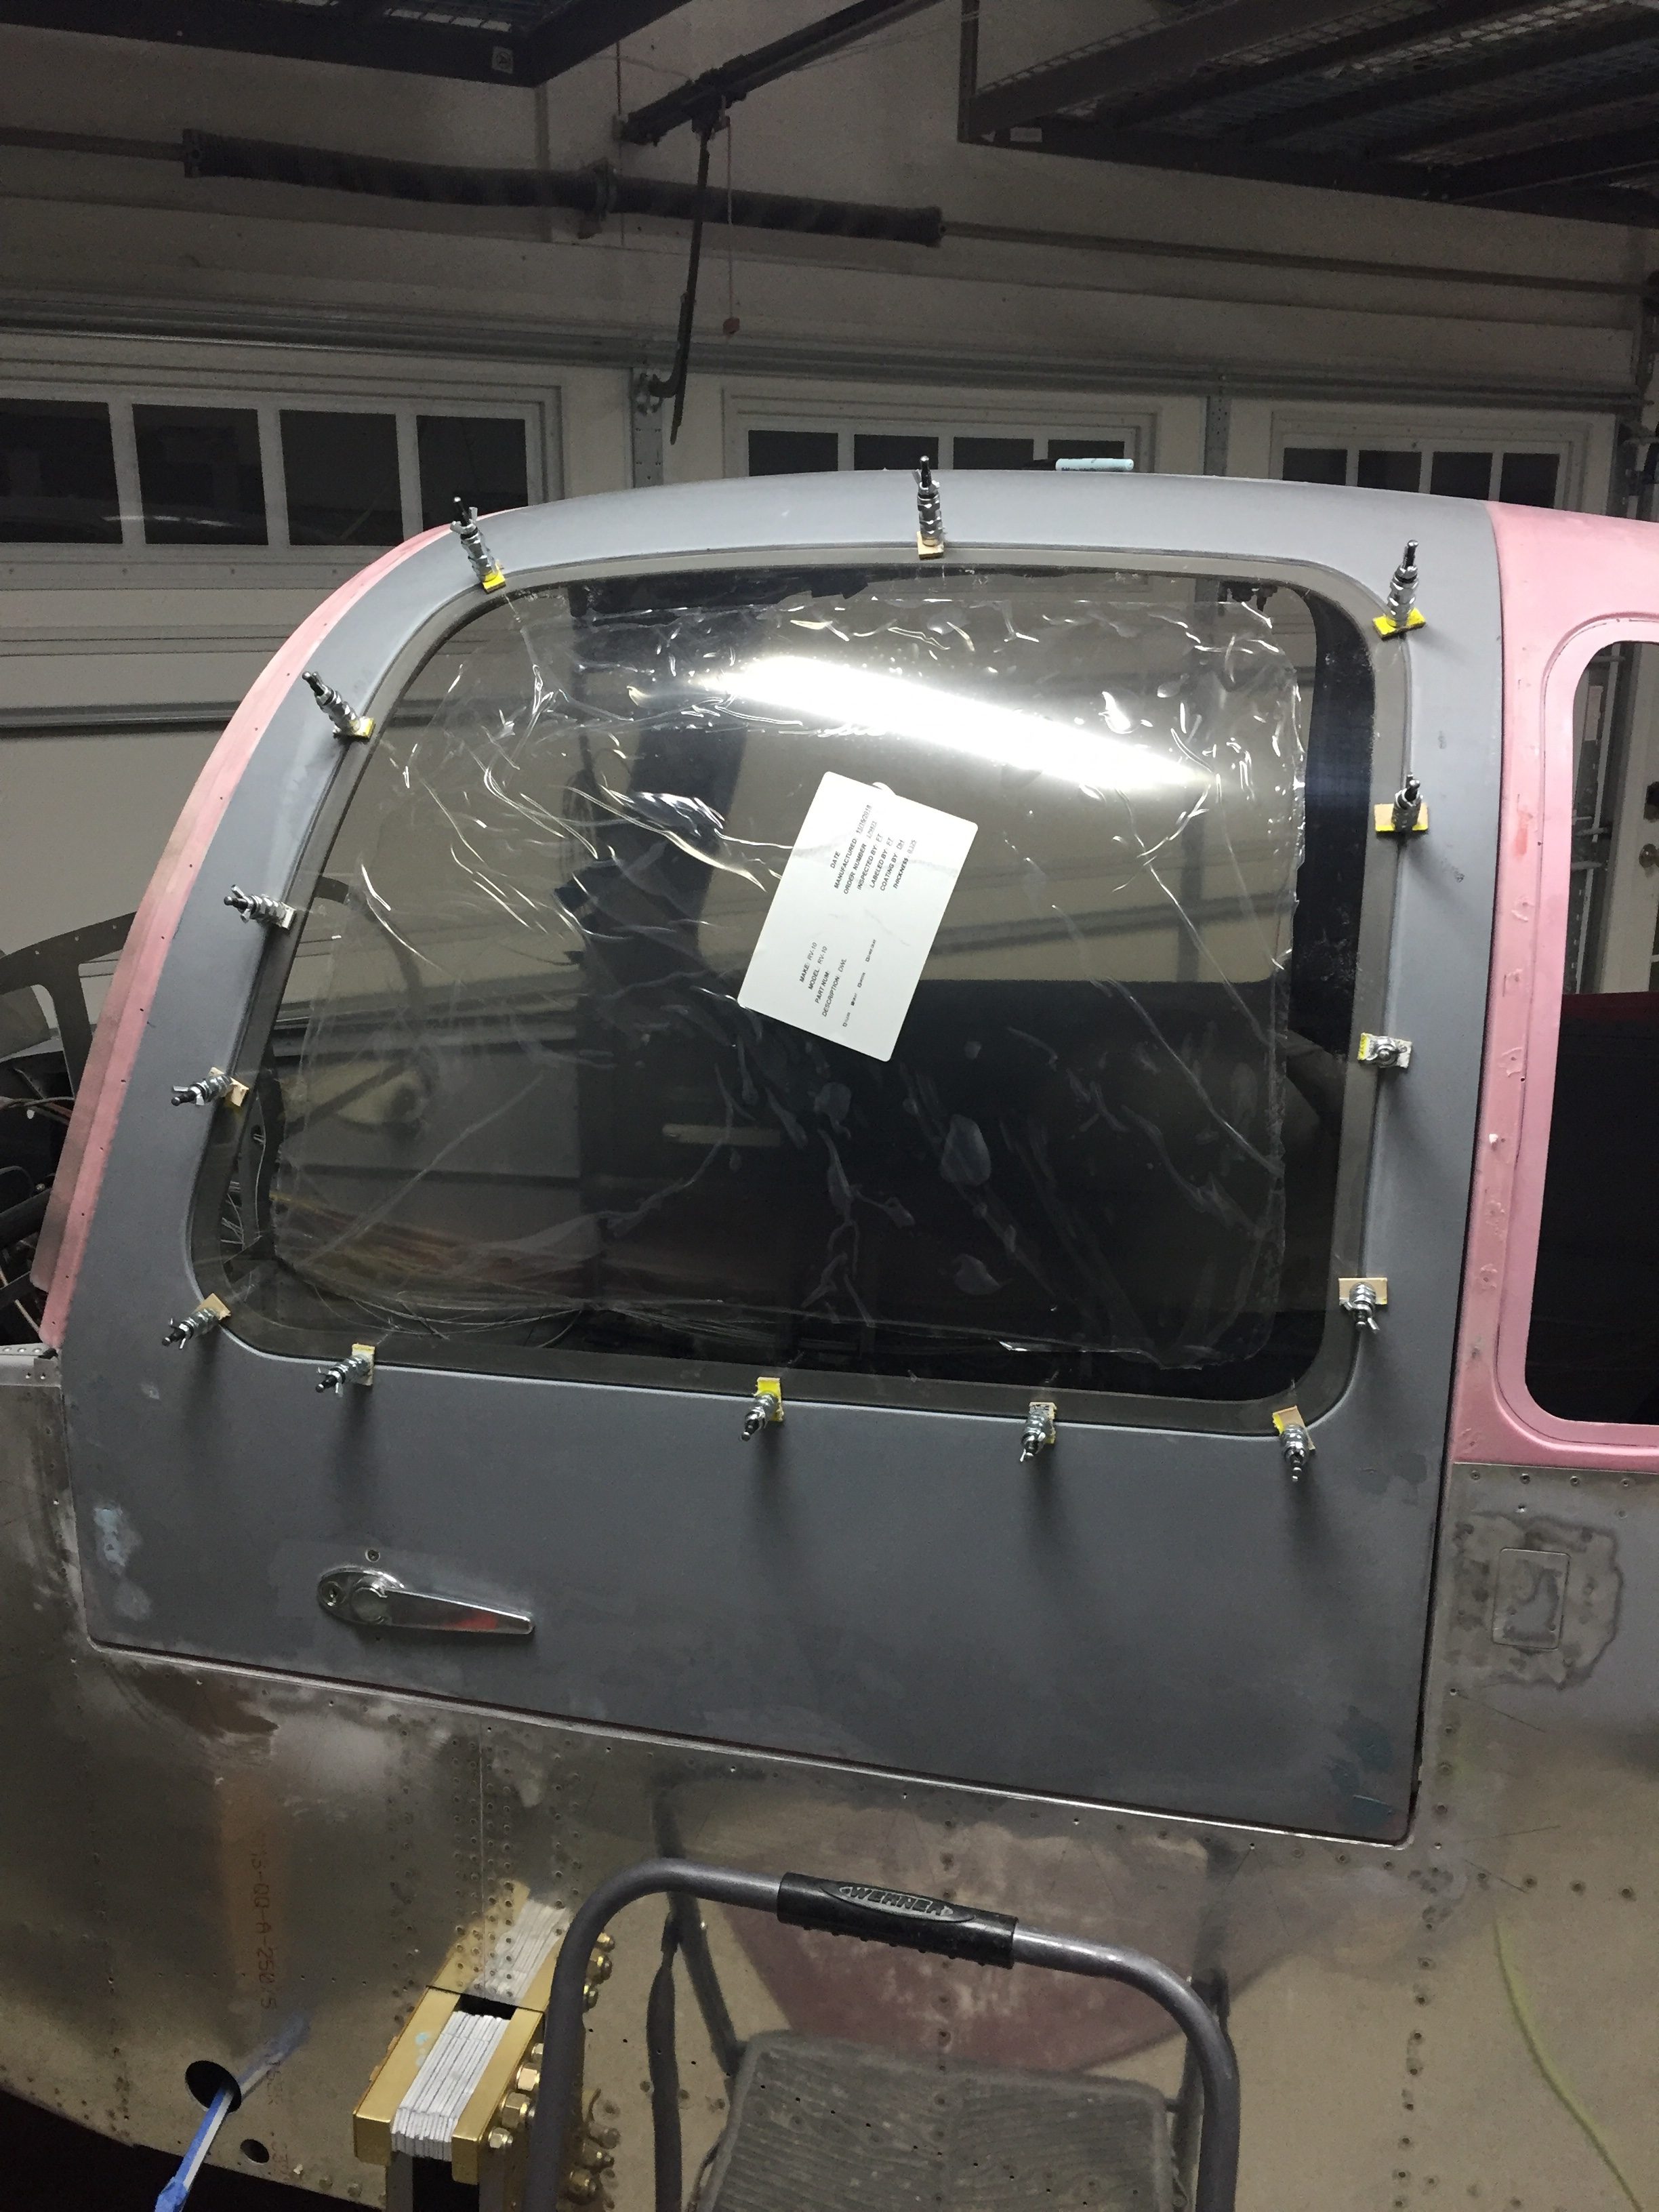
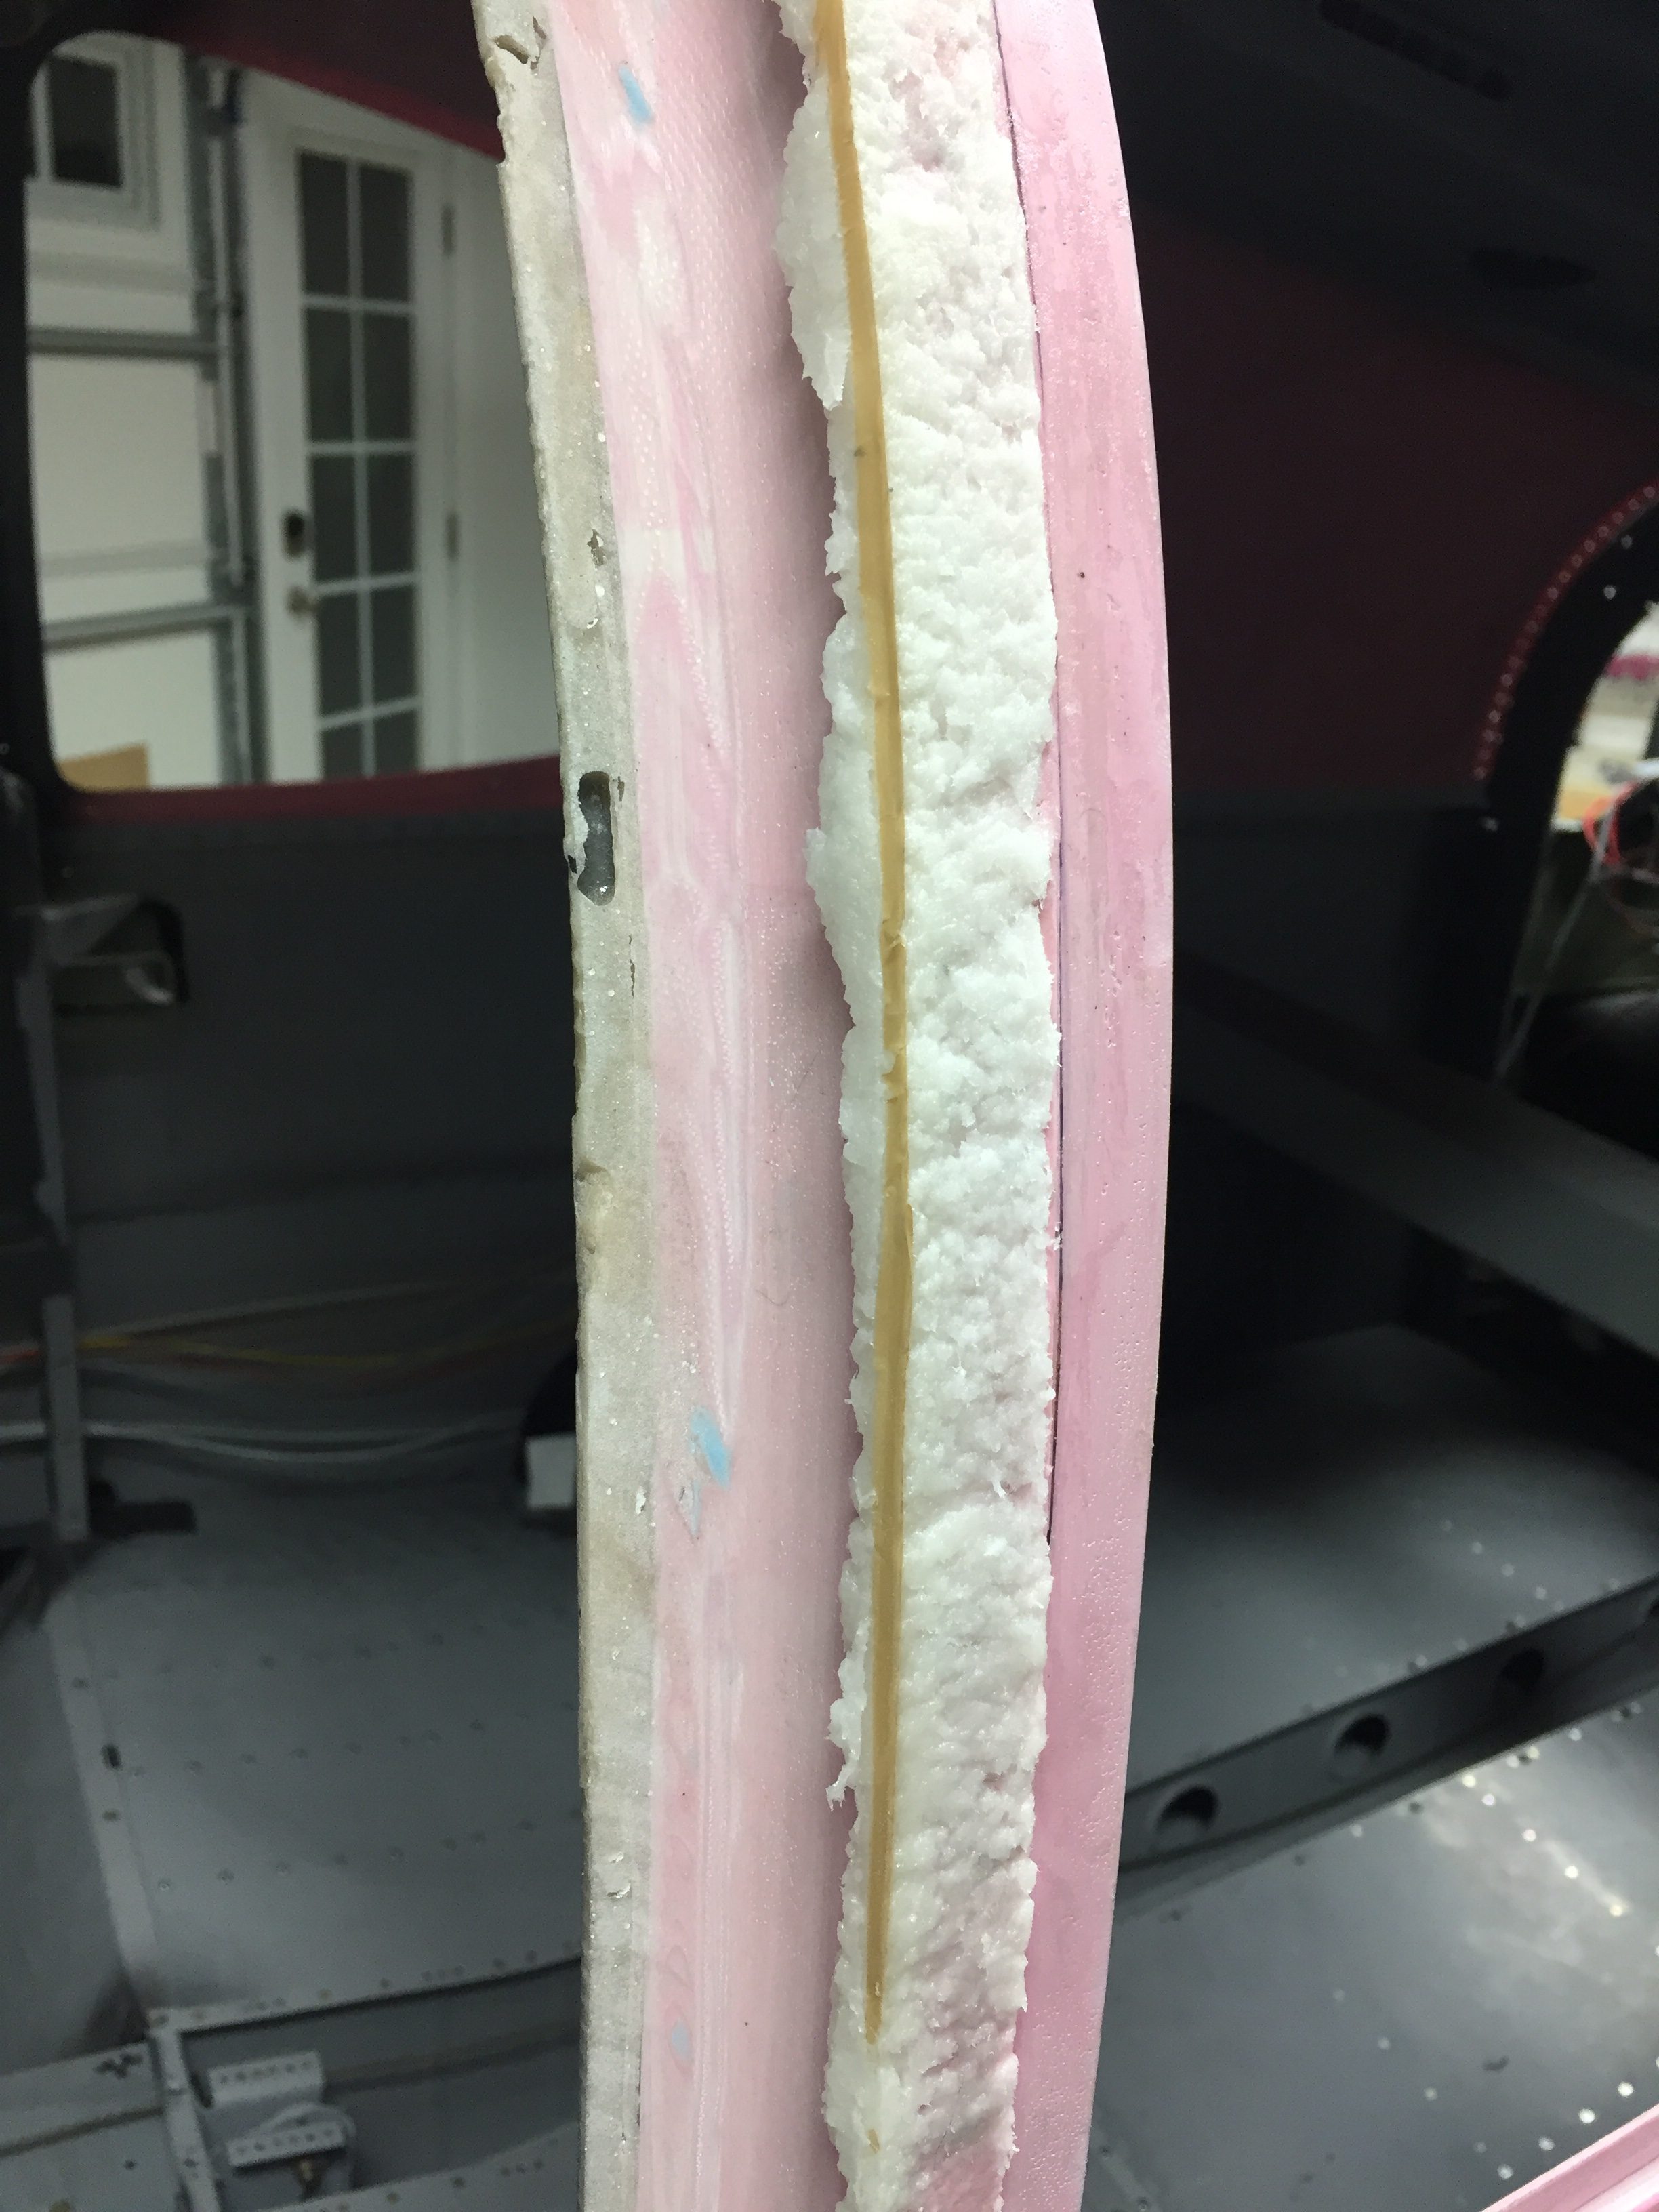
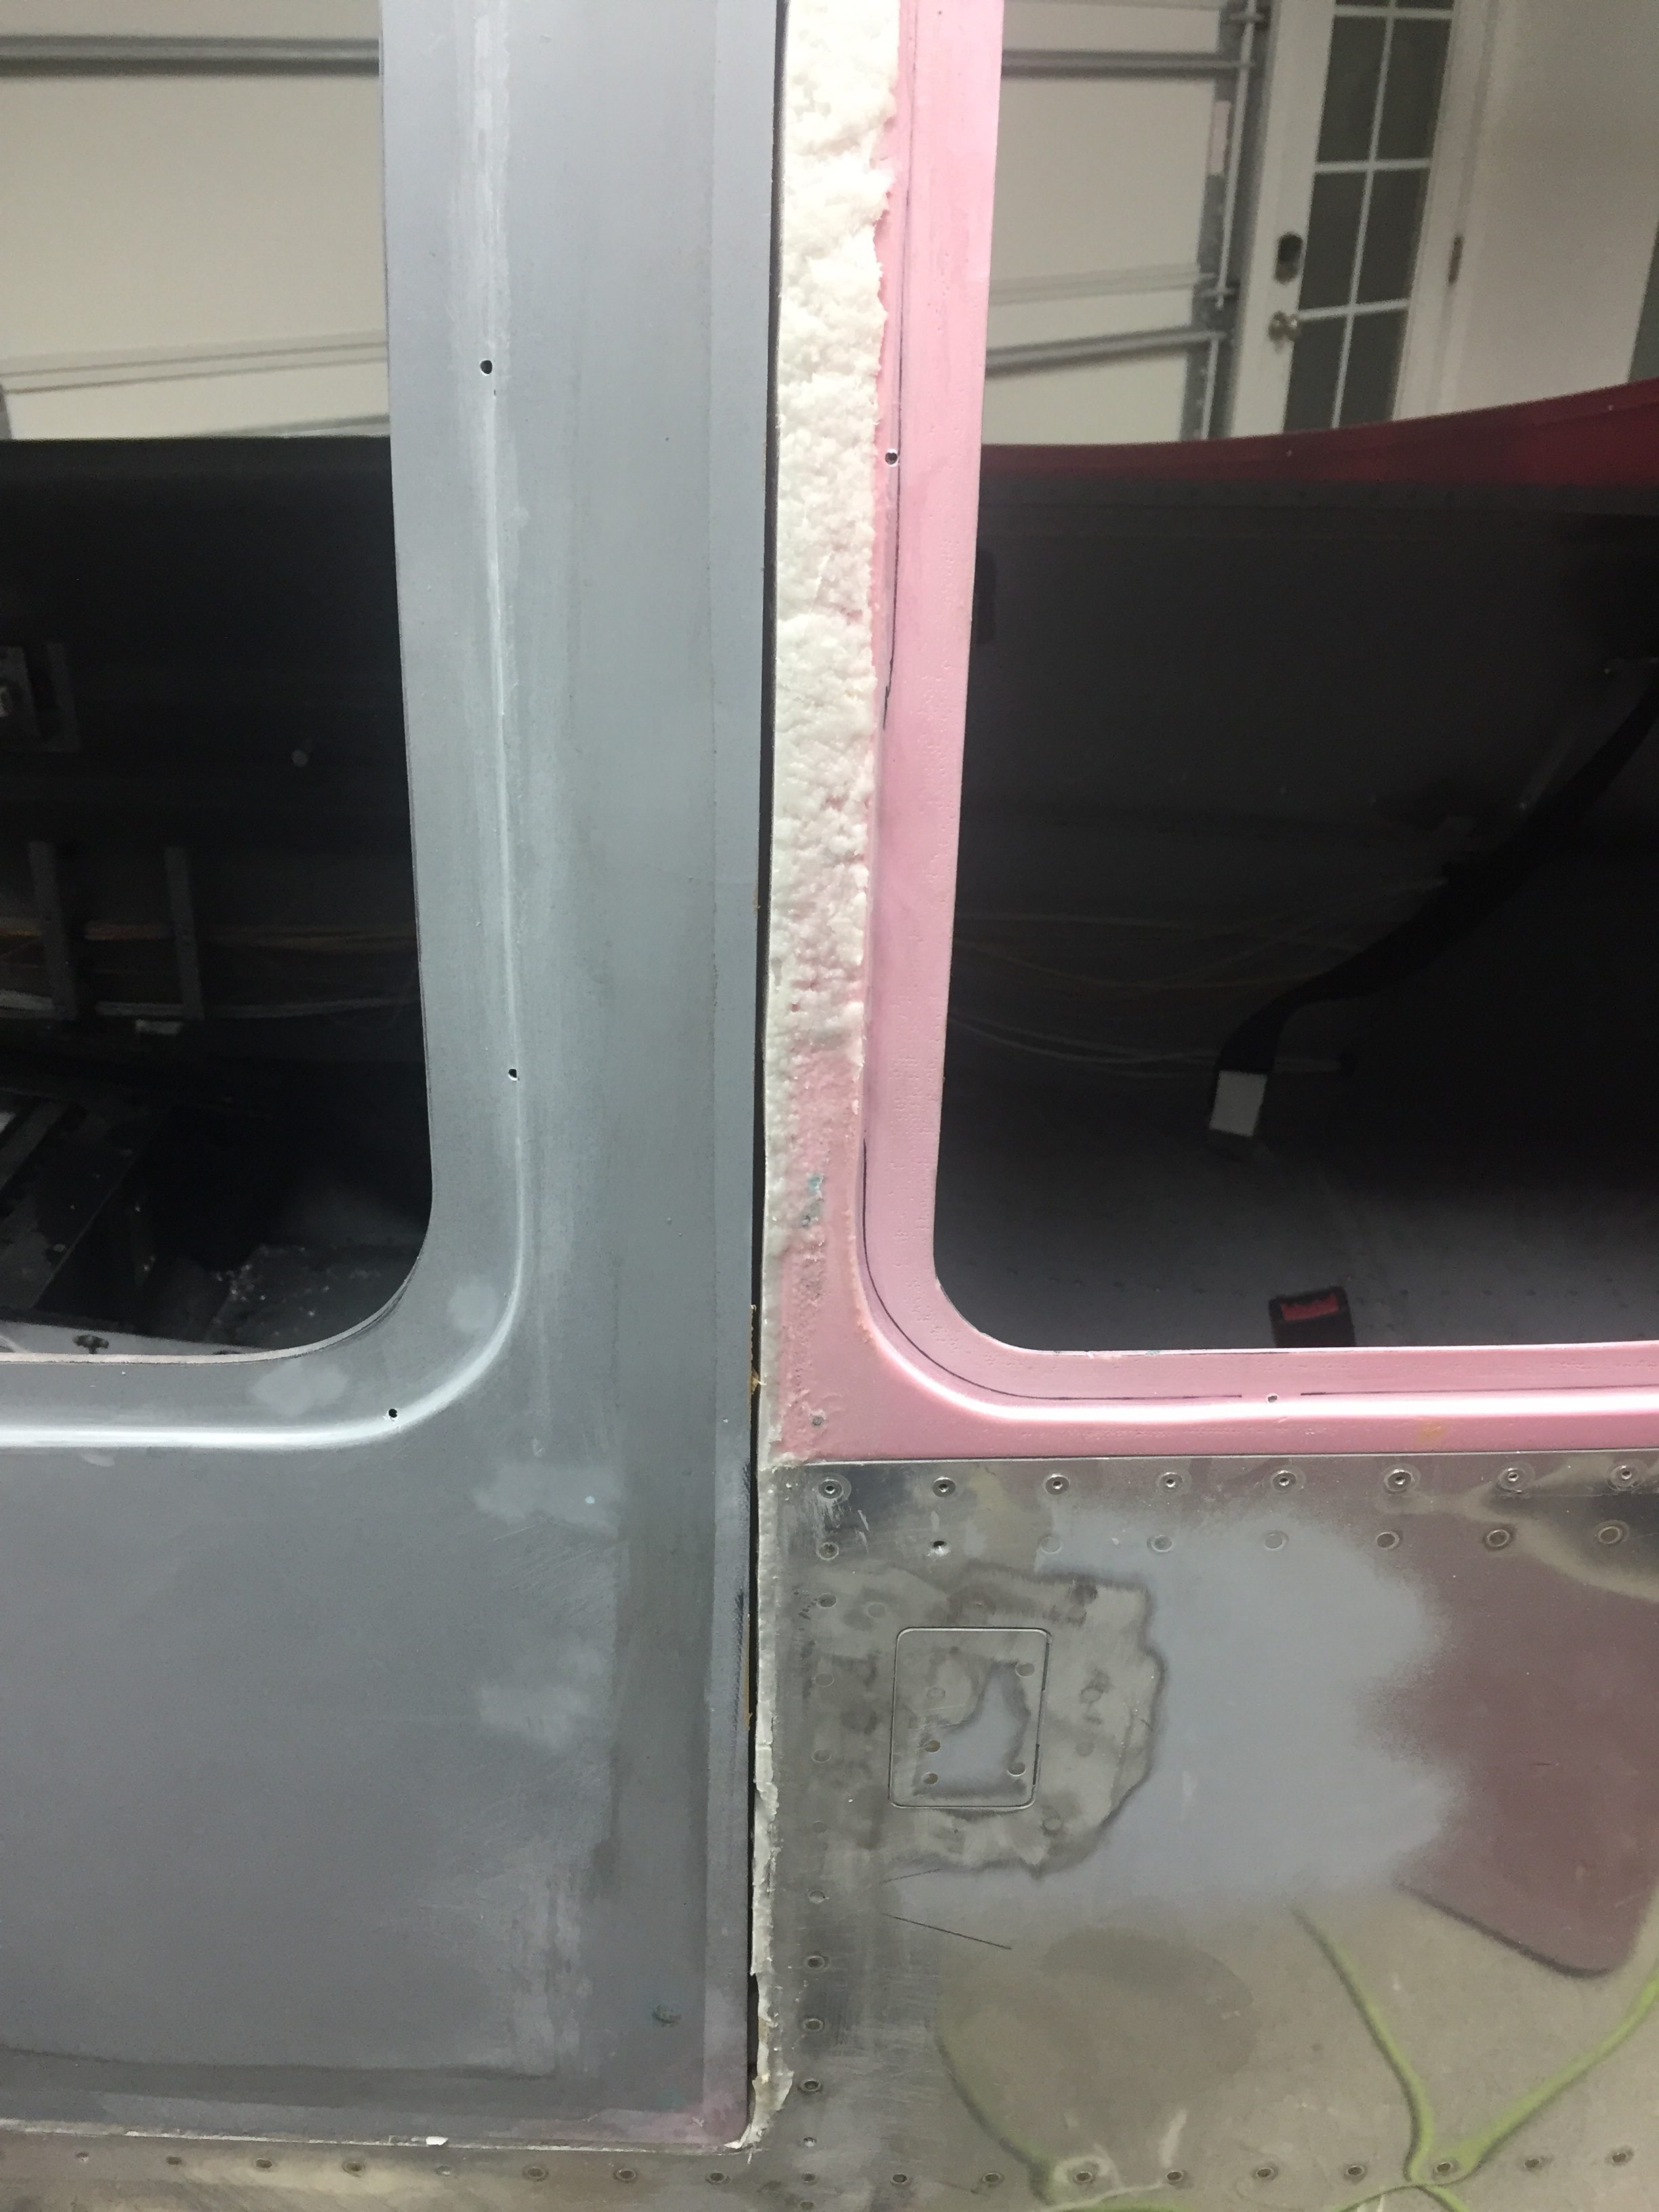
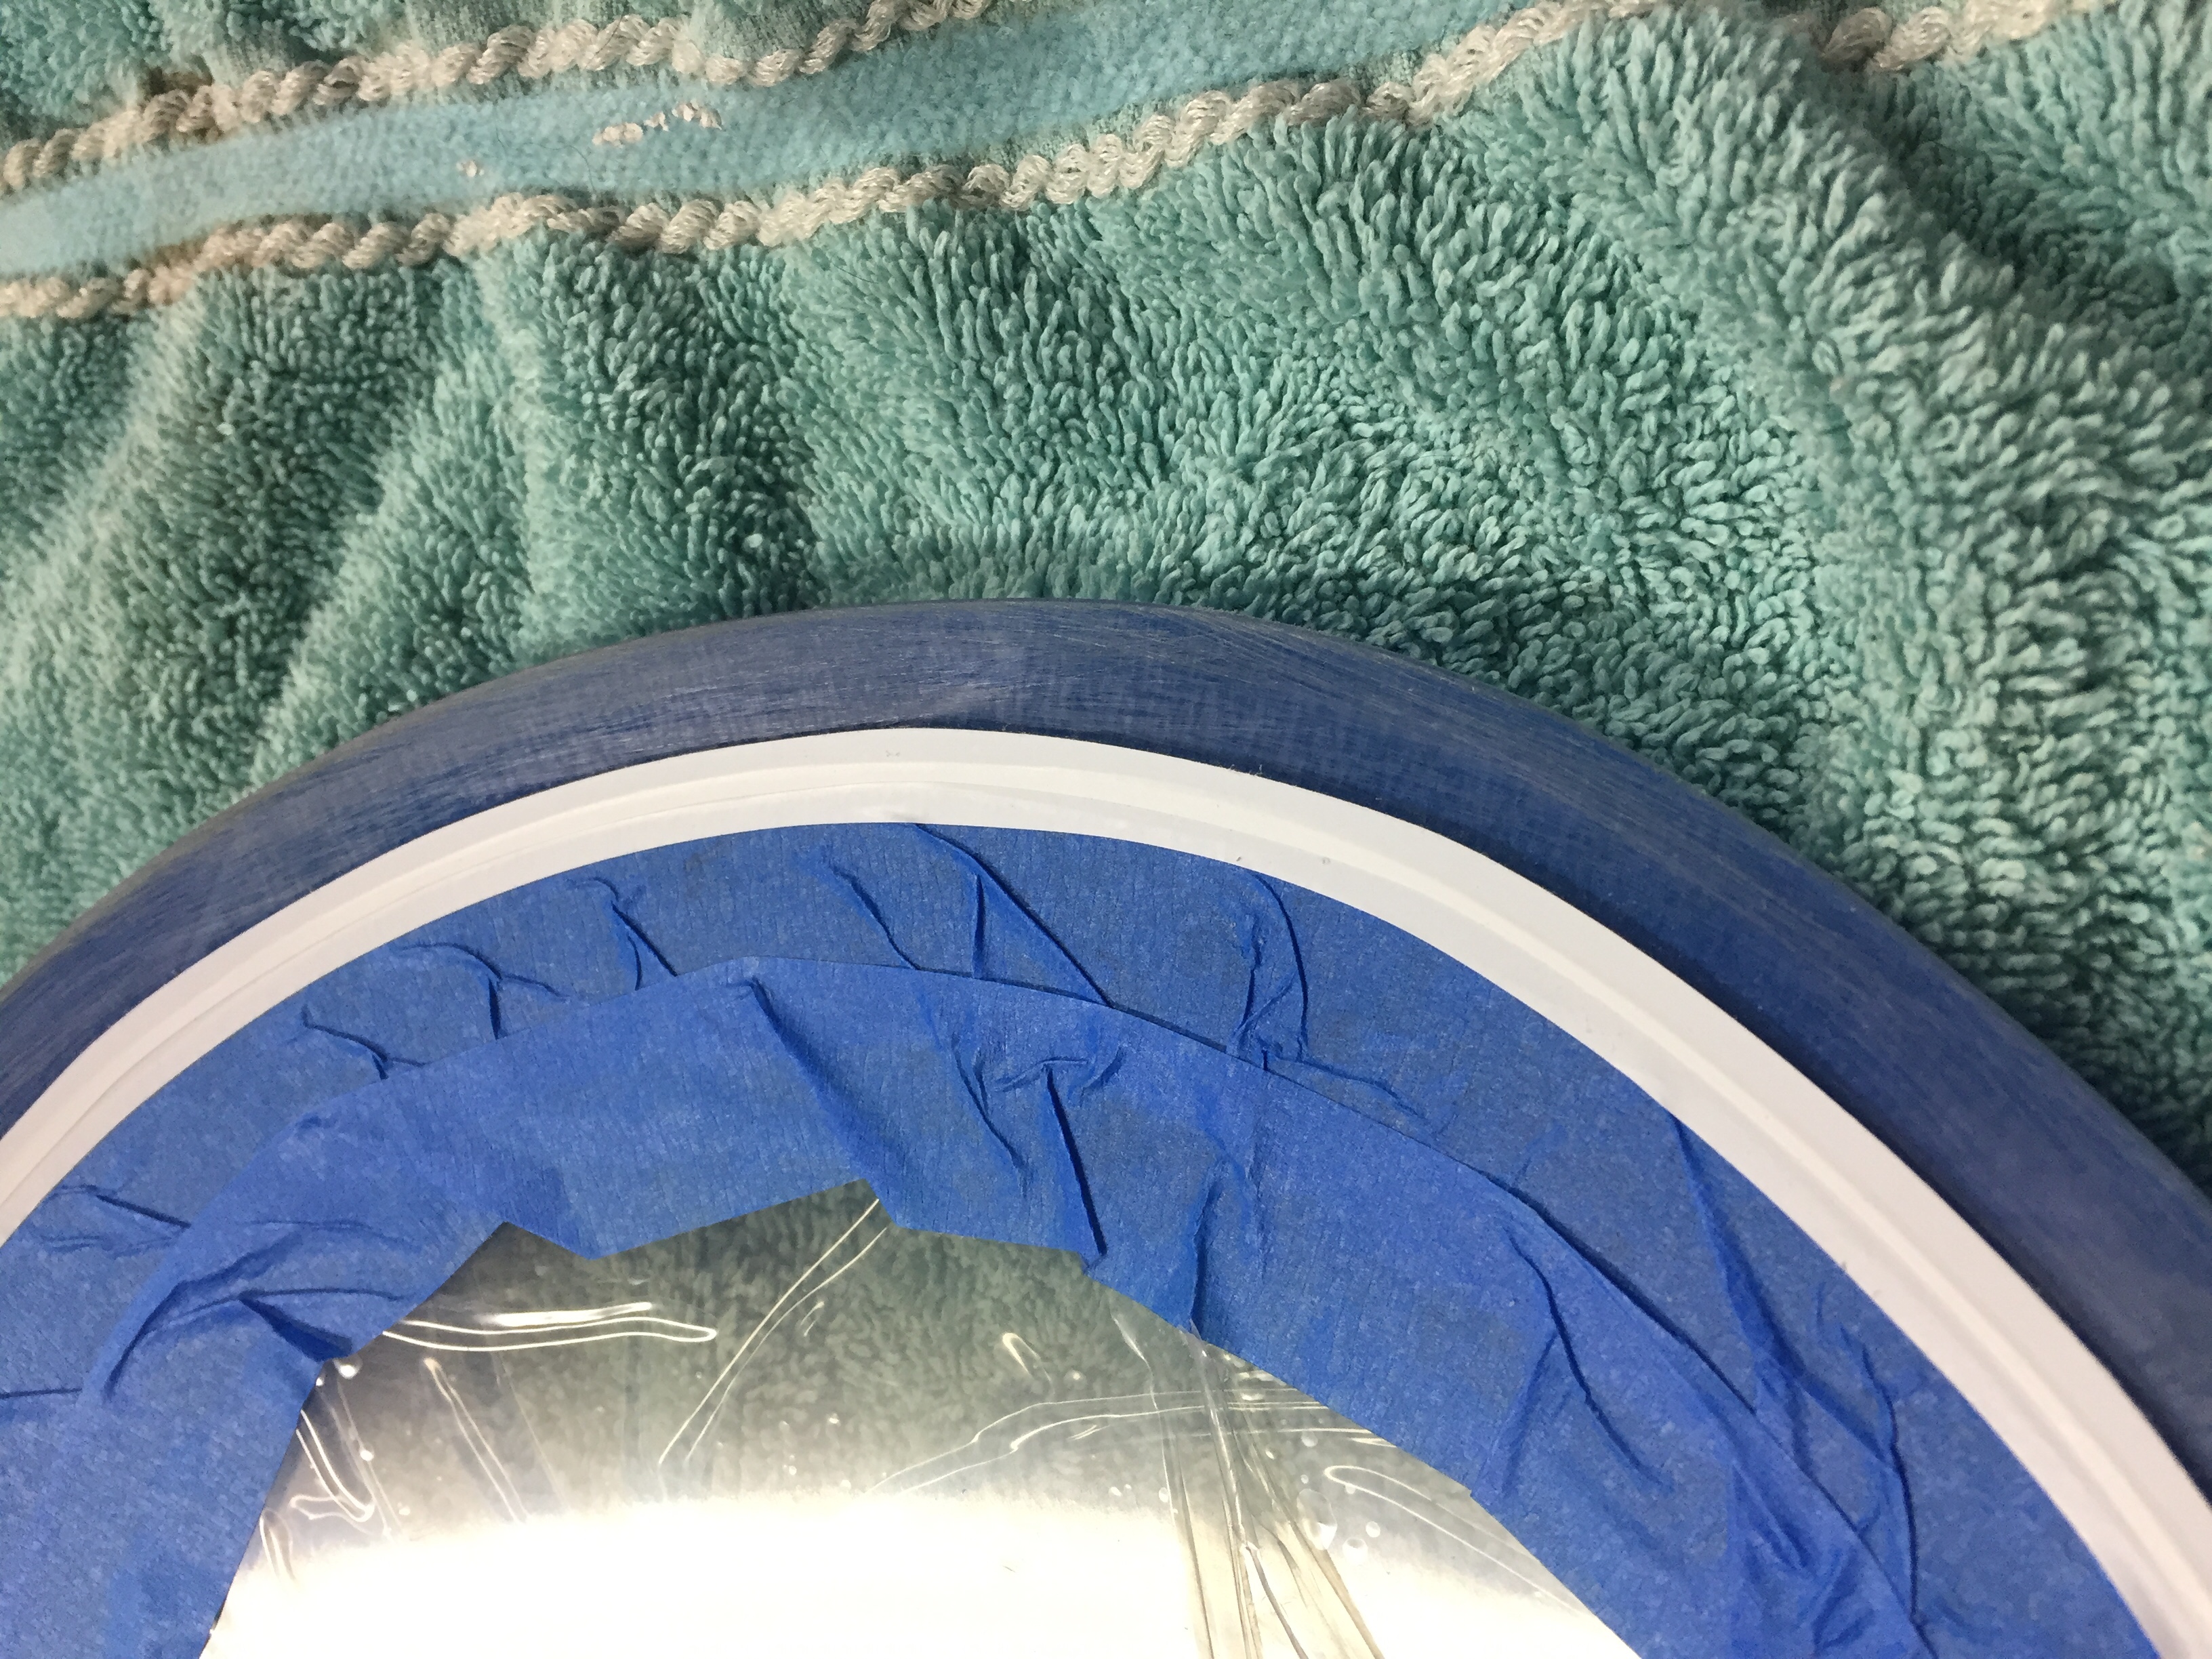
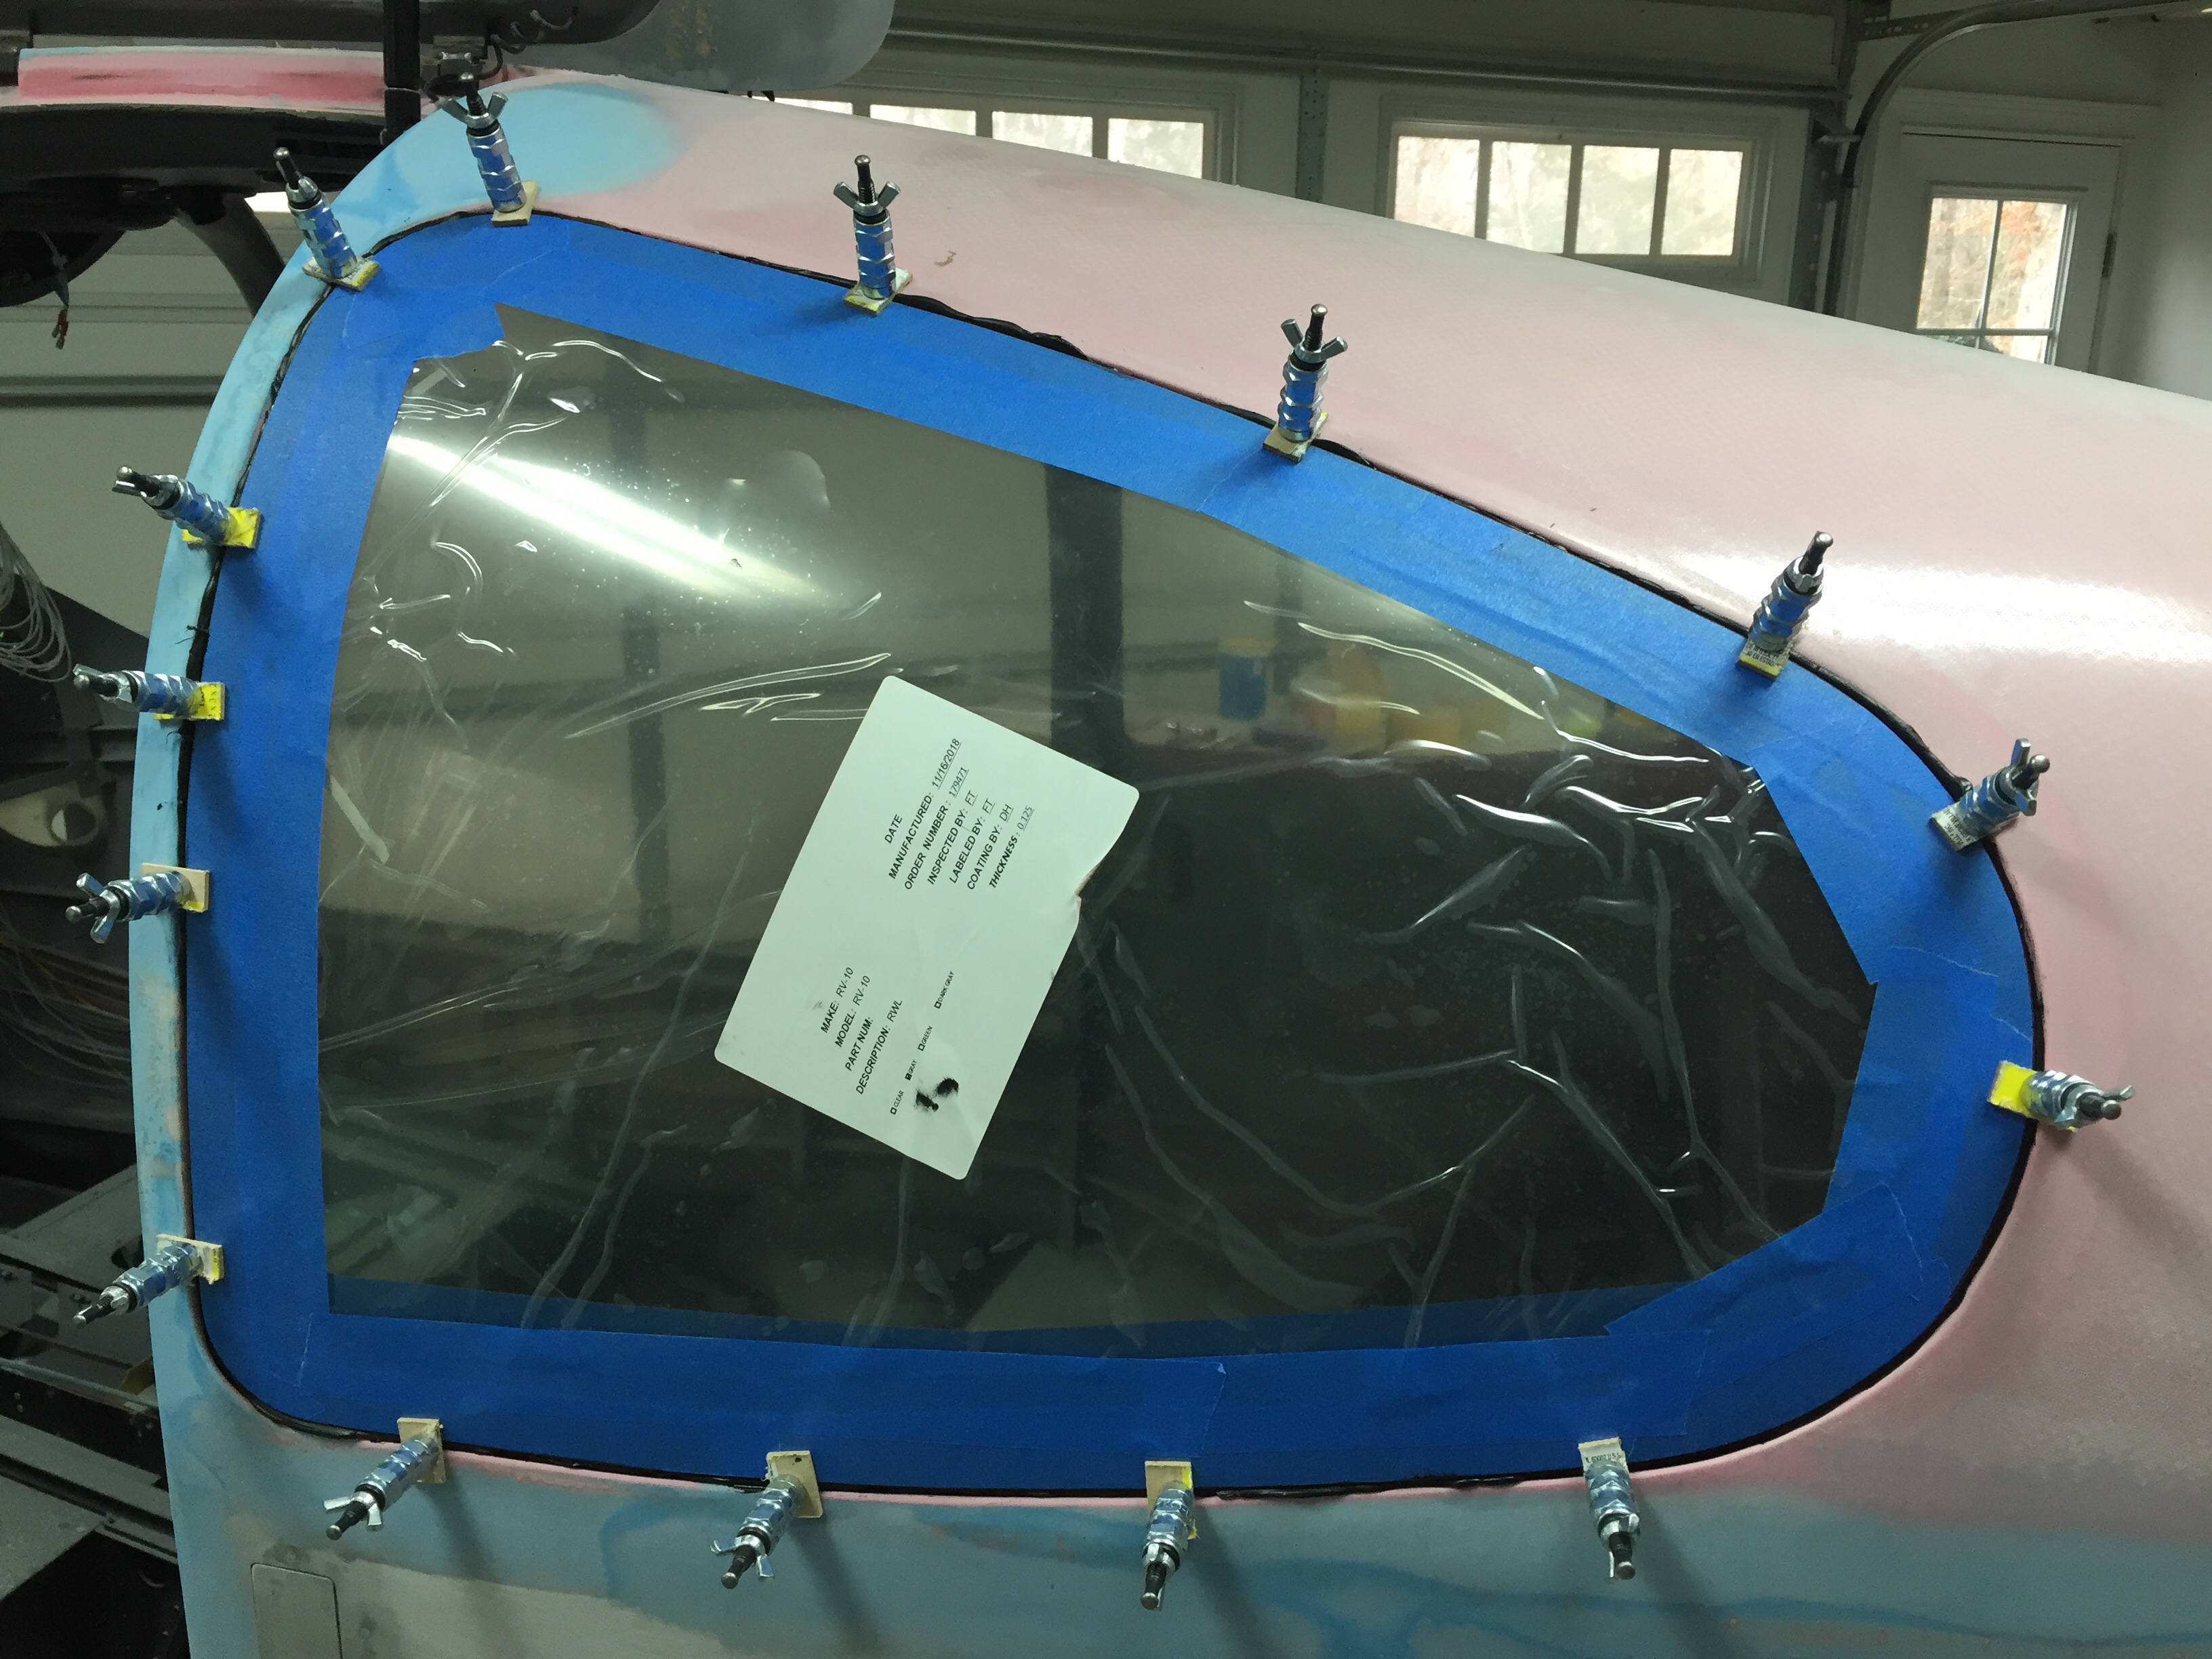
I quickly grew tired of snide comments on social media about my inventory of aircraft parts on the approved aircraft parts storage location, aka guest bed, so set about installing the rear windows.  The missing piece was flexible 1/4″ masking tape which arrived from Amazon.  This tape is used to go right up to the tape line, earlier traced from the cabin top openings.  The first and most critical layer of tape is used to create the finished line of Sikaflex on the inside of the plexi.  Another layer is applied over the exposed edge of the first layer so the perimeter of the plexi can be scuffed without damaging the first layer of tape.

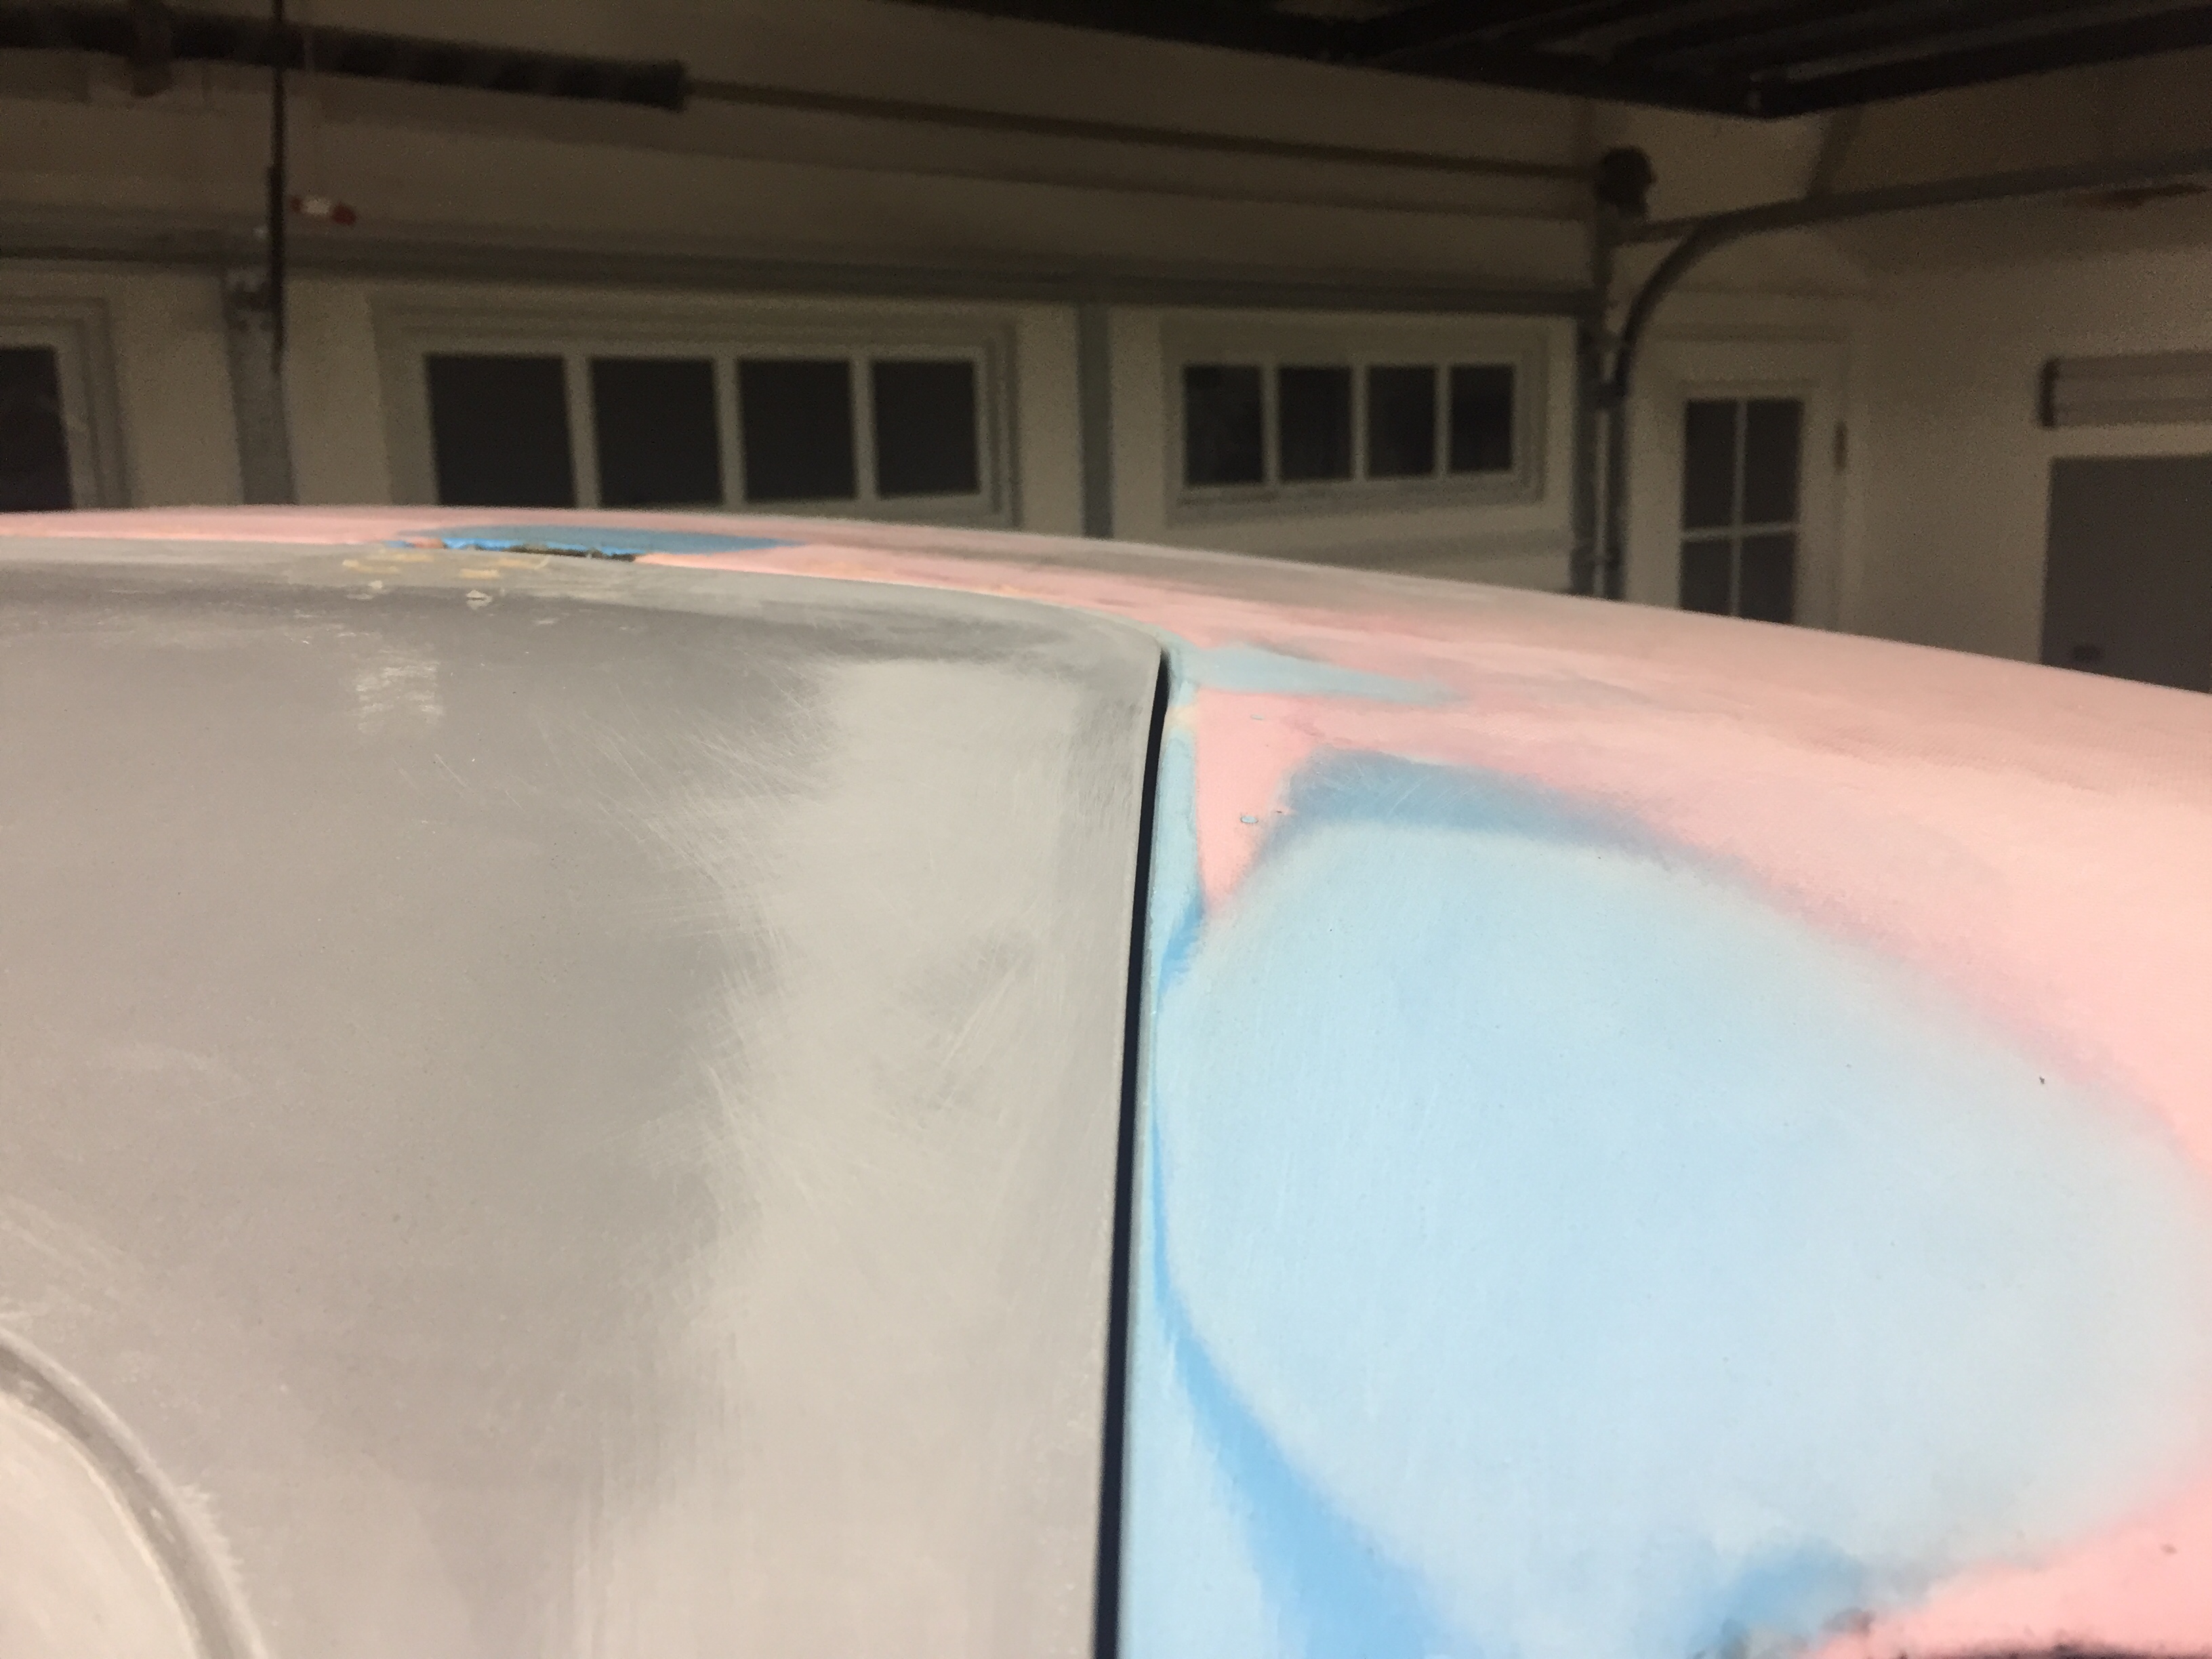
The method I’m using will result in a black band around each window that is visible from the exterior of the plane.  The majority of builders will use a rigid epoxy here and then apply fiberglass to bridge the seam between the fiberglass cabin top and plexi.  This will be painted after numerous hours of sanding, filling, cussing, repeating, and still not being done.  I honestly don’t mind the black band and rather like the definition it gives to the windows.  The one downside is needing to buy an entire can of the primer which is ridiculously expensive compared to the actual adhesive.  Oh well, it’s only money right?

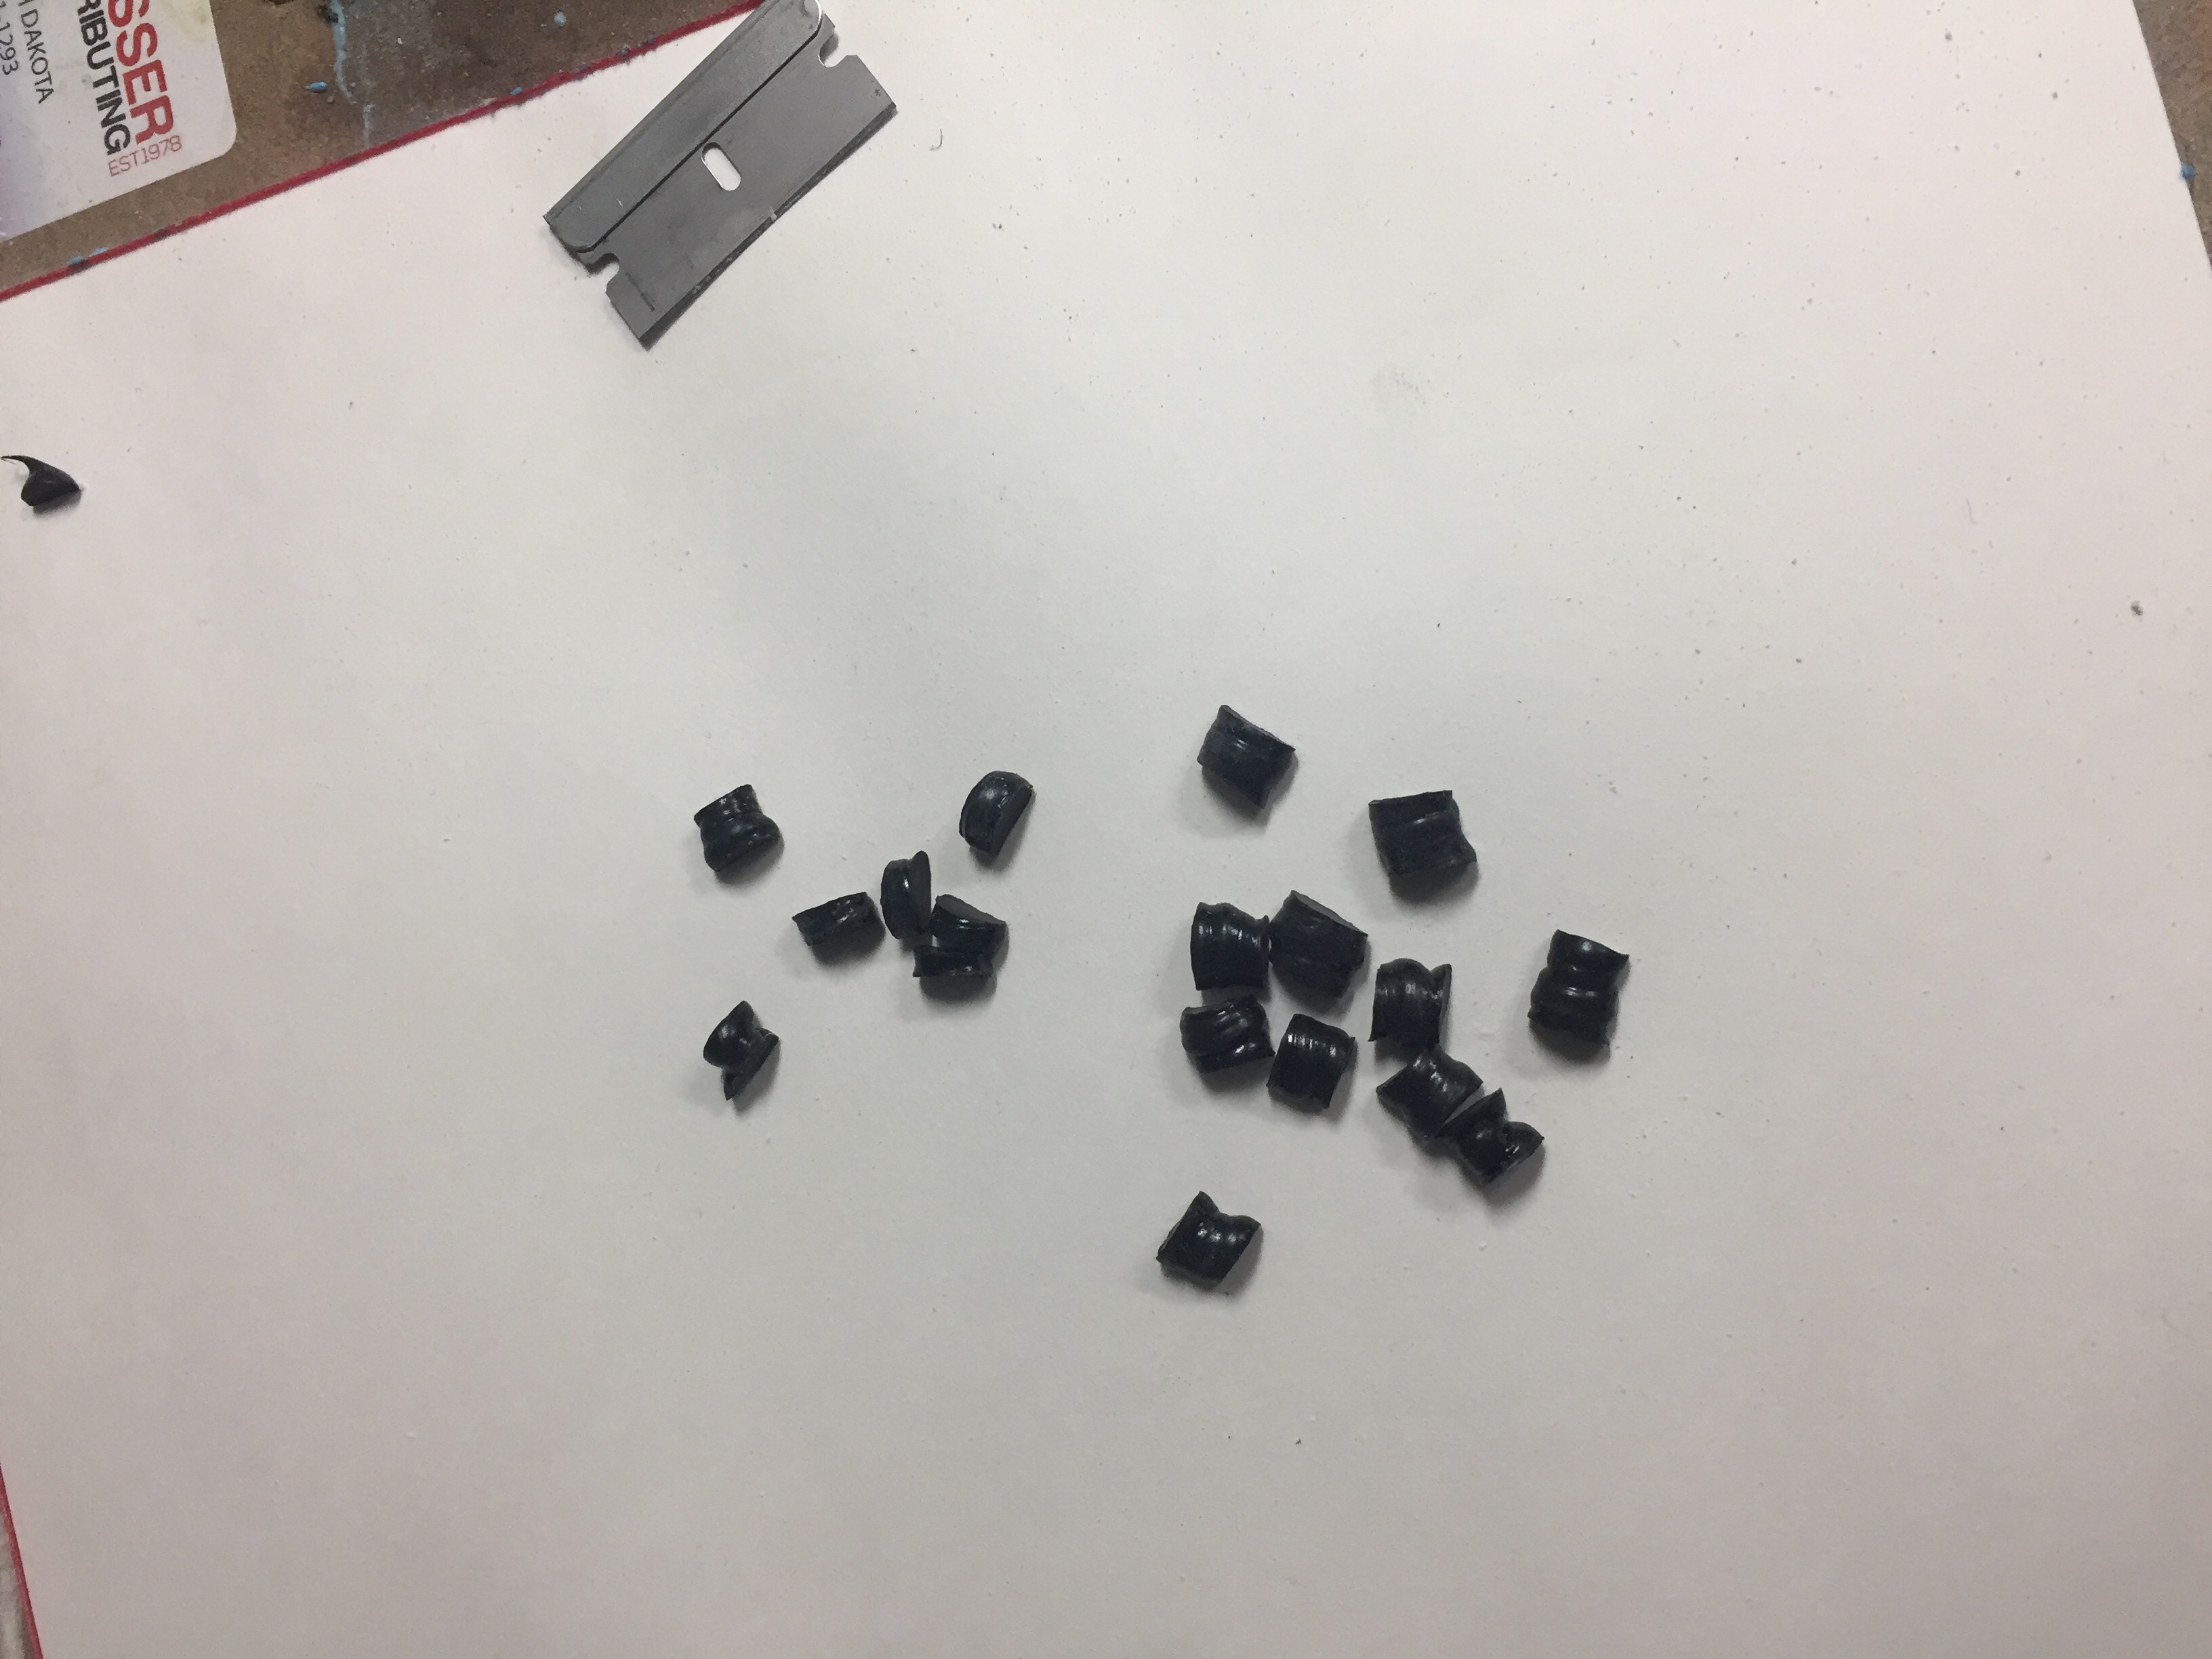
I scuffed the plexi perimeter and the cabin top then cleaned with the Sika activator (cleaner).  The primer is a very thin black liquid that has a very high surface tension so creates a thick layer on whatever it touches.  It dries pretty quickly and forms the visible black band from the outside of the window.  I had already laid out a few beads of the Sikaflex to cure and use as spacers.  I used superglue to adhere the spacers to the frames and set out fitting the window, trimming the spacers a few at a time to get a nice flush fit with the plexi to cabin top.  This takes lots of patience but in the end resulted in a perfectly flush window.

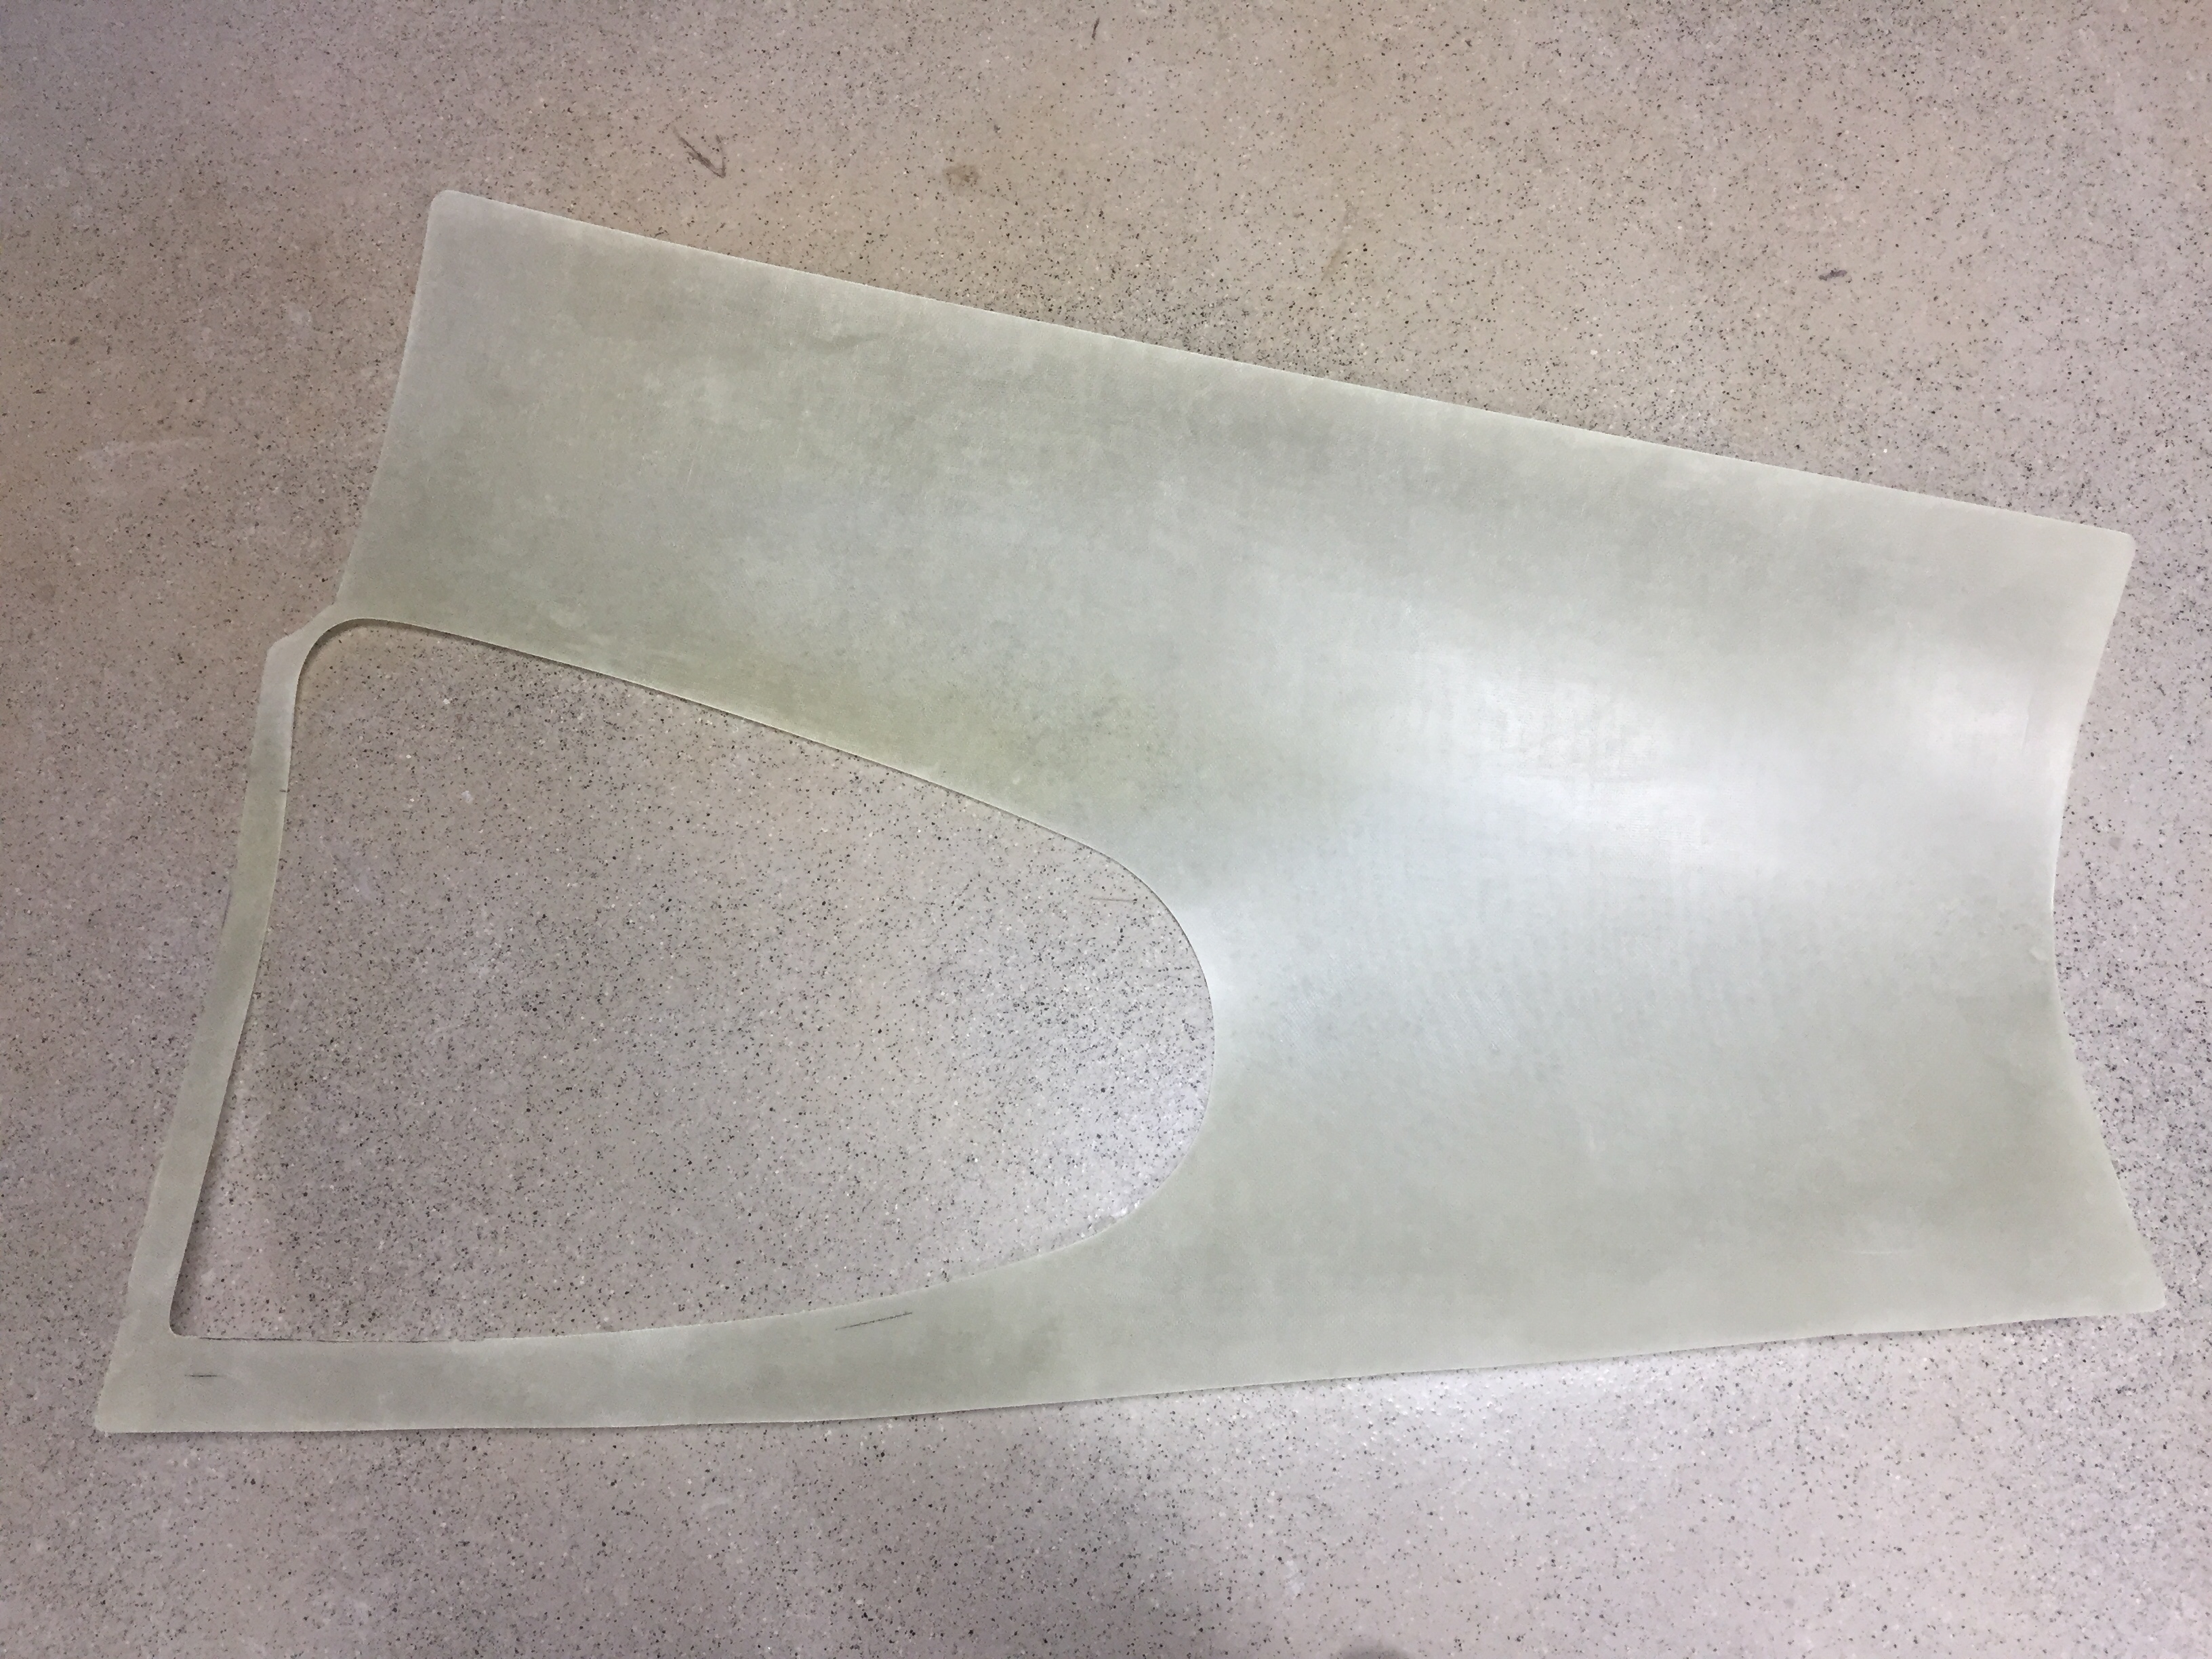
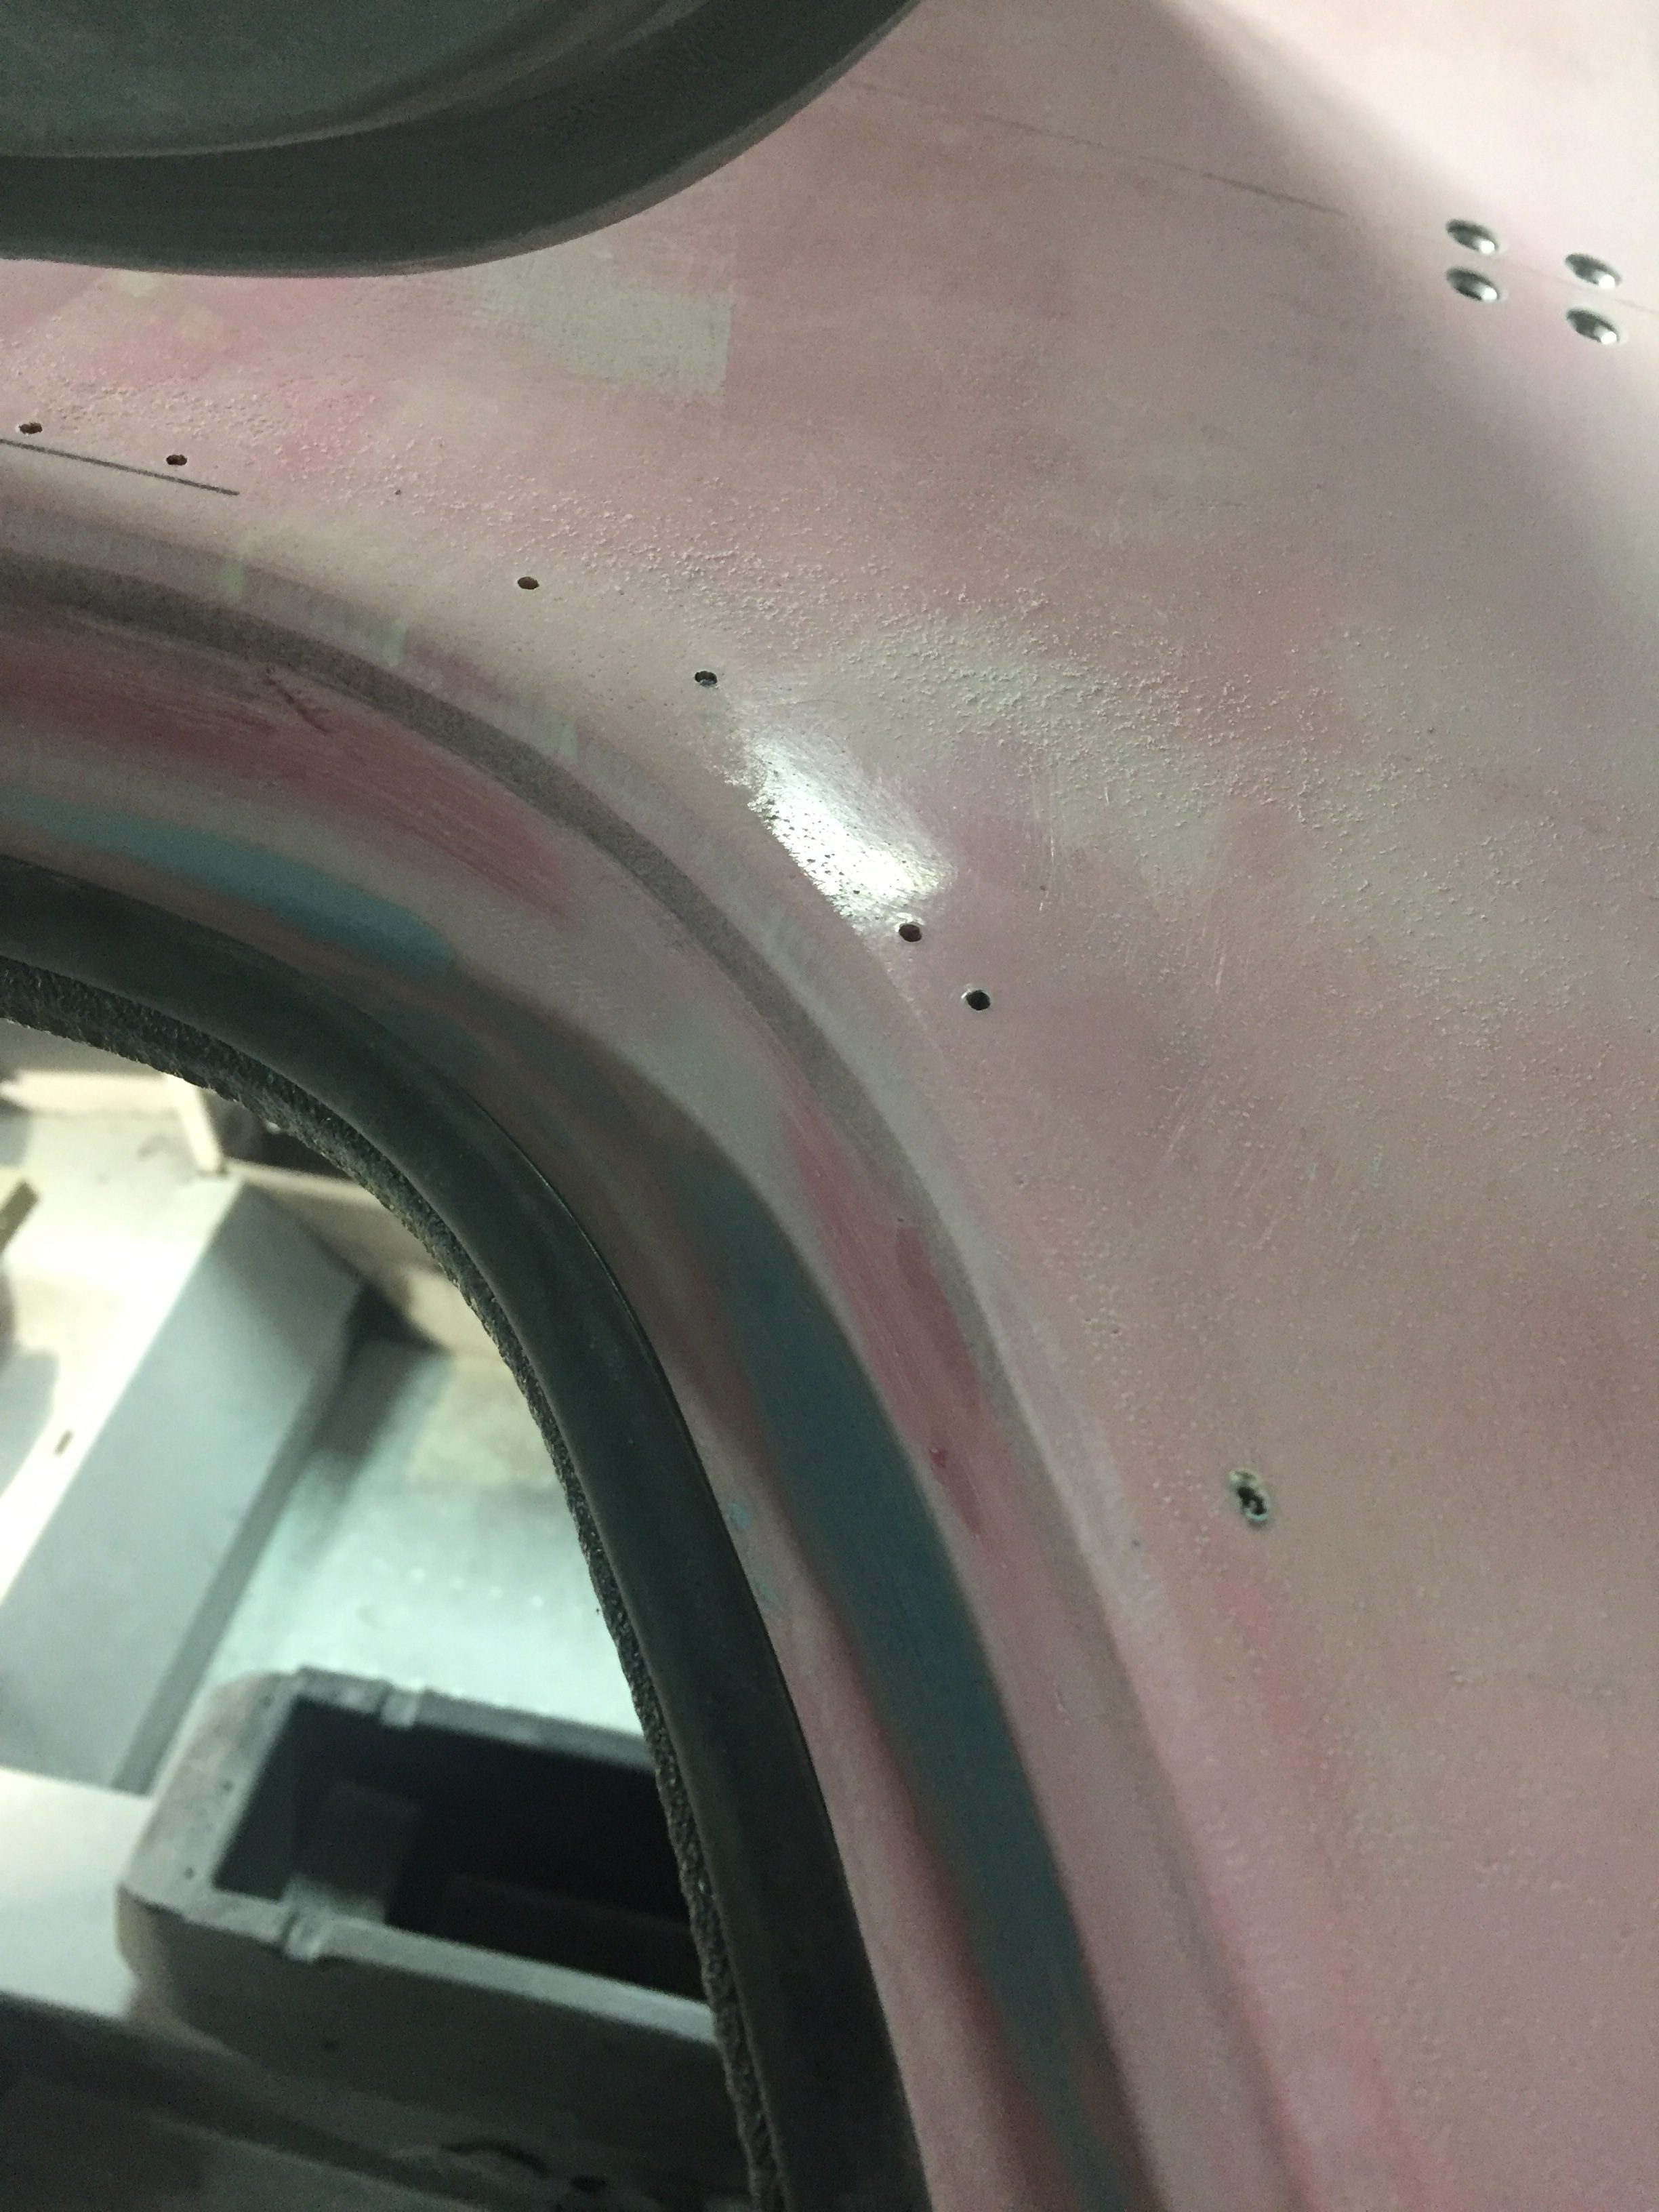
I did a final fit test with the clecos in place and found that more clecos were needed than I had originally drilled for due to the curvature of the cabin top and plexi.  So I drilled a few more holes around the joggle and got a good result.  I’ll only be able to do one window at a time, but that’s probably a good thing to focus and not rush as this is not a process that is easily undone and corrected.

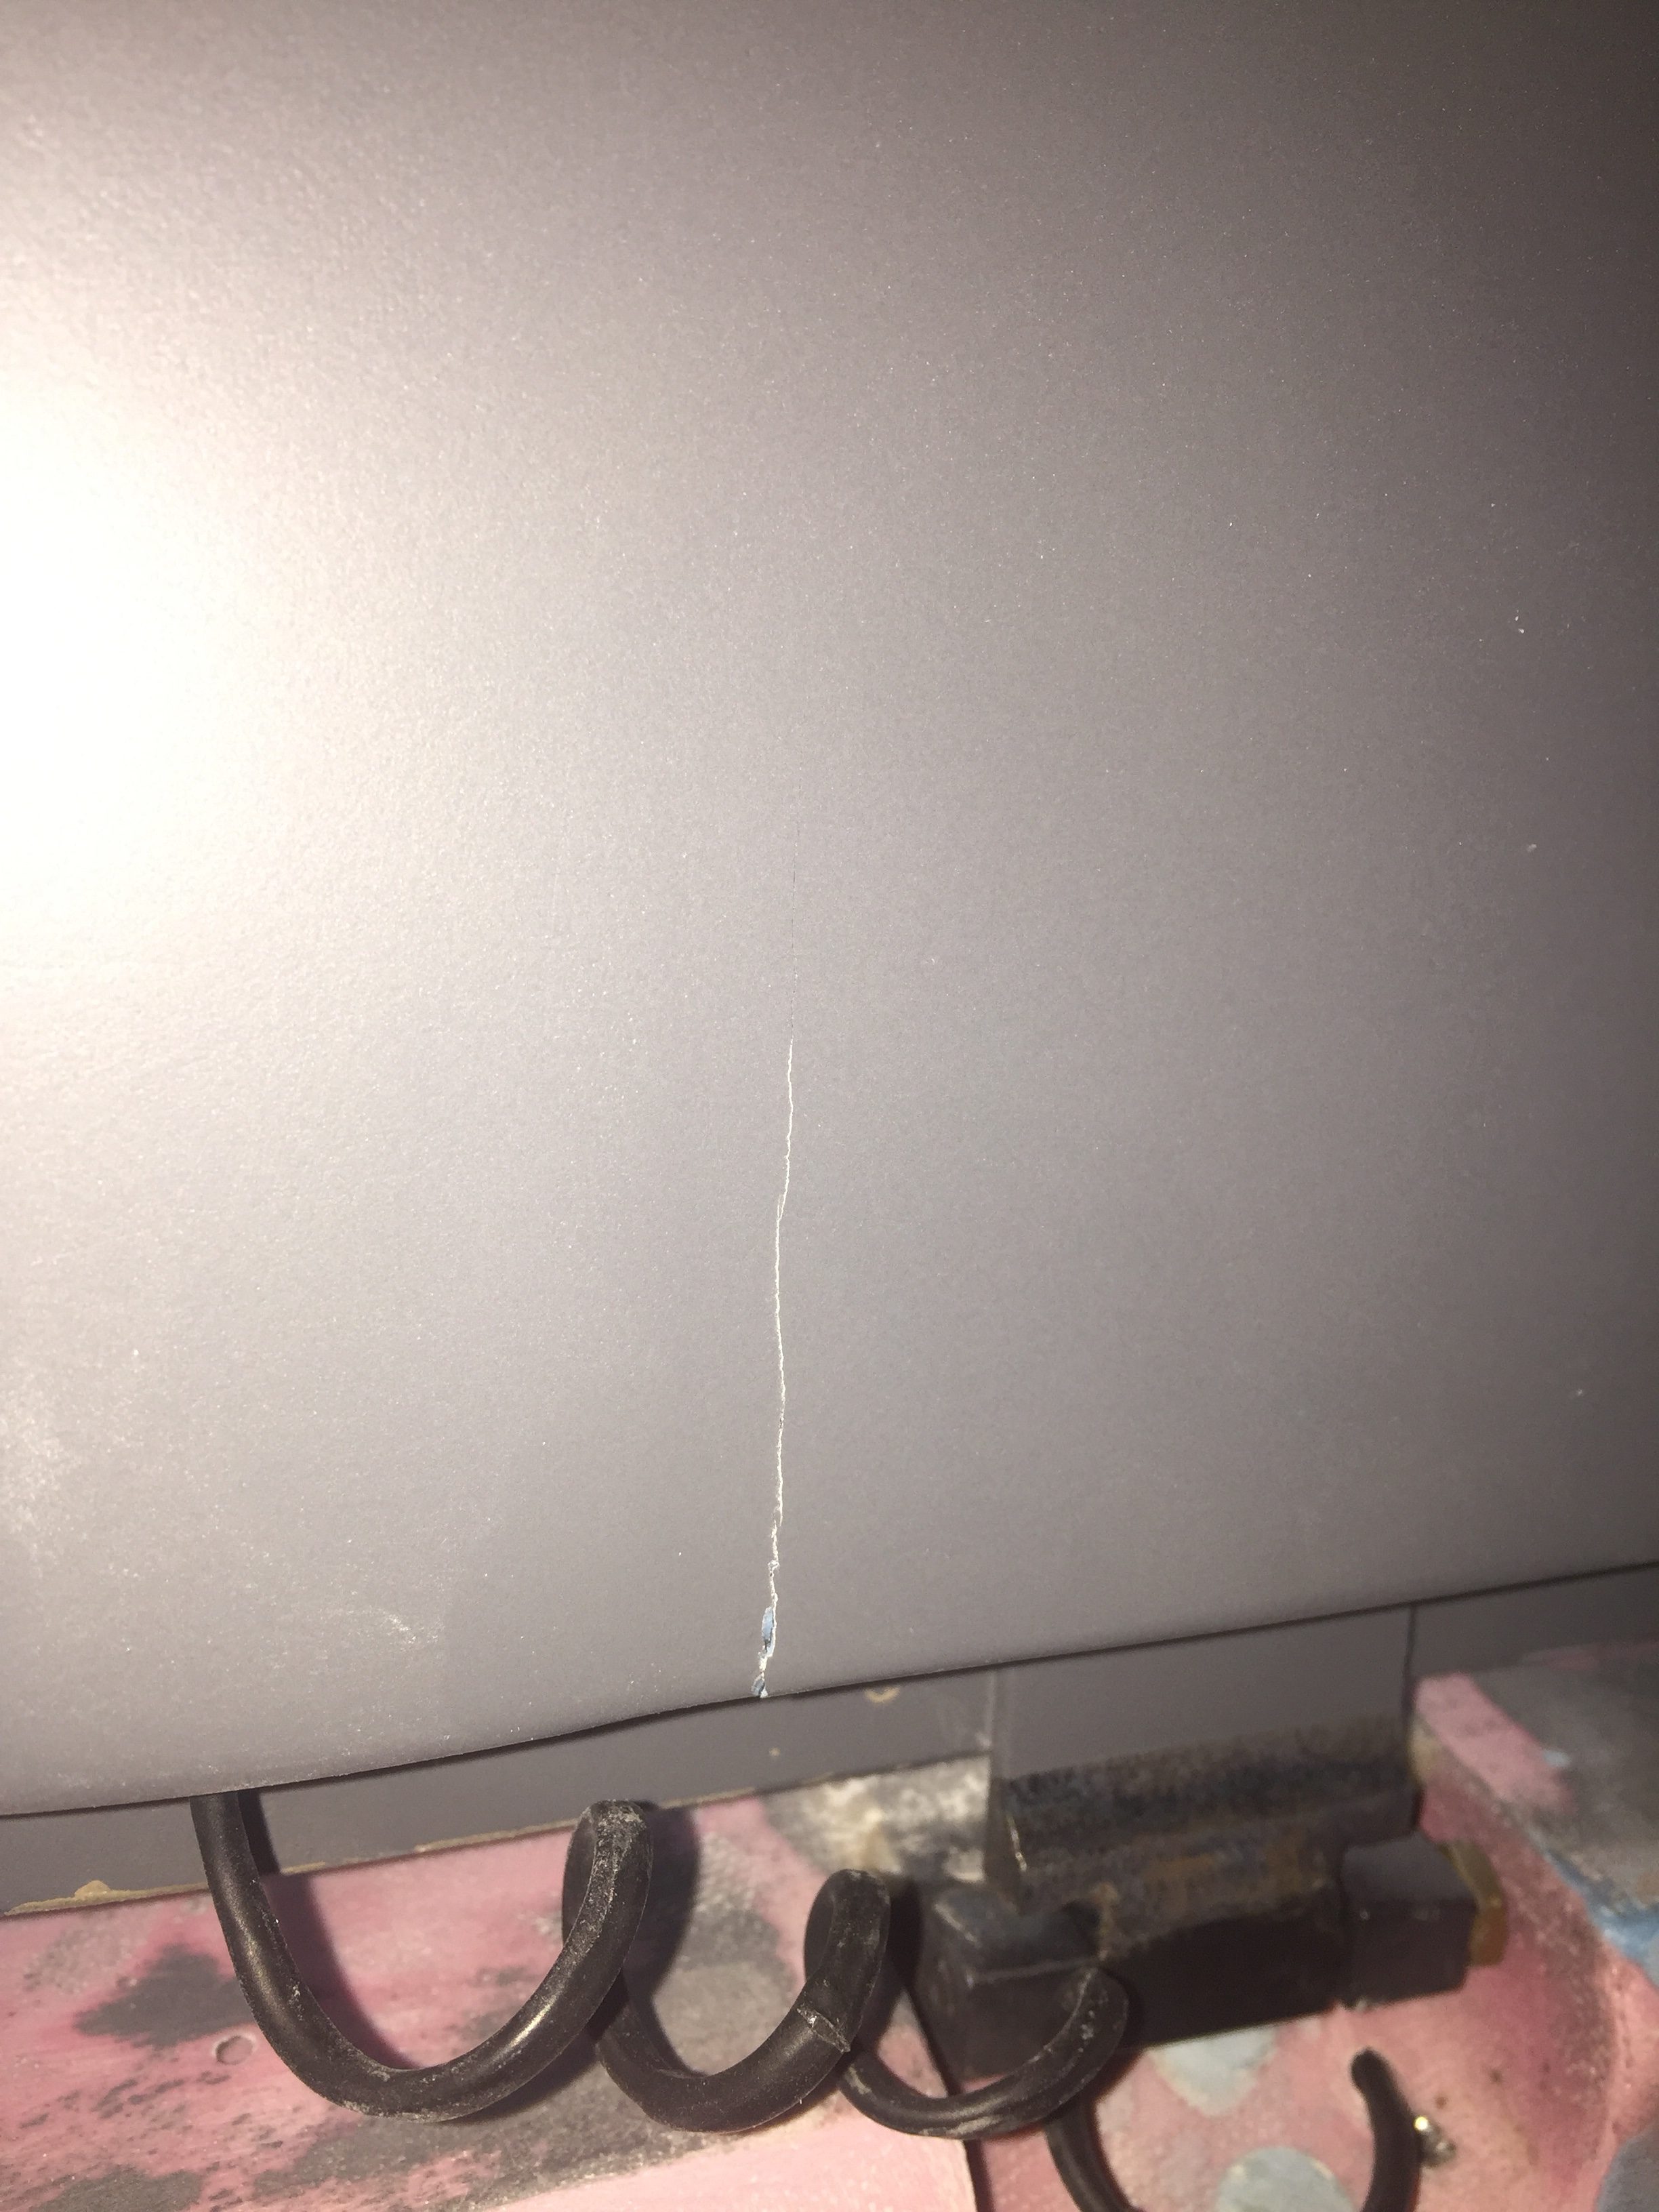
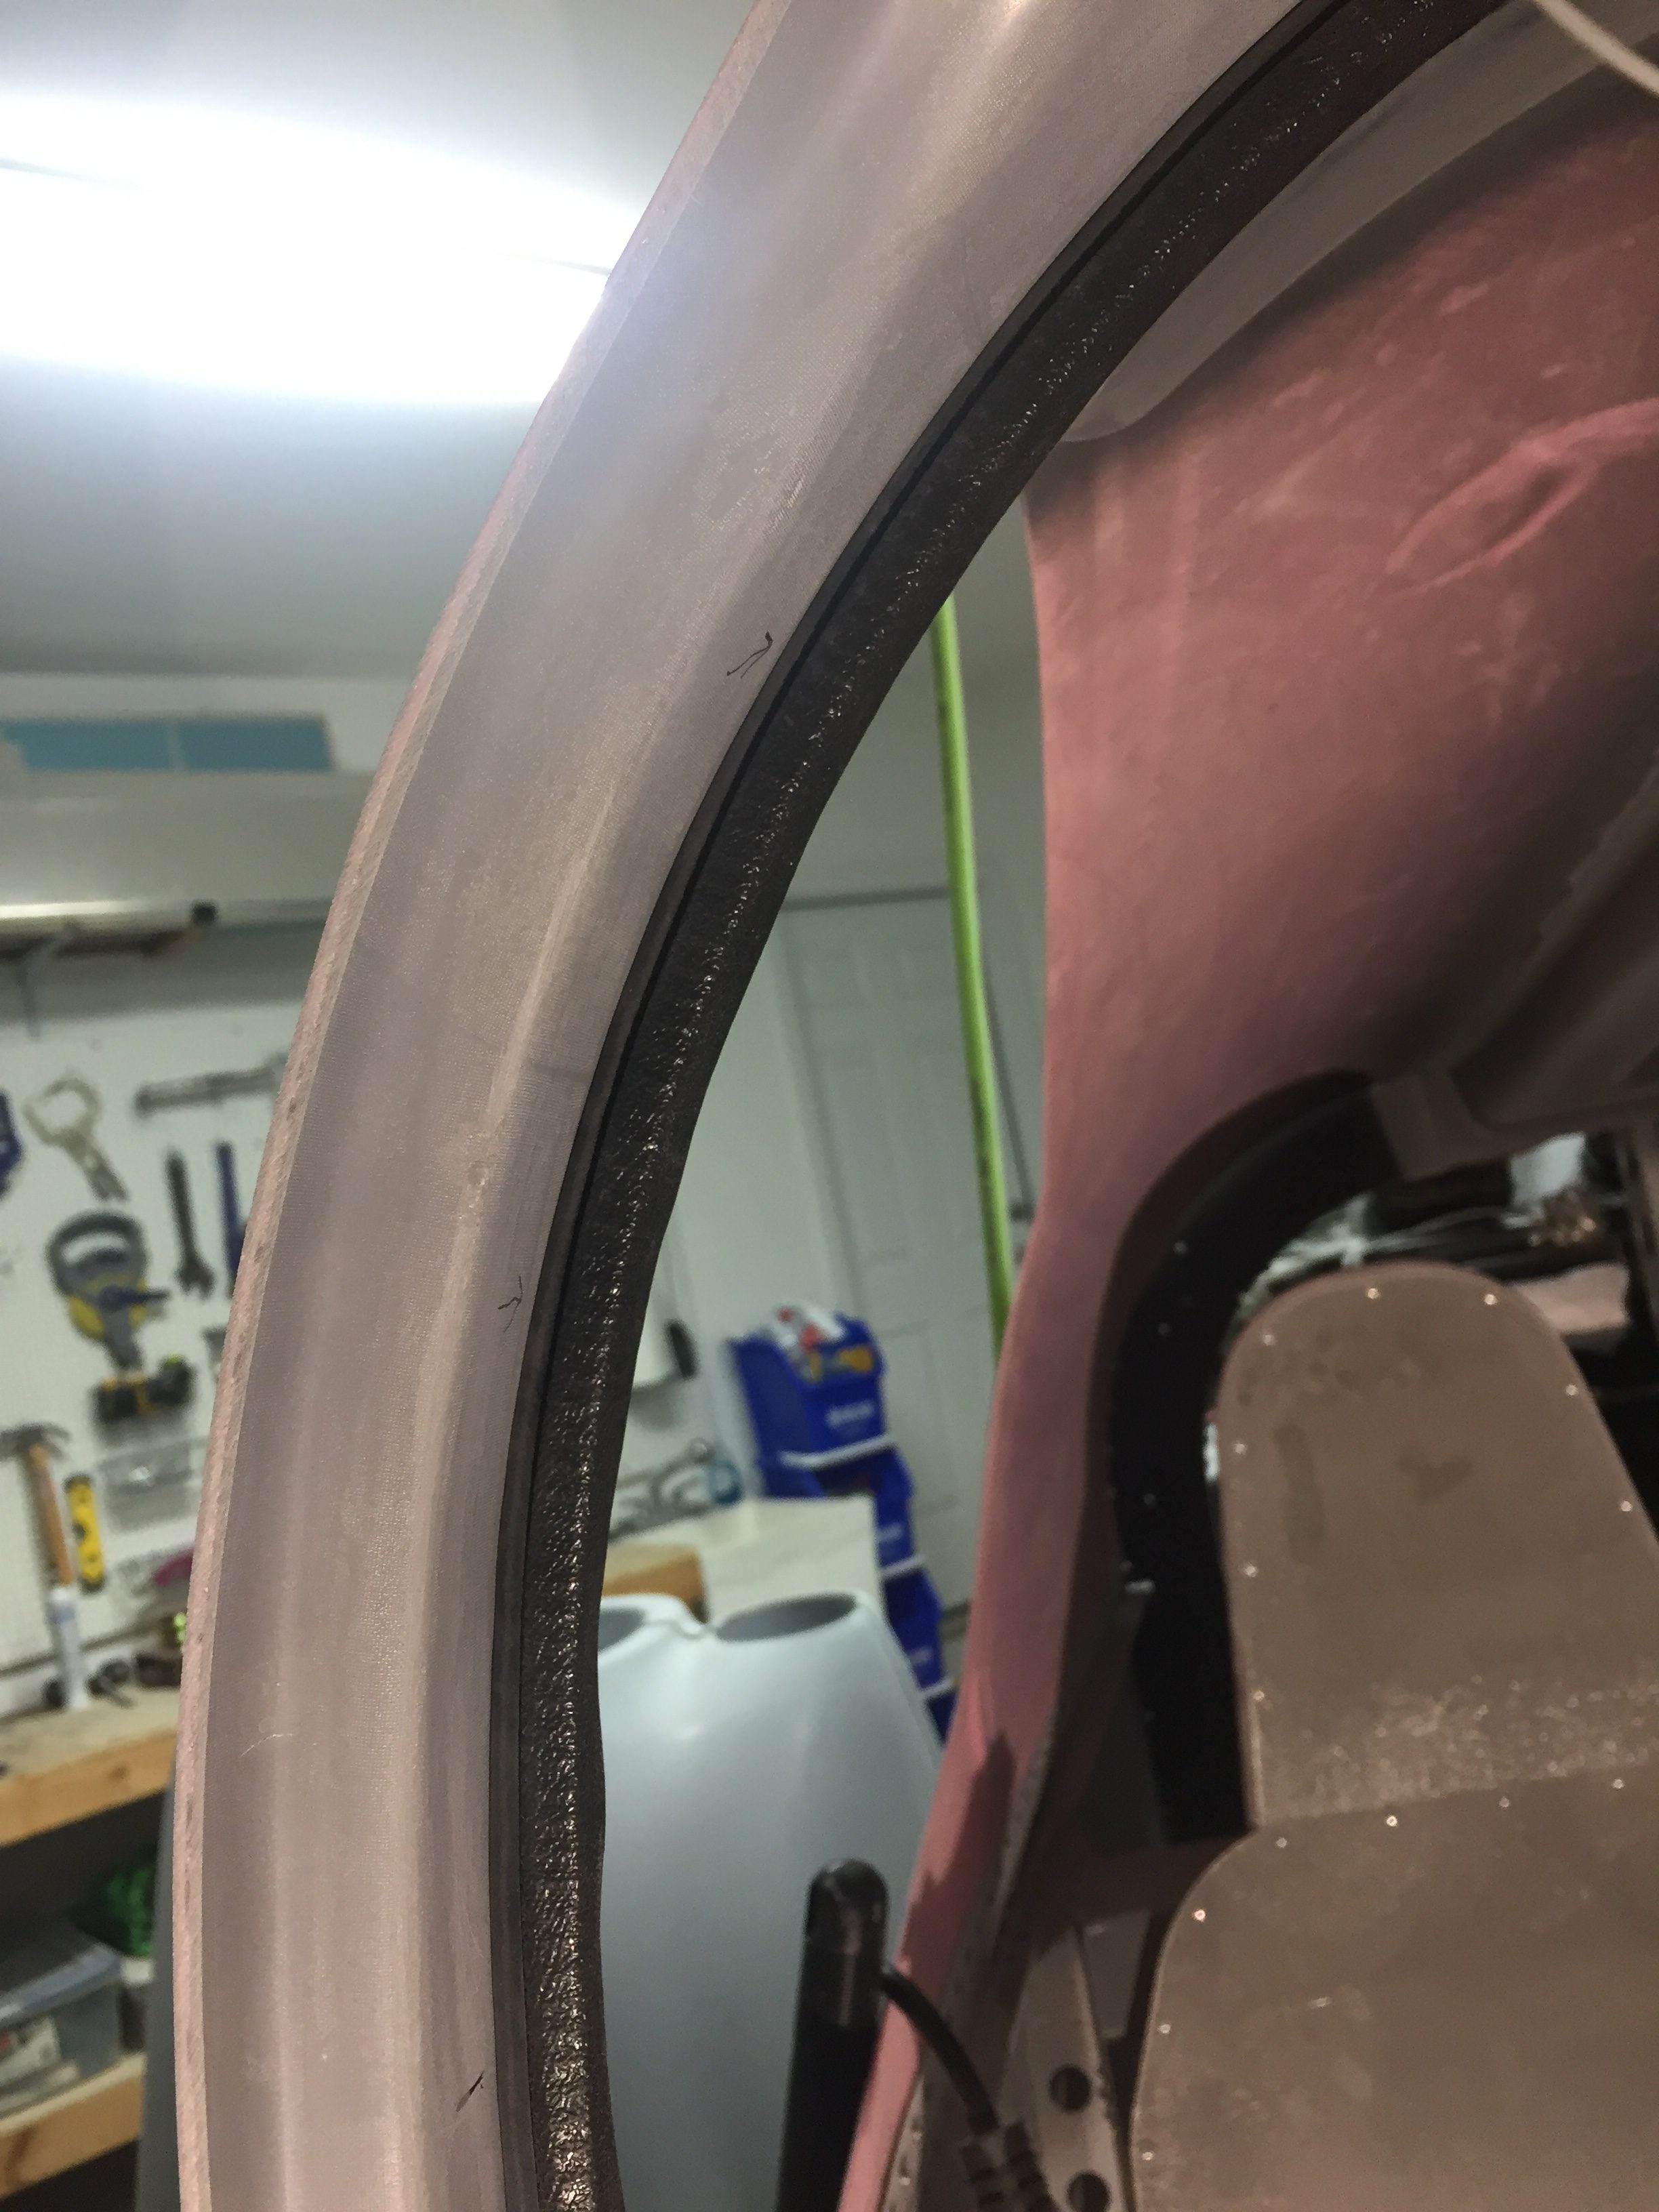
It’s recommended a smear of the Sikaflex is put on the plexi which I did, but I think it would work fine just laying a thick bead on either surface.  I was sure to use a bit of excess to ensure I didn’t wind up with bubbles or gaps in the mating.  After setting the plexi in place and pressing gently, I made several circuits around the perimeter locking in the clecos to get a good flush fit.  A great trick is to use the back of a razor blade as a guide.  You want it to just barely catch the edge of the plexi or be a hair over the window.  All in all, not a bad process and quite rewarding in the end to finally see a window instead of a big cut out.

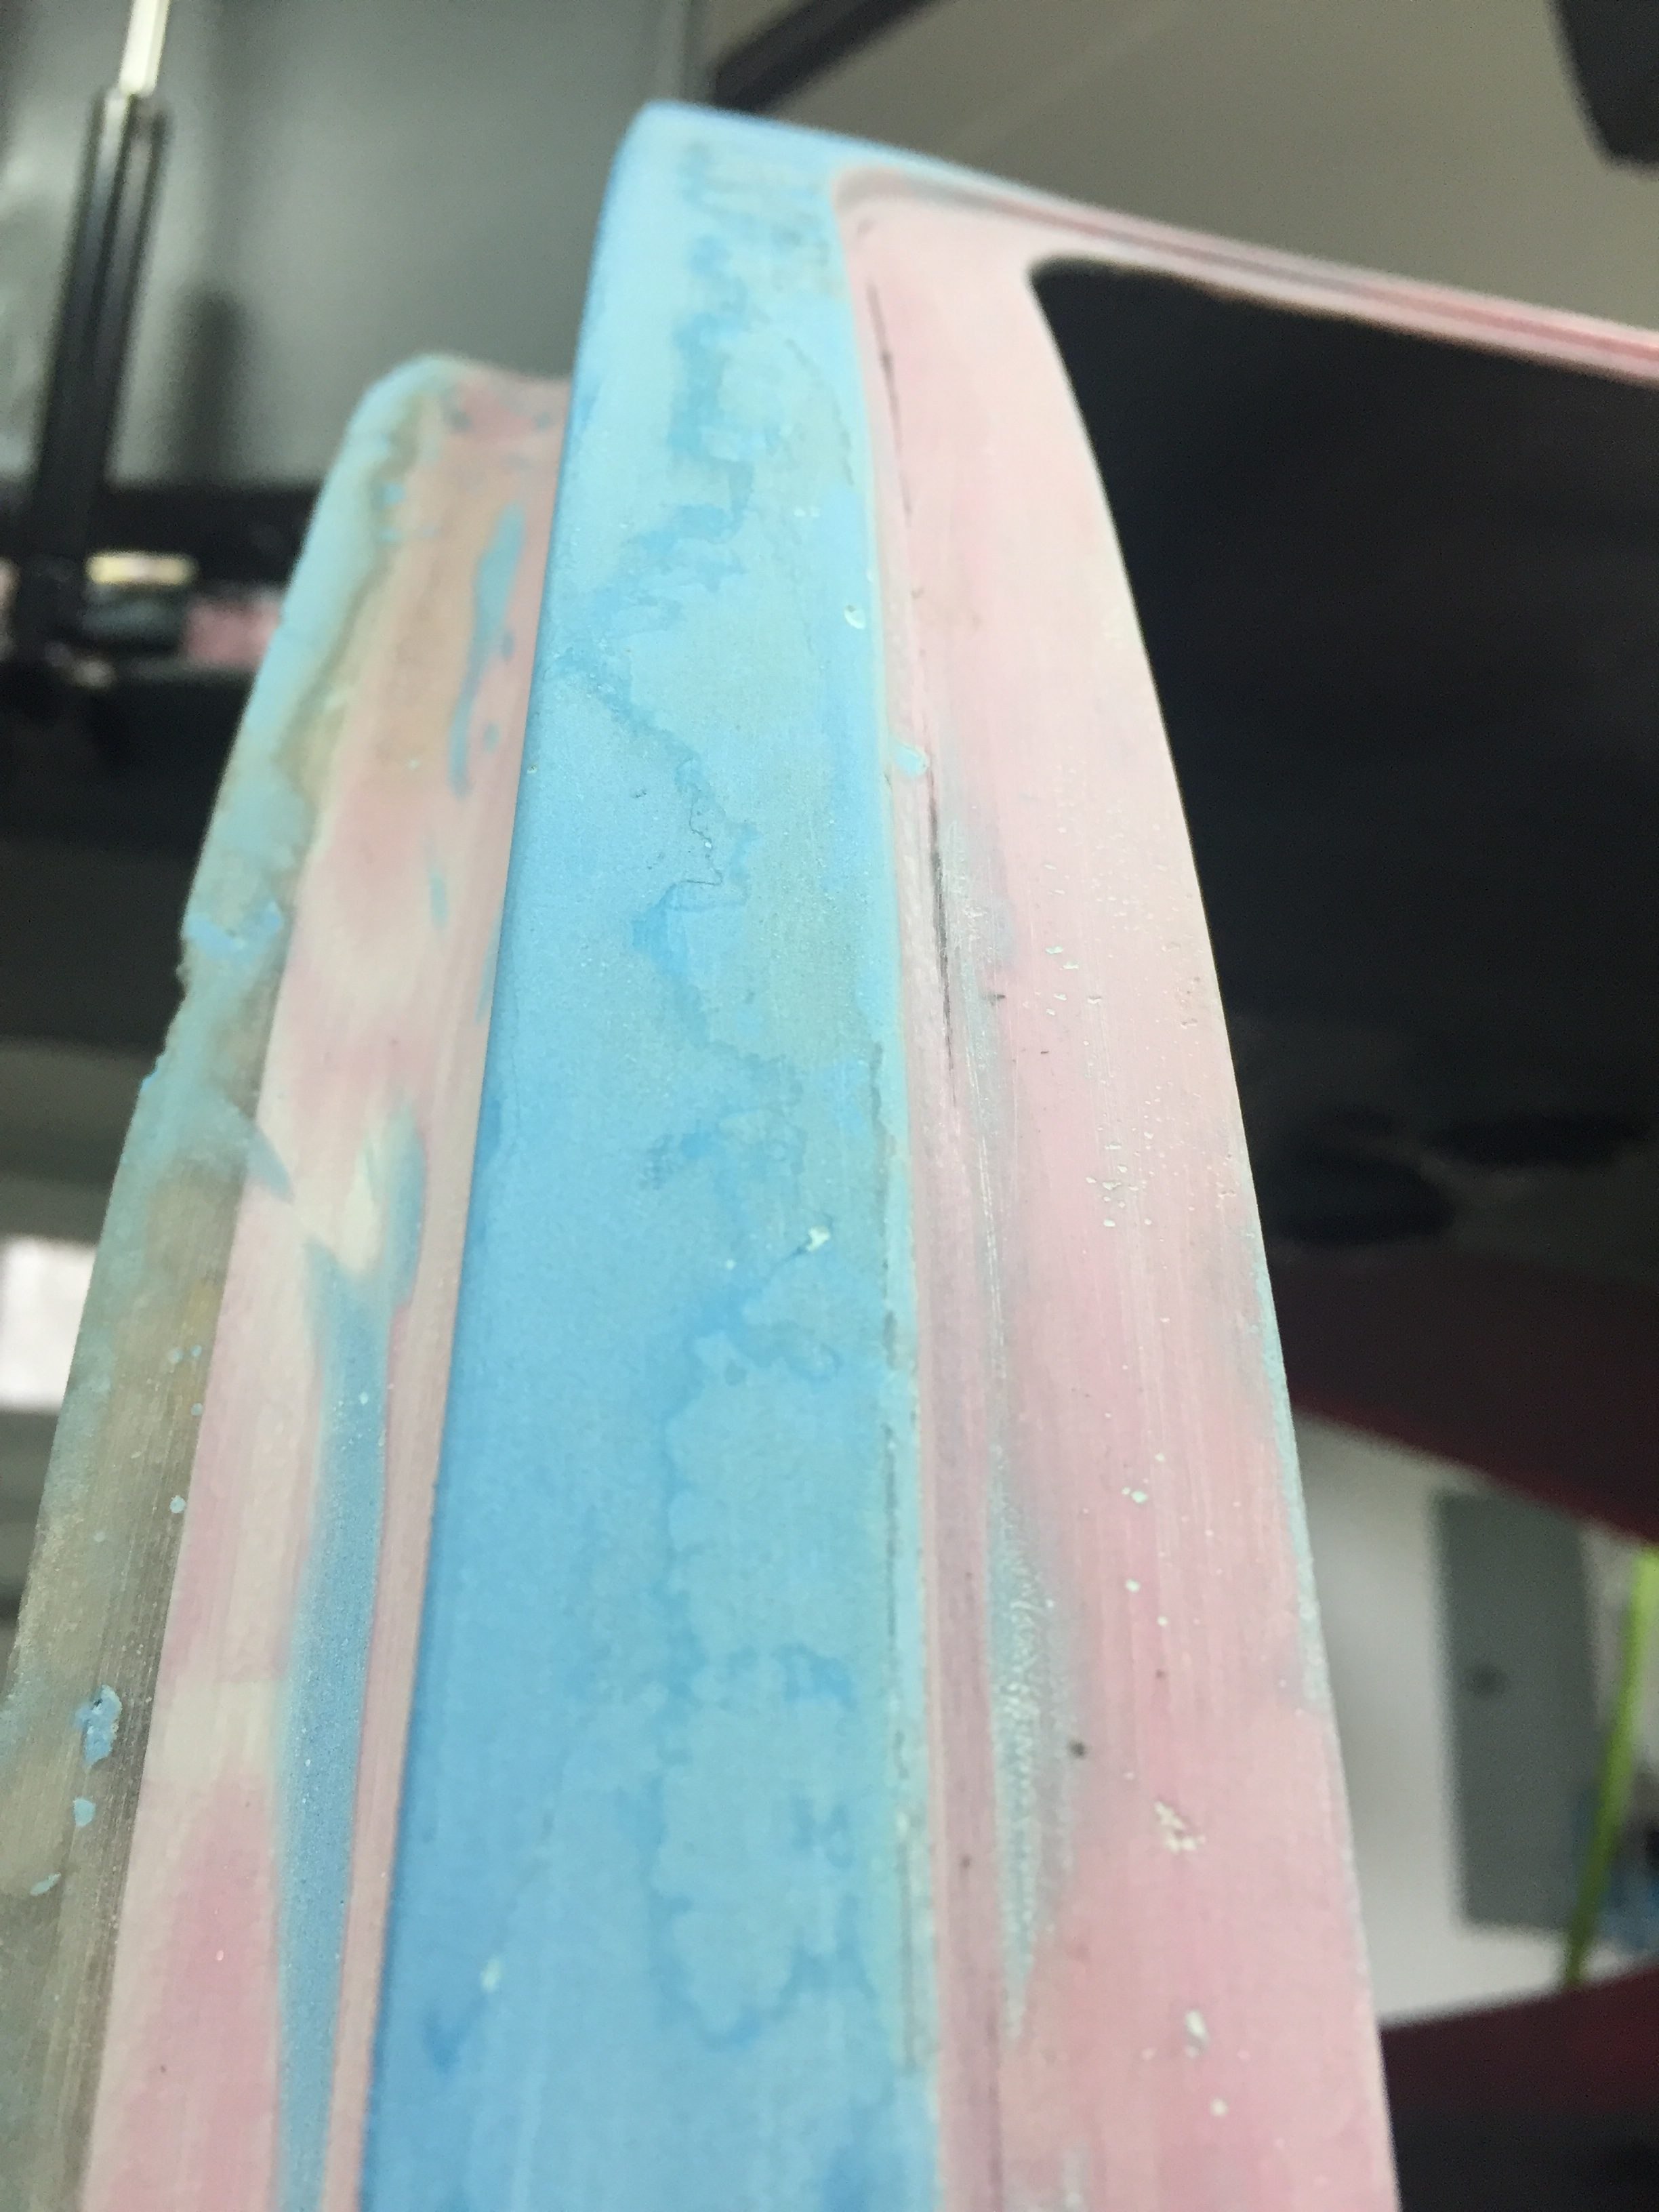
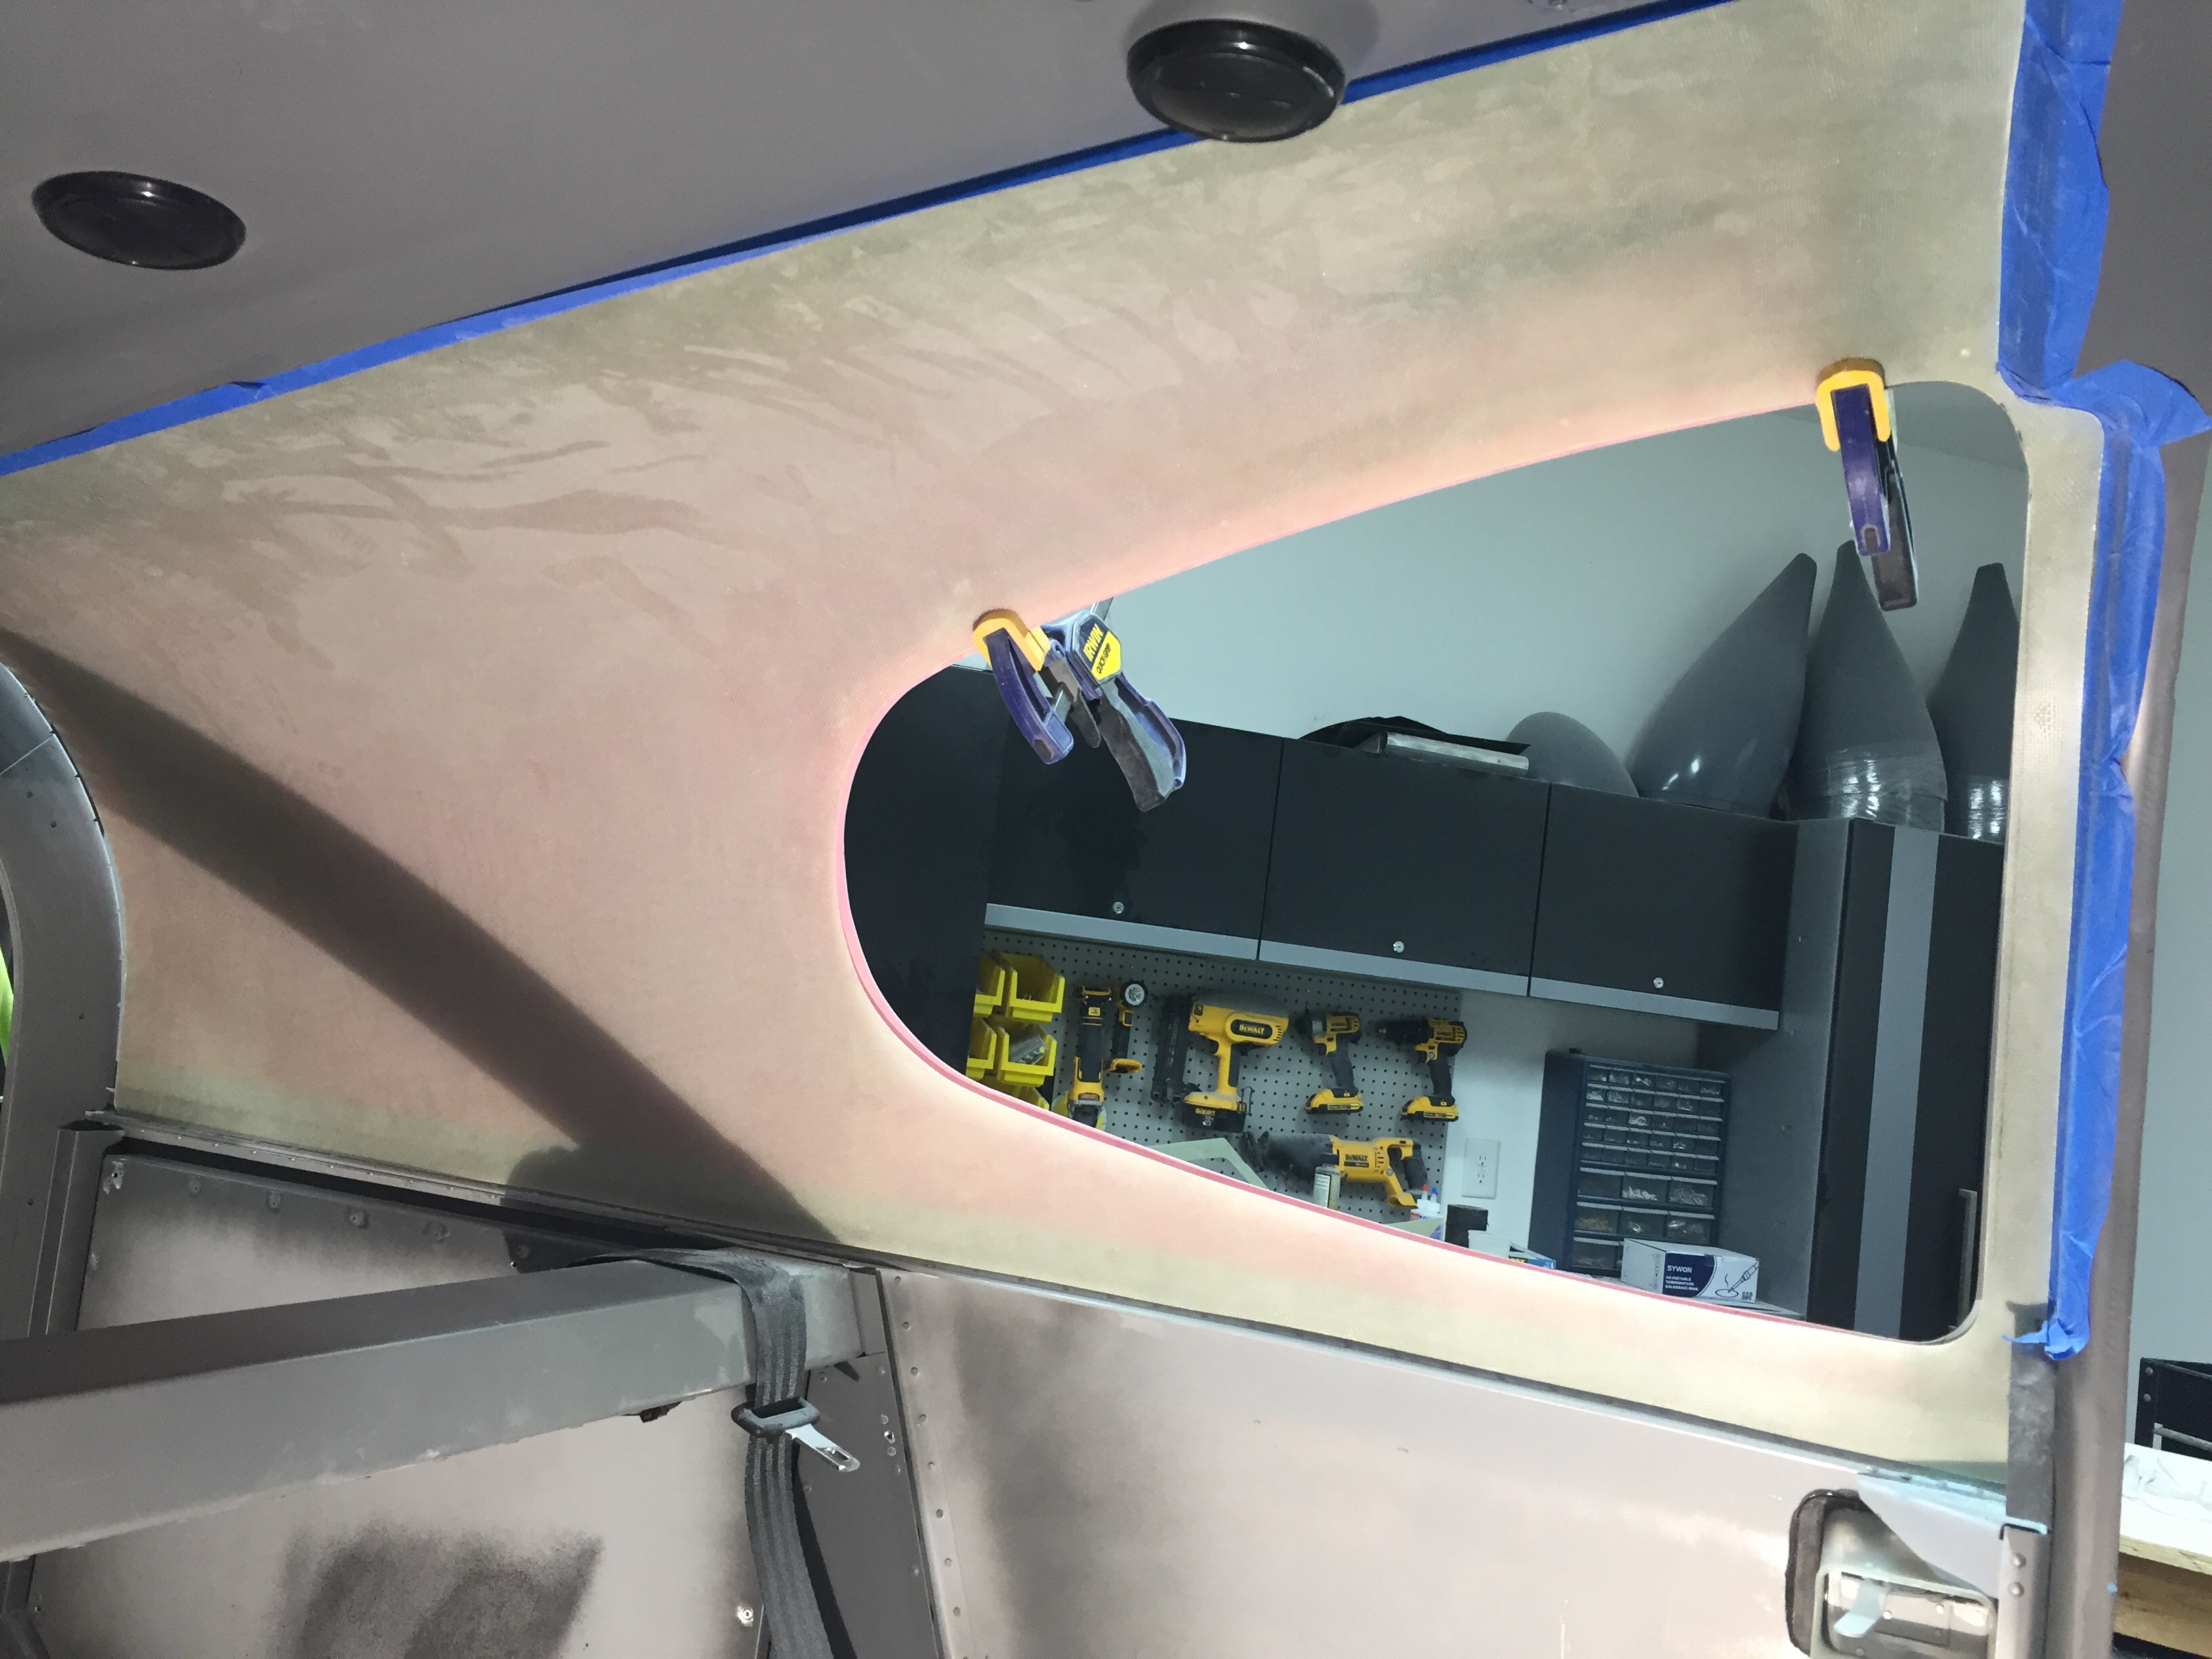
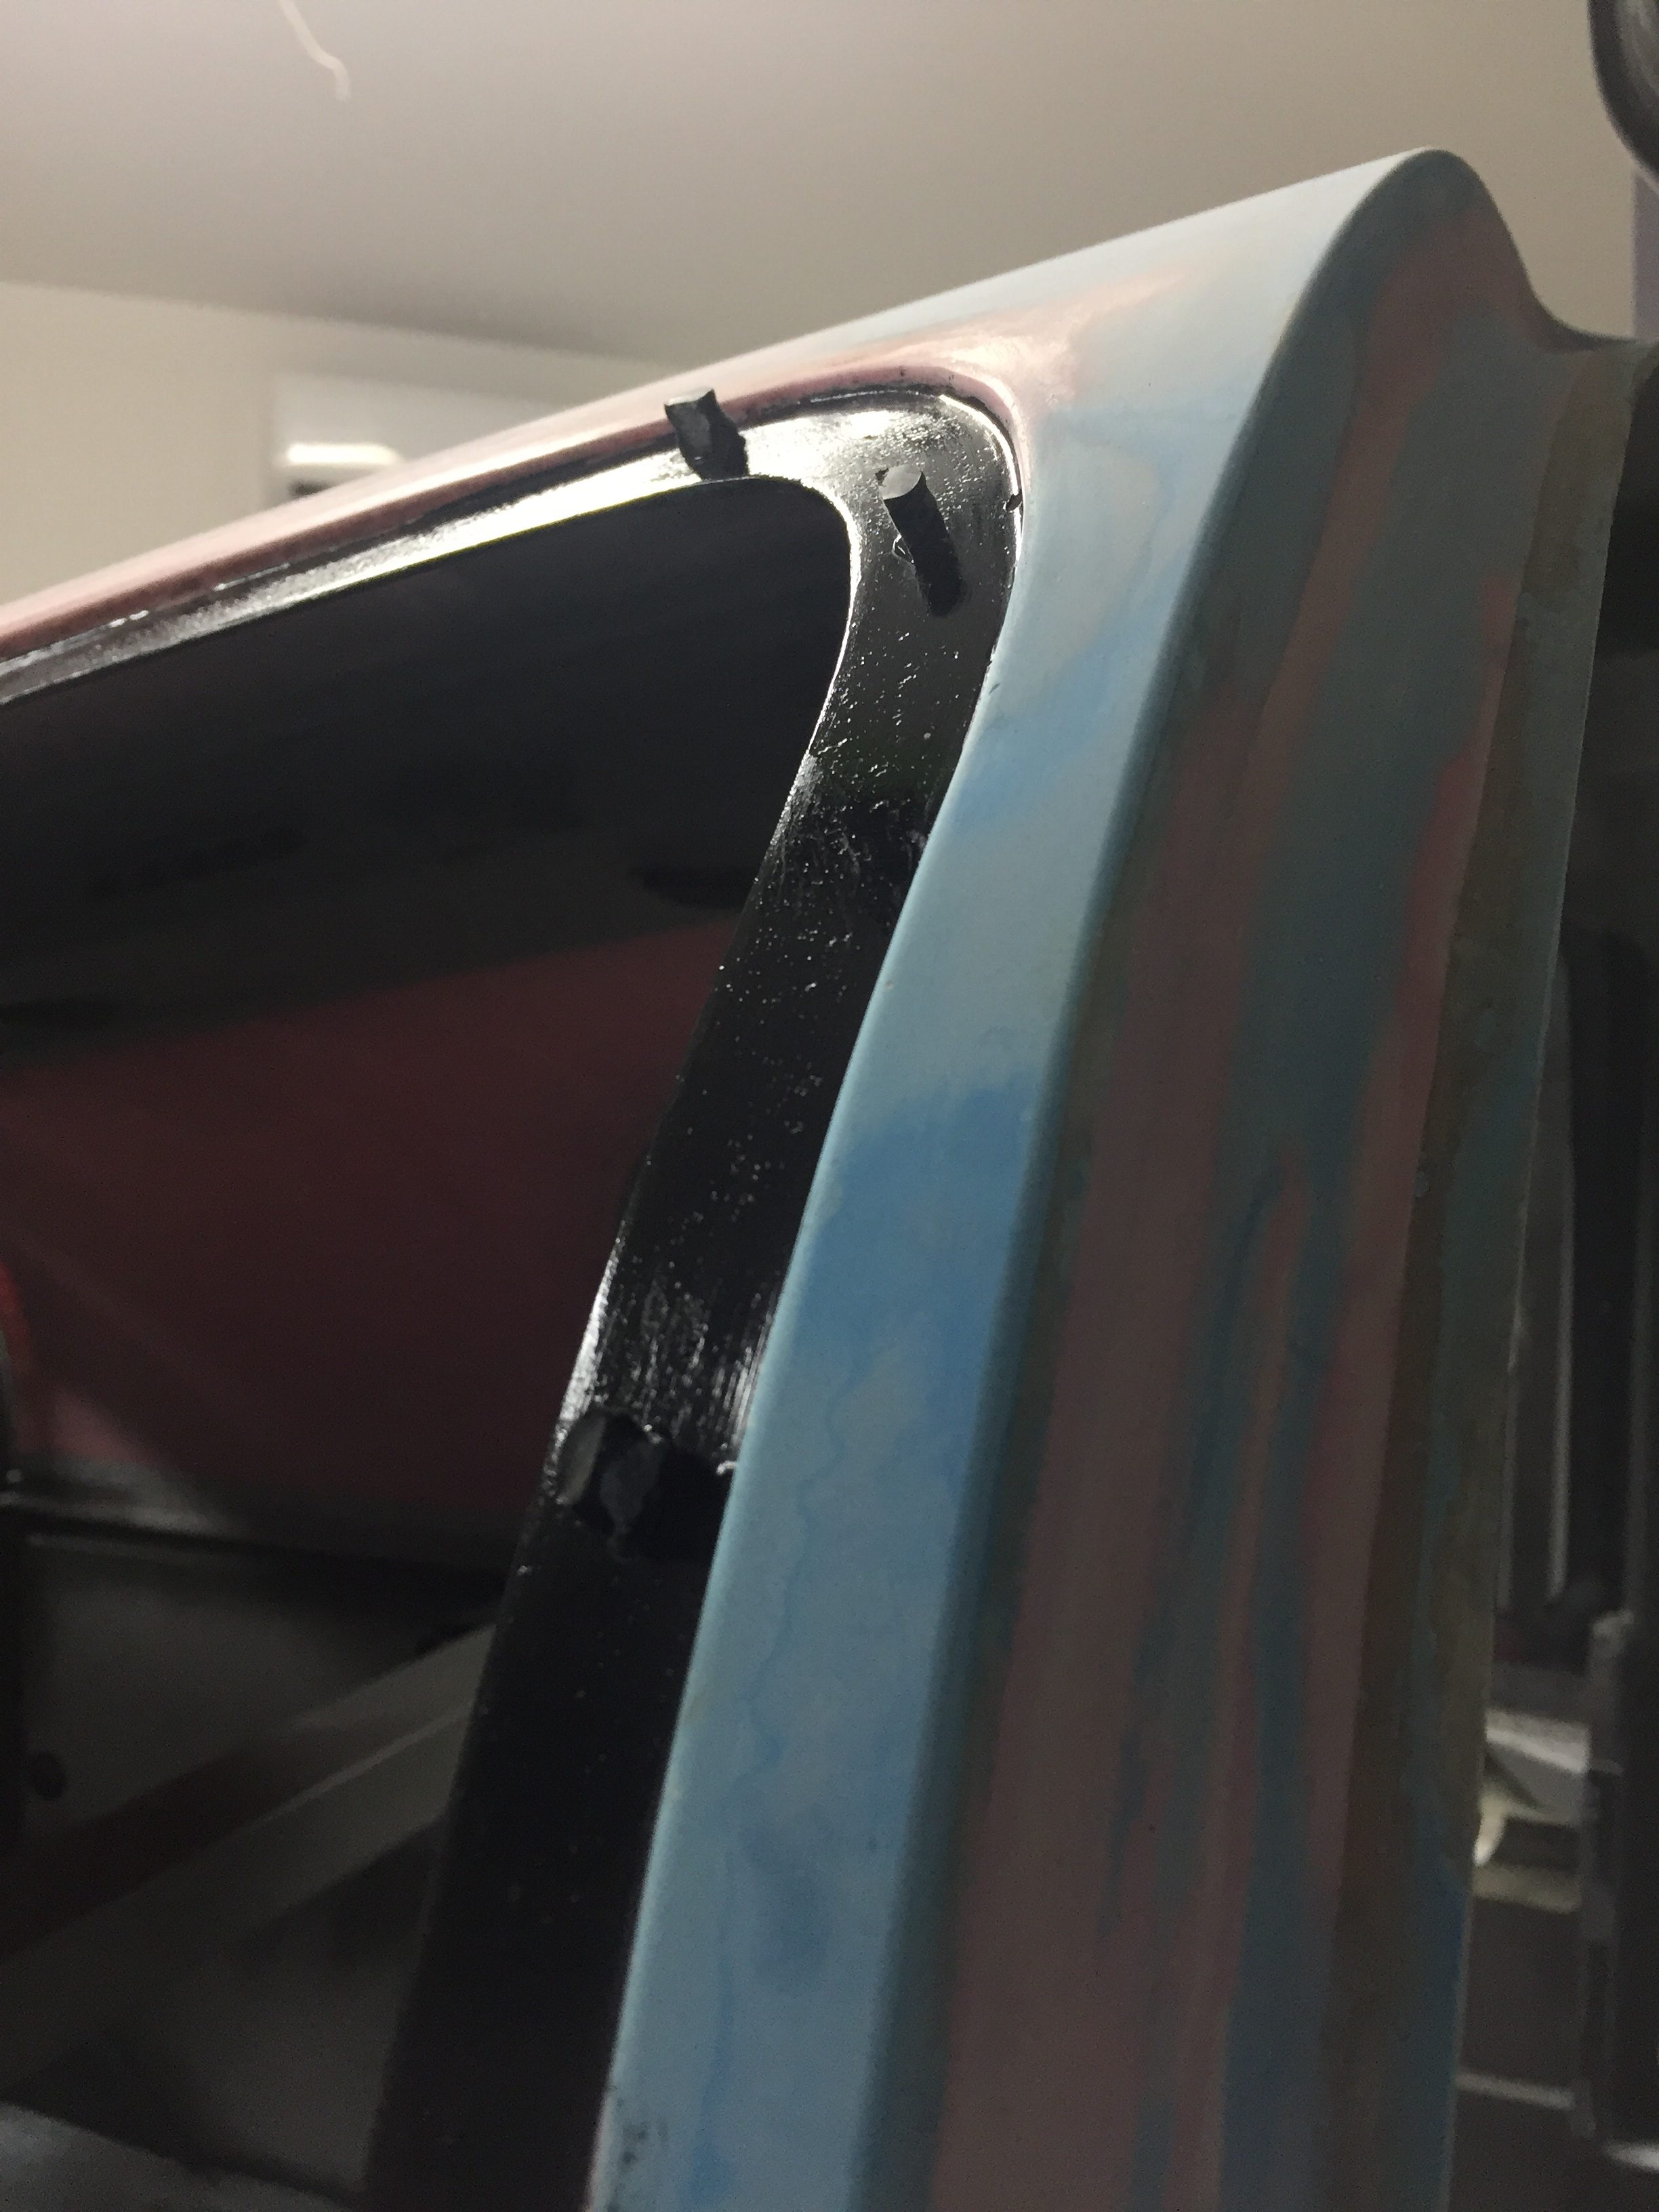
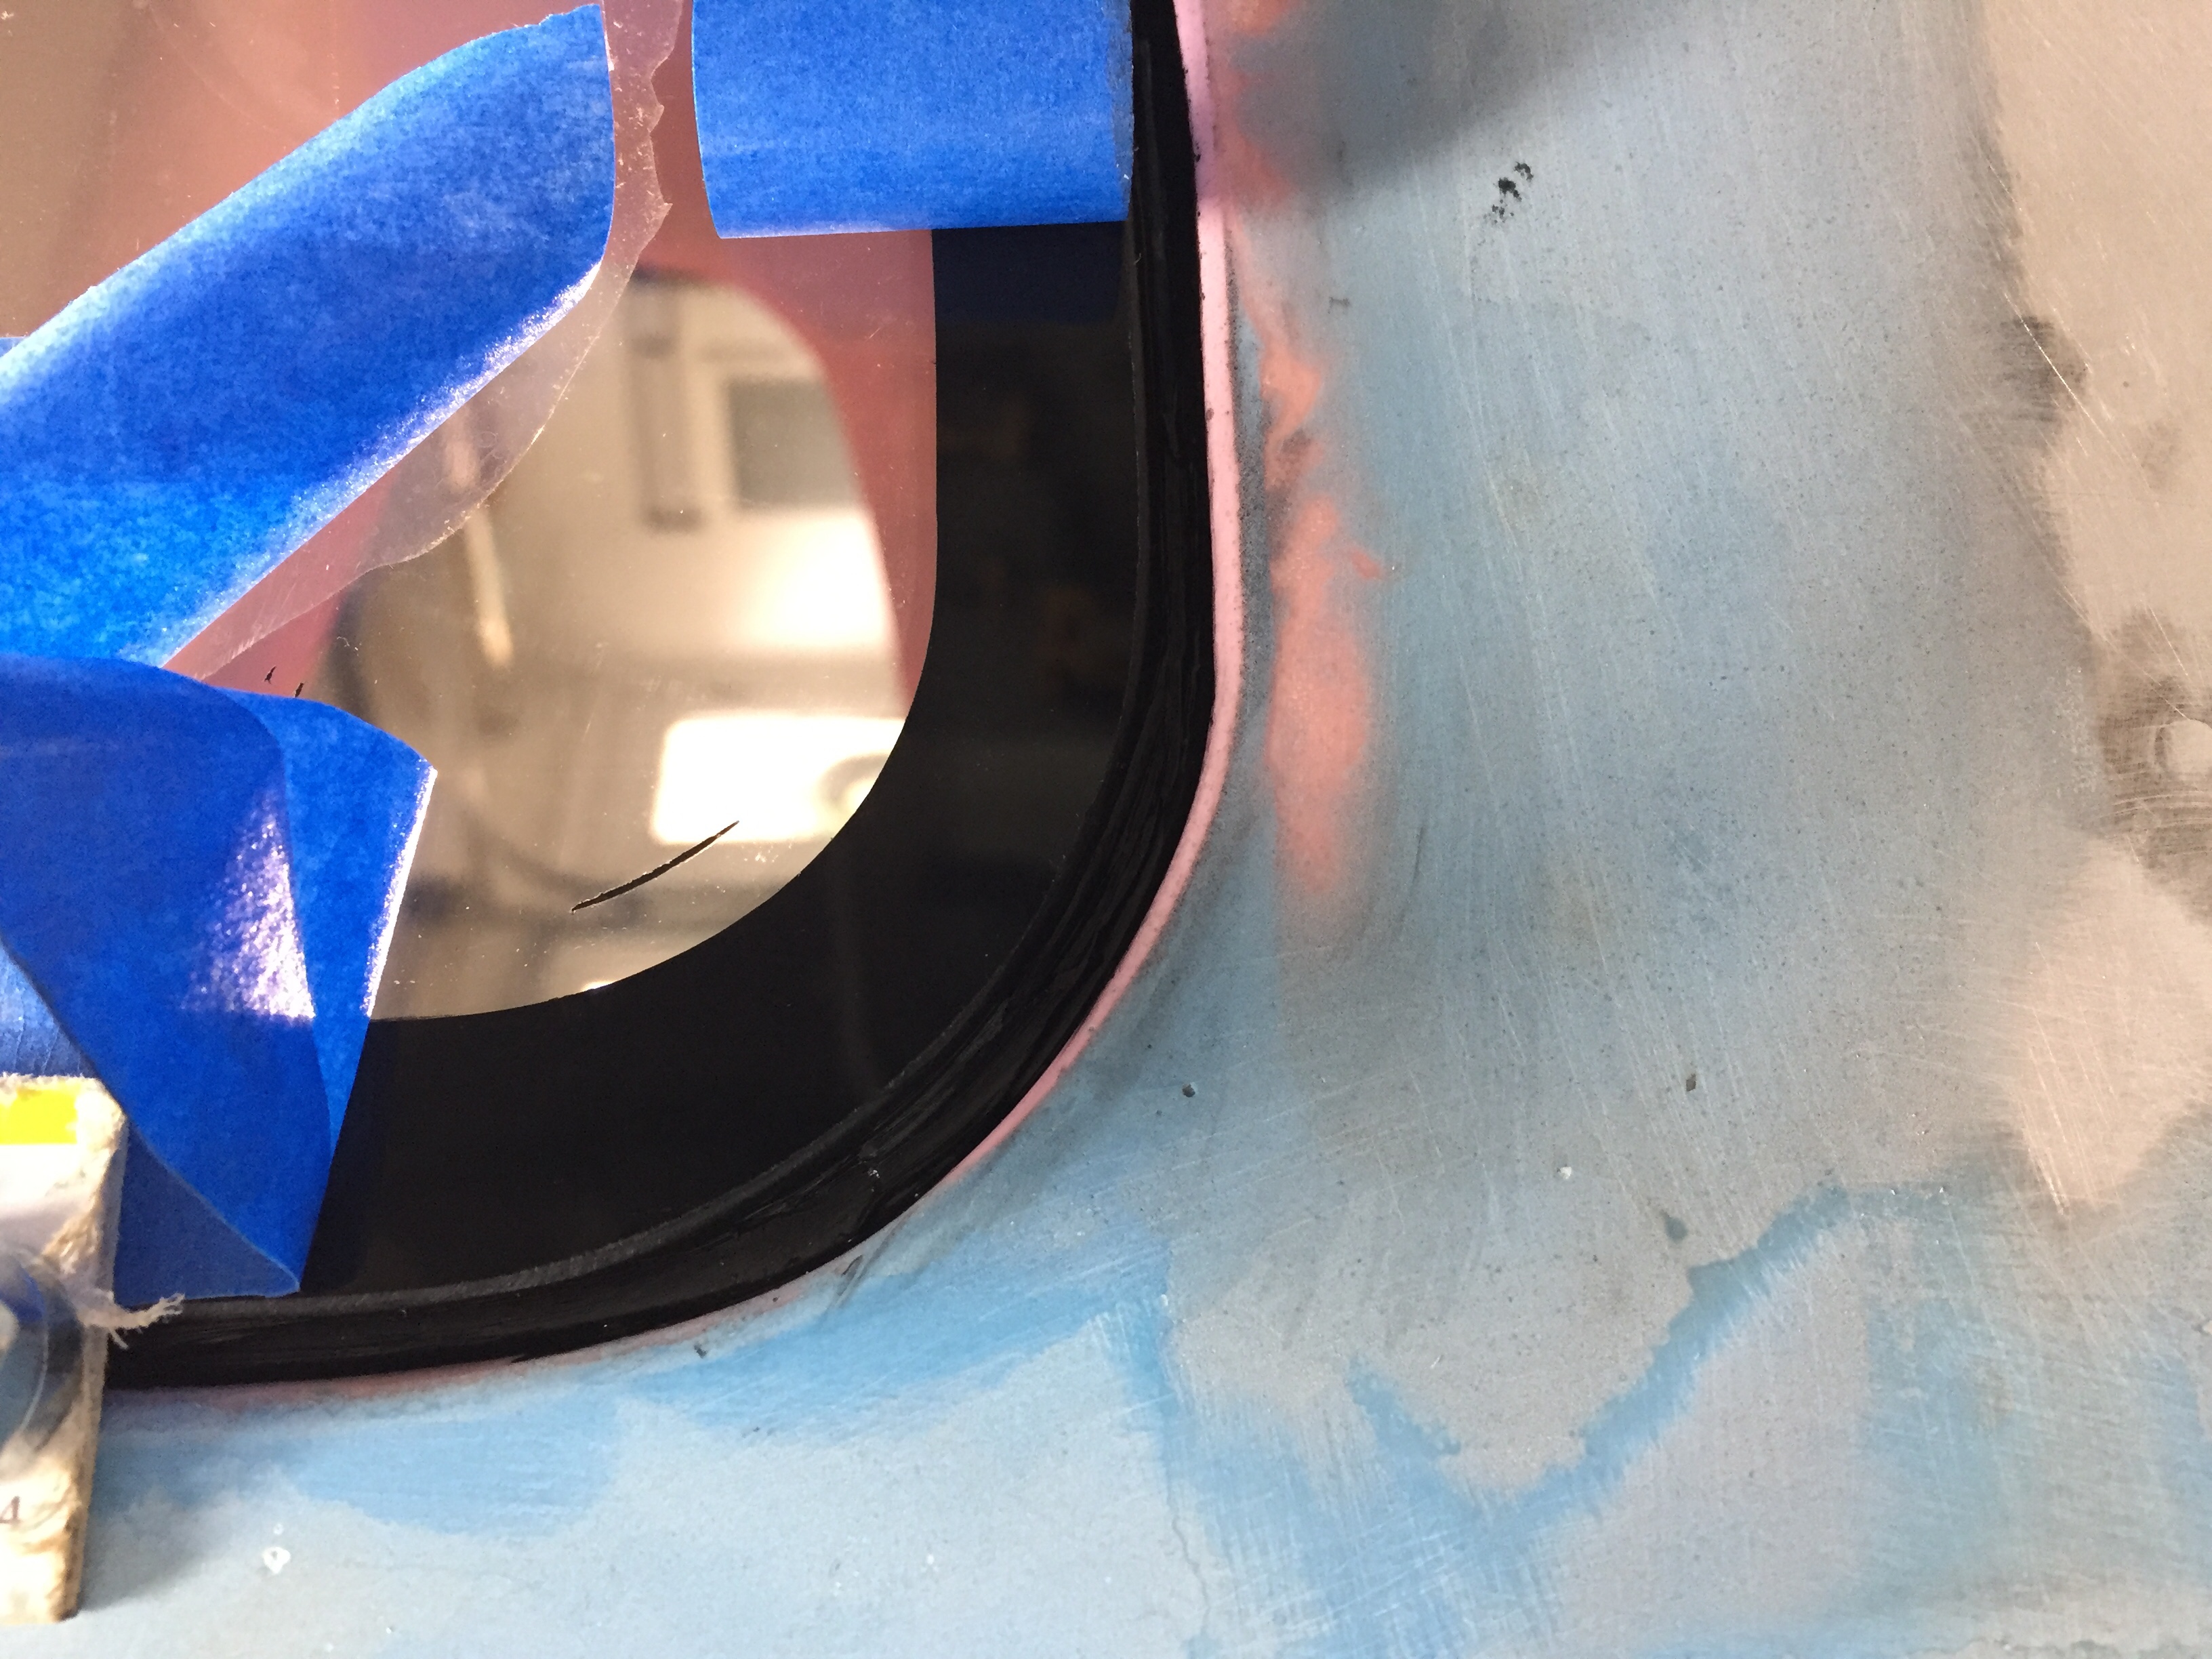
Once fitted from the outside, I climbed in and worked the excess adhesive from the joint.  I just used a popcicle stick and created a little fillet with it then peeled the 1/4″ tape back to reveal the inside of the window.  Two tiny spots of the primer wound up on the plexi which I carefully cleaned up with a hint of lacquer thinner and soft cloth.  I couldn’t help but peel back the tape on the outside after the excess was cleaned out of the perimeter gap.  It looks great!!!  After the plane is painted, I’ll go back and fill in the gap with another bead to finish the cosmetics and tool it to have a nice flush surface on the entire cabin top.

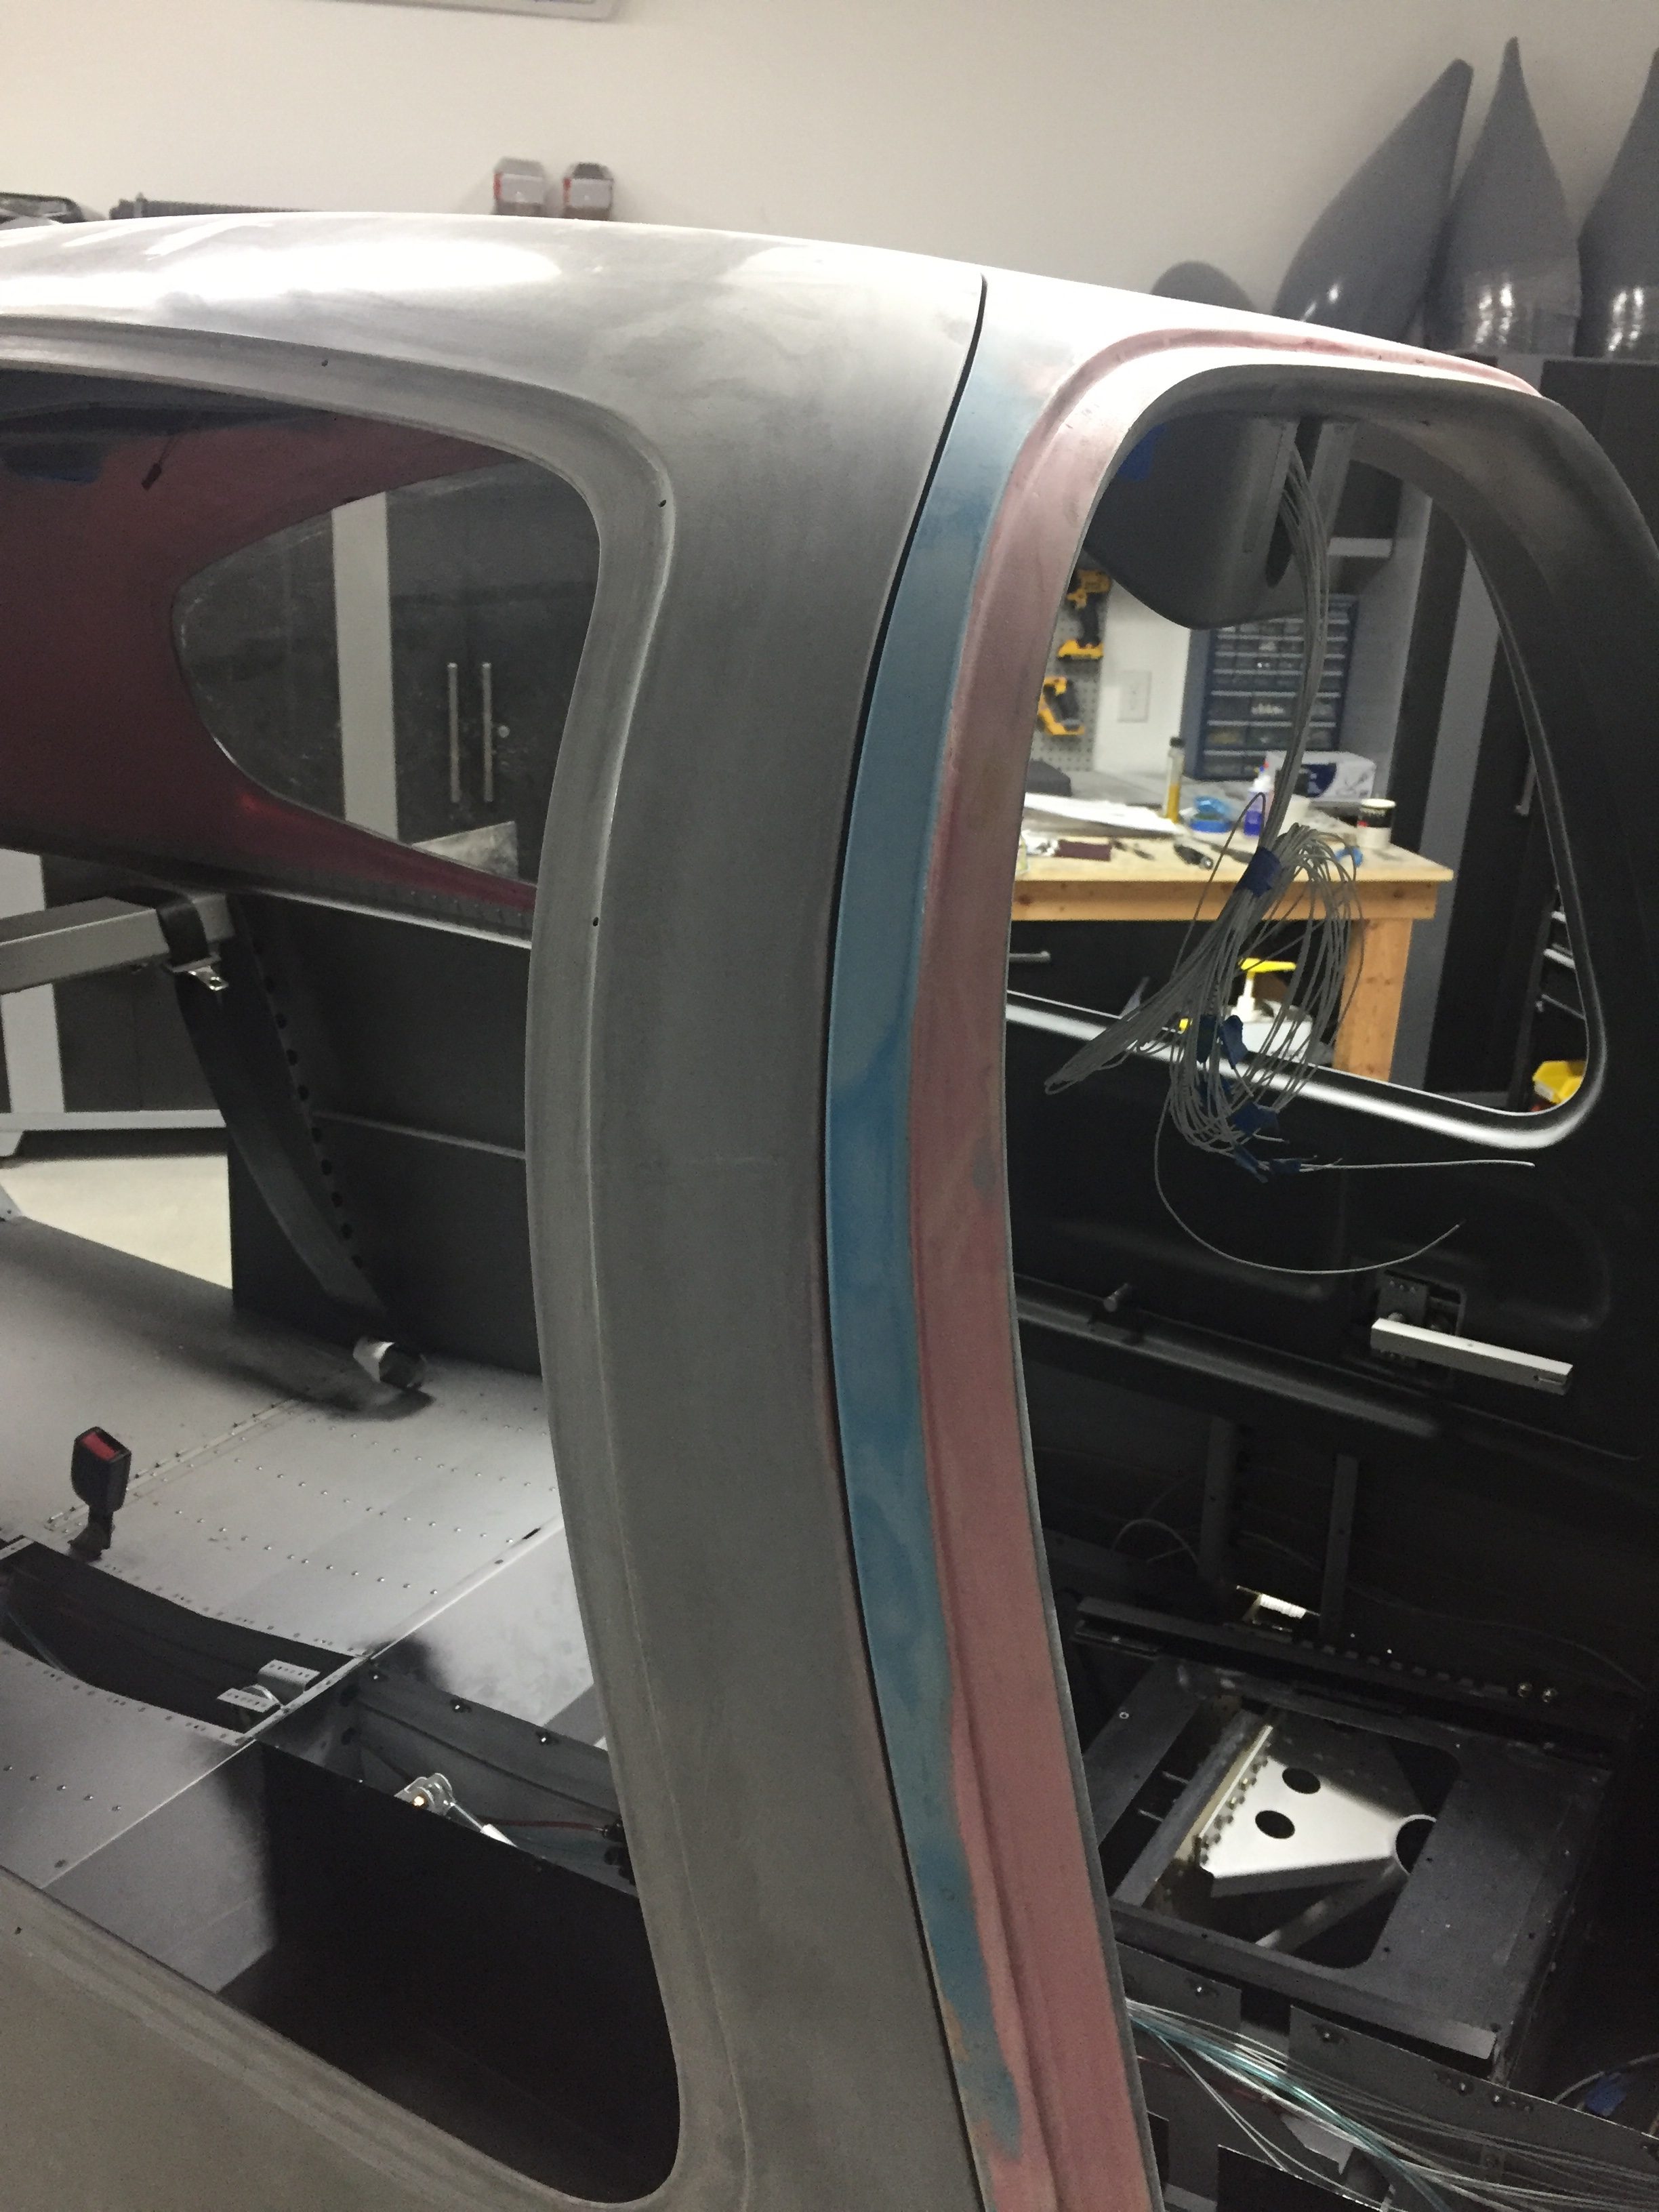
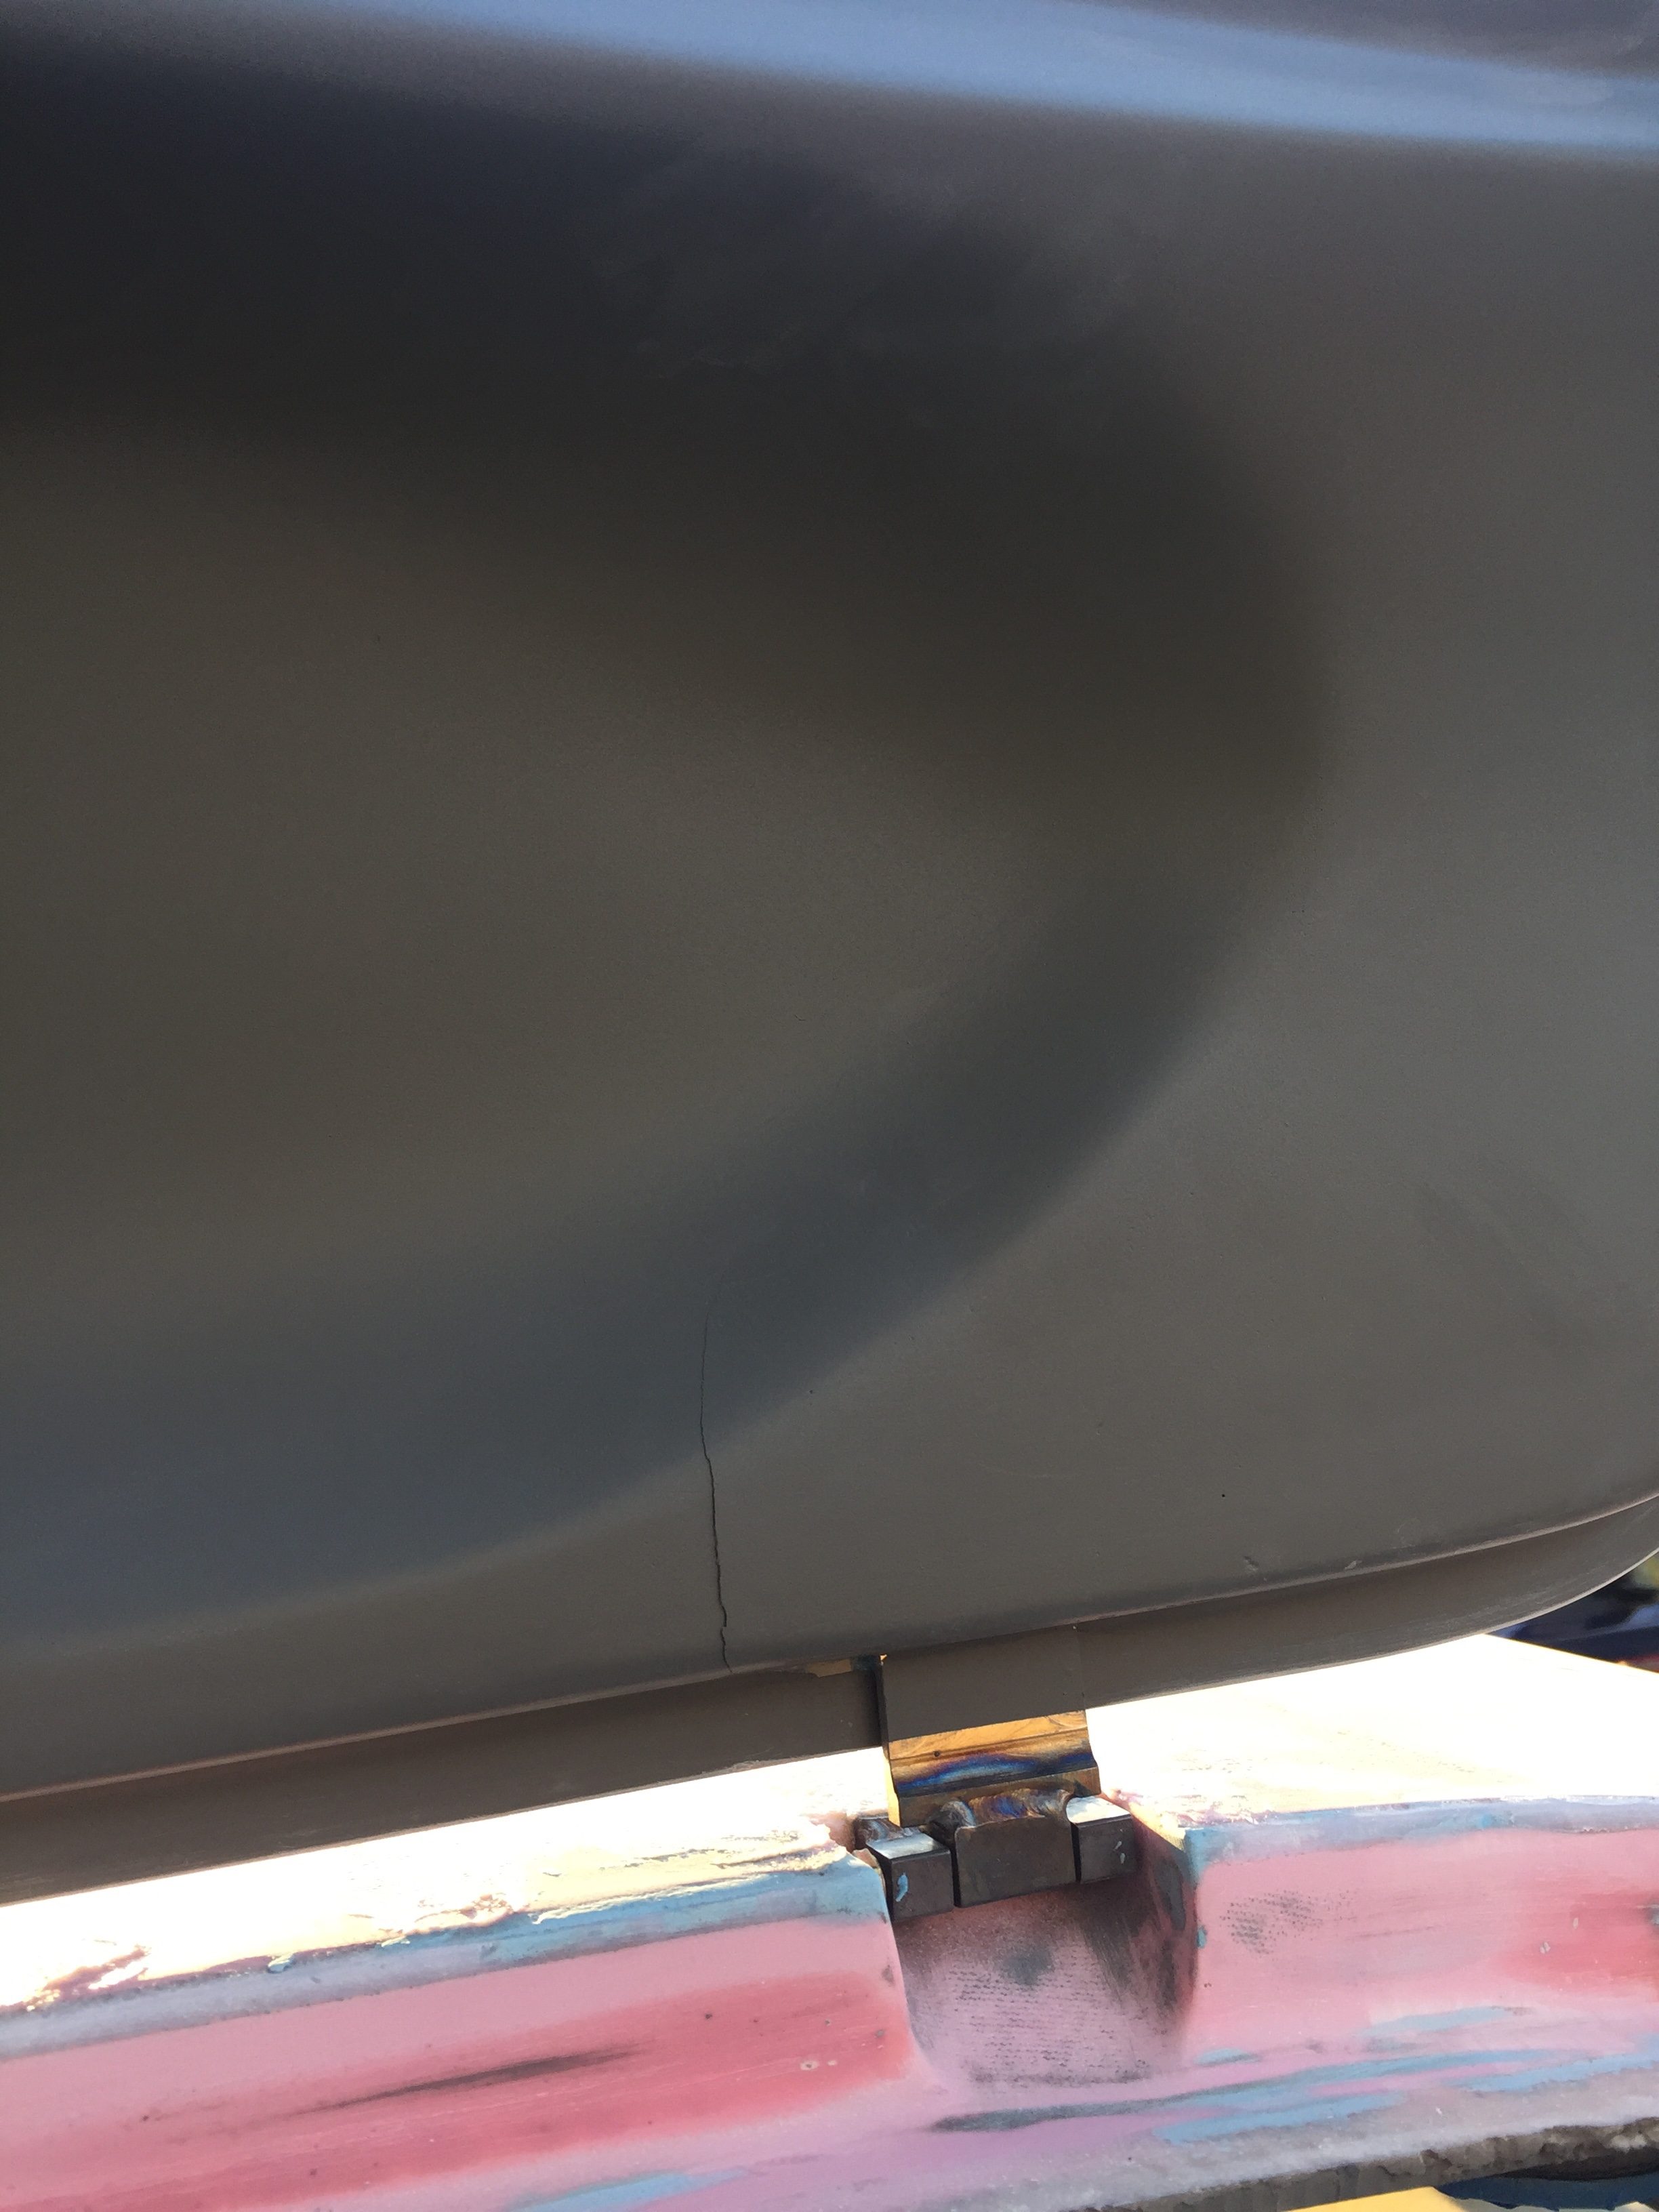
The right rear window went in much the same so I now have two out of four windows in.  I’ll put the door windows in after touching up the paint to finish those off.  I got the windshield on to trim it as well which was a bit bigger job than the window trimming but used the same method.  I won’t be installing it until after all of the avionics are installed to ease the install of the subpanel components.

Nope, doors still aren’t done

Have I mentioned doors suck?  Next airplane I build will be open cockpit.  I pressed on with fixing the outside gap and leveling the doors with the cabin top.  As I did with the pilot side, I used the door itself on the copilot side to create a mold in wet epoxy and then trimmed to a rough shape while still setting up.  What a neat trick, thanks Kurt!  Sand, fill, repeat.  Woof, I’m tired of this and very happy I didn’t build a Velocity composite airplane!

Finally, I got to a point where the door gap was consistent and had a proper gap so time to move onto fairing the doors to the top.  A few spots on the frame were lower than the door which resulted in a uneven profile.  This is where the SuperFil is really nice, as it goes on smoothly, is lightweight but strong, and sands wonderfully.  The key is to be patient and not make it perfect with the applicator.  I’m bad at that and wind up causing more work for myself down the road.  Either way, its more sand, fill, repeat to get a good profile around the doors.  I found the pilot side to be a bit worse than the copilots on the aft edge, but better on the forward edge.  On the bottom of the doors where it meets the aluminum structure, I sanded the door face down to smooth the transition, as it didn’t need much.  I figured that would be better than trying to put a few layers of filler on the aluminum.  I’m quite pleased with the way that turned out and it was an easier job.  Meanwhile I continued to perfect the jams, filling and sanding little spots that I saw or felt.

With the process of using the doors as molds, combined with the earlier paint issue near the door strut, I needed to touch up some paint spots again.  I took advantage of the need to fix a crack that had already developed on the left side aft hinge cover.  This was from me twisting the door inadvertently while working on the pins.  I used a Dremel to dig down to the joint between the wood and glass and filled with 5 minute epoxy then filler.  Now, that would have been a quick fix except that I doubled my work load by closing the copilot door on the air hose causing the same issue on the aft pin on that door too!  But wait!  Call now, and I’ll screw it up even further for only shipping and handling!  I later went on to shove the fuselage back into the garage after a final (ha, no not final) cleaning with the doors open.  Guess what doesn’t fit in the garage with the doors open?  Yup, twisted the door really good (glad it didn’t rip it off the hinges) and cracked another one.  Seeing a trend?

So three fixes later, plus a little TLC on the door edges, and they are ready for paint again, this time hopefully for good.  The outside of the door jams are also finally done and satisfactory to my standards.  This took a ton of time overall and was just as much work as I thought they’d be.  I could do it better and faster next time, but I doubt there will be a next time for me!  I rounded over the hard edge which will help the final paint on both the doors and the cabin top.  I wound up with a 2-3 mm gap all around and it’s close enough to the naked eye that it looks really nice.  I spent some time reinstalling the pin guides and really have the handles and pins dialed in for smooth operation.  I tested the seal temporarily on both doors and you don’t even realize it’s there now, which is perfect.

I took the chance to put a tape of glass over the seam between the top and the aluminum followed by two coats of fill to smooth the transition.  This will make a nice finish under paint down the road and is completely cosmetic, not structural.

The only Aerosport product left in the storage rack were the headliner panels, so I got those down and knocked off all of the dust.  They are a very thin layup of fiberglass that the headliner material will adhere to and then velcroed to the cabin top.  I needed to get them trimmed and fitted before putting in the windows, so spent a few hours on each getting just the right shape and fit.  It’s not hard, but it was a bit tedious as there isn’t a good way to get a pattern since each area and side is a bit different.  Lots of fitting, removing, trimming, repeat.  In the end, they fit very well and I’m excited to have them finish out the interior of what will be a very nice and comfortable cabin, no doubt.

I ordered two different color headliner material (available a lot cheaper from online retailers than Aerosport) and found one that matches very closely to the grey of the interior.  I’ll cover the panels down the road when I am between major projects.  The carpet from Aerosport came in and looks great in the bonus room upstairs.  This leaves a bit of paint left to complete the inside work.

Belts and Glass

The seat belts have been a long time coming and now that the parts are anodized, I can install the seat brackets and get the seats off for covering.  I also had to have the belts redone, as the side mount was sewn on backwards, not allowing the belt to be mounted to the side wall.  The front receptacles also had to be special ordered since the mounting brackets for those were also designed for a seat mount, not tunnel mount.  I’ll say that Seatbelt Planet did a fantastic job at creating these for me and their service was excellent.  In the end I wound up with exactly what I wanted despite a lot of custom challenges.

I bolted on the front brackets and then used the guide brackets to locate the holes in the seat back.  Once the belt was fed through, it along with the reel will stay attached to the seat for seat removal. The belt end will be unbolted from the sidewall stock mount and the reel will be unbolted from its mount on the firewall.  The belt will run underneath the leather of the seat.  Thanks Mark Cooper for the design on these!

I ordered backing plates to mount the inertial reels to which will help spread the load better in the event of needing to use the belts.  It also acts as a nutplate so to speak and will make for quick removal and install for removing seats come maintenance time.  I wound up tapping the back plate for six screws so again, it’s easy install and secure mounting.  Note the flaking paint from the spar that I didn’t prep or prime.  What was I thinking?  That will need to be stripped down and repainted properly.

For the rear seats, the reels mount to the underside of the cross bar.  I used the same backing plates and located them on the widest part of webbing in the cross bar.  The belt then routes around the bar and into the brackets and mounts to the stock locations on the seat pans.  Since the rear belt brackets have a slot in them and don’t run through the seat cushion itself, they do not have to be removed to remove the seat backs.

I did have to have the sheet metal guys on base machine a few spacers for me since the receptacle mounts have much larger holes than an AN4 bolt per plans.  A six pack of beer was a small price to pay for the use of a lathe and a few scrap pieces of aluminum.

With the final piece of the seats being the seat heaters from Flyboy Accessories, I trimmed the heating pads and labeled them before boxing up all of the seat backs, foam, and pads to be shipped to Aerosport.  I also dropped in the armrest and the orange leather hide that I ordered as Aerosport will be supplying the black leather.

I decided to take a break from sanding the door jams and work on trimming the windows.  I chose to order the Cee Baileys’ windows and windshield versus the stock offerings.  Feedback says they are easier to fit, a bit better quality, and can be ordered with a light grey tint, which I took advantage of.  You’d probably have to put a tint and non tint together to see the difference, as the tint looks clear to me.  The first order to arrive was somewhat of a shipping nightmare.  The box was damaged, so FedEx decided to remove the windows and placed them on the floor of the truck or something.  Long story short, I marked it damaged and peeled the plastic off the windshield to reveal light scratches and pitting smack in the middle of the sight range.  Baileys was awesome and had a replacement windshield shipped in a few weeks.

After doing a lot of research and assessment of my own capabilities, I decided to use the Sportsman method of installing the windows.  This follows the same principle as Van’s except it uses a more flexible material to adhere the plexi to the substrate.  Some use SilPruf, but I decided to use Sikaflex.  It is very easy to work with, paintable (although not many people paint over it), and available online.  I was having a lot of trouble finding Lord, so all the better.  More on the Sikaflex later.

The first step was to trim the windows keeping in mind a 1/4 gap will be needed between the plexi edge and the edge of the joggle on the top and doors.  This will allow for a nice even gap to fill with the Sikaflex and create a clean looking final product.  Using the well documented YouTube videos, I started with a rough trim and then began marking with the wet erase marker.  The new angle grinder I bought was the perfect tool and made quick work of grinding away the excess material.

Once the fitting was done, I drilled holes for the wingnut clecos to hold in the plexi.  After each window was trimmed and fitted, I traced the perimeter of the fuselage opening onto the plexi to use as a tape line.  This is the second most important step in this method so I took my time to ensure it was all correctly completed.  The line is used to mask before installing with the Sikaflex and results in a nice clean finished look on the inside and outside of the plexi.  An hour of taping later, and the windows were placed on the guest bed, I mean, approved aircraft parts storage location, for a very short period of time.

It’s really a gray area

Another painting job is the Aerosport interior panels.  Now that they are complete and I won’t need to take them in and out a bunch, I wanted to finish them up to put them in storage until I’m ready to fly.  With some good information from SEM, I set about prepping them which was very easy and much simpler than prepping aluminum or carbon.  I used Dawn and gave them a good soapy scrub first, allowing them to dry one full day.  I then used SEM Sand Free to do a final lint free cleaning before spraying on the Plastic Adhesion Promoter.  The first light coat of Color Coat is sprayed on while the promoter is still wet, which helps the color melt into the plastic.  Then, it’s just a matter of a few more even coats of Color Coat to finish the color.  The paint does a great job on plastics and the panels turned out really nice.  I did not use clear on these, as I just didn’t see the need to.  If they scratch, they’ll easily be filled or sanded and then touched up.

I painted two front panels, two rear seat panels, baggage area panels, screw button covers, door handle plates, and handle covers.  I also painted and cleared the two metal panels below the doors and installed the foot well lights that I previously fitted nutplates for and cut out the mounting holes.

Since the headset jacks won’t fit on the center console, I ordered some recessed mounts from ACS for the rear metal side panels.  I saw another build with these and really like the look and functionality.  The only downside is I had to cut and bend the mounting side since it didn’t allow the Bose plugs to go in.  The jack mounting surface is perpendicular to the flush mount surface instead of the angled wall so if you have long headset plugs, these won’t work out of the box.  I used flox to fill in the corners and added a bit of poly fill to smooth them out, even though they won’t be seen.  I touched up these two panels as well and then cleared them along with the other metal panels.

I let the paint cure with the heat on in the shop overnight and then set to work installing the webbed pockets up front.  I wound up using blind rivets instead of screws and nuts which should hold just fine for the checklists and little trinkets that will wind up in them.  I also put the cup holders in place, finishing up the front side panels.  Part of my upholstery order will be leather covered inserts for the front and rear panels to dress them up a bit more.

I’ve had the baggage door panel sitting collecting dust, so I brought that down and fitted it for install.  The plans have you velcro it to the door or something, I don’t know since I didn’t really read the instructions.  I decided to blind rivet it, so drilled the holes and clecoed it in place while positioning the strut that will keep it open.  I didn’t get it cleaned and prepped in time to spray, so I’ll have to paint it down the road.  I’m also waiting on Parish’s order of matching lock cams to his fuel caps, as I may swap out my door locks for a single key matching my fuel caps as well.  If so, I’ll need access to the baggage door cam lock.

Bringing up the rear

Now that the carbon fiber bits are cleared, I went to work on the rear panel for the back seaters.  My original plan was to mount the oxygen ports, a USB power port, heat control rheostat, and headset jacks into the rear console but it all just wouldn’t fit.  The O2 ports had to stay there, as I didn’t want them in the side panels due to lack of room, so the headset jacks got the boot.  I drew up a layout based on the measurements of the rear panel area.  The carbon is too thick and rigid for the ports to cleanly snap into so I will use AL with a matching acrylic overlay just like the instrument panel up front.  I was able to keep the power port and heat control on top.  I won’t be back lighting these as there isn’t much room and I figure at night a task light can be turned on easily.

I did need to come up with a way to secure the O2 ports, so I used a scrap piece of carbon and installed a few nutplates before epoxying it into the console.  I had to trim the brackets of the O2 ports so they fit side by side as well.  In the end, it’s a nice fit and still allows easy removal for maintenance.

I used some advice from TCW Tech folks to add a source selection switch into the controller for the rear heat servo.  I had to cut the rheostat off of the circuit board and ordered two matching ones from DigiKey, wiring them up with the control wire going to the switch.  This will allow me to control the rear heat using the rheostat mounted up front or give control to the rear seaters.  Testing with the multi-meter confirmed the desired function so those were tucked away for future install.

Now that I knew where the rear O2 ports would exactly be, I could continue the plumbing of O2 lines.  That also led to running the wires to the O2 ports, power port, and rear heat rheostat.  I fabbed up a few bushing holders to attach to the tunnel and ran everything down the left side.  The front seat headset jack holes were drilled inside the armrest cubby and the wires will be secured onto the tunnel cover.  I placed connectors on all of the wires so that the tunnel cover and center console could be removed for maintenance without needing to remain attached via wires.

I also ordered a four channel dimmer from Pilot Lights to replace the three single channel dimmers for the overhead panel.  They all would fit up there, as space is tight, so this was  a good solution.  I’ll have a spare channel if I want to add anything later.  I chose to epoxy the mounts to the overhead cabin top which kept some of the wiring runs short.  All wiring for the overhead will be coming up through the center post from the sub panel.  I went ahead and fabbed up the wires for the switches and controls on the overhead so I could ensure it would all fit within the post – no issues there.  With that bit done, I was able to close up the overhead console minus the switch panel which is waiting on the back light panel.

Oh yeah, I sanded more on the doors.  You know, the same thing I’ve been doing for months now.  Gah, the damn things are never going to be done.

The art of design

If you aren’t building, you probably don’t care about this article regarding how and why I laid out my instrument panel the way I did.  For those of you that are building, be my guest and read on.

I have spent many Air Ventures looking and playing with avionics and decided some time ago that AFS was my favorite.  I don’t have anything against others, but the layout, functionality, and features of the AFS just fit perfectly for me and my flying mission.  I’m going to fly a lot of IFR with my airplane, as I already do with the Diamond so want a very capable suite of avionics up front.  I also don’t want to upgrade or add on for a very long time so I budgeted to do everything I wanted upfront.

A quick run down of the panel includes:

Two 10″ PFD touch screens

One 12″ MFD touch screen

Dual ADAHRS

IFD 540

Garmin G5 as backup instrument

XM radio and WX

ADSB in and out

Oxygen control head for MH 4iP

A/C control head

Space for SDS control head

Toggle switches and rheostats all matching

All controls that I need located to the left of the center console – no reaching over my pax!  Now, my wife is not a pilot and doesn’t really need the PFD in front of her, but we both like her to be situationally aware and I fly with other buddies that will appreciate a PFD on their side.  It also allows me to one day teach someone else to fly easier.  Again, I don’t want to have to put the airplane down for an upgrade later.  Do it right the first time.

The big pieces go in rather quickly as there aren’t many options of where to put them.  My main concerns were what switches go where and how to get a good flow on the order of switch groupings.  I also was determined to create a back light setup for the switches much like Ed Krantz did on his plane.  More on this later.

With the main components located, I decided on all lighting switches and dimmers to be located on the overhead console.  The upper left has the “misfit” switches like defrost, pitot heat, oil cooler, etc.  The main switch panel in front of me will have master switches and all engine controls in order of startup procedures.  Finally, the lower console will have the O2 and cabin climate controls where either left or right seat occupant can easily control them.

The space for the SDS control head is not ideal, but that instrument, should I go with SDS, is really only used during testing and tuning.  The EFIS will display all engine parameters for normal operations and I haven’t even decided if I’ll mount the display on the panel or remote mount it for use only when I need it.

I do a lot of night flying and despise red dome lights or using a flashlight.  While all three screens and the GPS will put out a good amount of ambient glow, I wanted the switches to be properly backlit to add that extra pop to the panel.  While playing around on the internet looking for lighting solutions, I came across electroluminecsent or EL panels.  They are a really neat product, only about 1/32″ thick and available in many different sizes which are then trimmable with a few restrictions.  All run off of a 12V transformer and provide equal, dimmable, light across the entire surface.  Perfect for what I was wanting!

I ordered a test piece to experiment with in the shop and requested a sample of engraved acrylic from Aircraft Engravers.  Match made in heaven.  The EL panel glows nicely through the laser engraved markings and can be cut, trimmed, and hole punched for all of the switches and dimmers that need to go into the panels.  The transformer makes a bit of high pitch whine, but it will be drowned out in the airplane and a few flight tests in the Diamond confirmed that the transformer was not electronically noisy, only audibly so.

With a successful experiment, I set back to work in Draftsight to come up with templates to be cut and engraved by Aircraft Engravers.  AFS, who is building my panel, will still cut, paint, and label the four main panels.  This will be a presentable back up in case my EL project doesn’t work out in the long run.  I worked with an EL supplier from Etsy who has been awesome to get a proper prototype panel cut for the overhead console.  There are some limitations with the EL panels such as the power lead locations and two edges that have the contacts running along them not being able to be cut.  It was a bit of puzzle work, but in the end fairly simple to draft up and layout.  Aircraft Engravers cut and engraved the acrylic overlay for the overhead console panel and I was able to put it all together with switches to see how it looked.

I was so excited that I forget to specify which color, so Marc sent white.  No worries, as the production version will be a blue.  Needless to say, I spent a lot of time sitting in the dark garage flipping switches that weren’t wired to anything!  It’s a very elegant solution and a rather easy one at that.  For the whole cockpit, all EL panels will be wired together with one transformer and be dimmable through a rheostat.  I wanted all of the instrument panel to match, so I’ll be spending some extra money on acrylic overlays for the entire panel rather than just smaller panels around the switches, but it’s my plane and I’ll do what I want to!  Wayne at Aircraft Engravers has been great and is pretty excited at this working so well, as he may be offering more panels like this in the future.

So now, I have finalized the lighting panels and overlay panels for production.  I’m hoping the avionics arrive on time at the end of February for me to finish wiring and installing.  With my higher level of customization, I’m not using the AFS quick panel switches so I’ll have a bit more work to do than most quick panel customers.  I’m very grateful to Rob, Stephan, and all of AFS for hanging in there with me on this over the top instrument panel.  In the end, I’m confident I’ll have a real show stopper that I’ll be admiring for decades to come.

I love shiny things

While the doors were being worked, I picked up the carbon fiber parts that were at the painters getting clear coat sprayed.  I was smiling ear to ear walking out to the car with them.  The pieces turned out better than I had imagined and are darn near perfect.  The painter put two coats and while it has a nice gloss reflection, it’s not overly shiny.  The carbon really comes to life with the clear over it and I think it’s going to look great in the cabin.  I now regret painting the overhead instead of clearing it.  I have made up my mind if I ever have issues with the paint on the overhead, I’ll strip it and clear the carbon portion without a second thought.

At home, I had to put the push to start button and Aero Vents in to see how it looked and make airplane noises.  Some hours later, I got back to work printed out a few panels to see how things were going to fit and look.  I’ve been working for over a year on my instrument panel layout, playing with this and that, moving things around, and finessing the position of switches, etc.

I started with Panel Planner and really liked it for the ease and simplicity of it.  It is great at putting components in the panel and seeing what it will look like with all the fancy touch screens everywhere.  What it’s not good at is custom anything.  I never could figure out proper switch labels and the 310 switch panels weren’t loaded into the panel template, so I just stuck with the main layout on there.

Meanwhile, I reached out to Rob Hickman at Advance Flight Systems (Dynon) with a few technical questions about the AFS system.  We had a couple great conversations that led to him providing a quote for a “quick panel” customized to my liking.  Surprisingly, he was able to quote a complete panel far less than just the components from Stein!  I had planned on doing all of my own wiring, but I couldn’t pass up this opportunity and deal, saving me money and time.  I started working with Stephan on the layout and wound up using Draftsight Plus at his recommendation to do more detailed drawing on the layout.  I decided to give poor Stephan a break and finish the final details myself as it was just easier and I’m a control hog.  Draftsight is based on a version of Autocad that I used back in high school so I was able to pick it up really quickly.  It’s also much easier and simpler than SolidWorks, as I don’t need computational fluid dynamics to label the Defrost Fans switch and put borders around switches.

The switch panels, upper, and lower console panels turned out great and were a good fit.  I was able to confirm the lack of need to reach across the center console for anything I’ll need in the cockpit except for activating the ELT, a major goal that I wanted after flying the DA-40 and constantly using my right-seater’s knee as a armrest.  Since I had already ordered the Apem toggle switches and Pilot Lights dimmers, I decided to mock up the overhead panel to finish the night off with more flow work and airplane noises.  I admit I’m pretty giddy about getting controls in the cockpit and I’m really happy with how they layout is working.  I can’t wait to get the panel and avionics from AFS installed to light everything up!

The cart before the horse

Finishing the interior now consists of painting the remaining surfaces not covered by the Aerosport panels and painting the panels themselves.  The doors, door frames, and a few other areas needed the Presido gray applied and I wanted to get that complete so I could turn full focus onto the outside.  I took my time to prep the areas needing painting with paper and tape and then set to work ruining my index finger with four cans of spray paint.  I used the SEM sand free to wipe all the surfaces down after a good cleaning with a wet rag to get rid of dust.  I then primed a few spots that had the bare filler / metal exposed.  I then put three coats of color on it, letting it flash in between coats.  Finally it was two coats of clear on the doors and door sills.

I was excited to put the recently anodized hardware back on the doors to get the struts mounted for good.  The anodizing came out really nicely.  I had a few “trinkets and trash” done but the main parts were the seat belt brackets that I needed complete so the seats can be sent off for covering.  While installing the bolt holding the strut to the brackets, I managed to scrape off some of the newly applied paint.  I then proceeded to scream at the top of my lungs, collapse on the floor in a heap of fiberglass dust, and cried like a little school boy.

After that, I picked myself up and started asking questions.  SEM is advertised as a flexible dye, not a spray paint, for plastics, vinyl, and leather.  I know others had used it on their interior with good results so I was pretty confused.  I do have some spots on my carbon fiber overhead that have flaked off, but I attributed those to poor prep on my part, mainly not enough scuffing for it to properly adhere.  After a few dire nights thinking the entire interior may need to be stripped, I called their tech support and got reassured that the Color Coat is adequate for all substrates.  They did say it’s not going to be as durable as a two state professional coating, but it should be just fine and touch ups will be easy.  Sure enough, the areas I saw flaking was poor application on my part.  I tried pretty hard to scuff and scrape over an area I know I applied it correctly and the finish help up very well.

The need for a few touch ups is just as well, because I but the cart before the horse on painting and still needing to sand.  The external door gap was the next hurdle to tackle and I knew I really made a mess of it when fitting the doors originally.  While I used the cleco to cabin top method, I originally started with the plans directed 45 degree bevel before turning to square the door edges off so paint will stick better.  That left me with a large and unsightly gap between the cabin top and door edge seen from the outside.

Thinking smarter but not harder, I decided to put globs of filler on the top and then prep the doors to simply close and latch, creating a nice even gap all around.  I had seen others do this with layers of tape.  Now where they got that mystery tape, I don’t know.  I can’t find any tape thicker than about 20 mils and it’d take 200 feet and 10 layers to create a nice 2mm gap around the door edges.  So, I compromised and kept the globbing plan but simply wrapped the door with brown packing tape and shut it.  I then monitored the epoxy flox mix during curing to start working it as it hardened.  I just used razor blades to go back and cut by hand an even gap in the curing epoxy.  It was really easy and very clean.  The trick is to catch it at the right time.

I cleaned up the tape residue and a few areas of the flox and was really happy with the results.  It was a good base for poly fill to smooth everything out nicely.  It’s also a lot stronger than just the poly fill.  I rough sanded the epoxy to get an even more consistent gap and then put the first coat of poly fill on to dress it up.  Another sanding, this time with a lot of fine tuning pretty much finished it up.  A few spots have some pinholes or voids that will be filled in after an initial prime coat is applied to highlight any last defects.  It wasn’t nearly as much work as I thought it’d be and I’m happy with the outcome.  Now, on to the co-pilot’s door!

It’s not easy being pretty

I realized I forgot a post about installing the door seals after building up the door frame lip.  As always, it took more effort and involved more frustration than I had originally imagined.  To sum it up, my problem was not having a consistent gap between the door frame lip and the interior of the door.  I had some tight spots and some just right spots.  The issue are the tight spots that take a lot more force to squeeze the door seal bulb than you want to put on the door.  Basically, I had to start again with fitting once I got the seals.

My first idea to make the seal fit with less squish was to remove a lip on the u channel of the seal.  It’s designed to help hold the seal onto the door frame lip but it also added about 1/8″ of bulk.  While that did help, it wasn’t enough.  I tried different combinations of seals, but due to the uneven gaps, the smaller seal wouldn’t actually touch both surfaces in a few spots and adding filler would have required re-sanding and contouring the inside.  That wasn’t a viable option, so it was back out with the angle grinder and Scotchbrite pads to go to town on the door frame lip.

I was shocked at how much had to come off in some areas.  I determined this using a marker and template, acting as a scribe to measure the proper gap.  I used an area that had a nice amount of squish on the seal but not too much as a gauge for the entire door gap.  It worked well and after making a lot of dust all over the just cleaned interior, I was getting a nice fit on the door seals.  I know I’d have to add some filler on the door jams anyway to get them looking nice, I wasn’t too concerned about my grinding methods.  I mainly wanted a good fit, cosmetics will come later.

After a few evenings and a lot of opening and closing the doors, I had achieved a good consistent gap for the seal and was happy with the fit and function of the door seal.  I noticed that even after two nights of the door remaining closed, the seal was already getting broken in, making it easier to close the door.  Folks say these seals need to be replaced as they wear down, so it will be a maintenance item every other year or two,, I’m sure.  What I wasn’t happy with were the pins that held the doors shut.  The Plane Around latch was doing its job of pulling the door closed, but the back pin still needed to do some work to align to the block.  The pins I have are stainless with epoxied magnets in their tips and are shaped like bullets.  That sounds great if the doors are almost perfectly aligned, but they did a poor job of any movement into the aluminum blocks that I also had.  Even after a few weeks of working, the blocks were gouged and the bullets were wearing scars.

Luckily, a call to Sean at Plane Around solved my problem.  He had a set of angled stainless pins, much like the shape of the stock pins, that were hollow for a magnet to be dropped into.  These use setscrews to attach to the rods and can be positioned to most efficiently capture the blocks and align the pins.  He also has Delrin blocks that are machined to have a nice rounded funnel shape.  The stainless glides effortlessly on the Delrin making the closing and opening of the door handle a seamless effort compared to the rough metal on metal that I had.

It took some time to fit, because I had to cut the rods and machine the pins to orient them just right but the effort was worth it.  My doors now close perfectly with the seals and have a firm but easy motion in the handle.  I fine tuned the blocks’ alignment with shims which allows the pins to insert perpendicular to the block, reducing the friction along the way.  This has been a huge burden lifted, because while the doors were functional and airworthy, they weren’t easy or pretty.  Now they’ll be both.