This Bird is Squawking

I will document the biggest and most annoying things wrong with the airplane during the test flight here but do not plan on blogging about every repair or modification to the airplane. Mainly because I’d have to become a full time writer.

The flight tests went fairly smoothly and I finished the 40 hour phase 1 in under a month. Most of my issues were builder caused, I must admit. Either a rework or bad soldering, decision making or lack thereof, and a few “that’s good enoughs” that came back to haunt me were to blame.

I tracked these by creating a list in my phone/iPad that I could check off as I corrected the issues. The list kept growing for some time before it started getting checked off. It’s worked really well for me and actually motivates me to complete all the repairs or adjustments to get the check boxes checked. I can also make group entries into the logbook to keep track of the work.

I found that I had a lot of electrical gremlins throughout the first bit of flying. Solder sleeves are amazing little buggers that are notoriously difficult to use correctly. I used sparingly while building, but they still bit me a few times. The problem is you think the solder ring has melted completely but it hasn’t. The connection will be good until it’s subject to some vibration and then all kinds of weird things happen. My oil pressure spiked to 200 PSI, multiple random annunciations based on my discrete inputs, and a few others due to the solder sleeves. And I only have about 10 in the whole plane! I will use them now if I have good access to the connection, but if not, I’ve found using Dsub pins and heat shrink as more reliable.

I had to reposition my EGT probes, as I realized they blocked 5 out of 6 spark plugs. I had a master cylinder bolt leaking just a bit. Lots more clamps and zip ties were installed, mostly firewall forward, to avoid chafing after a few oil changes and seeing where things moved a bit too much. I had to replace the autopilot pitch servo due to a service bulletin, roll servo due to slipage, and had to reinforce the rudder trim tab mount to get it to work effectively. I chose to rewire a few engine switches and add a engine master switch, which I should have done in the first place. That all neccessitated under the panel work, a new switch panel overlay and backlight sheet. The oxygen system leaked above 1200 psi (loose connection), and a few adjustments to the door light switches have been made.

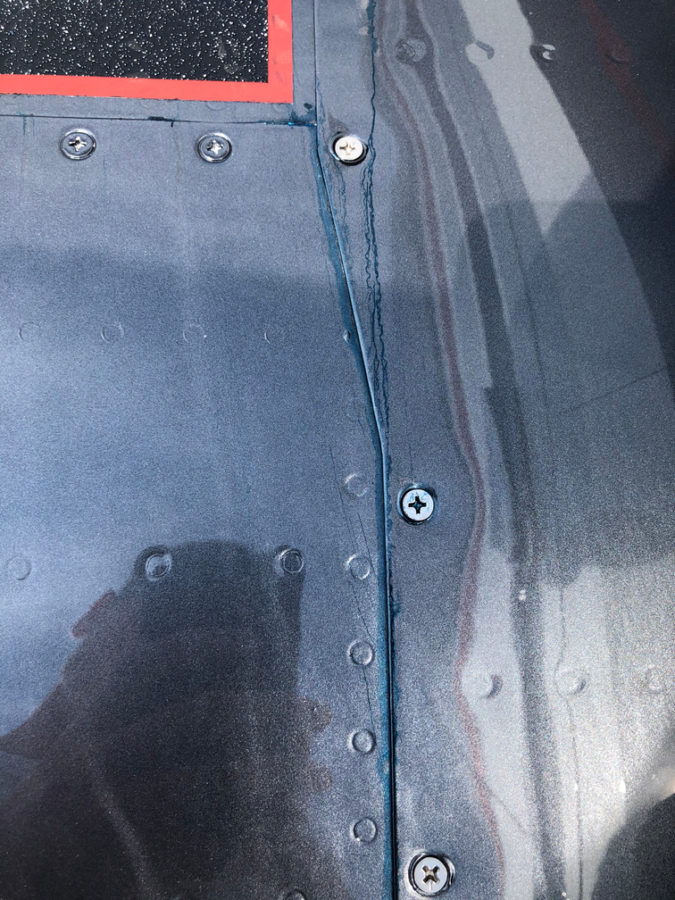
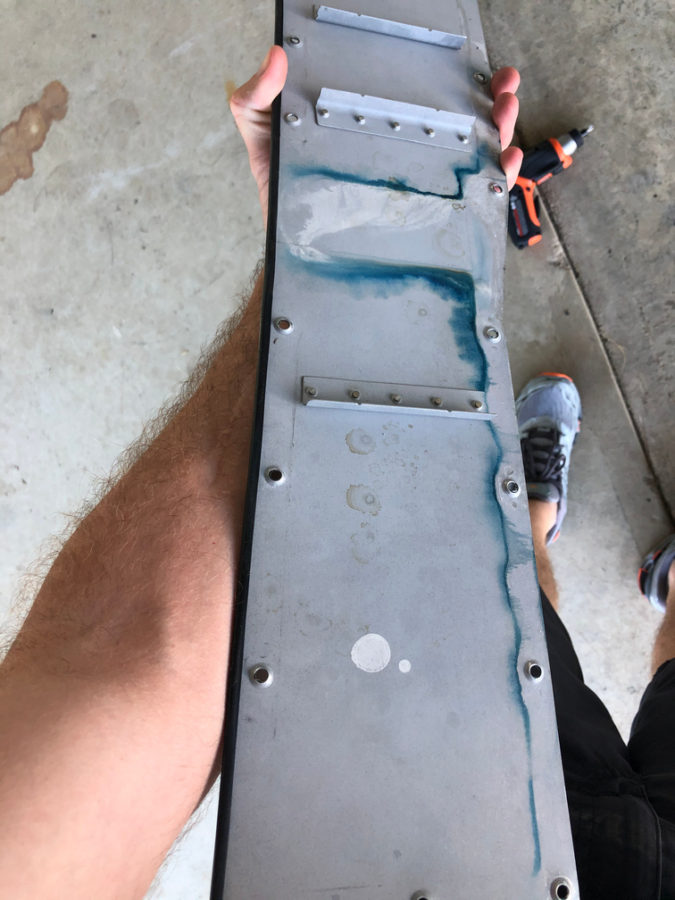
The biggest squawk is a leaking fuel tank. I am getting ahead of myself on the blog, but this was discovered post paint unfortunately. Turns out a little weeping rivet that I discovered prior to paint and thought I had fixed with the Loctite trick wasn’t fixed. In fact, it wasn’t a weeping rivet, but a pinhole in the sealant on the rear baffle. Fortunately, I spent an entire day and was able to use my borescope to provide a view and a coat hanger/tube of pro seal to apply sealant and fix the leak without taking the tank off. Not a fun job.
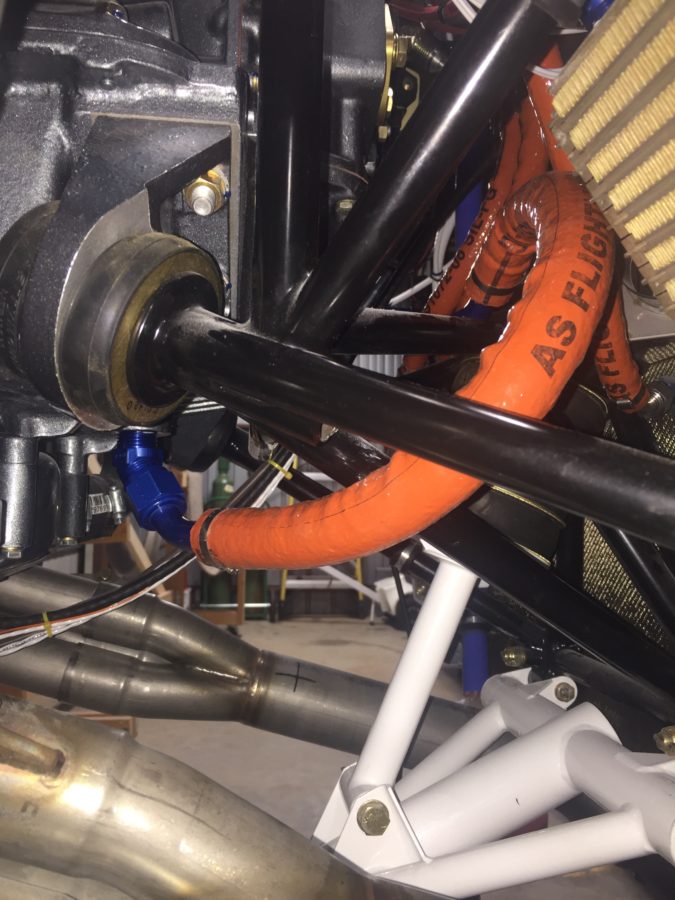
The engine ECU tweaks were pretty easy, although I’ve gone through four O2 sensors (leaded fuel doesn’t make them last long). I removed the air filters and just installed a mesh screen over the intakes. Speaking of intakes, one was too close to the exhaust header and a hole burned through it so that required a bit of glass work along with better heat insulation and a bit more clearance.

Lots of other tweaks and adjustments were made and most of these delayed discrepancies were taken care of during the first condition inspection performed in November last year. I do have a few more items to check off the list including new door hing covers, some finish rework on the interior windshield pillars, an intake plenum on the air conditioning condensor (more on that later), and adding a second tunnel access plate are all on the list for 2021.

Bottom line, you’re not done building when you’re done building. Flying brings on new stuff that you can’t forecast on the ground so it’s a continuous process to keep it in tip top shape. I also put some of this stuff off, as I wanted to get it flying so its been a challenge to get caught up after flying so much. I am now at a point where the regular maintenance time is decreasing vs the flight time increasing. The check boxes are all most all filled in!

Back to my roots

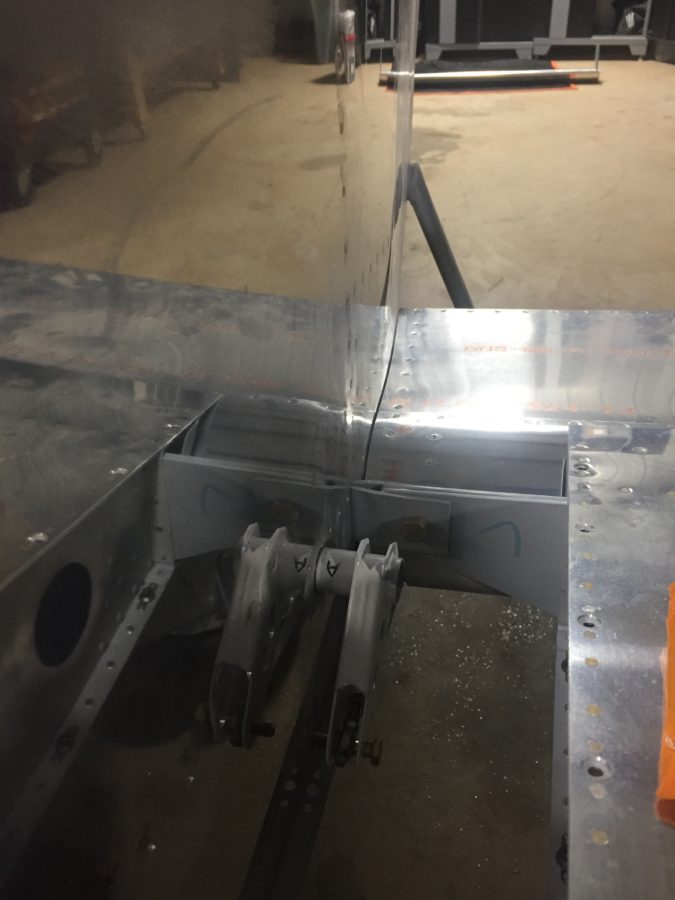
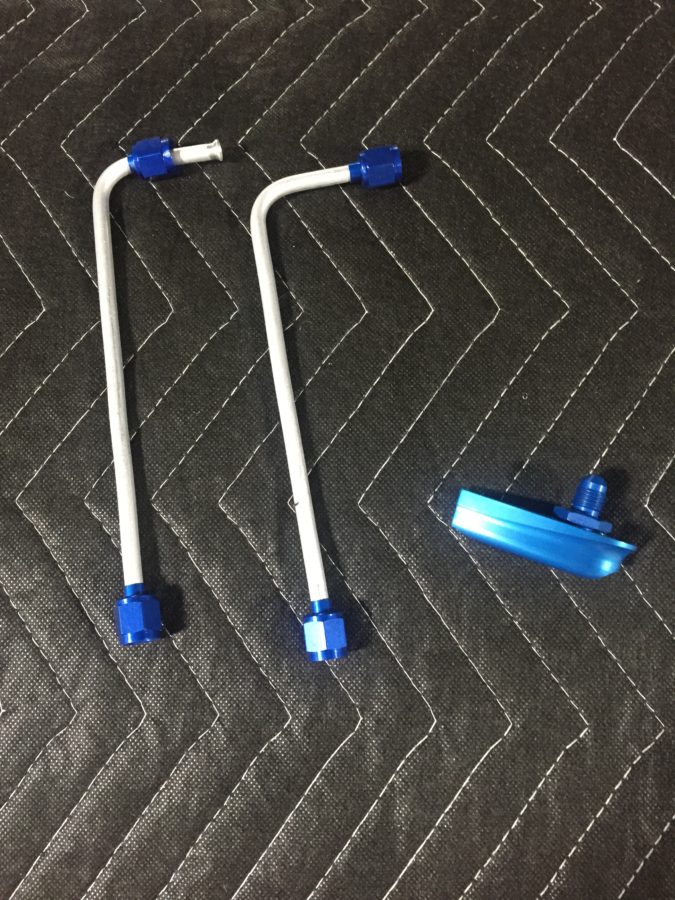
The wings are initially fitted to get the wing root covers installed and hook up fuel lines, vent lines, while getting the flight controls initially rigged.  The wing root cover brackets went on quickly and I fabricated the two fuel vent lines that exit the bottom of the wing root cover.

You also drill the bolt hole in the rear spar and work out a few other fasteners.  I installed the flight controls and worked out the stick to the plans while adjusting the rigging and pushrods.  It wasn’t too bad of a process with a little patience and double thinking before adjusting a rod end the wrong way!  In an afternoon, I had all the controls lined up nicely with the wingtips and fuselage just as described in the plans.

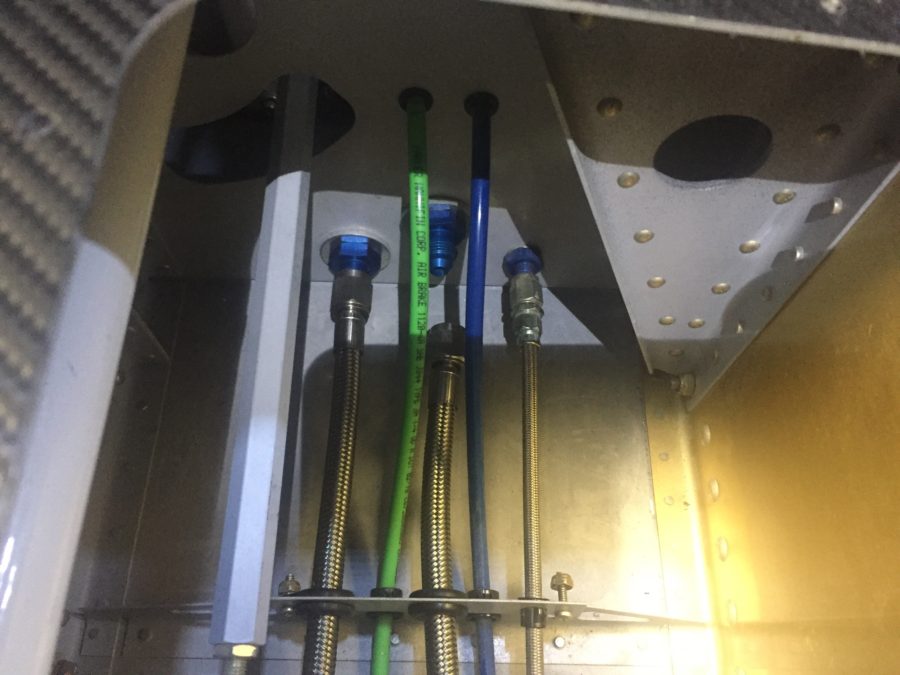
I also finished up the fluid lines up front.  TS Flightlines really came through again on an awesome product.  I had one line that didn’t quite fit to standards and the return lines for the fuel tanks from the tunnel had the wrong fitting (my fault) on them, so those went back for modification.  If you don’t know, TS will rebuild the lines for free until they are correct.  You get what you pay for and I’m glad I spent the money knowing I’ll have lifetime quality hoses.

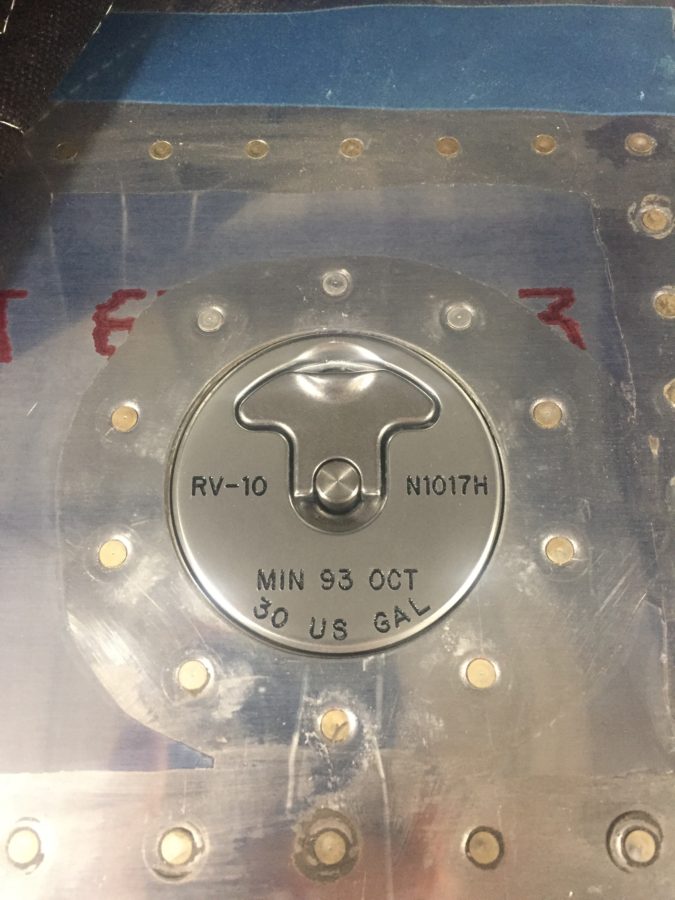
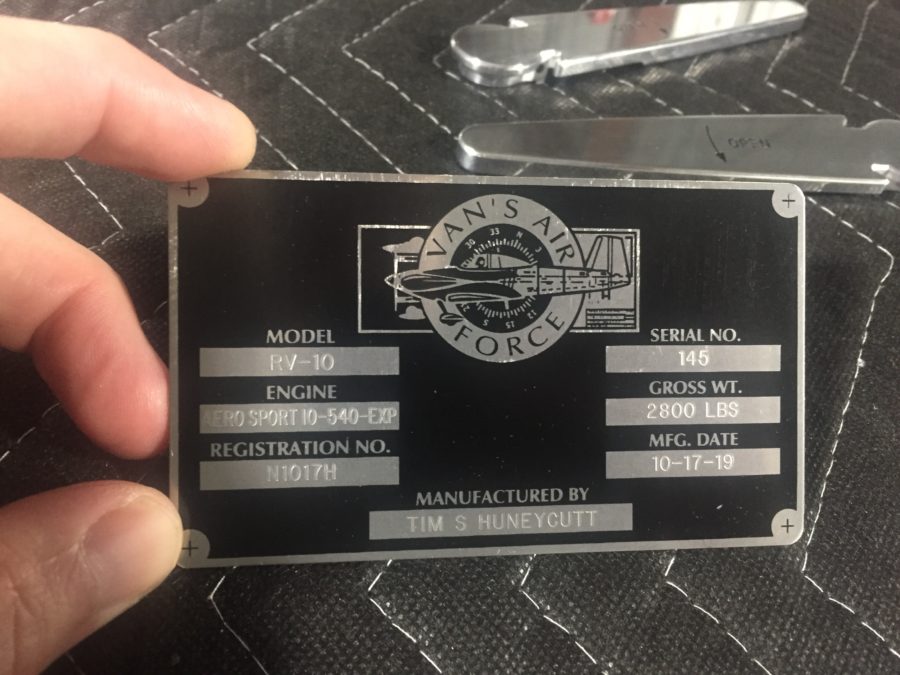
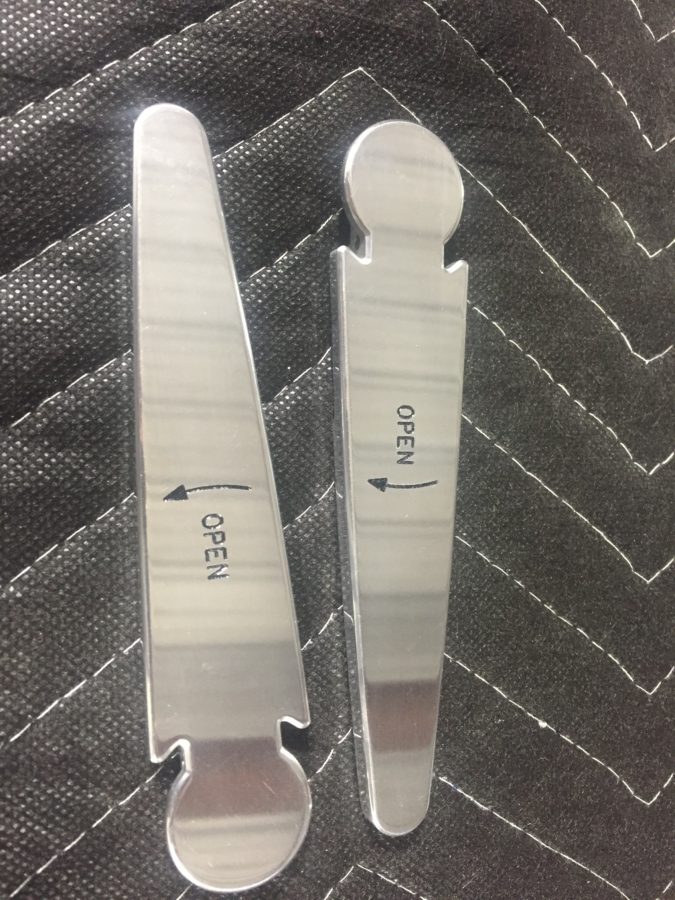
On a side note, my engraved parts came back looking fan freaking tastic.  The door handles are an extra set that I had and will go on after paint.  The data plate turned out perfect, as did the fuel caps..

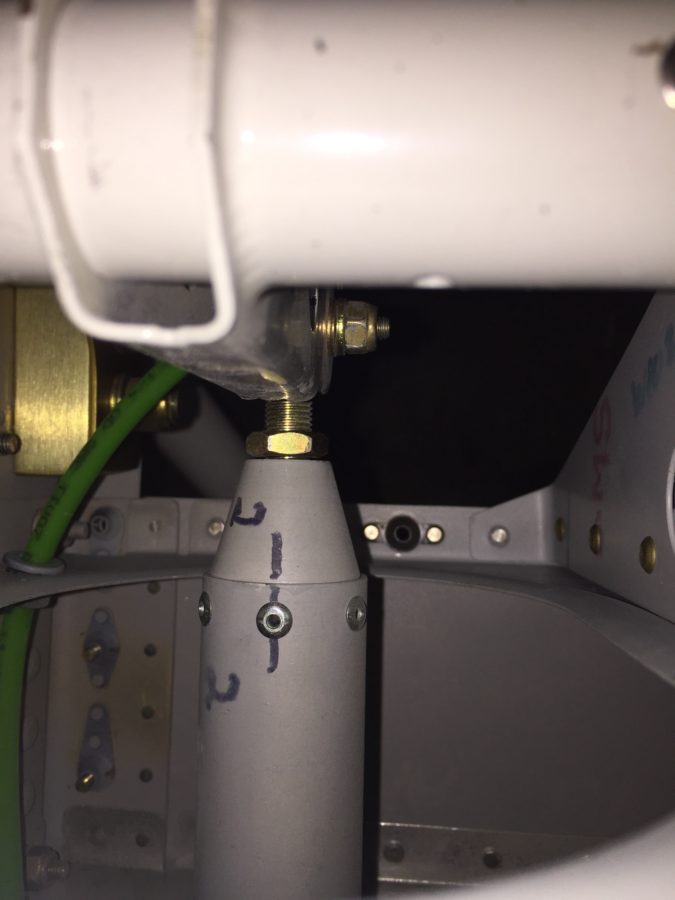
Speaking of fuel, a while back I misdrilled the holes in the tunnel on the right side for the fuel line.  I decided at that time to just use a 90* elbow but that made torquing and replacing the incorrect fuel line difficult to say the least.  So I broke down and ordered 90* bulkhead fittings to do it correctly.  I had to dig into the tunnel to put the proper spacers (covering up the now too large hole) and secure the lines from the fitting to the fuel valve.  Boy am I glad I did this, because while looking around since I was in there, I discovered a cross threaded line on the fuel valve that would have made a mess come testing time.  I was able to clean the threads on the fitting and got it on correctly.  I took my time to reinspect all other fittings and lines.

With the airworthiness inspection scheduled for early November, I am shifting into inspection mode so try to check everything I can while working in an area.  It just so happens that the 137 articles Vic Syracuse has written for KitPlanes all mention loose jam nuts!  I want to break that chain but came close to being a statistic in your next bathroom reading material.  The left aileron jam nut had just enough space that it caught my eye while working the fuel lines.  Ha!  Not today, Vic, not today!

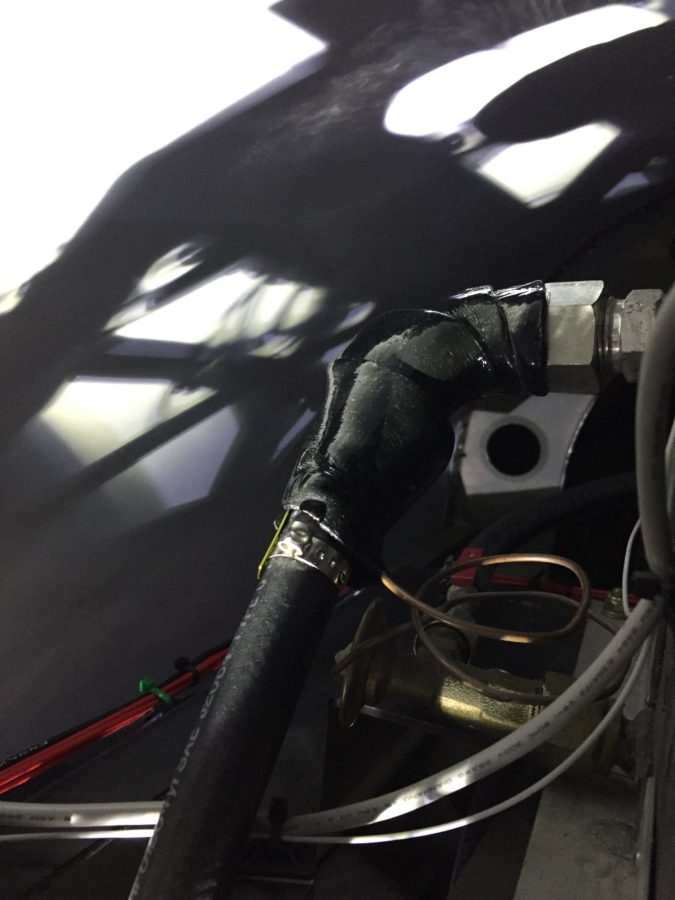
Another little side job that had been lingering was wrapping the aircon line with insulated tape to ensure the thermostat coil was in good contact with the line.  I had ordered this sticky tape months ago and finally crawled into the baggage area to finish that up.

Finally, Laura came over to help me pull the wings off so we could prep and install the wing root brackets and finish up the few tasks before permanent install.  This coming weekend will be critical for staying on track towards inspection, as I need to get the entire tail surface wrapped up and the fairings done.  Fingers crossed!

That moment in the middle of the night you wake up and realize…

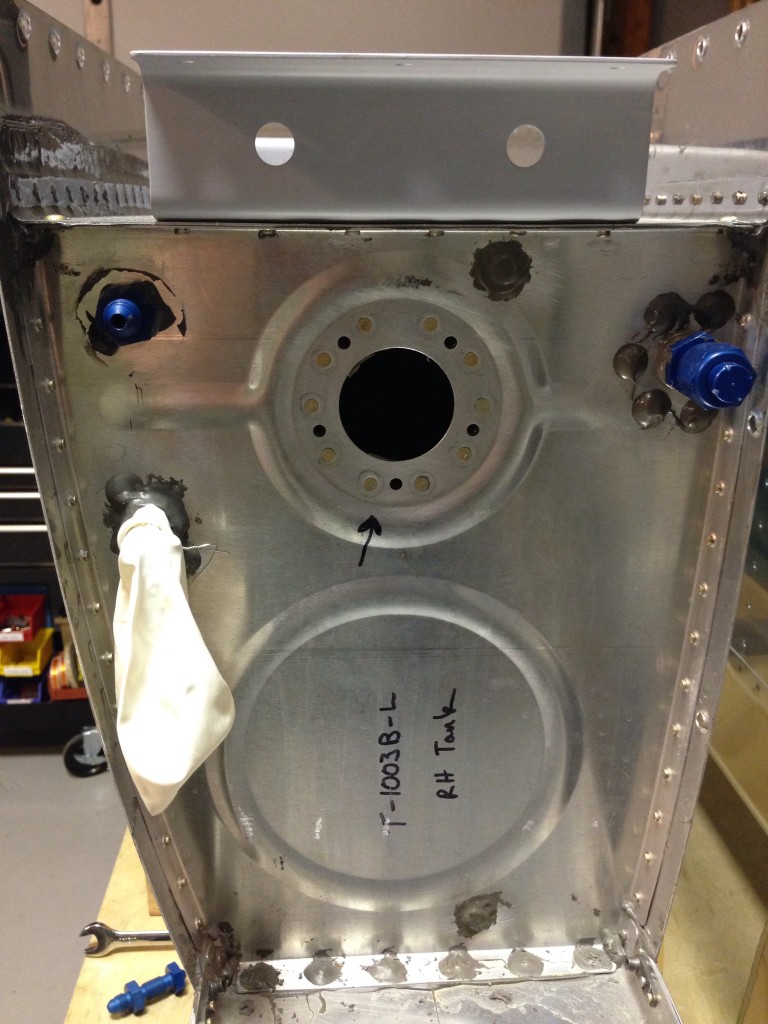
…that something off plans you did has already gone very wrong.  To be honest, that ton of bricks actually hit me while reading VAF as part of my nightly routine.  Another 10 builder posted about his fuel return line fitting interfering with the spar and warning others about this issue.  I looked at his pictures and thought to myself, wow, one are just like that.  Damnit.

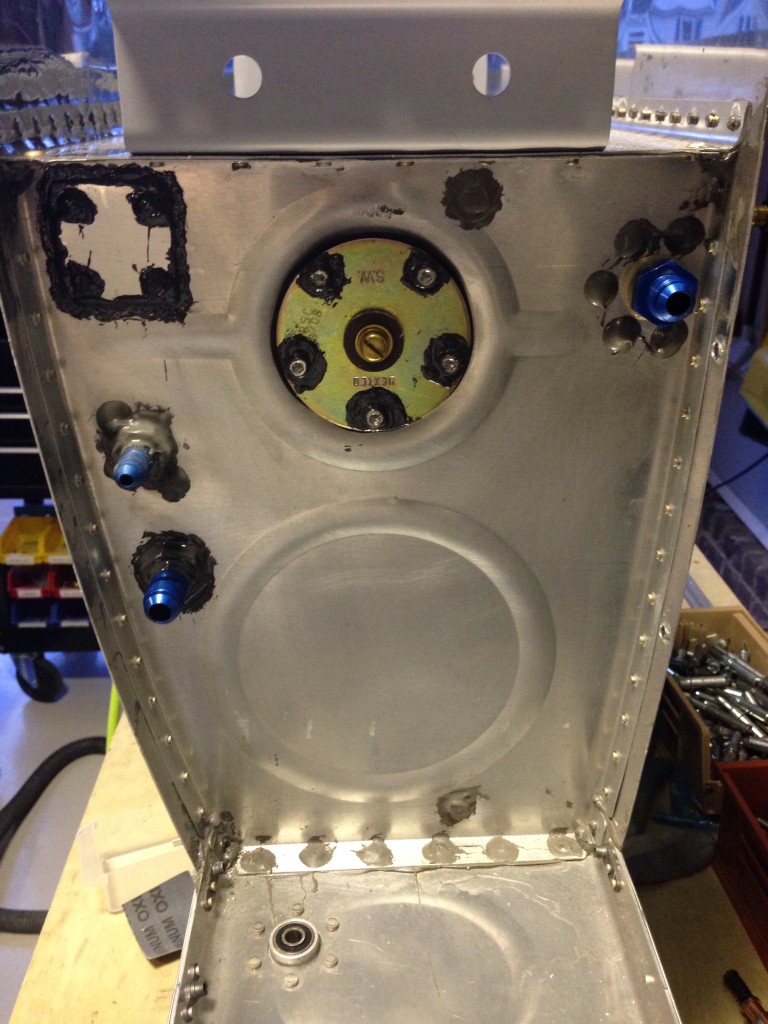
As part of the EFII electronic fuel injection system, a return line needs to be plumbed into each (or one) tank to allow excess fuel to return.  I plan on having a duplex valve, so need a return into each tank.  The problem is the location I, and others, chose was going to be right in front of the spar, thus not allowing any line and or bolt to be installed.   This was going to necessitate removing both tanks and somehow fixing the problem without building new tanks.

img_0421

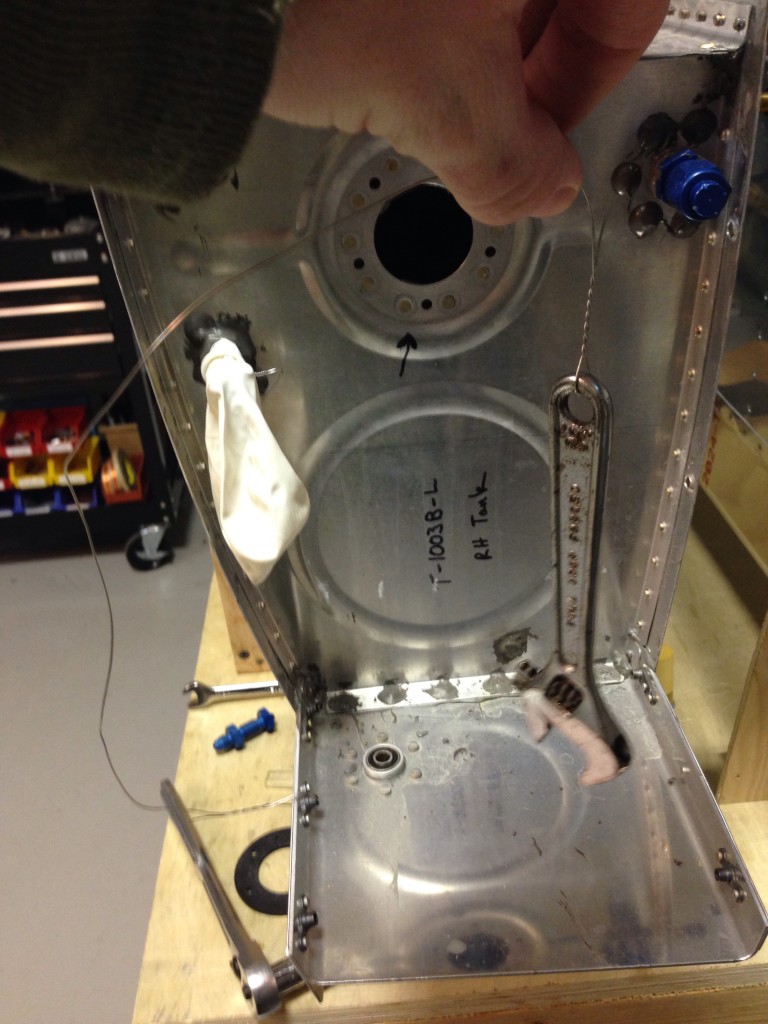
You can see the return line on the left in the very corner.  Bad place to be.  Some have cut an access hole in the back rib and used a kit from Van’s.  But I hated to introduce so much weight and mess if I didn’t have to.  I decided after a lot of thought that I could get a wrench inside and remove the fitting without too much trouble.

I put safety wire on the wrench so it would not be lost inside the tank and got to it.  With a little patience, I was able to break the tourque and pro seal to get the fitting out.

img_0422

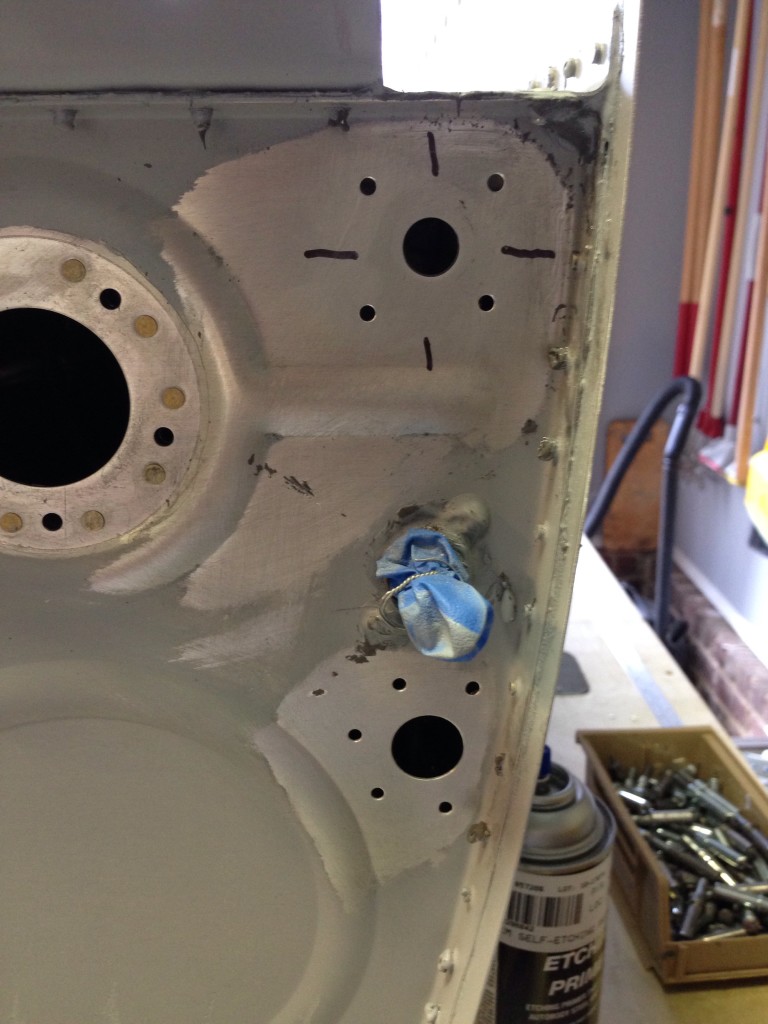
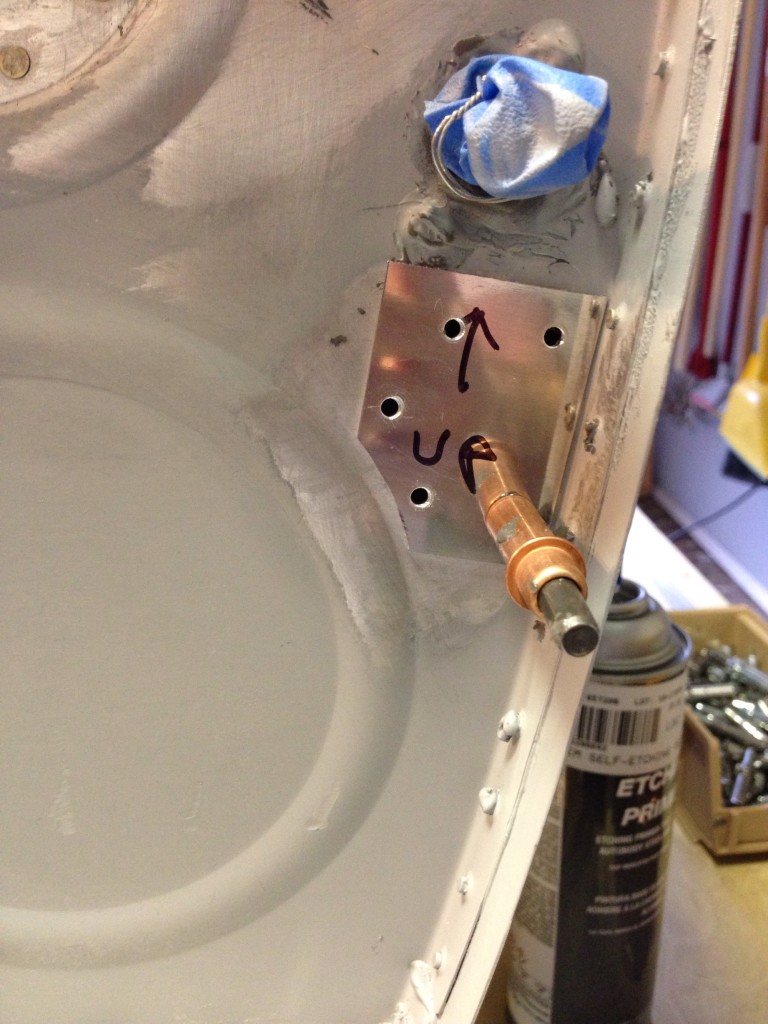
After that, it was just a matter of making a patch for the old hole and properly placing the new hole.  Sounds simple, right? Well, let’s take the opportunity to make it better.  FEedback from EFII was to have a larger fitting for the return line so I ordered the parts and had a brilliant idea of using a left over fuel bong plate.  I thought that would be a nice fitting that I could just screw the fitting into.  Wrong again.  Different threads.  I discovered that after already drilling the holes.  So another patch was in order.

img_0436

img_0439

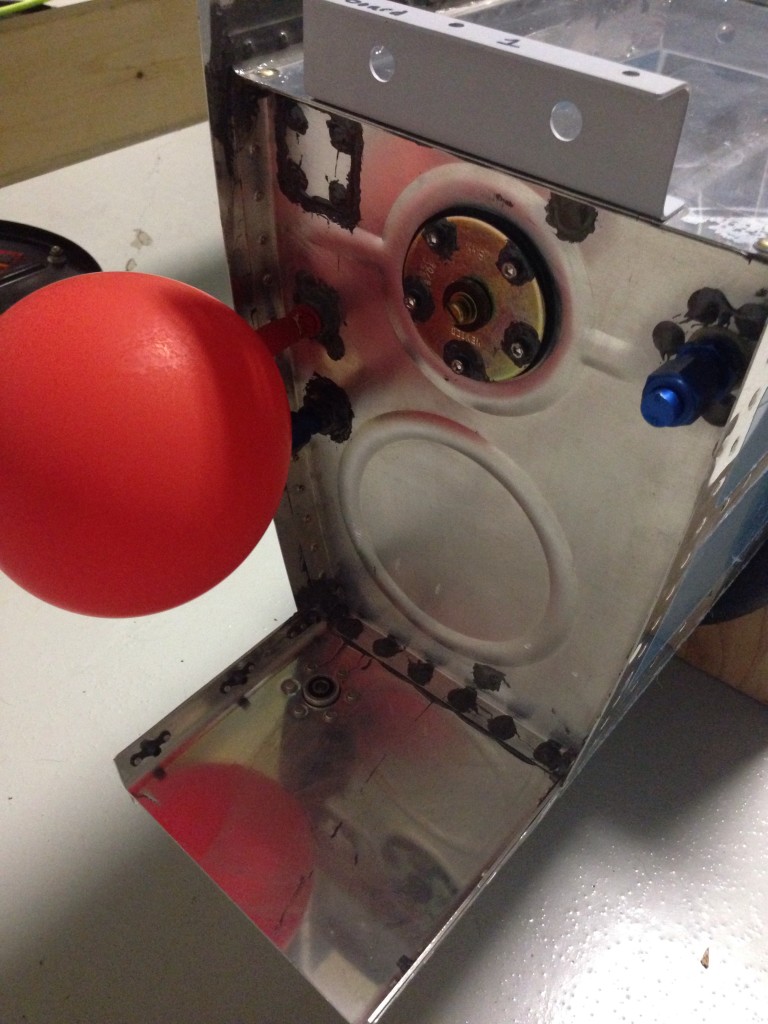
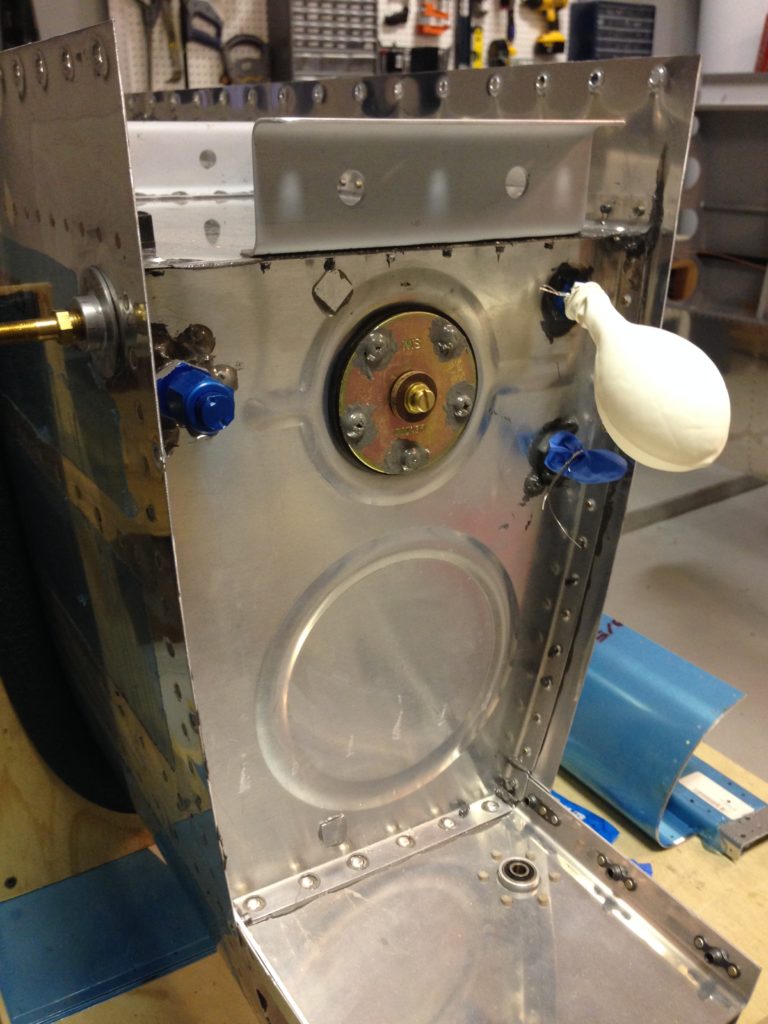
In the end, it was a one evening job and I didn’t have to cut a hole in the tank since I was able to go through the fuel sender hole.  Another two day balloon test with no leaks anywhere on the tank reassured me on the construction.  Finished priming them and back on the wings they go, hopefully this time for good.

img_0447

img_0460

A tale of two tanks

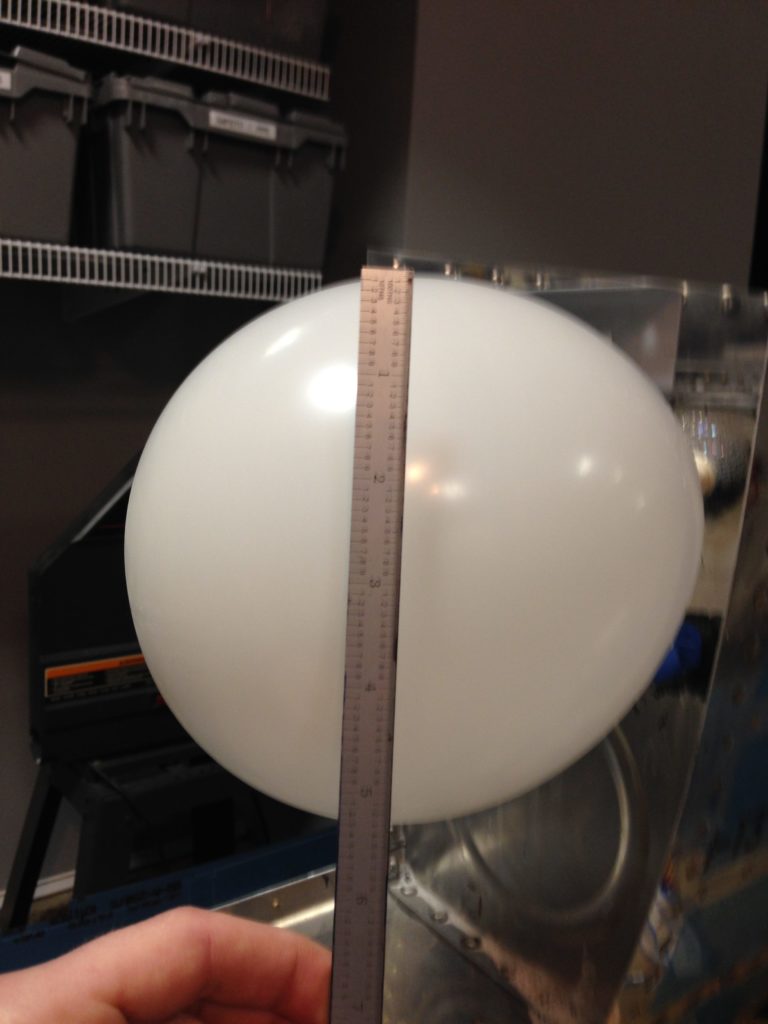
Many folks have shared great stories about their troubles sealing tanks using pro seal.  There are tips and tricks and dos and don’ts.  Finally, there are balloons.  Yes, balloons.  The test kit Van’s sells to test the tanks have balloons.  Lightly pressurize the tank with all openings sealed, and hope the balloon is the same size tomorrow morning as it was the night before.  After my water test of the tanks sans the spar plate, I was pretty confident that I’d only have one or two little issues.


IMG_0365Well, this is off to a great start.

IMG_0359
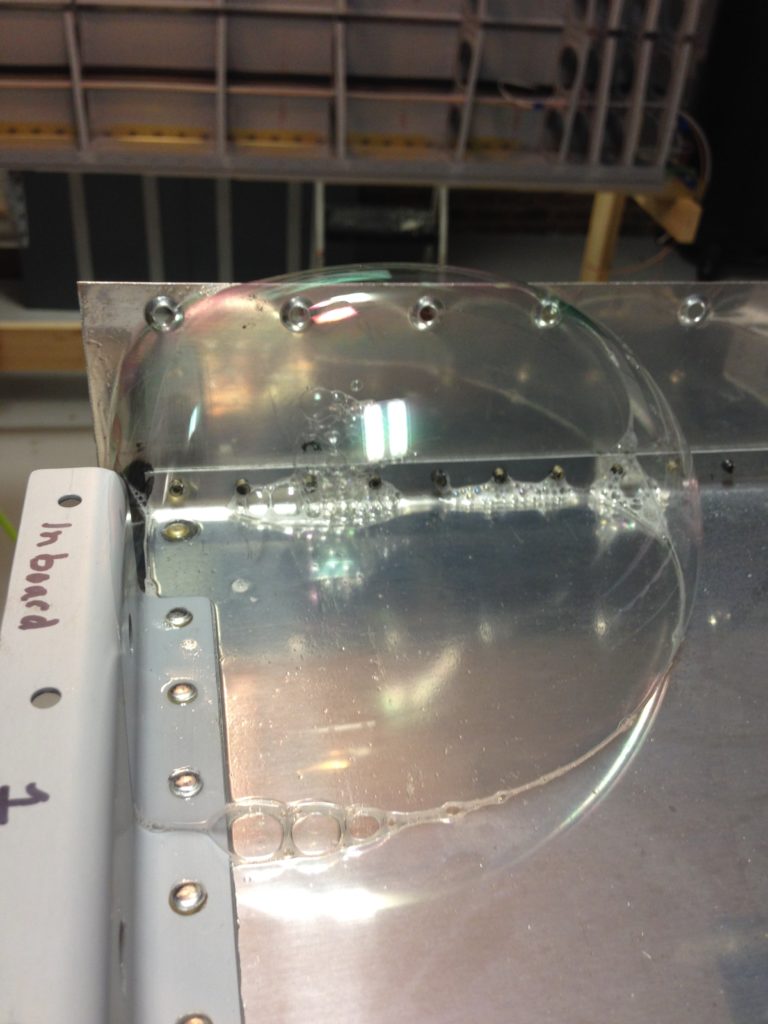
We obviously have some leakage.  I pressurized the tank slightly again and used a water and dish soap solution to see if I could find bubbles.  Turns out this is the best way to find leaks immediately and long term.  I discovered it only takes a very tiny hole for air to get through the pro seal.  And if air can make it through, then fuel definitely can.  Now, one thing to keep in mind is that the leak could also be around the temporary fittings to close the tank up tight.  Thus was the case for my first tank, as it wound up to be the balloon leaking not the actual tank.

So one tank was perfect on the first attempt.  The second was not.

IMG_0360
Okay, no worries, just apply more pro seal on the outside and it will seal it up.  In my minimalist mentality, I decided to only apply pro seal where the immediate area showed a leak.  Wrong idea.  I went through three apply and cure sessions (three days) before I finally smeared the whole seam with a nice layer of pro seal and got rid of the bubbles.

After another two day balloon test with no issues, I primed the last bit and happily bolted the tanks onto the wings.  I guess it could have been worse, but I’m very happy this is behind me in the project now.

img_0367

img_0368

Closing the gaps

The final step for the tanks is to seal the rear baffle in place.  This is always a bit tricky as you have to put a bead of proseal and then place the baffle in using it as a squeege and hoping that it seals internally.  If not, it’s a tough fix as you now can’t get inside the tank.  

Using the applicator gun helps here get a nice even bead of proseal in place.  Putting a cleco in every hole, I let it set up overnight as usual and came back the next day to finish riveting.  With the perfect world scenario, the rivet line would be outside of the wetted fuel area.  However, if there might be a leak, I decided to continue my habit of wet riveting.  This would make it easier to seal from the outside.

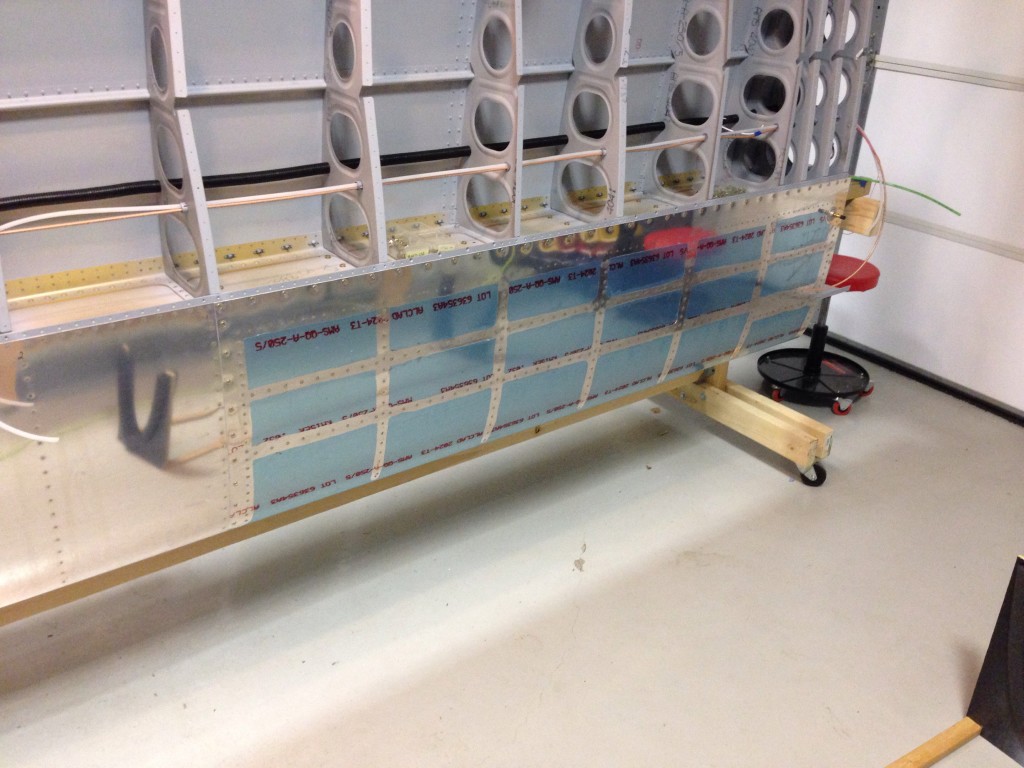
While the tanks set up, I turned to preparing the wing for close up.  I want to follow other’s advice on finishing everything inside the wing before riveting the bottom skin on.  Wiring is a big part of that so I ran the first bit of conduit.  This is a real pain in the ass.  Yes, I said pain in the ass.  It’s my blog, so I can say it.  And it’s true.  The corrugated conduit from Van’s is a royal pain to pull through.  You basically have to pop each ridge through the hole.  Starting from the middle of the wing, I pulled inboard and outboard to minimize the number of ribs the conduit has to be pulled through.

After a lot of sweating and some worn out hands, conduit is in place.  At the locations where wiring will exit the conduit, I cut a hole after wrapping the conduit in duct tape.  This made it a bit more sturdy and allowed the gromet to stay in place better.  The rubber gromet will prevent any chafing.  I tacked this in with a little silicone to help keep in place for the long term.

I will be terminating all connections at the wing root for a couple of reasons.  First to allow me to do as much wiring and plumbing as possible early on in the build process.  Second, it will allow me to keep the wings off of the fuse down the road as well.  I went ahead and pulled string through the conduit from the wingtip and seperately each exit to the wing root.  I then ran wiring for the heated pitot probe along with tubing for the pitot and angle of attack hook ups.  The wiring for the aileron trim servo and coax for the two Archer antennas in the wingtips were all secured for later connections.

Finally, I installed the newly arrived servo mount for the autopilot roll servo.  The same bracket fits Dynon and TruTrak servos, which covers the spectrum for Dynon or AFS avionics.  I’ll be purchasing the servo down the road.

On a wing and a…well, just on a wing

With the recent success of the fuel tanks boosting my spirit, I got to work over a long weekend on the wing and leading edge union. It’s a big step, as it adds a lot of surface area and shape to the wing. It also now takes on the appearance of a wing so hopefully folks can tell what the heck is hanging from some wooden rack in my garage!
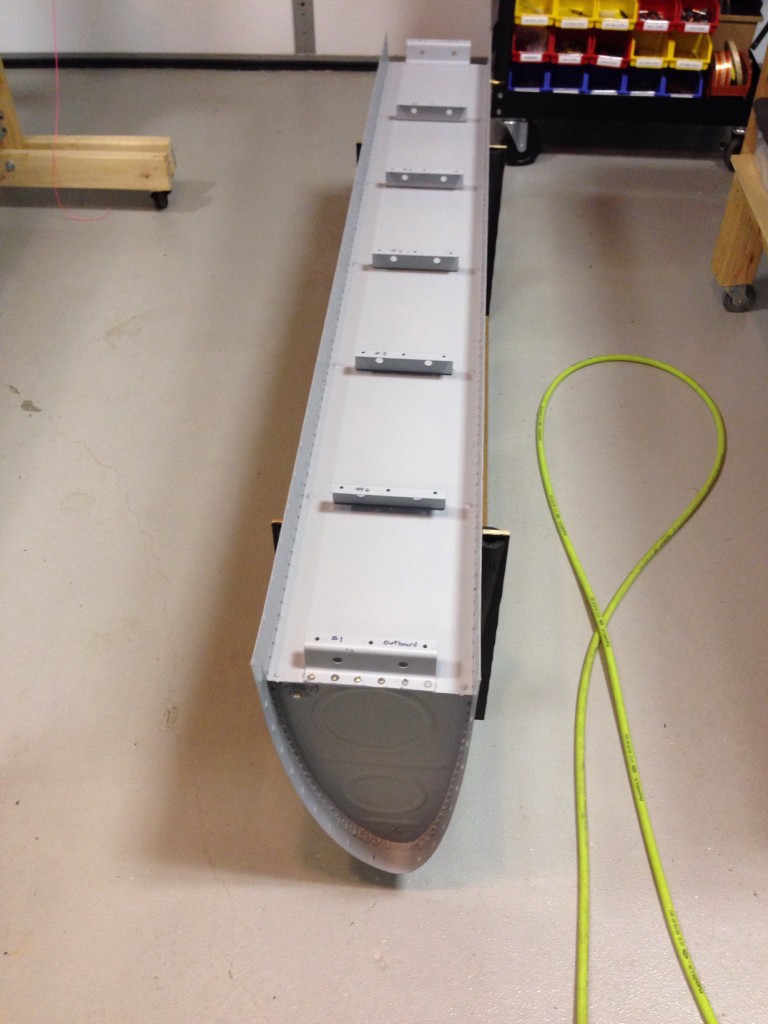
I started solo by clecoing the leading edge to the right wing spar. Working on the bottom first, when I got to the top side of the wing (it’s laying upside down) I noticed that the skins overlapped instead of a nice butt joint. Thus, I removed all those clecos and started from the top side (again on the bottom as it’s upside down) first to get the joint smooth.

IMG_1492.JPG

IMG_1490.JPG
It worked like a charm and within no time, I was using my squeezer to rivet the bottom of the skin to the spar. This is when a tool like this comes in handy, as it makes quick work and nice consistent results.

IMG_1503.JPG
Then it was time to figure out how to position the wing so that two of us could rivet the top skin. It worked out for me to use the DRDT2 dimpler as a spar stand and the wooden cradle on the other end. I put a couple of pieces of wood to block it and it provided a very stable stand for the wife and I to team up for some riveting.

IMG_1496.JPG
We made great progress, finishing both leading edges, the rib/spar rivets, and moving on to modifying the wing rack for the final time. With the leading edges on the spar, I had to move to the carpet tactic to form a soft cradle for the leading edge. We had the material and it was a quick fix. Hopefully the last time we’ll need to reconfigure it.

IMG_1505.JPG
I used the good weather to swap the wings from side to side on the rack and finish priming the interior of the left wing. The last project of the day was to blow out both tanks very well and ensure no foreign contaminants were left in them before sealing them up as the next task.

IMG_1506.JPG

Are we there yet?

The right fuel tank cap flange is not my friend. This same rivet continues to leak. I’ve inspected with mirrors, flashlights, magnifying glass, and fingertips to no avail. It drips the third test just as it has the first two. At this point, it was clear that there was a path for the water to get to that hole from somewhere obscure and slathering proseal on the back isn’t fixing it. I decided to drill it out all together.

IMG_1475.JPG
I then surgically removed a chunk of proseal from the back of the flange covering the shop head. I cleaned the area well and mixed up a mini-batch of proseal, this time resealing the hole from the front before inserting and setting the rivet. I then resealed the back and put one more generous layer of proseal, basically covering the inside of the skin and flange from the end rib all the way over to the flange.
The good news is that the once-large leak is no more and the rest of the tank was finally behaving. All of this testing time has given me ample opportunity to finish up the leading edges with a bit of help from the Mrs. and a buddy who came over to drink a beer and was voluntold to learn how to rivet in quick order. He now owns 1/100,000,000 of an RV-10!

IMG_1494.JPG

Being on the leading edge isn’t all that great

I have decided I don’t like leading edges. While they are beautiful and shapley, not to mention aerodynamically critical, they are a real pain in the ass to build. The real problem are the rib tips and how they just never want to fit right the first, second, and sometimes third time. But with enough patience, perserverance, and hammering (not really, but yes really), they will come together. After assembling and final drilling the components, everything got deburred, primed, and dimpled.

IMG_1456.JPG
Of course now that I’ve done this four times, I figured out the easiest way to get the skin to wrap around the ribs is to start on the flat side, then work from end to the other around the profile of the skin. I also had the first “F**k-up” that will be a lasting oops on the project. I managed to drop the bucking bar and it seemingly bounced around the inside of the leading edge before finally dropping right in the bottom with a nice zit on the outside.
It’s not terrible and I was able to very gently hammer a bit back into place. It’ll just remind me that I built the airplane every time I do the preflight!

IMG_1476.JPG
In other bad news, the fuel tanks gave me a 50/50 success rate. The left tank tested fine after the initial fixes cured. Not a single drop of moisture, which made me happy. This was confirmed after four days of water sitting in the tank.

IMG_1460.JPG
The right tank wasn’t done fighting. The one rivet on the fuel cap flange continued to drip like I hadn’t even attempted to fix it. And the rather large leak on the front spar continued to leak, albeit a bit slower and farther out on the spar proving I didn’t really fix it but just slowed the exit path. So, again it was drained of 30 gallons of water down the driveway and dried out to prep another fix session. For now, here is the completed bits of the left wing.

IMG_1479.JPG

Leaking…I mean Testing…the tanks

You can guess how it went by the title. I read another build log and saw the idea of testing the tanks before sealing the rear baffle in with water and food coloring. The guy had taped toilet paper on all the seams to be able to identify weeping rivets / leaking joints. I decided that was a good idea since I’m not in a hurry and it would allow me to fix any spots with Pro-seal instead of having to tear into the sealed tanks.

IMG_1427.JPG
Boy am I glad I did this.

My dad and I got out the hose and filled up the right tank first. Overall, I’m really happy with my first Pro-seal job. I had one weeping rivet (a solid, steady drip) at the fuel cap flange and a stead little stream at the seam between the front spar and skin. After a little inspection, I think I can see where I didn’t get a complete fillet on that joint, so I’m confident it will be a quick fix. I also had one drop appear on the fuel sender plate after letting it sit for 24 hours, so I’ll beef up the Pro-seal on those as well.

IMG_1430.JPG
The toilet paper really wasn’t neccessary, so I didn’t repeat the prep on the left tank. We filled it up and were immediately standing in water. I missed a fillet on the outboard rib and it was a pretty good leak there. I also had one weeping rivet on the bottom leading edge of a middle rib that I’ll need to put some more on.

IMG_1441.JPG
I’m pretty excited that my work was solid and method proven capable. I didn’t use nearly as much as others and my tanks look clean. While I know it wont’ win any awards, it makes me feel better not having the extra mess, weight, and sloppiness inside my tanks. My plan is to fix those few spots after a couple of days of drying and then retest for a few days to ensure they are all set before cleaning and sealing the rear baffles.