Let me see that glass

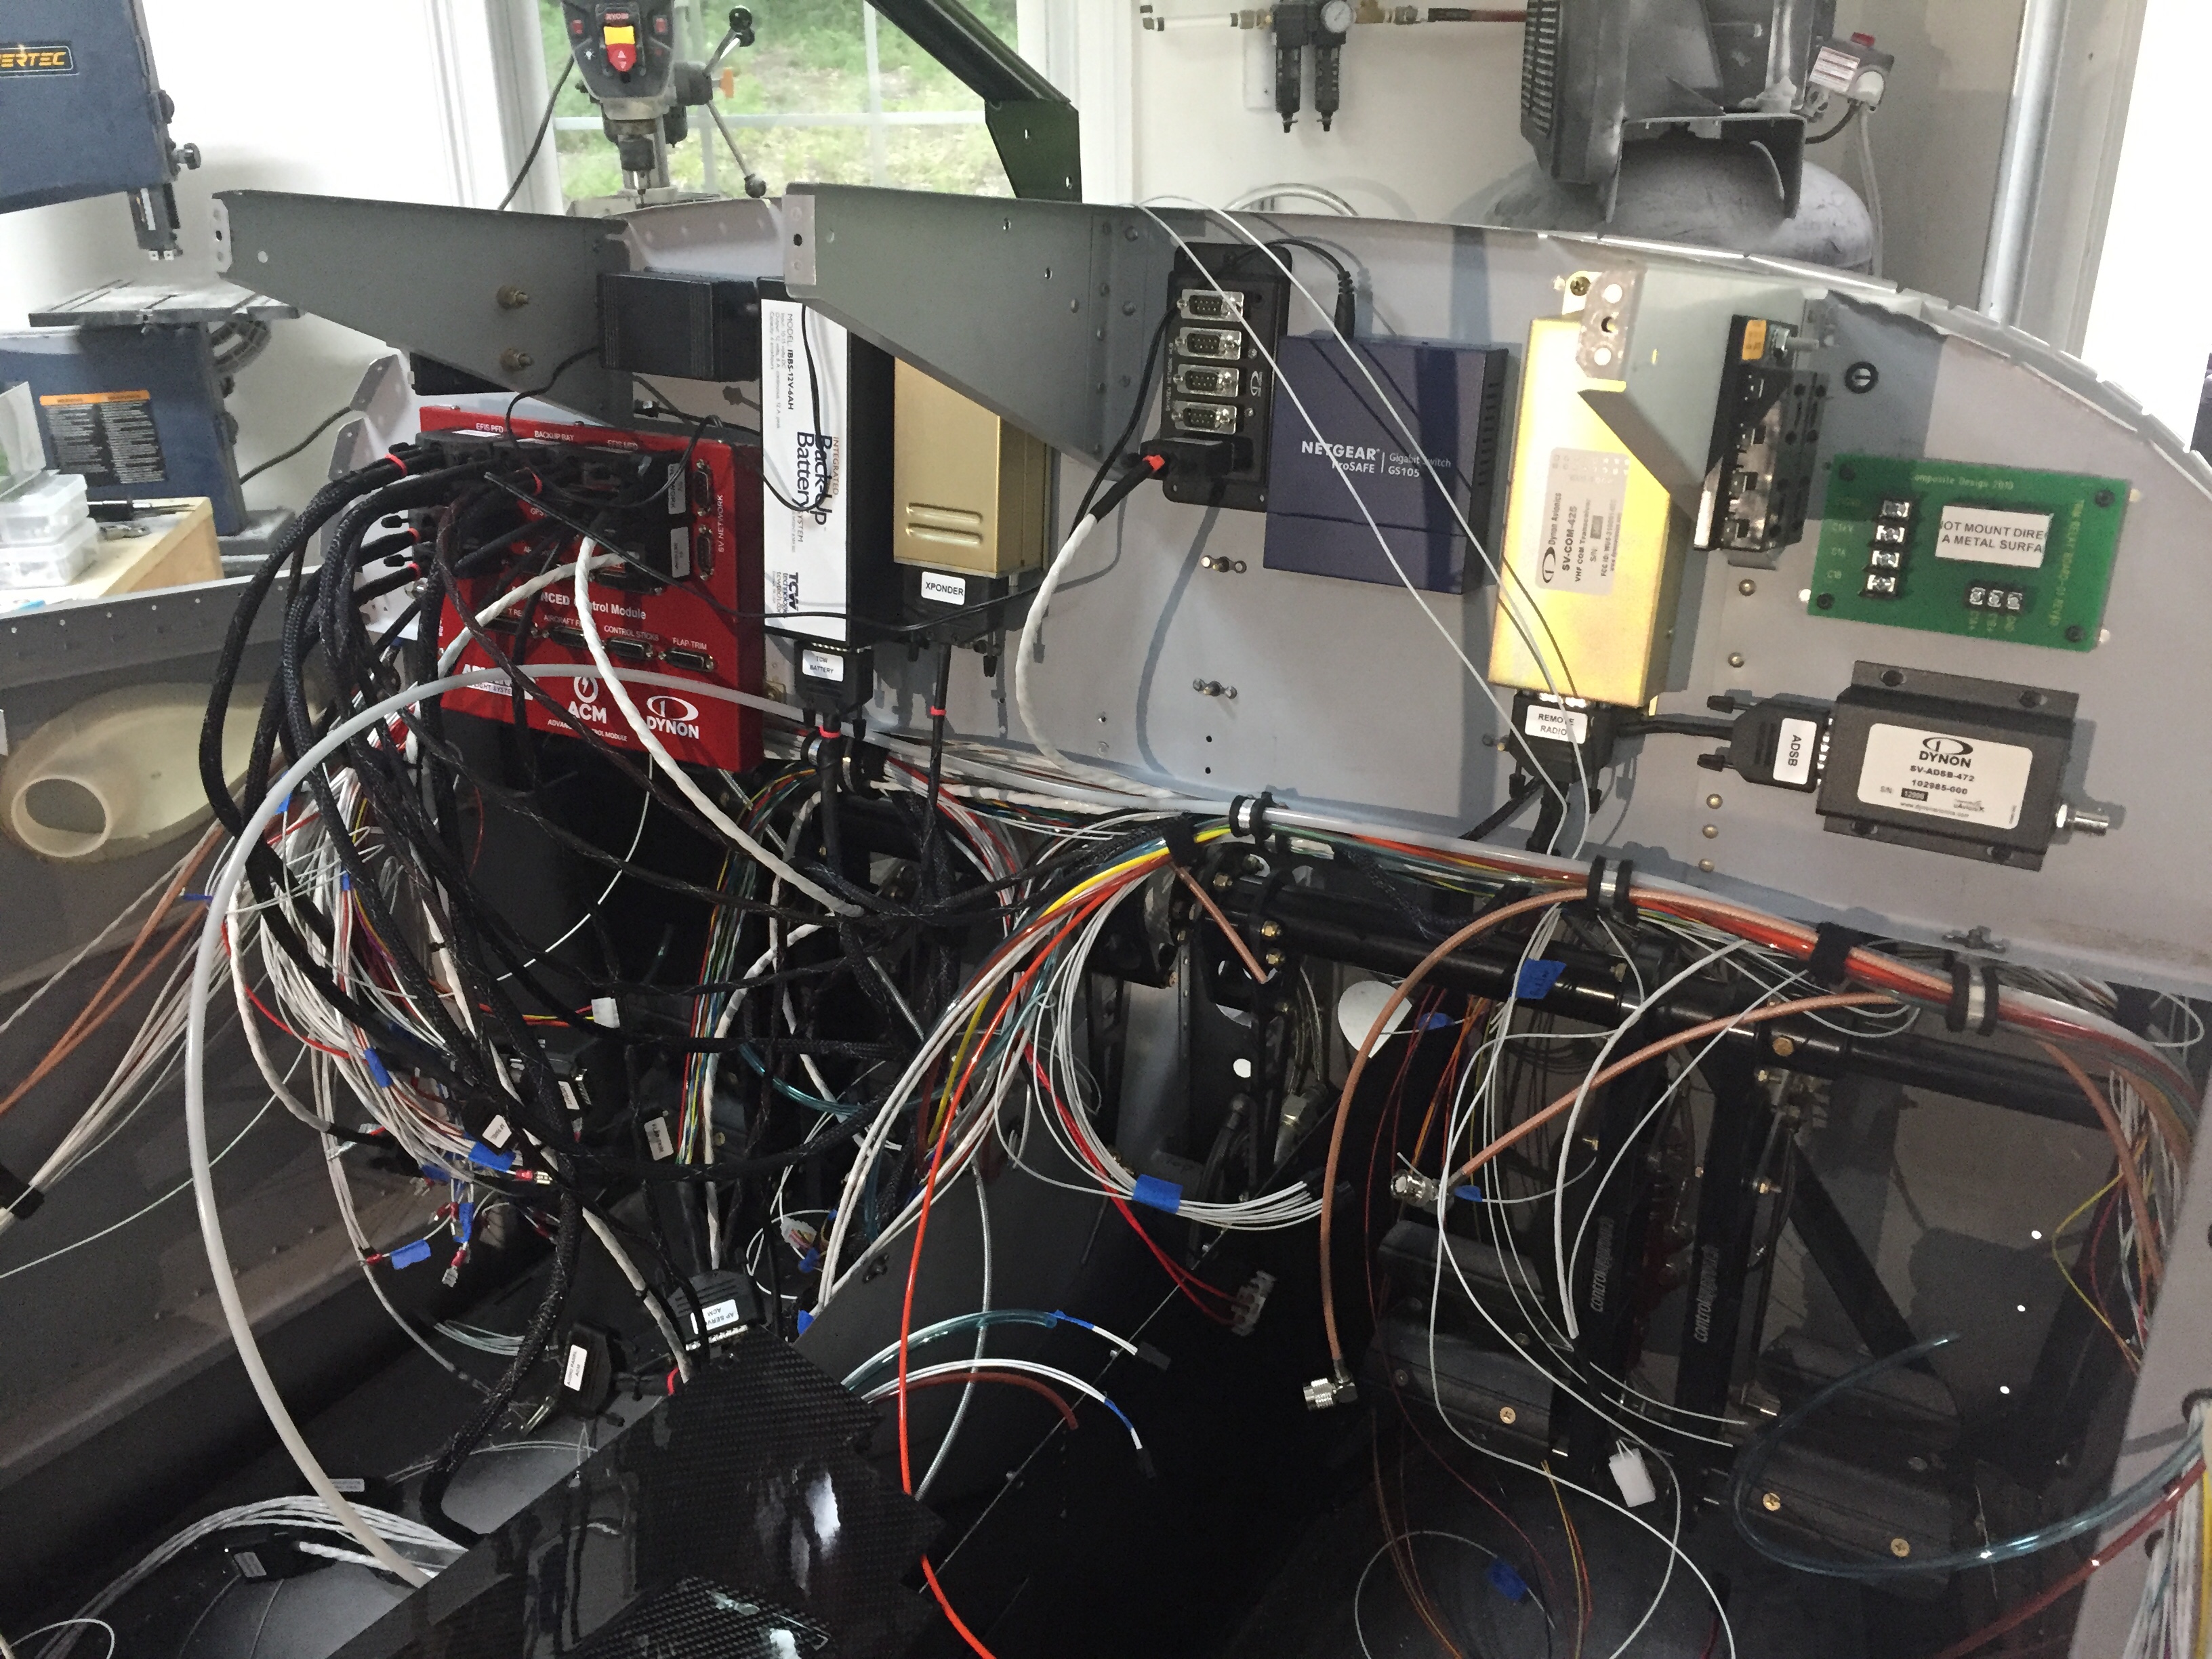
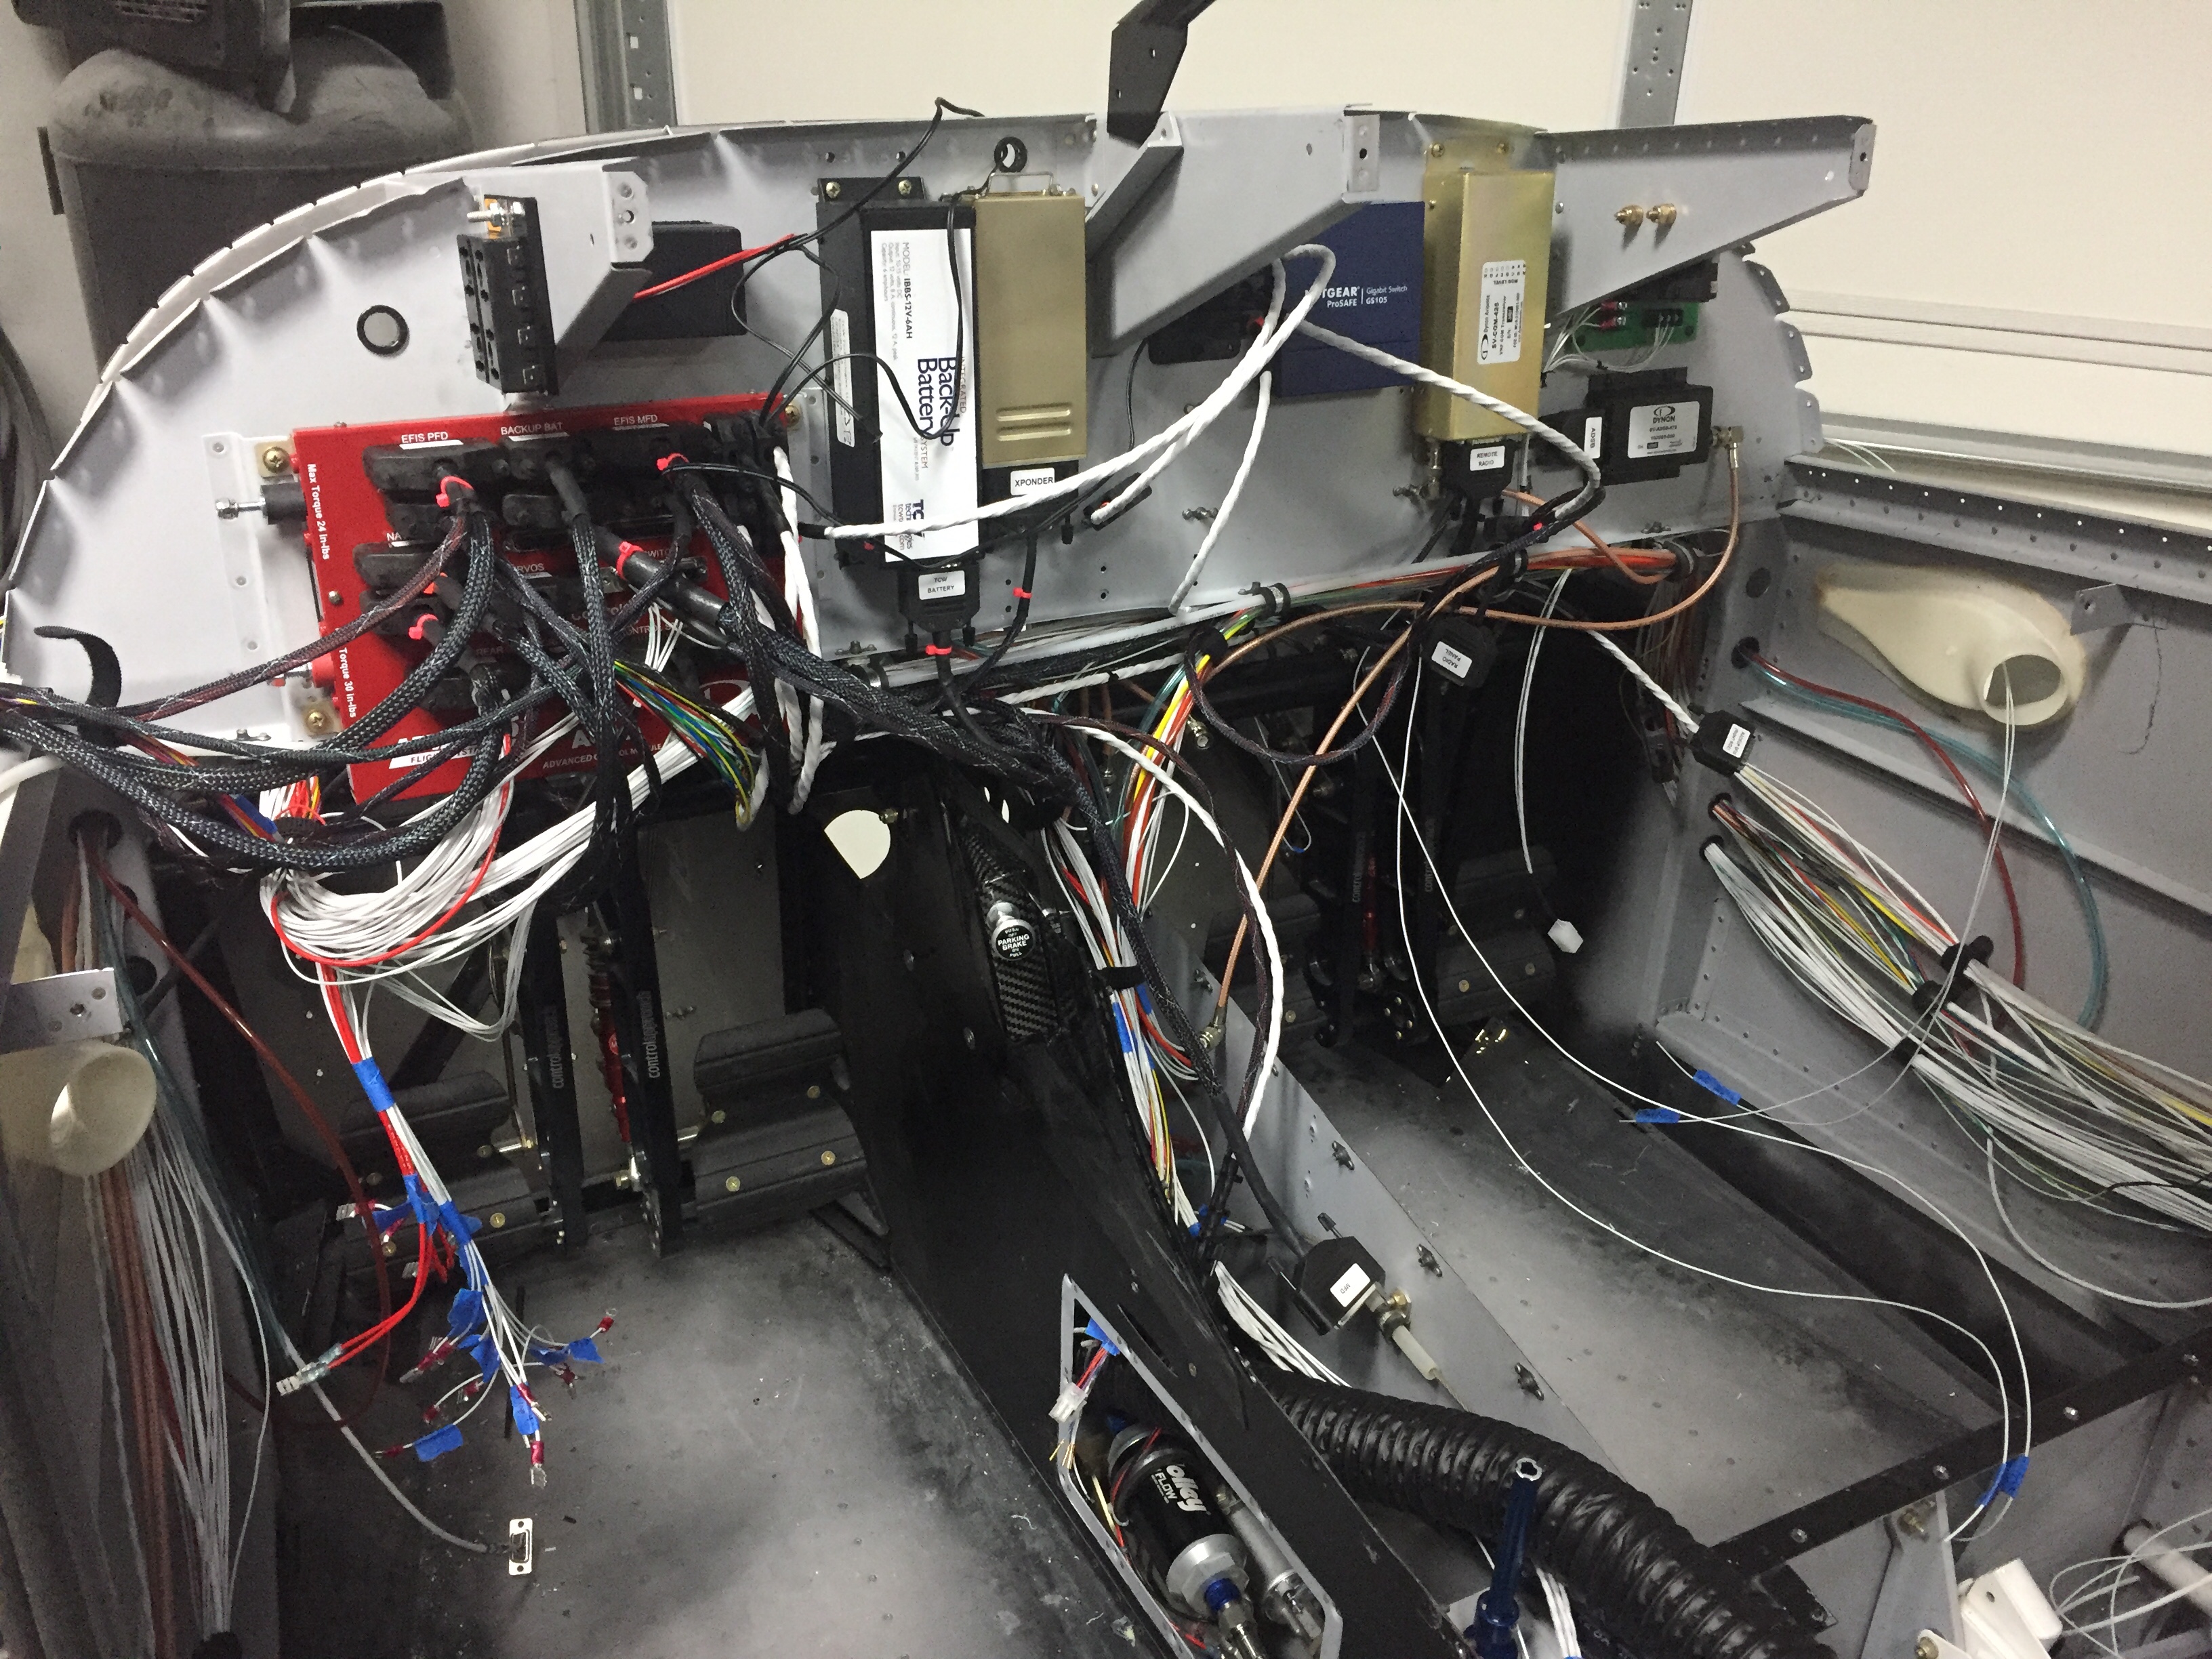
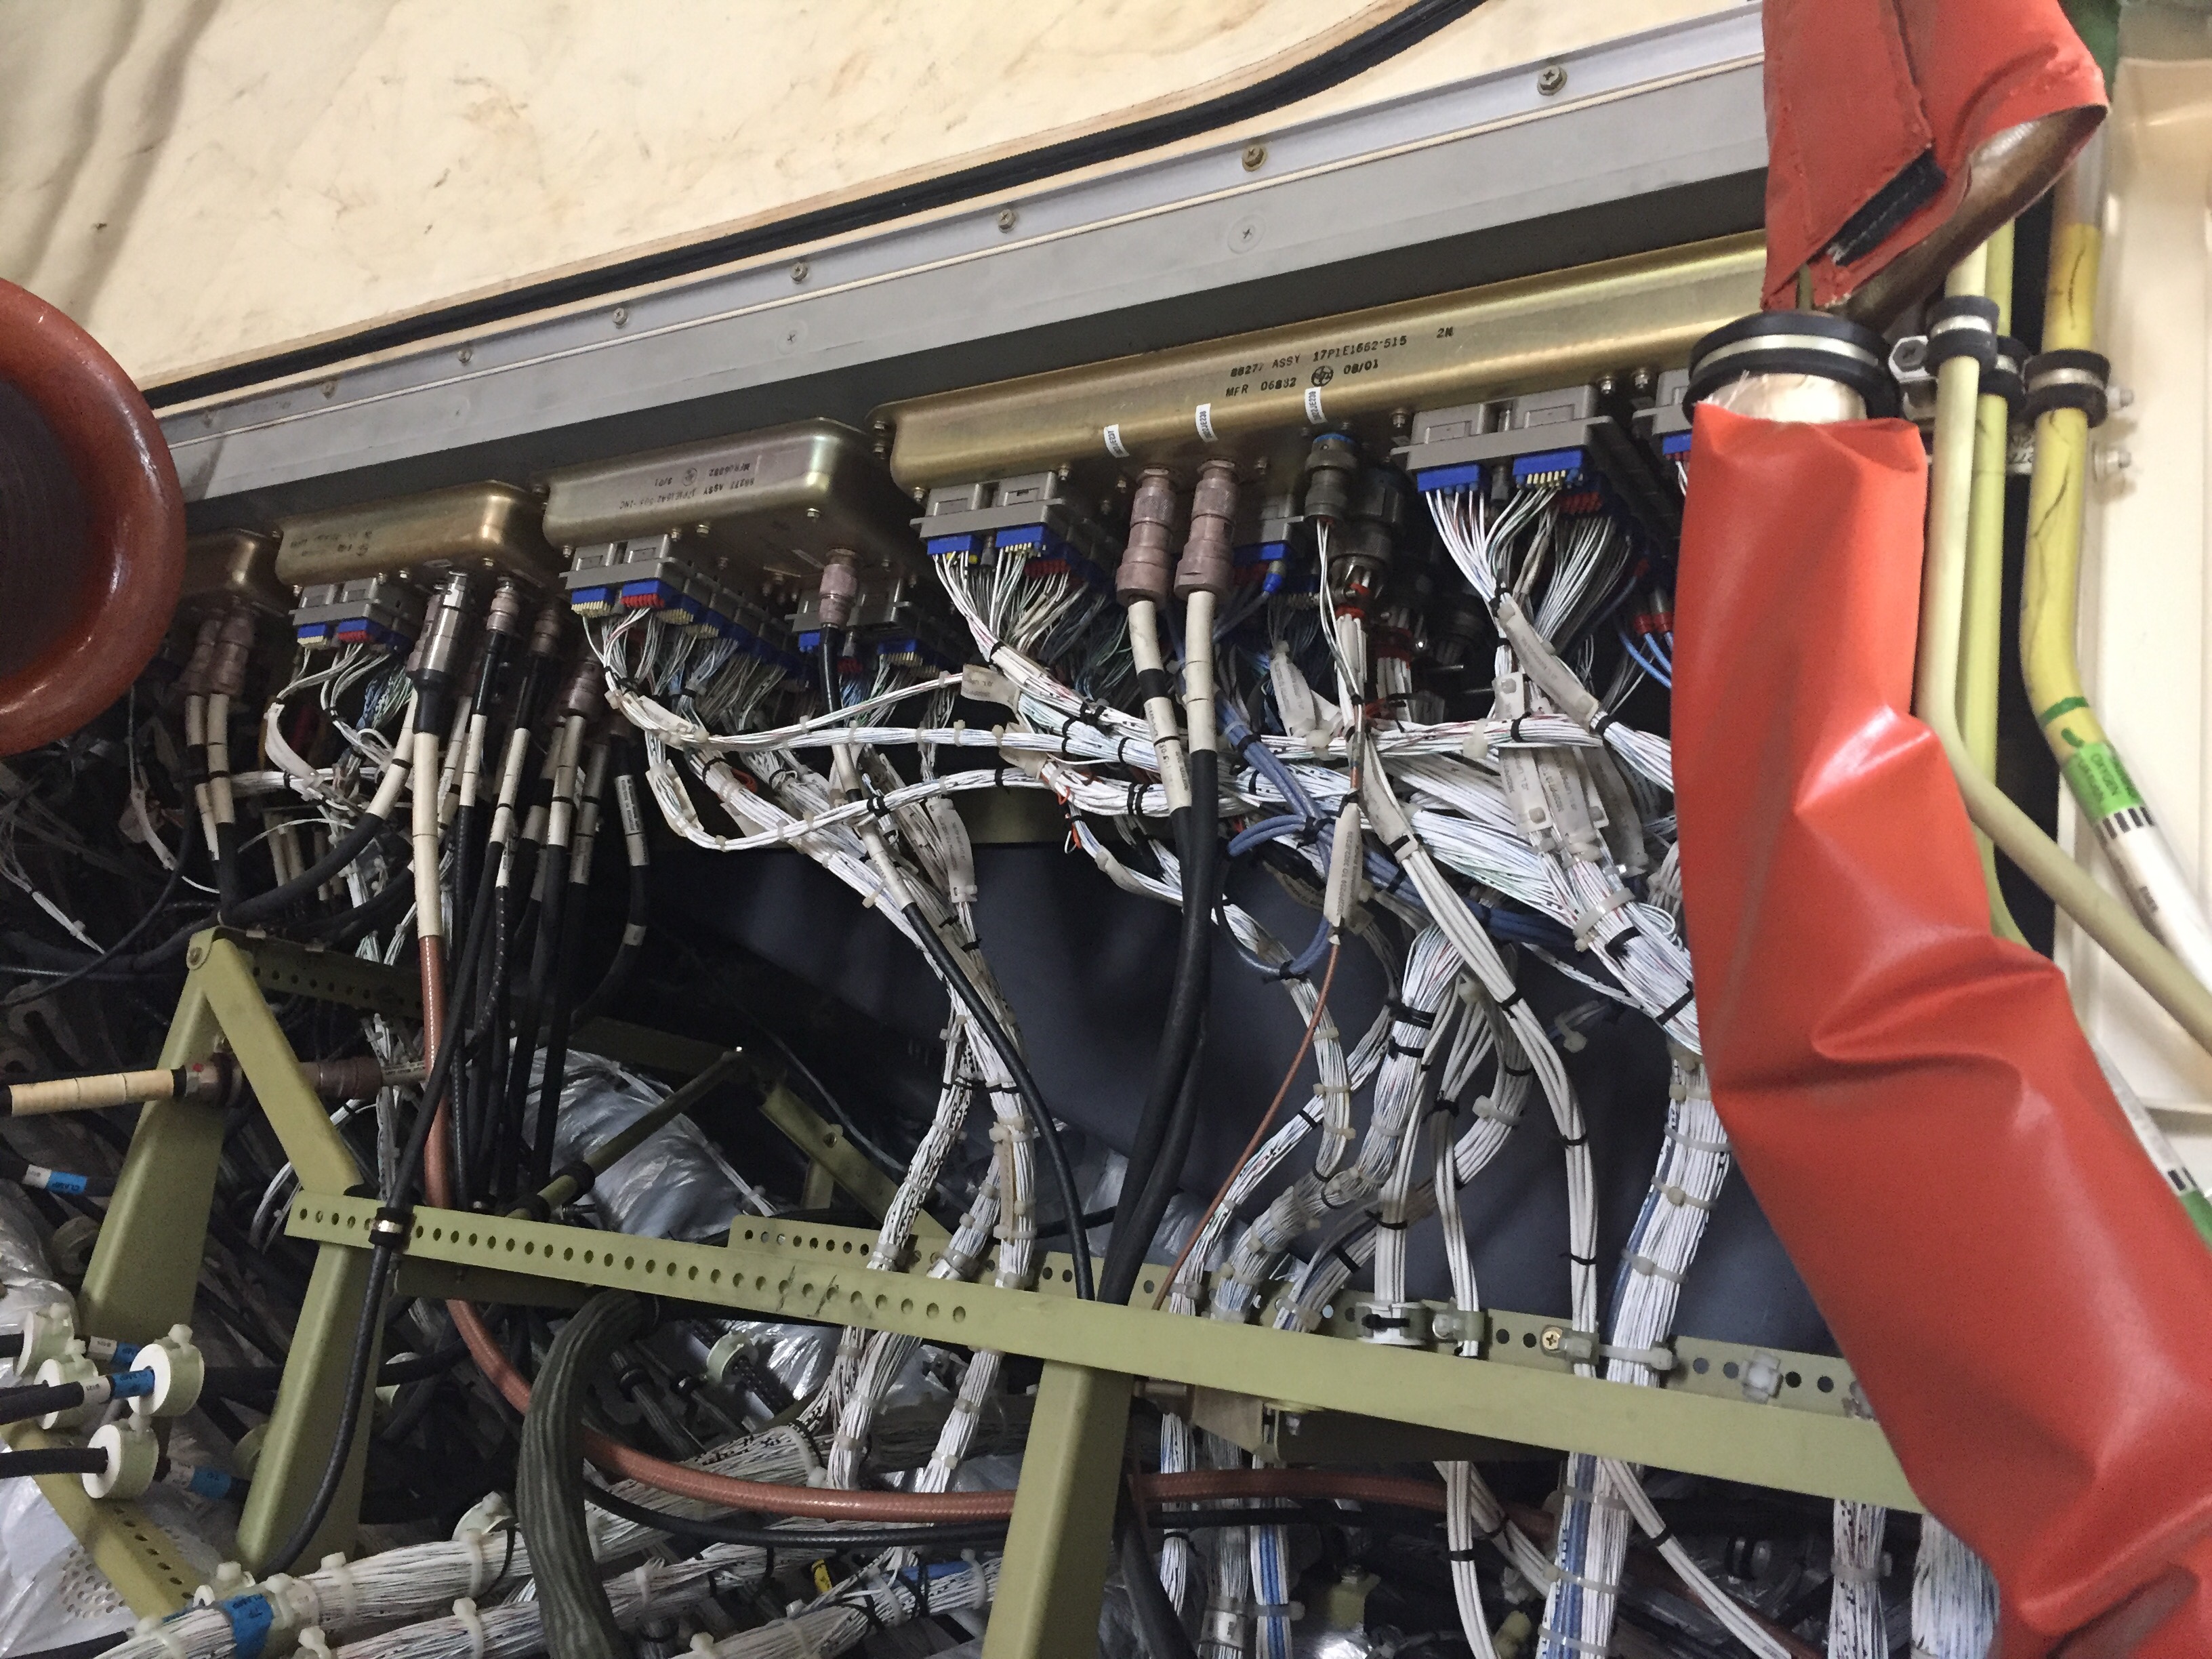
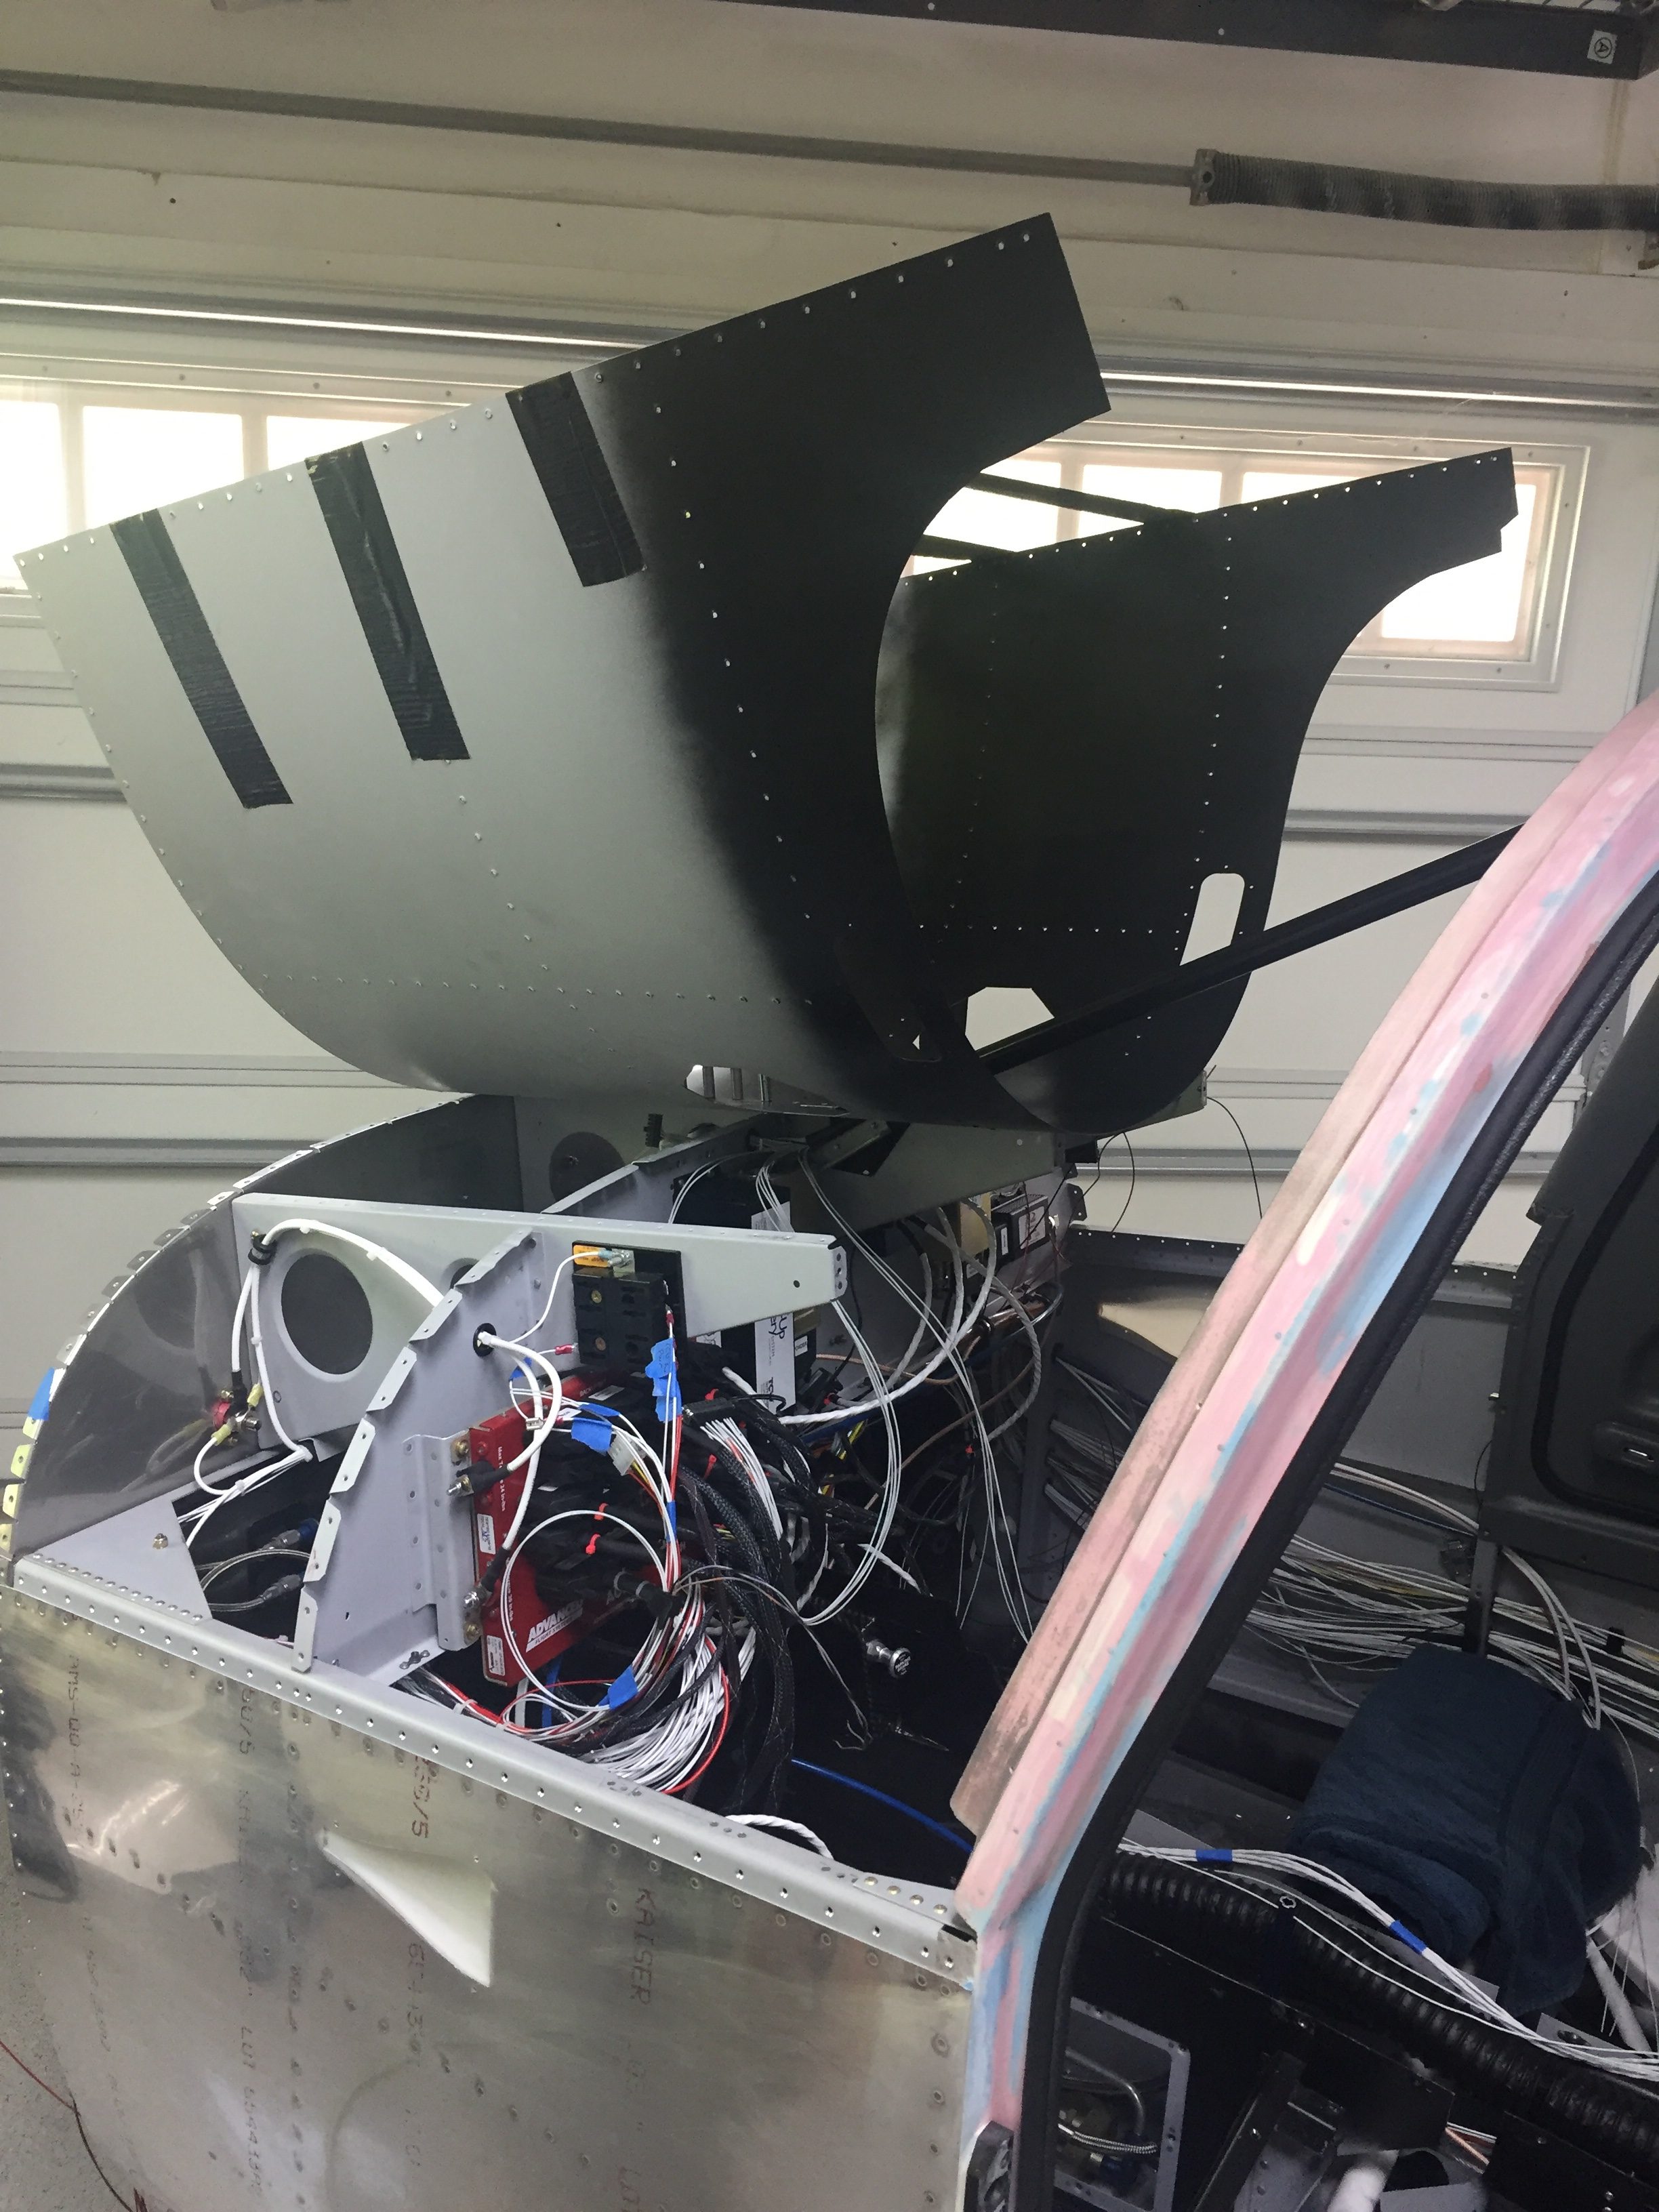
At this point, I’m out of wires to run in the plane and about out of wire from my workbench!  I made the call to rivet in the forward fuselage section structure so that the bundles could be zip-tied and I could move forward with putting the panel and avionics in for good.  (I actually riveted this in before doing the firewall insulation, but it was easier to type in this order.)  As with most big things, it was very anti-climactic and completed in about 15 minutes.

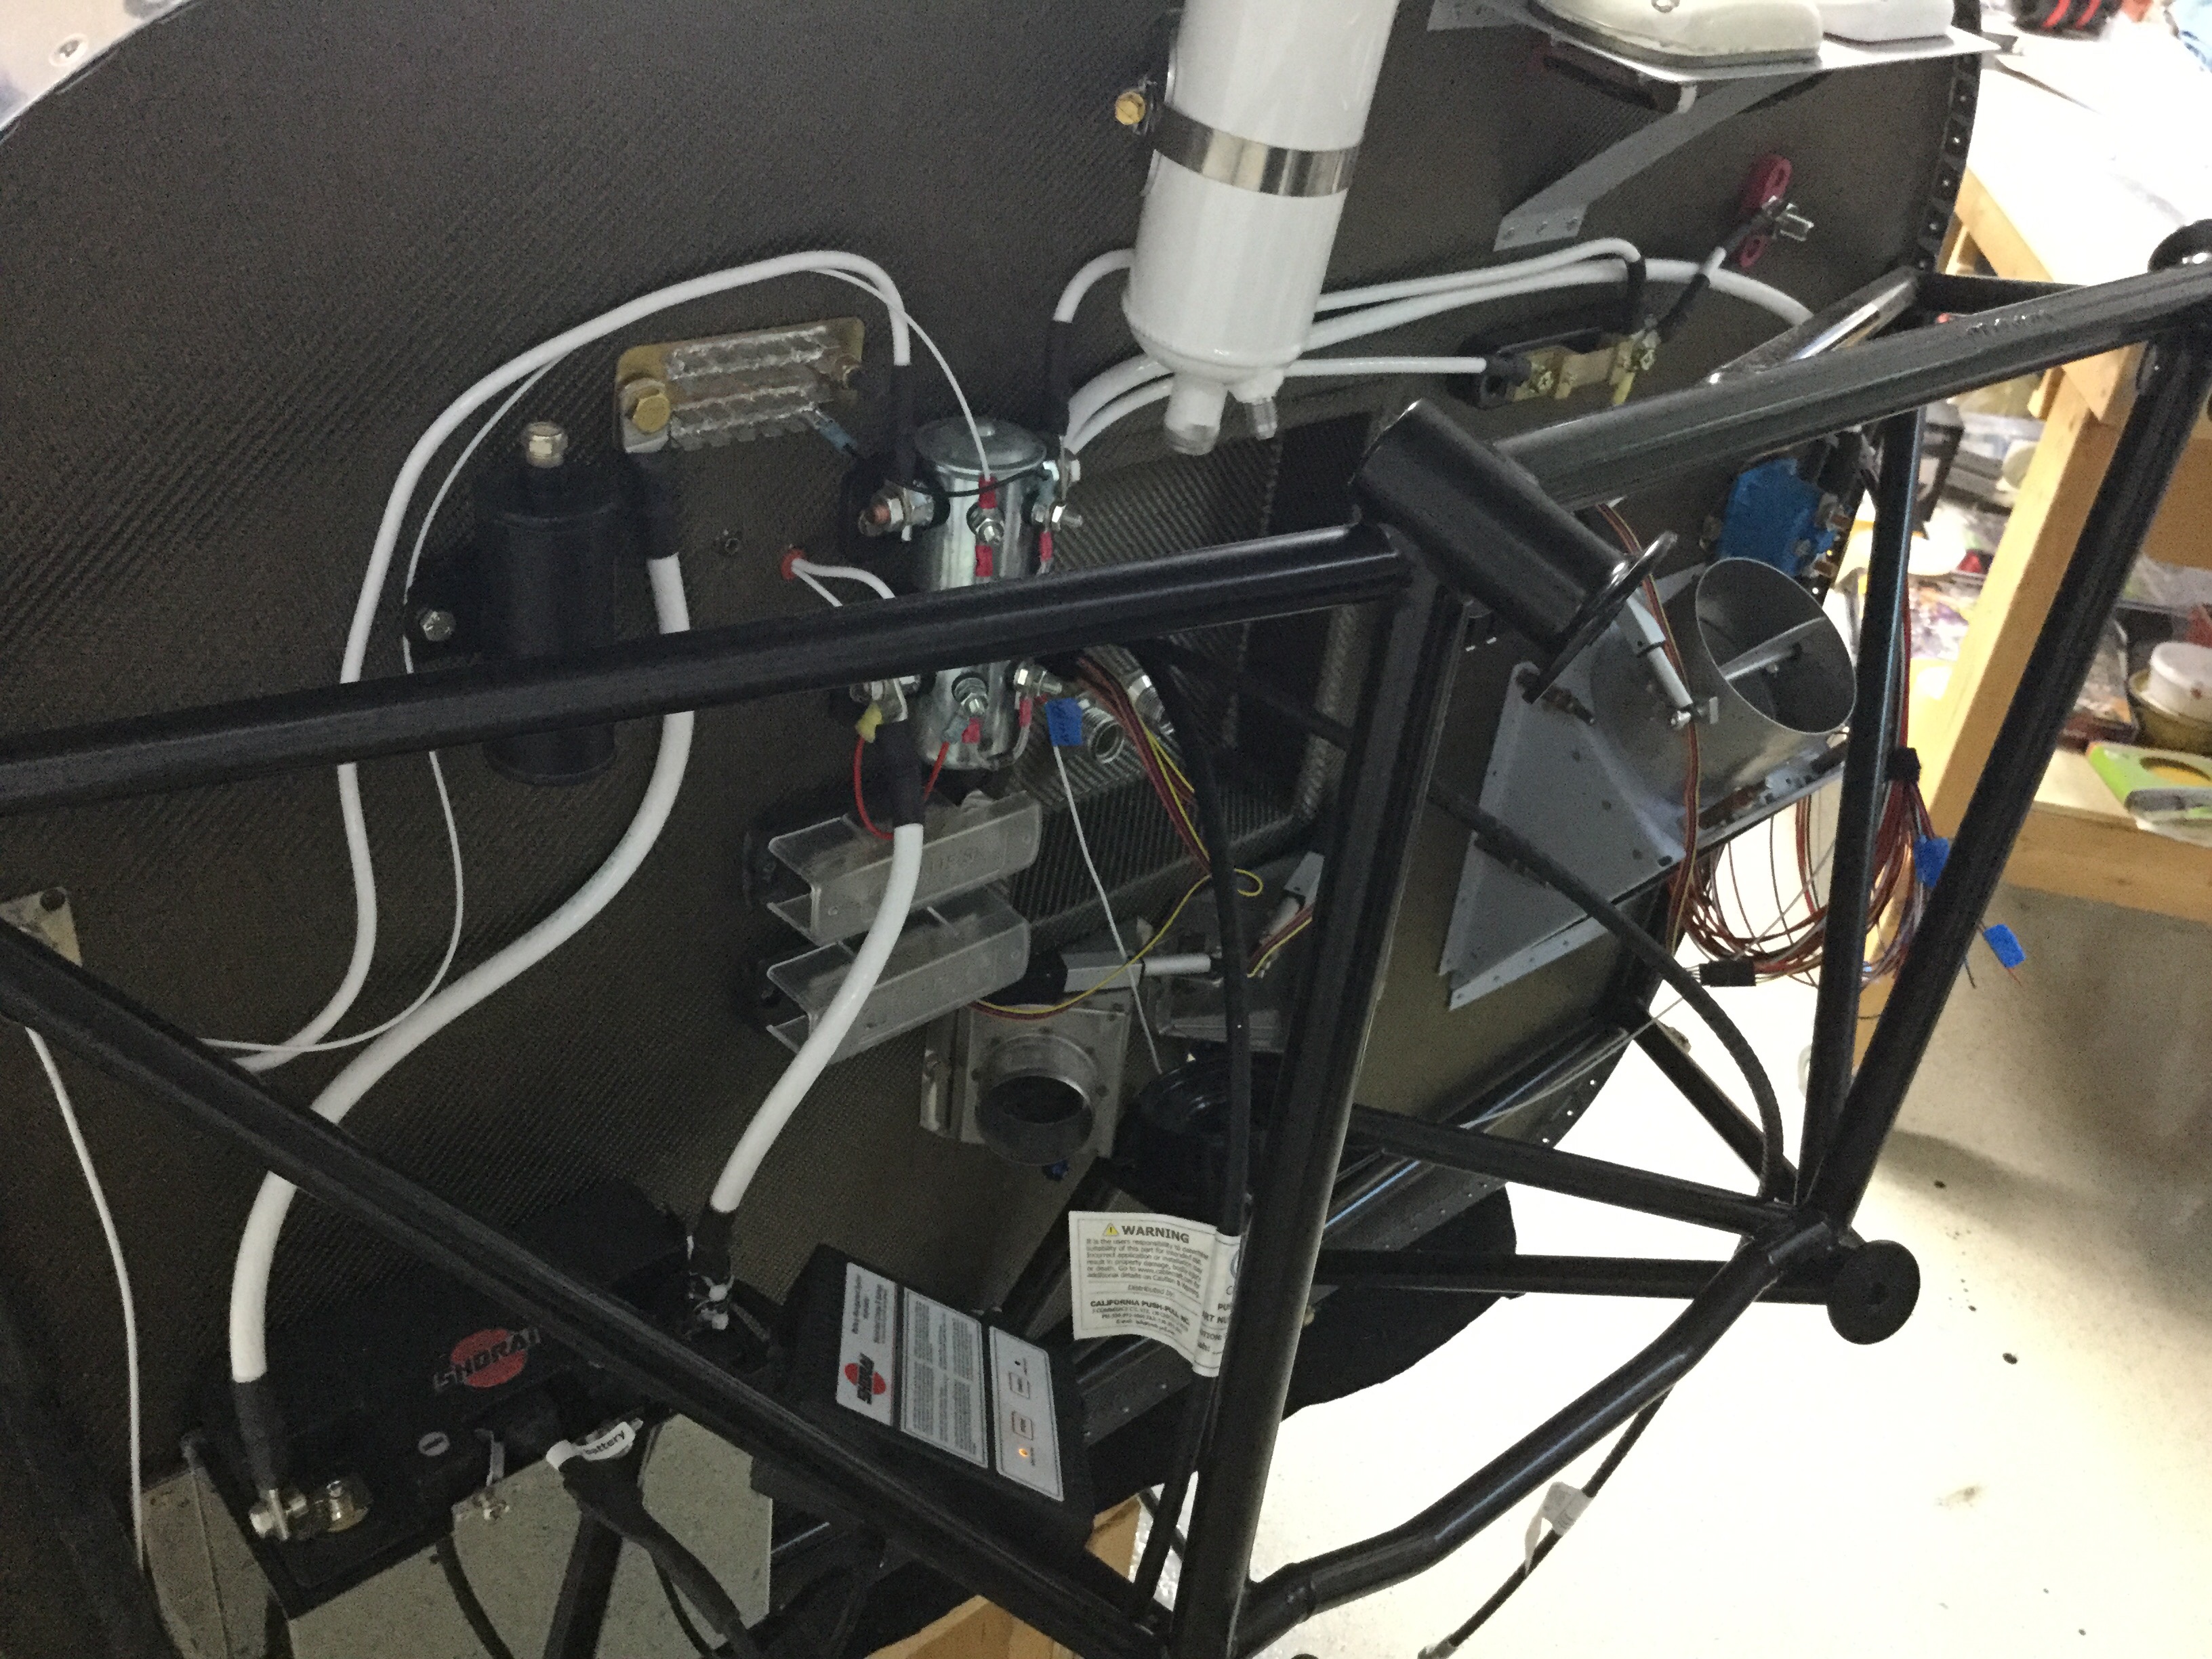
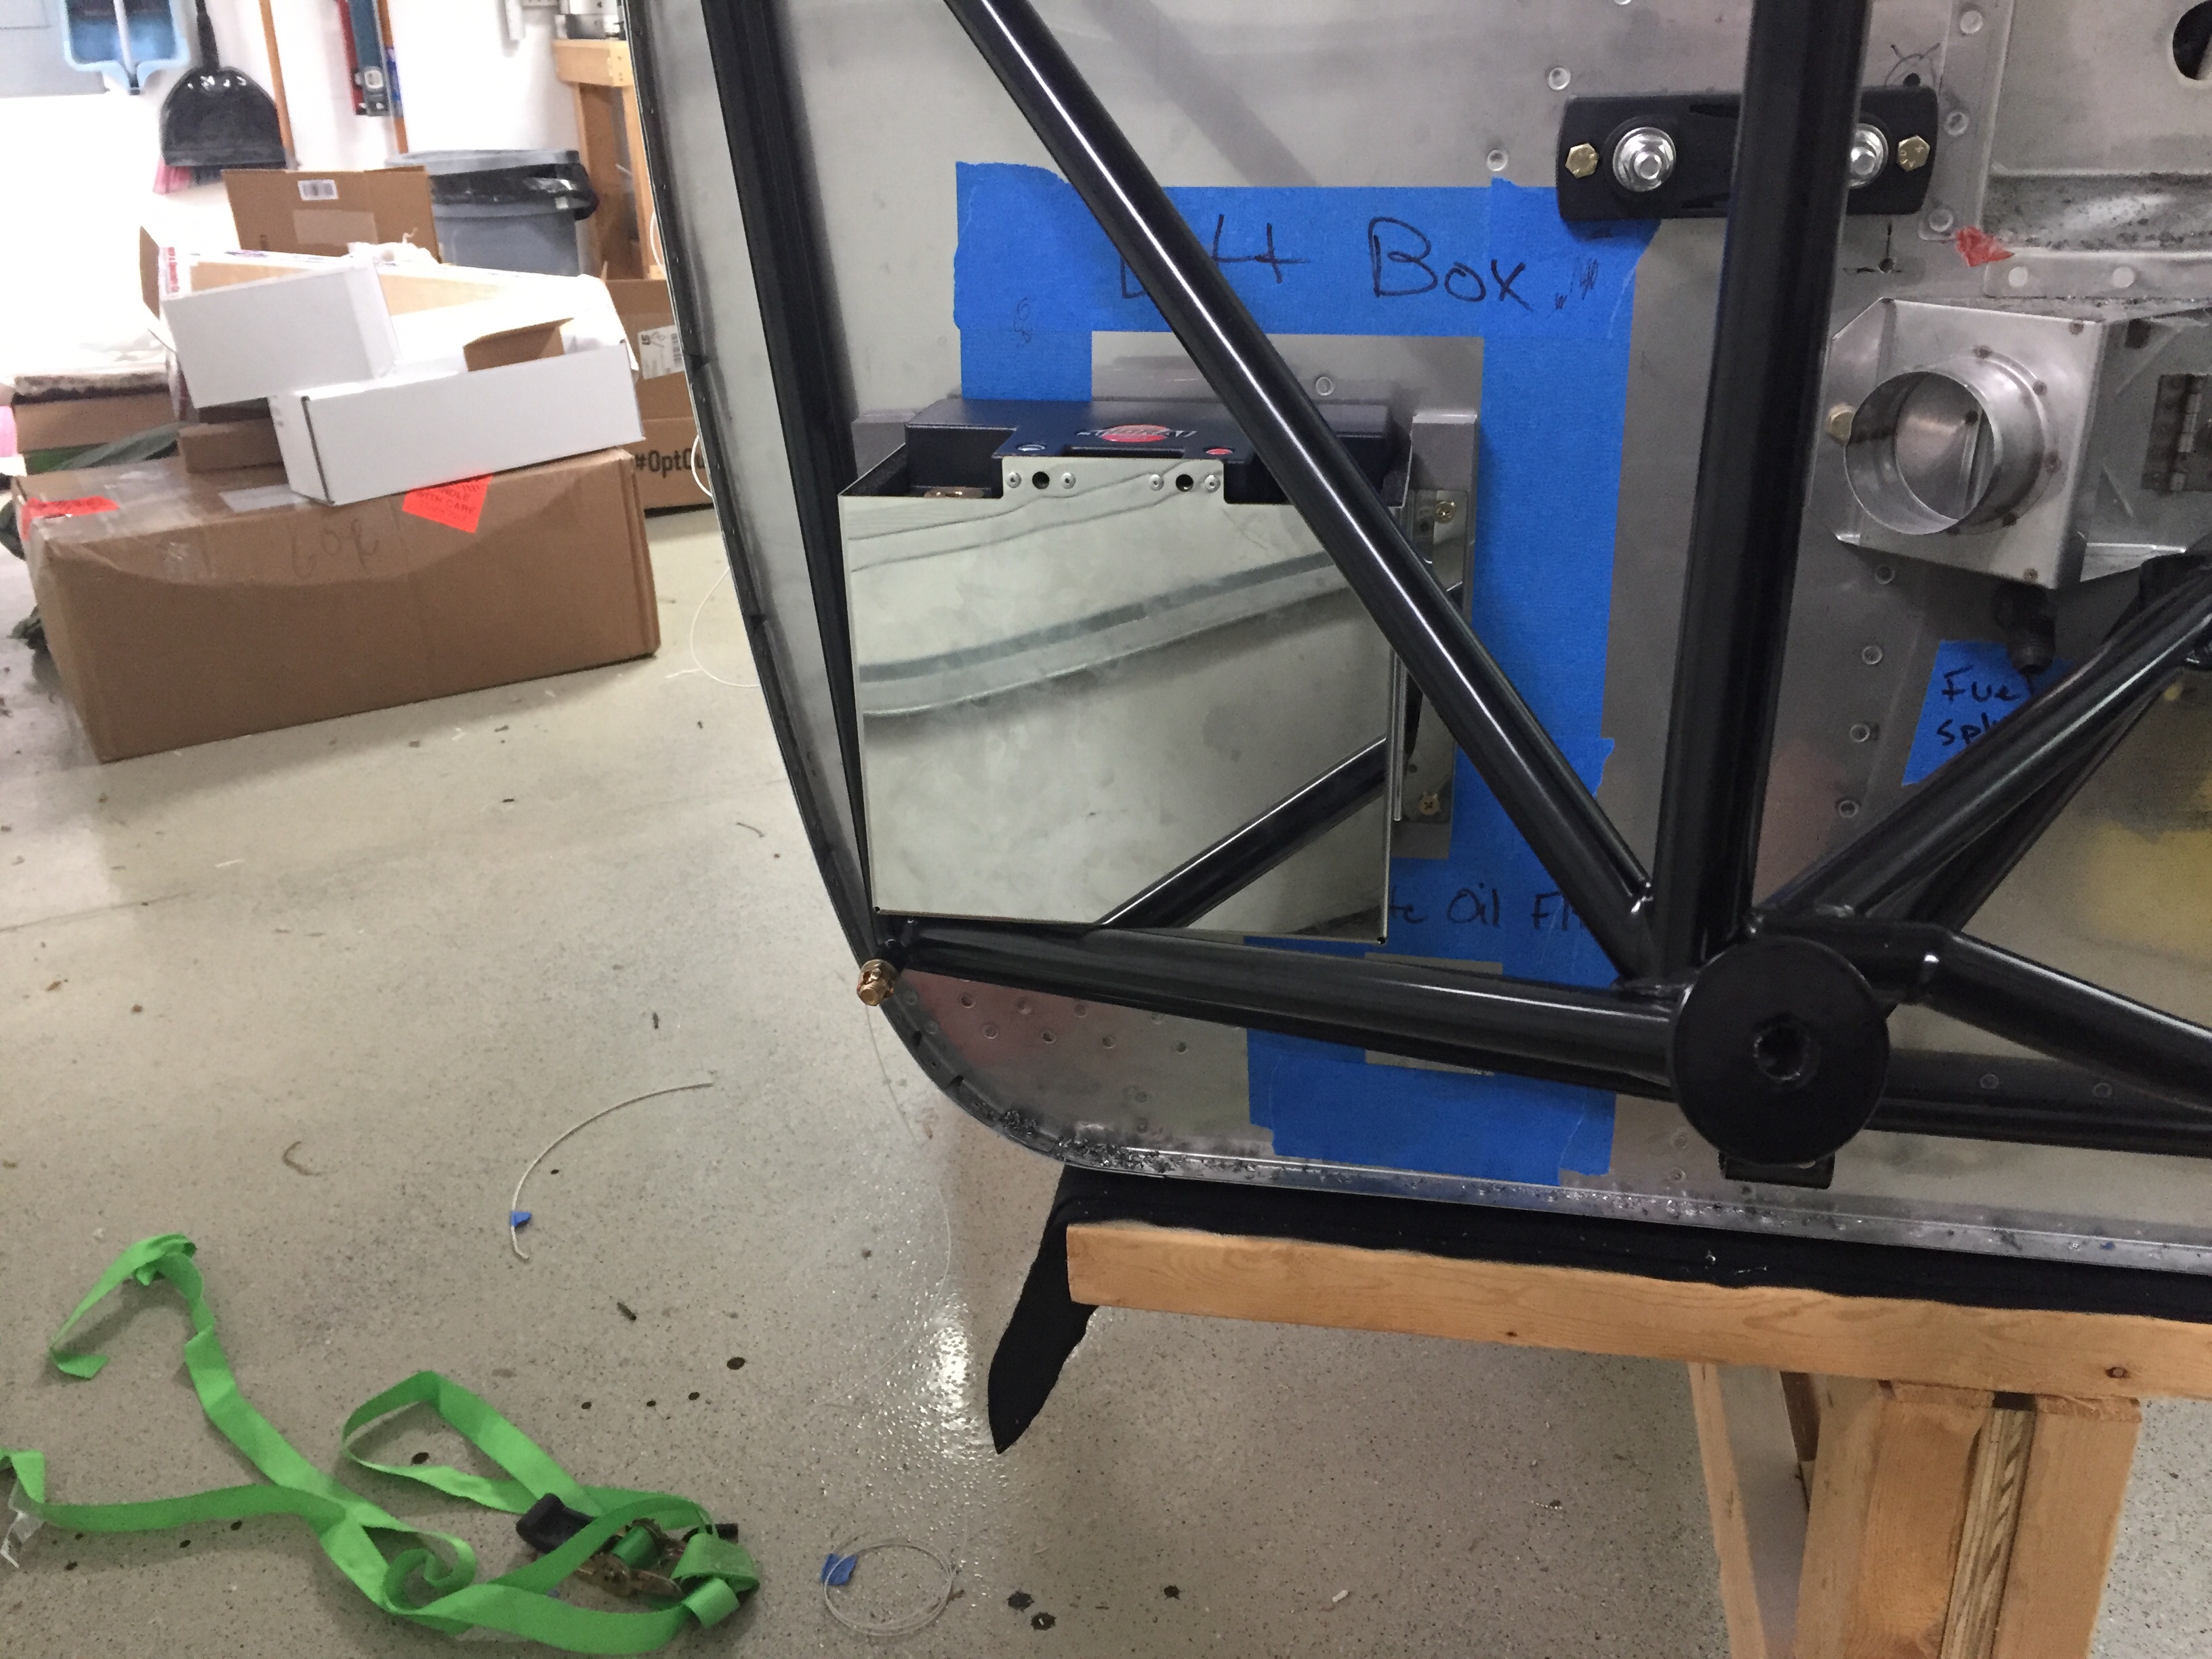
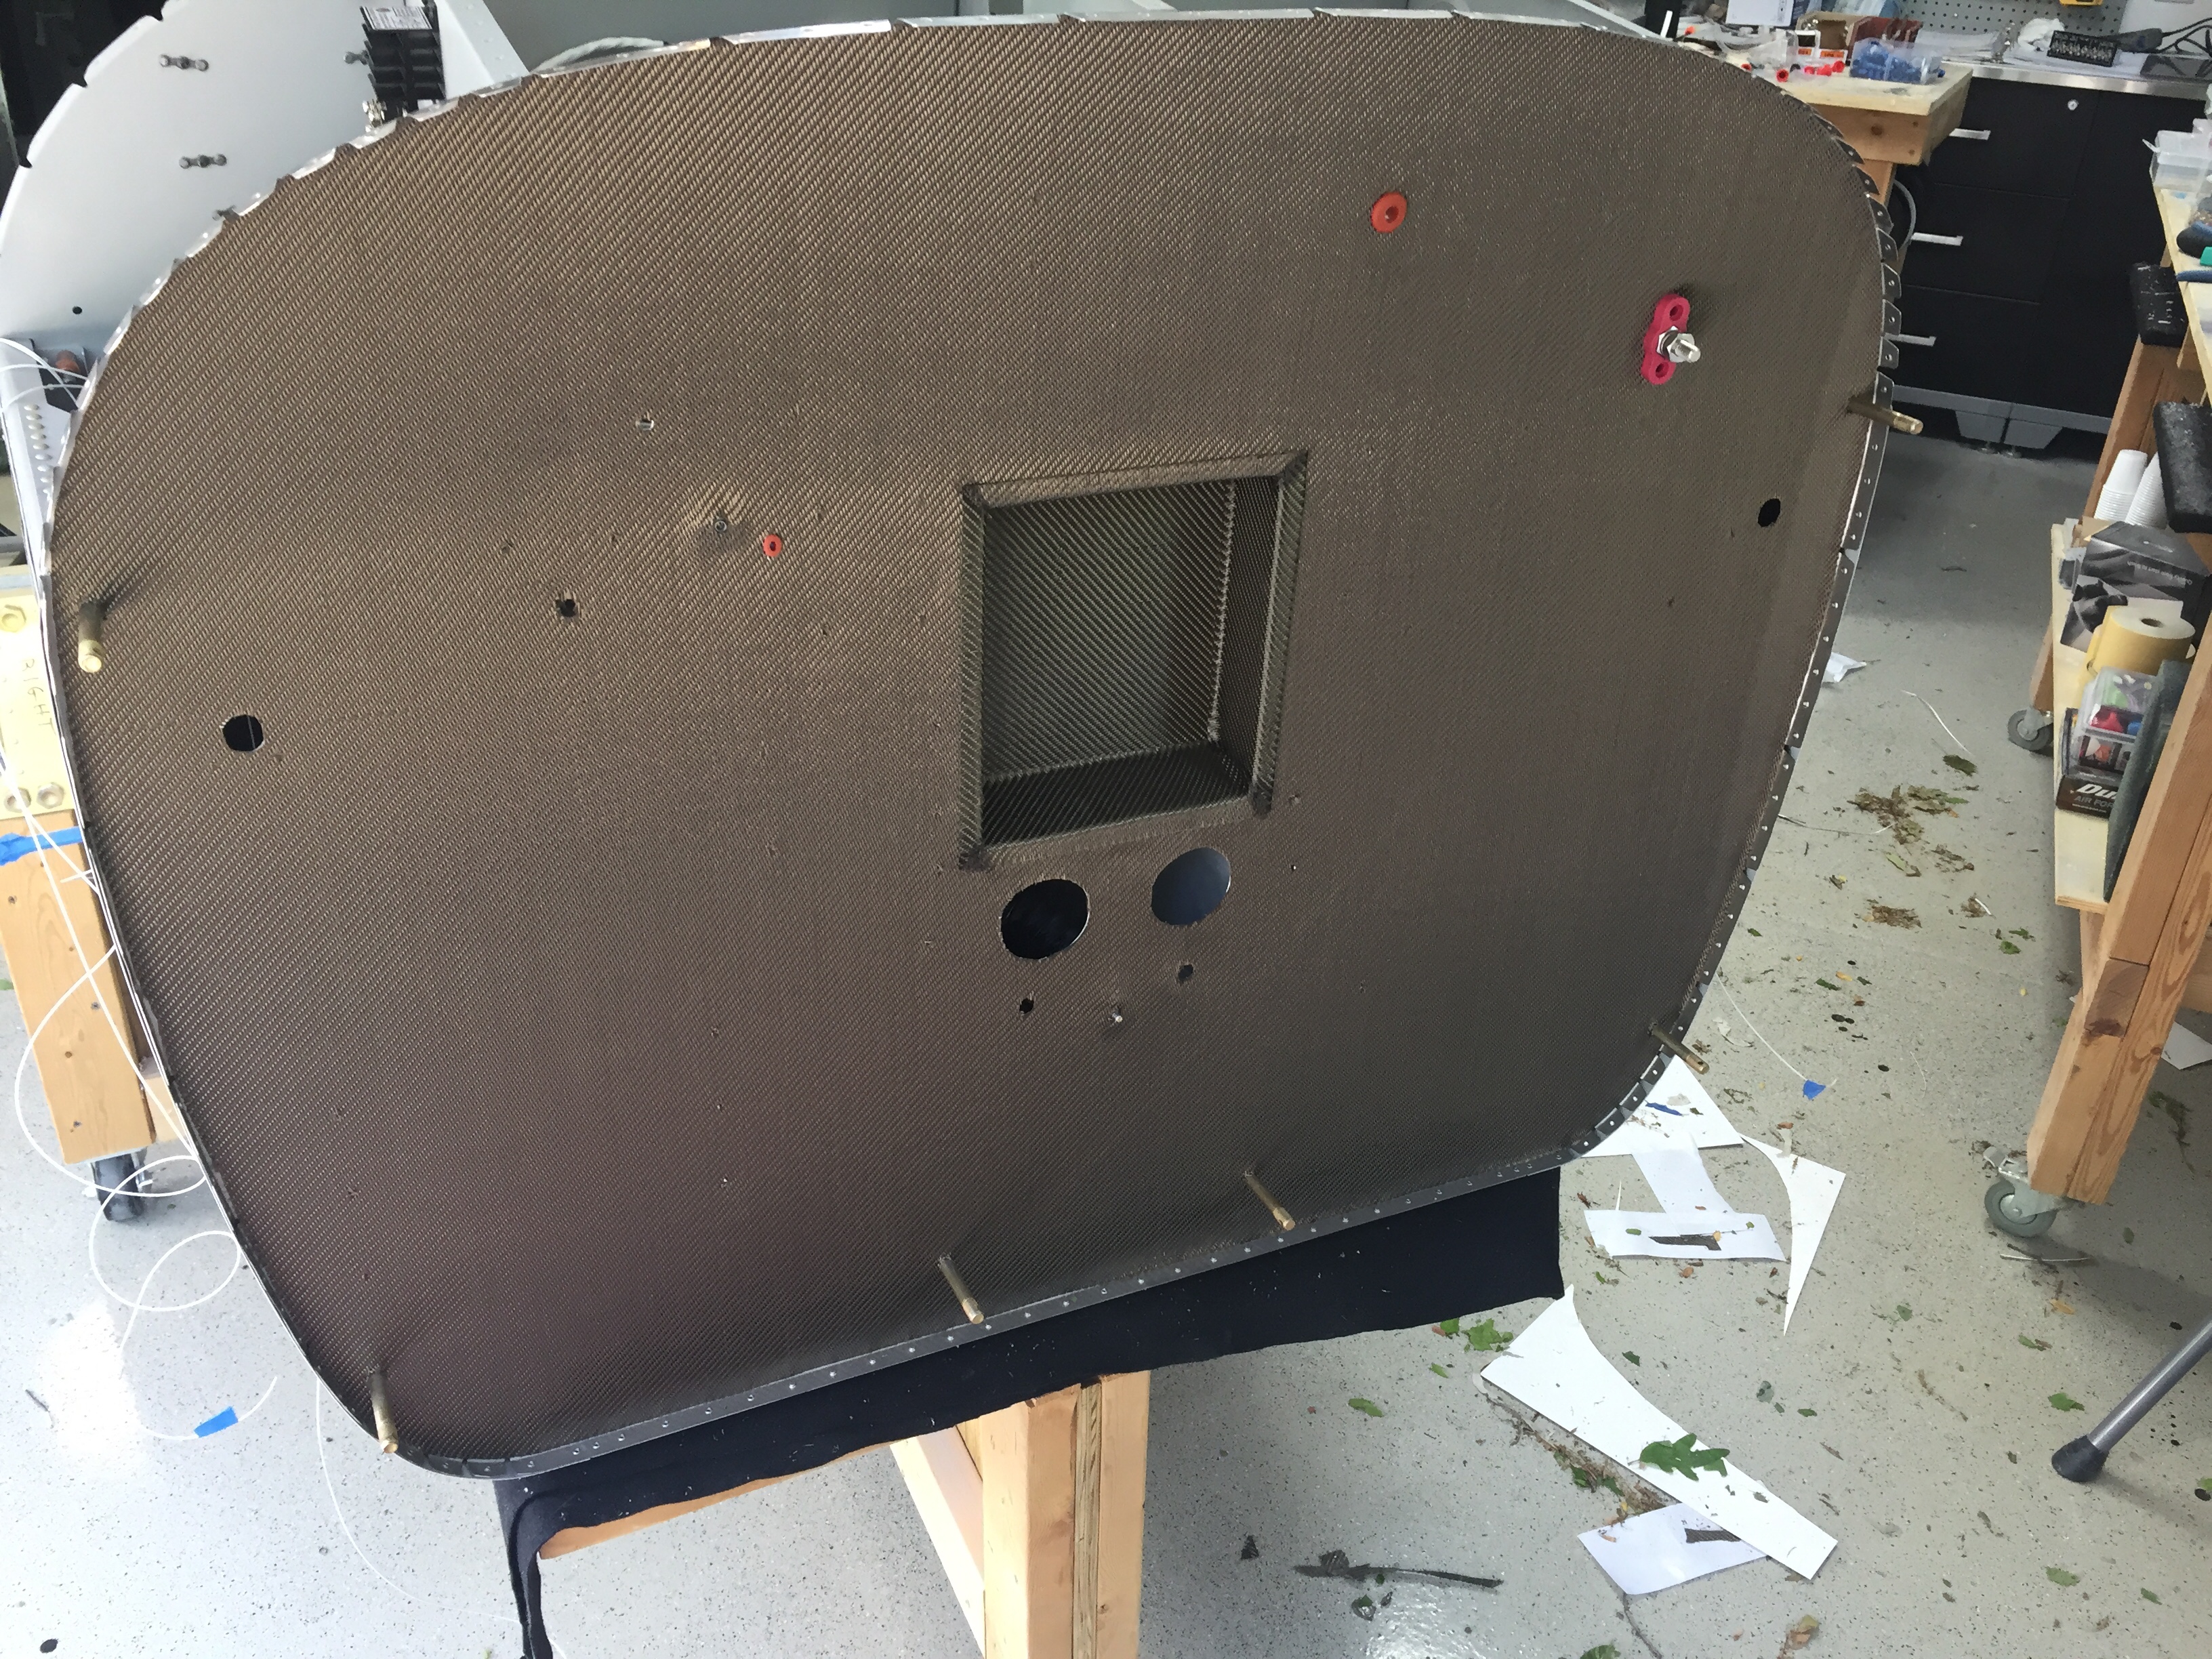
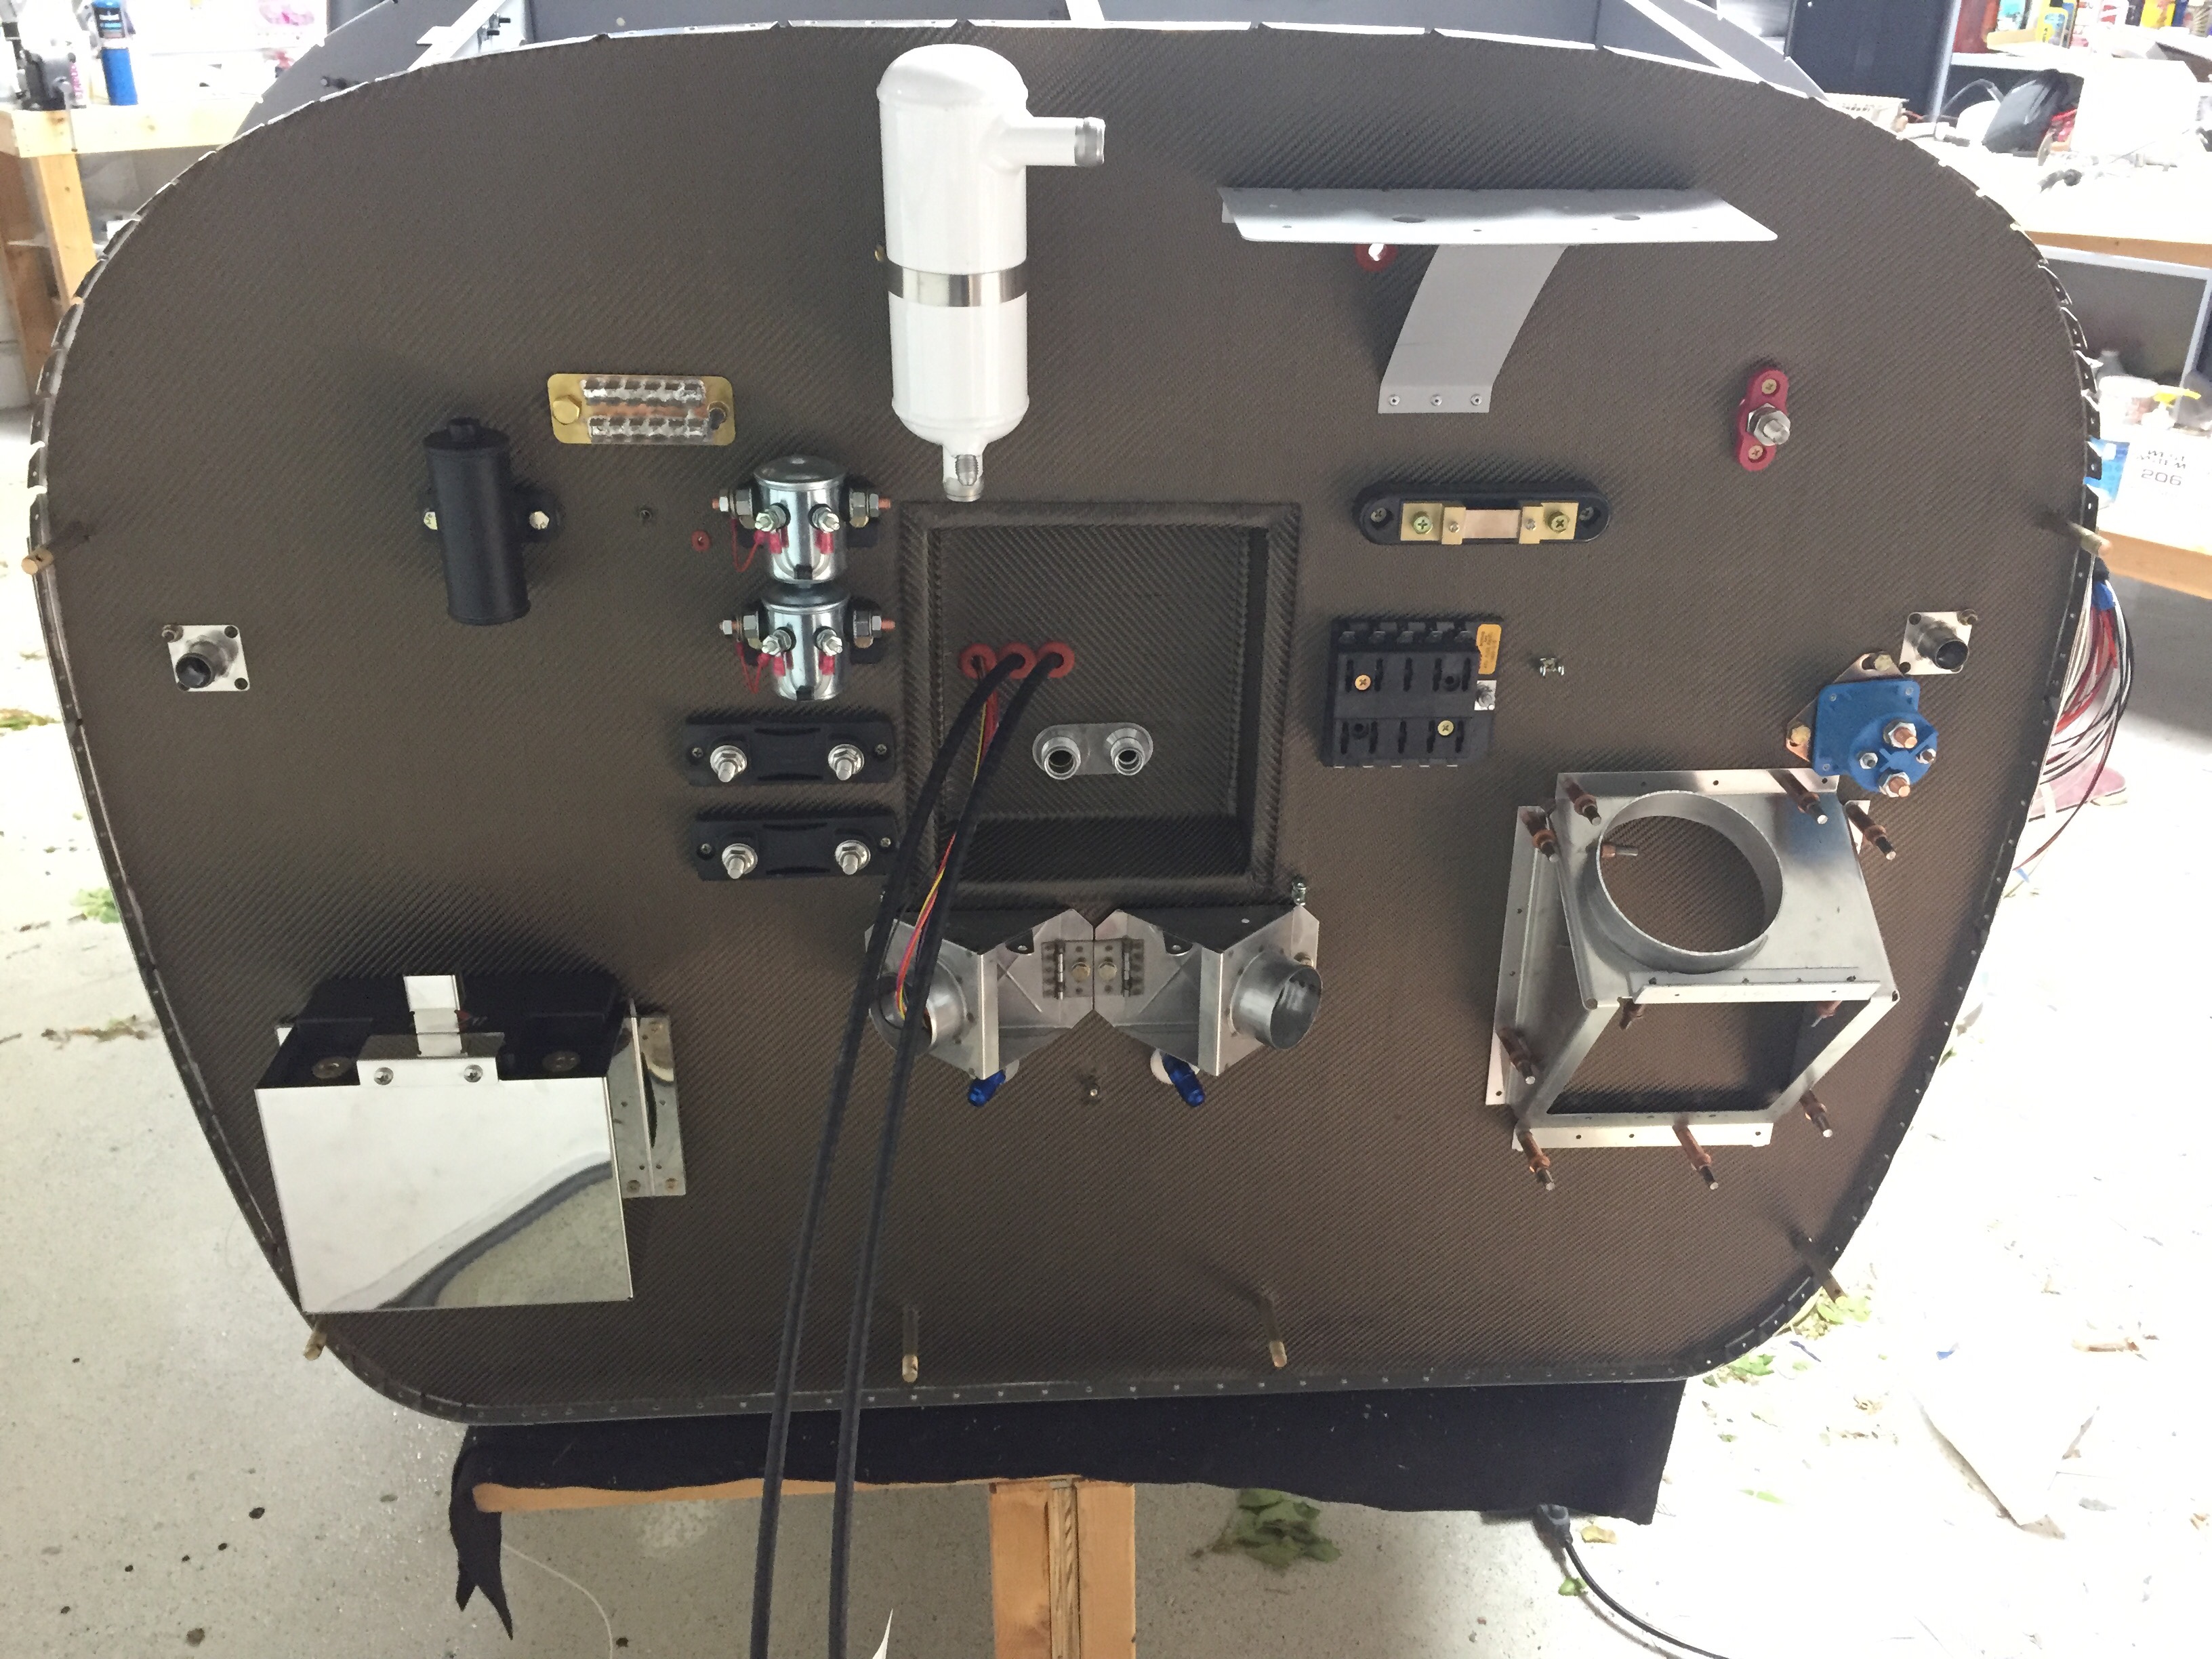
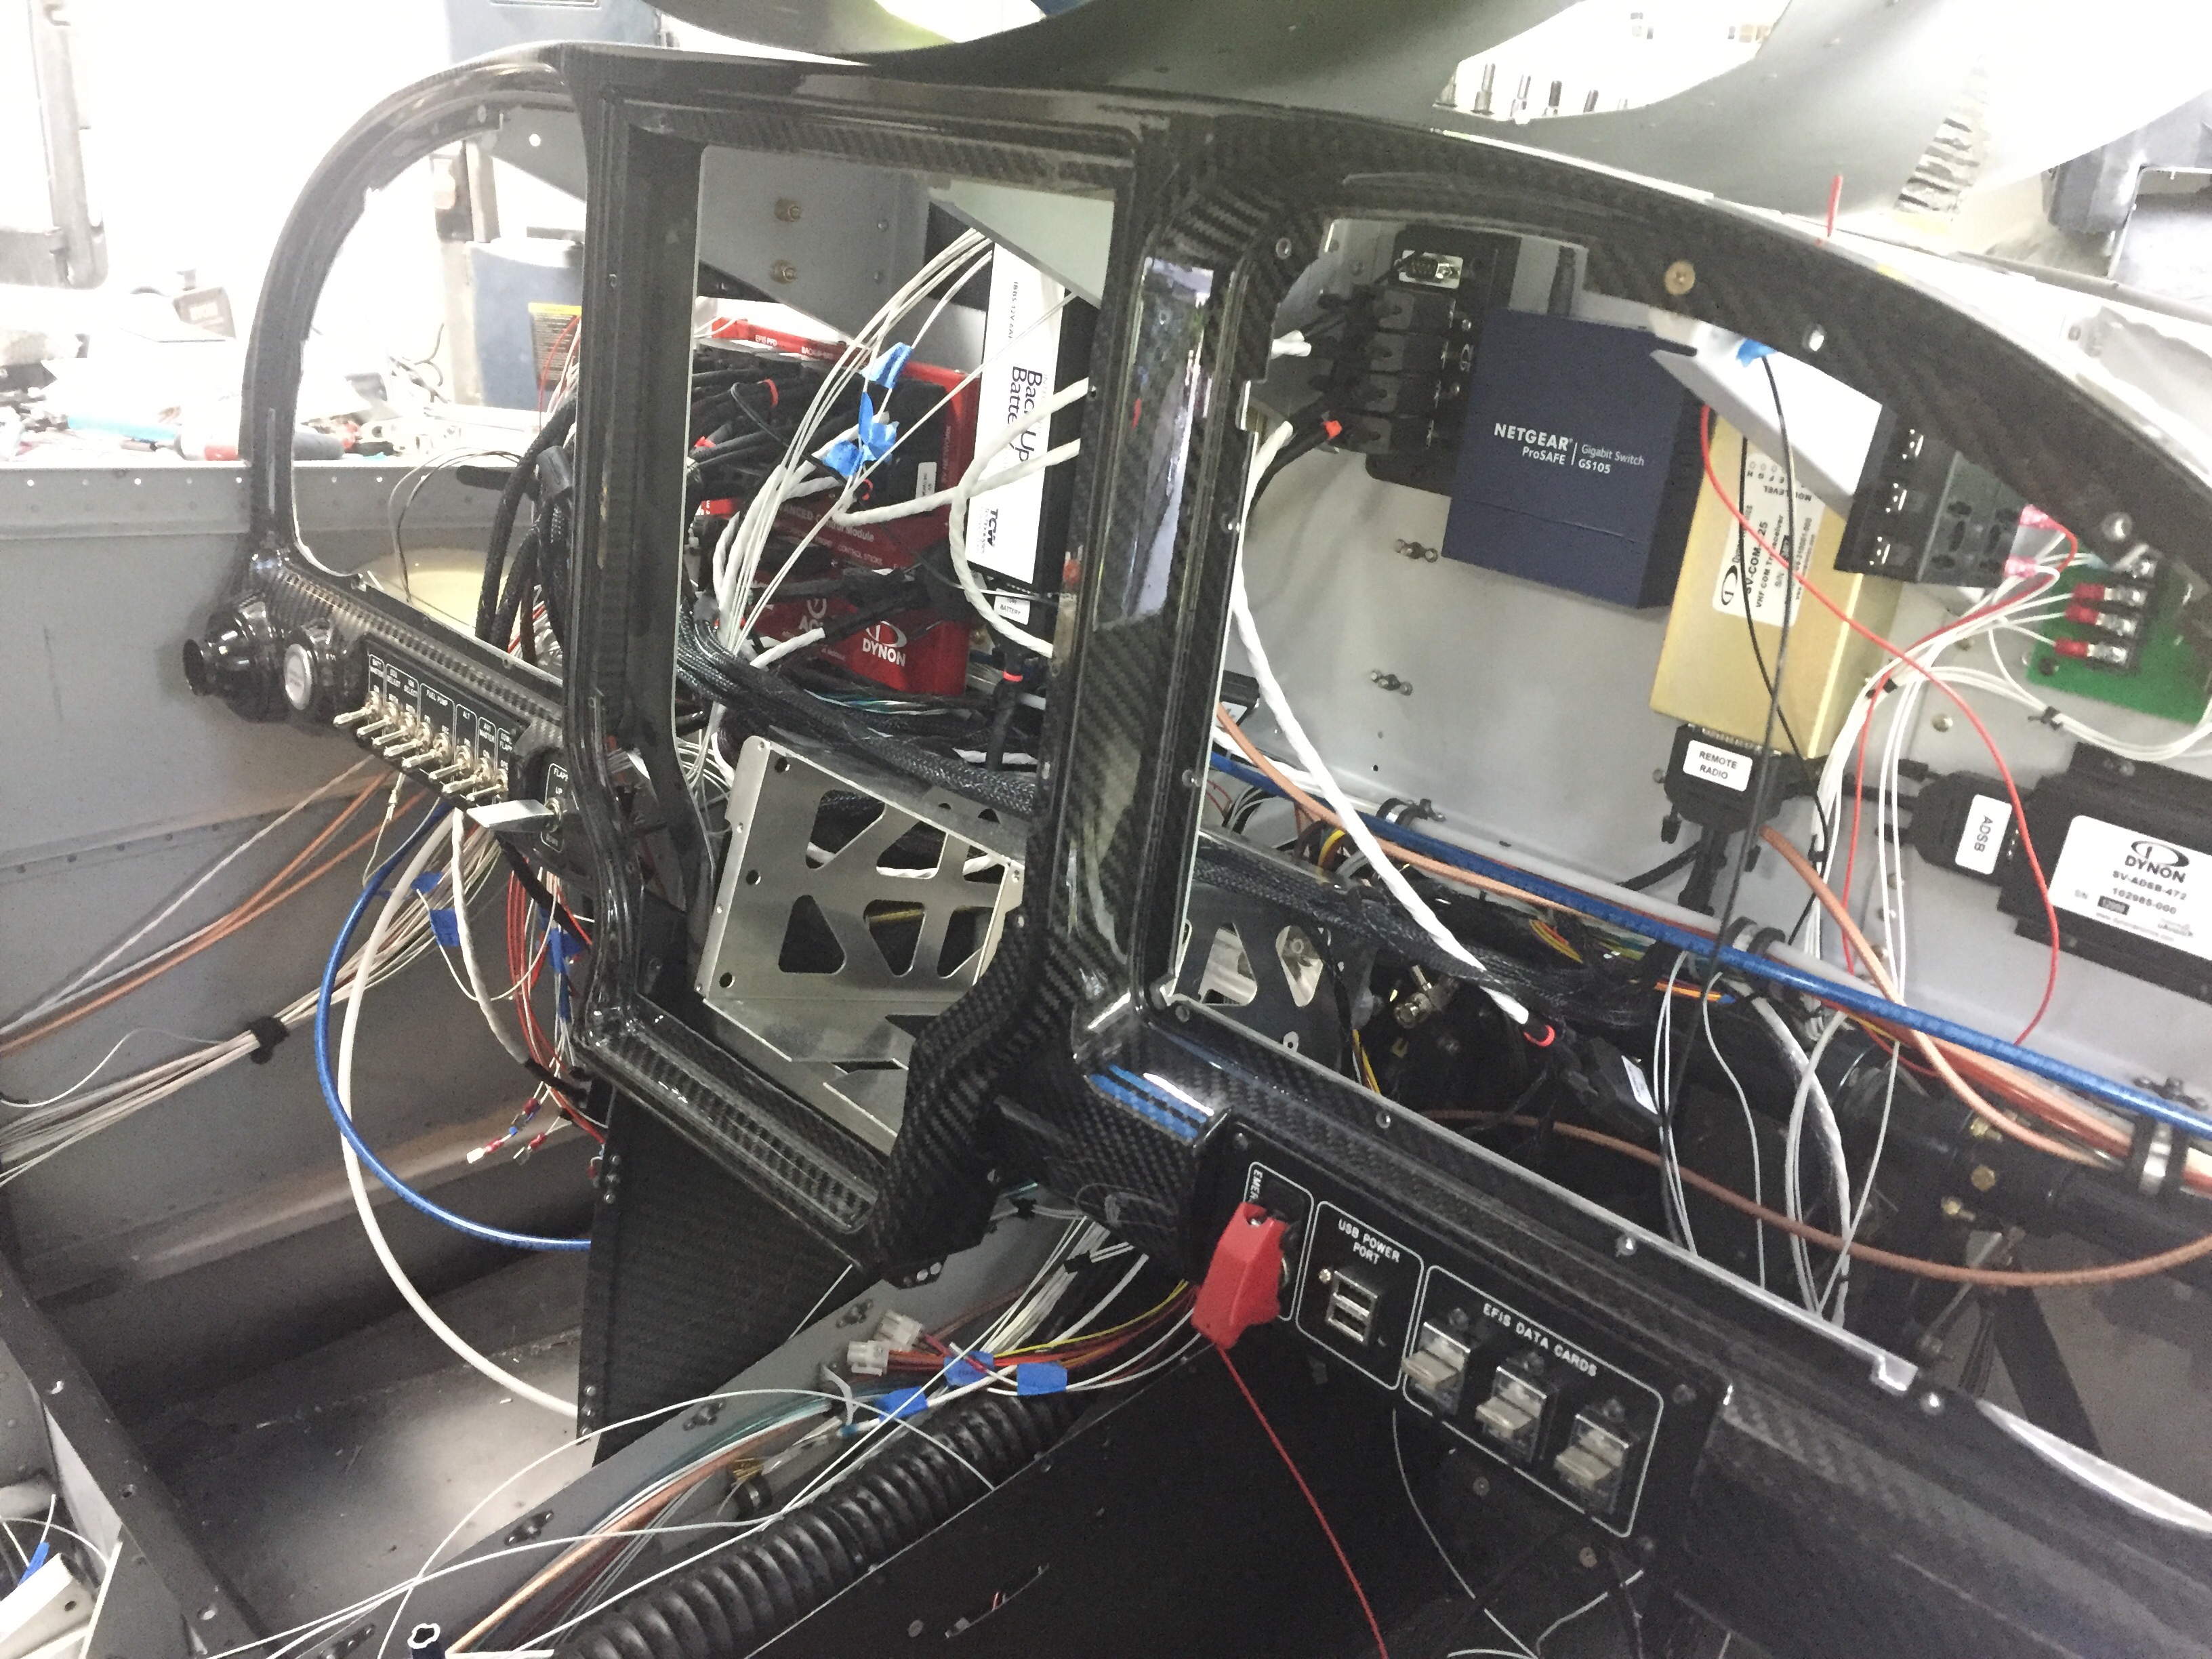
I put the carbon fiber frame and back plate in and got it all screwed together in the right order.  All of the switch panels were hooked up for good and along the way, bundles were tidied up as much as possible.

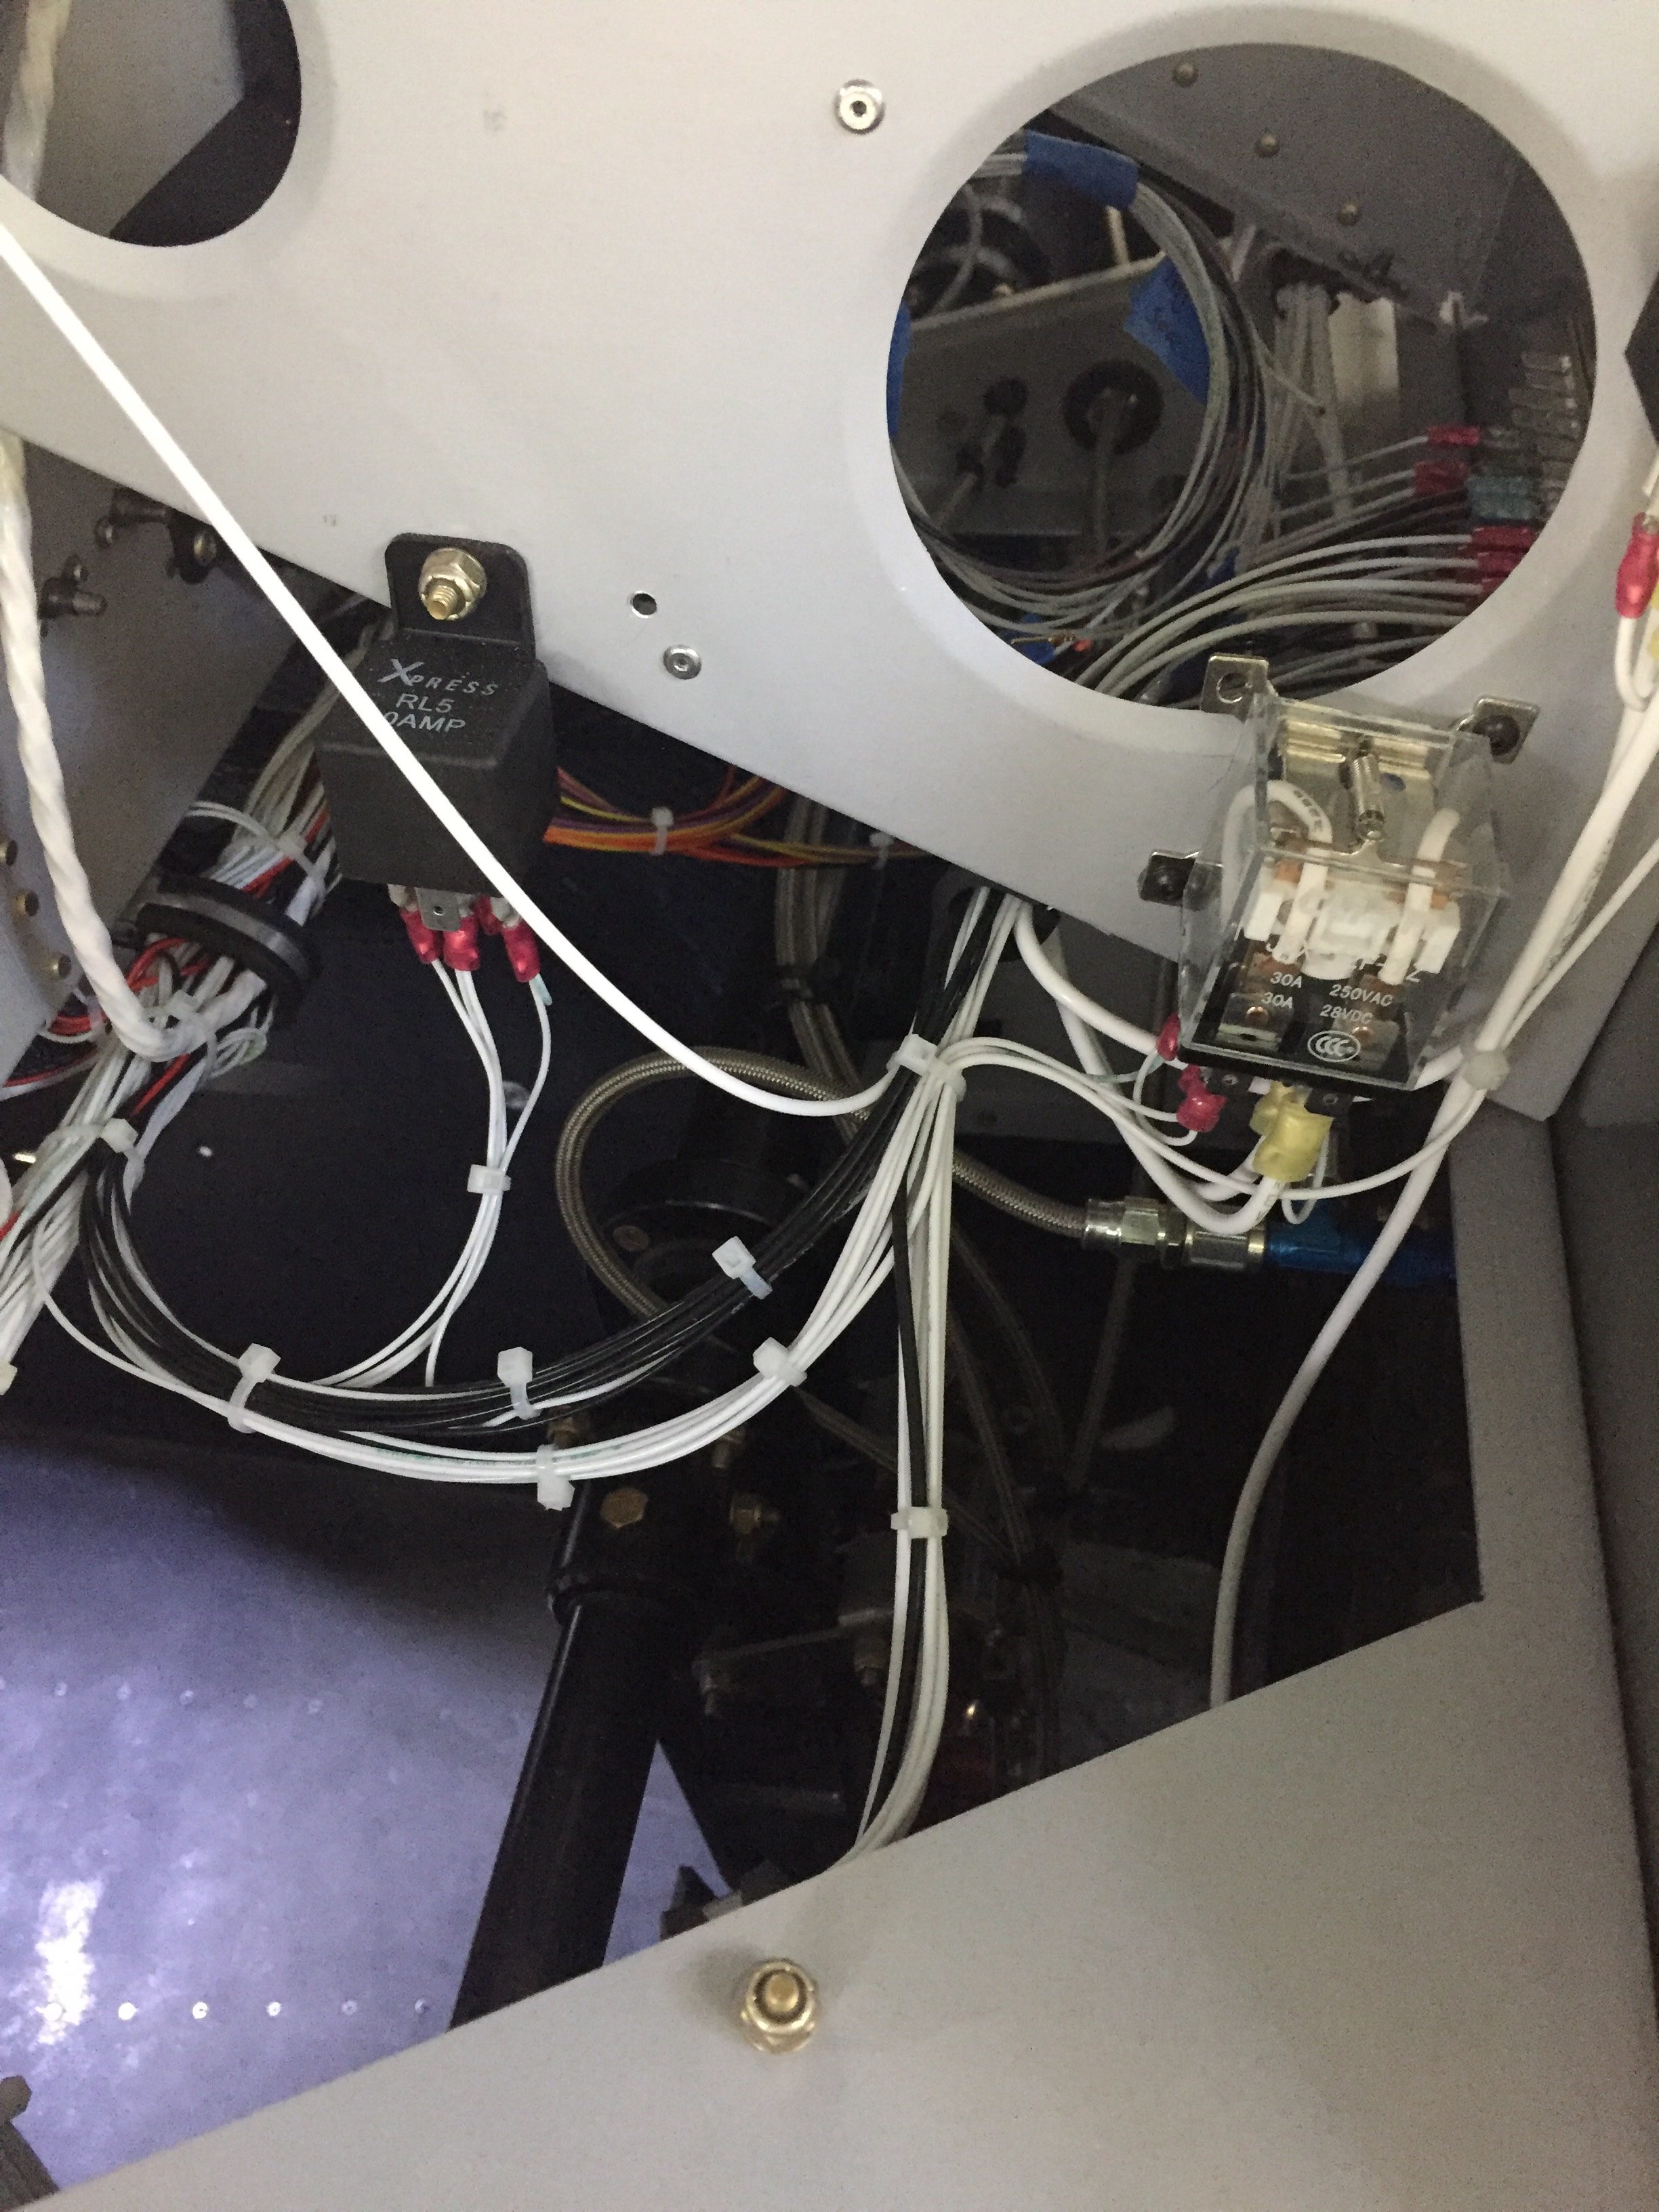
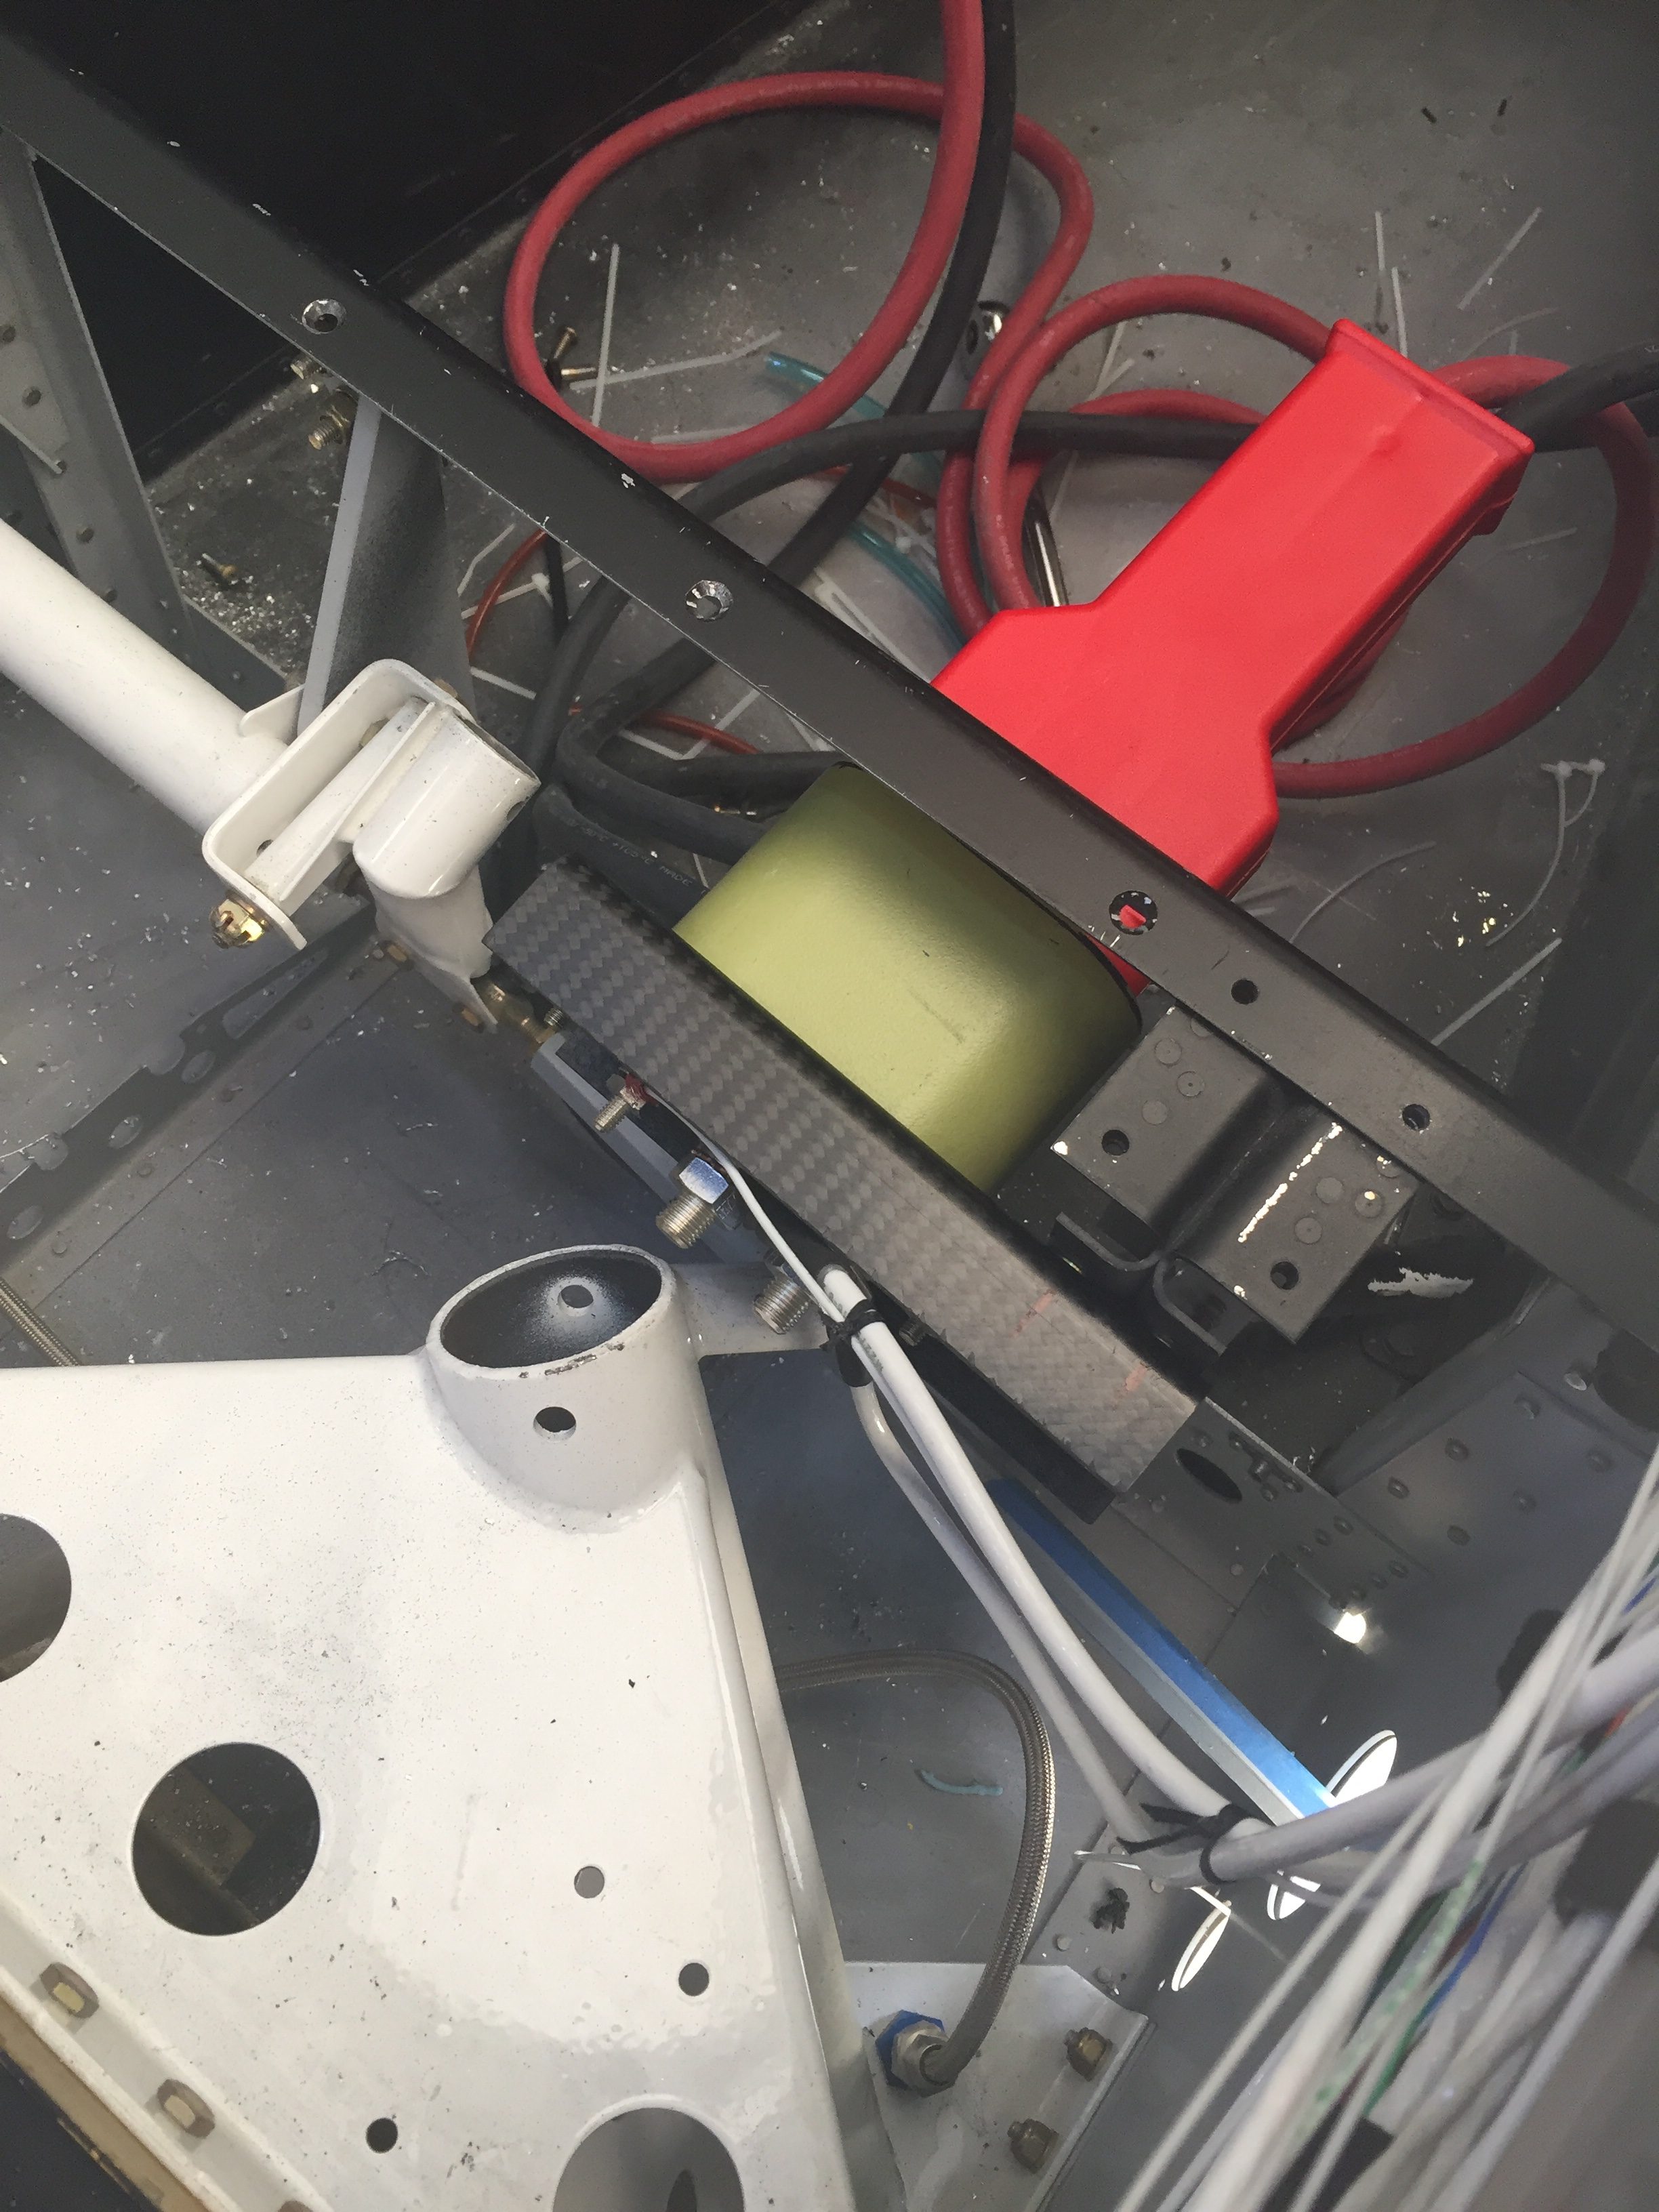
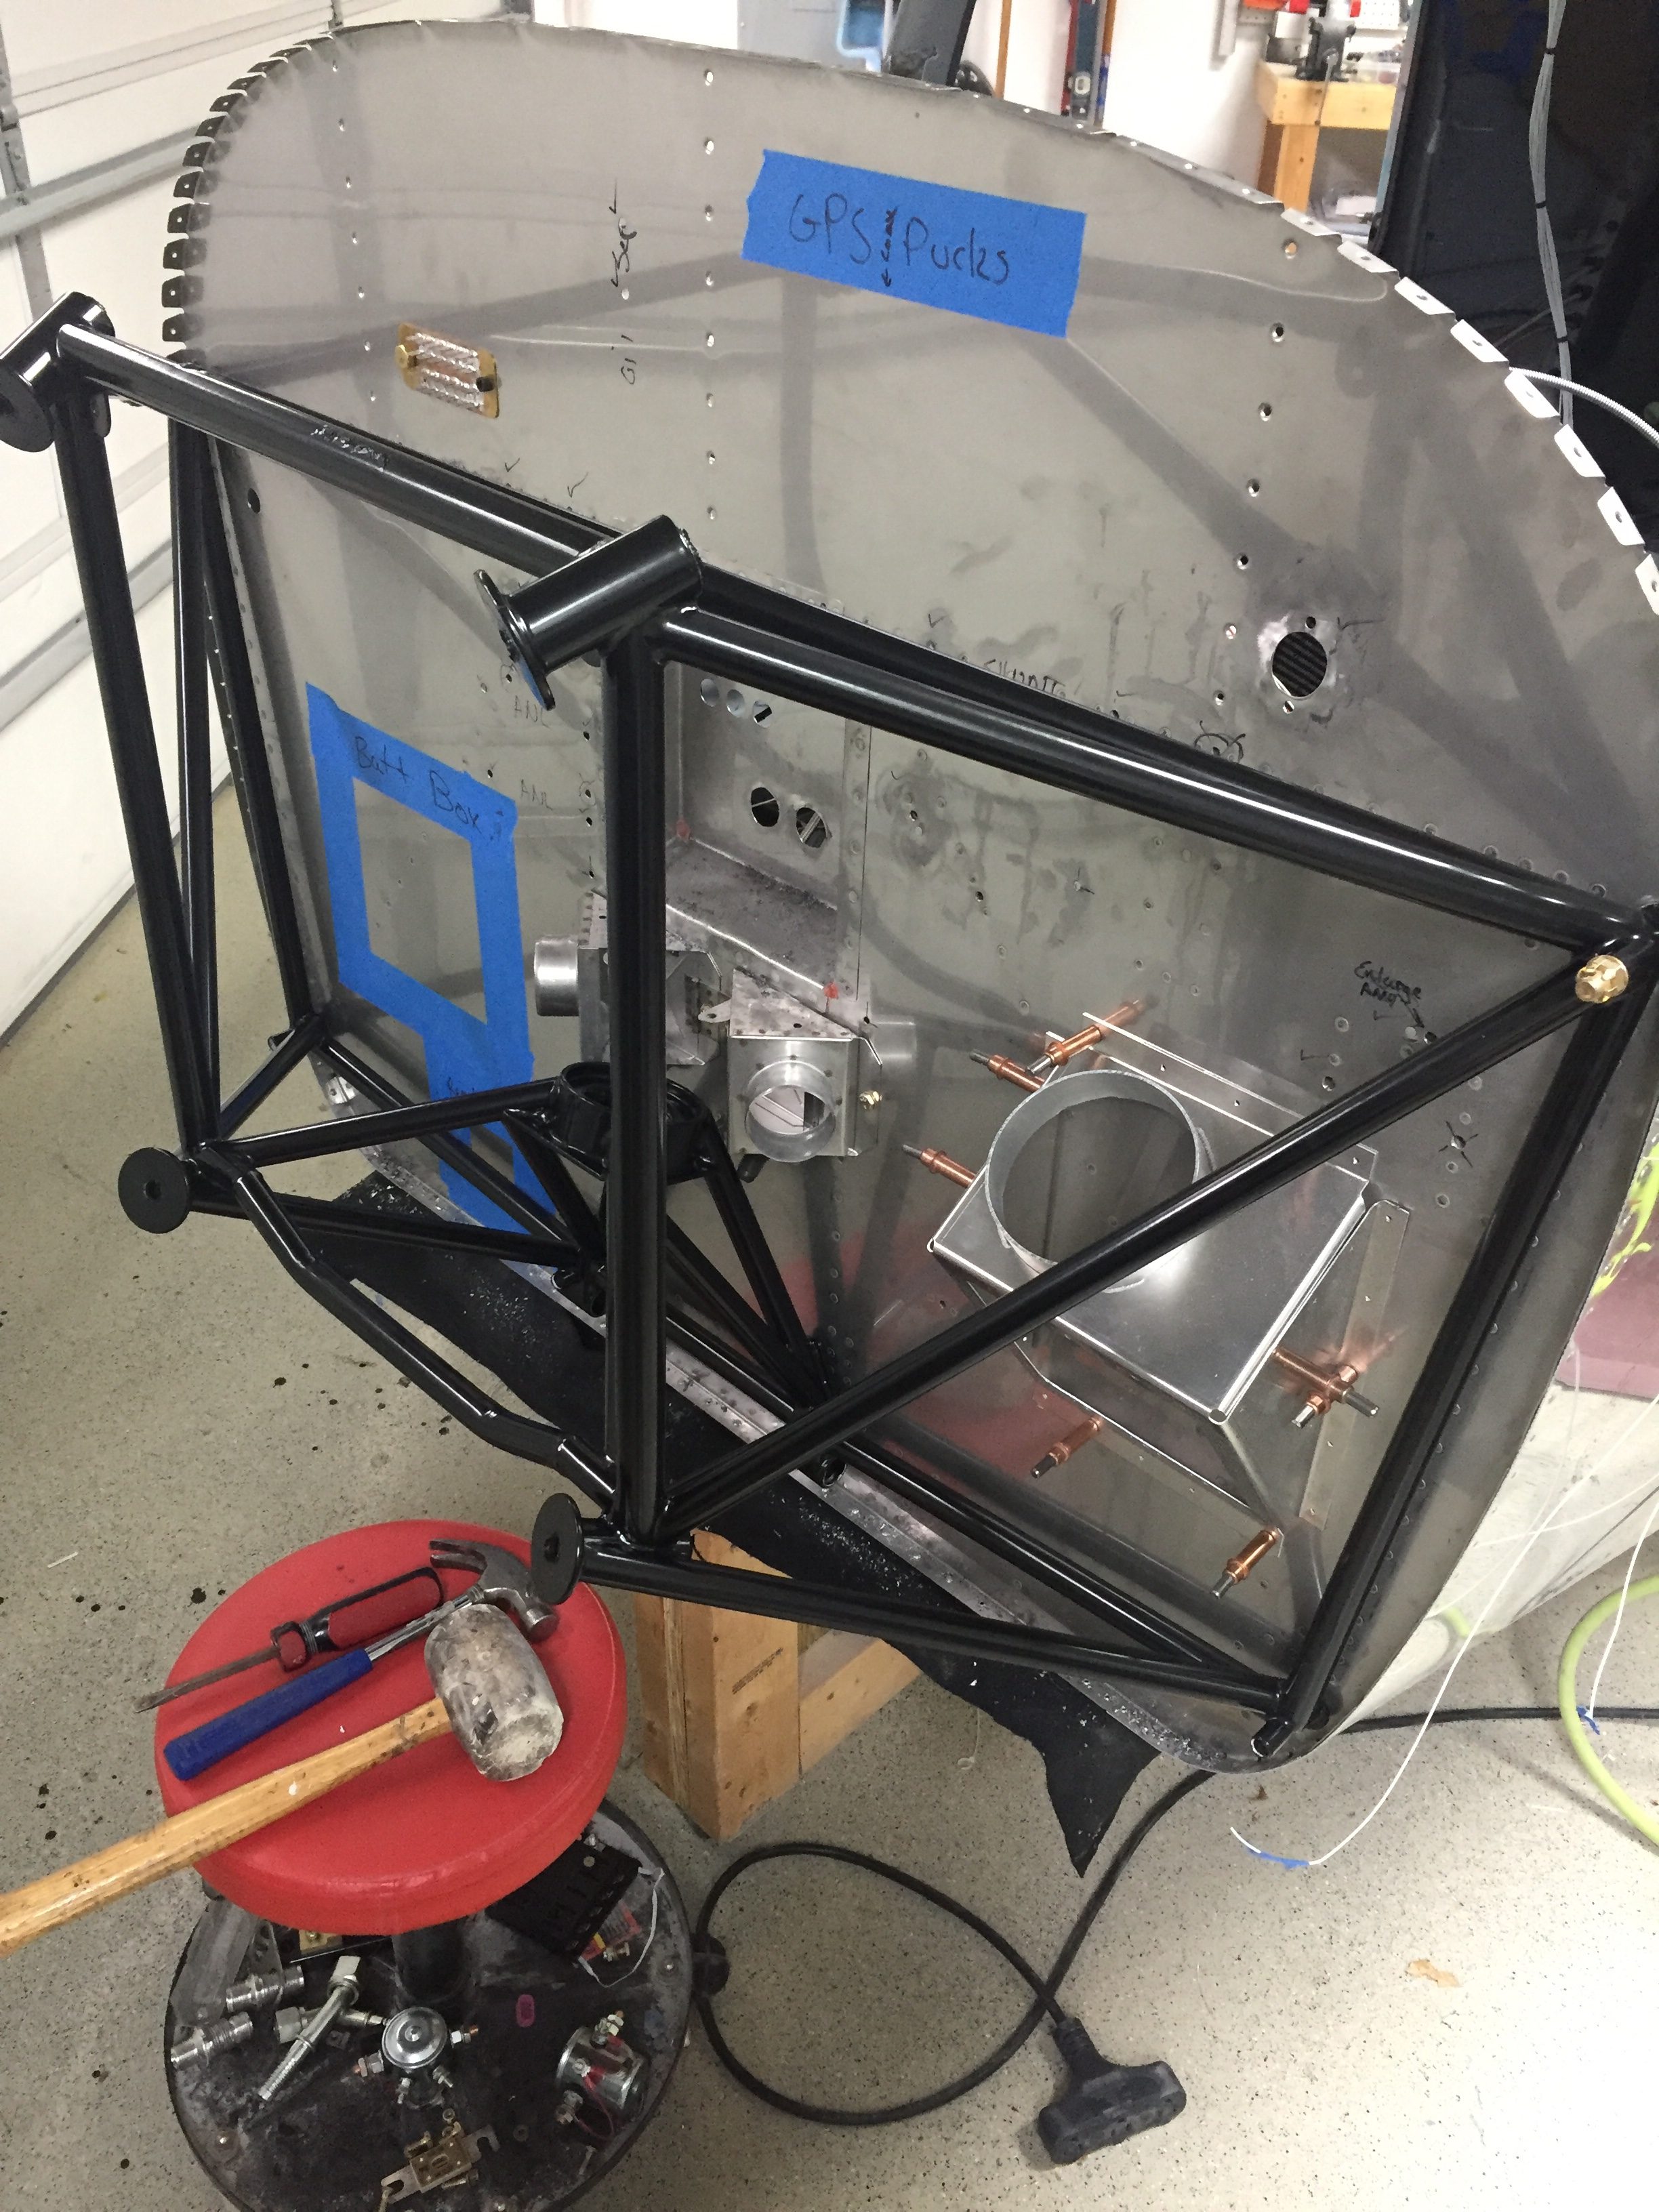
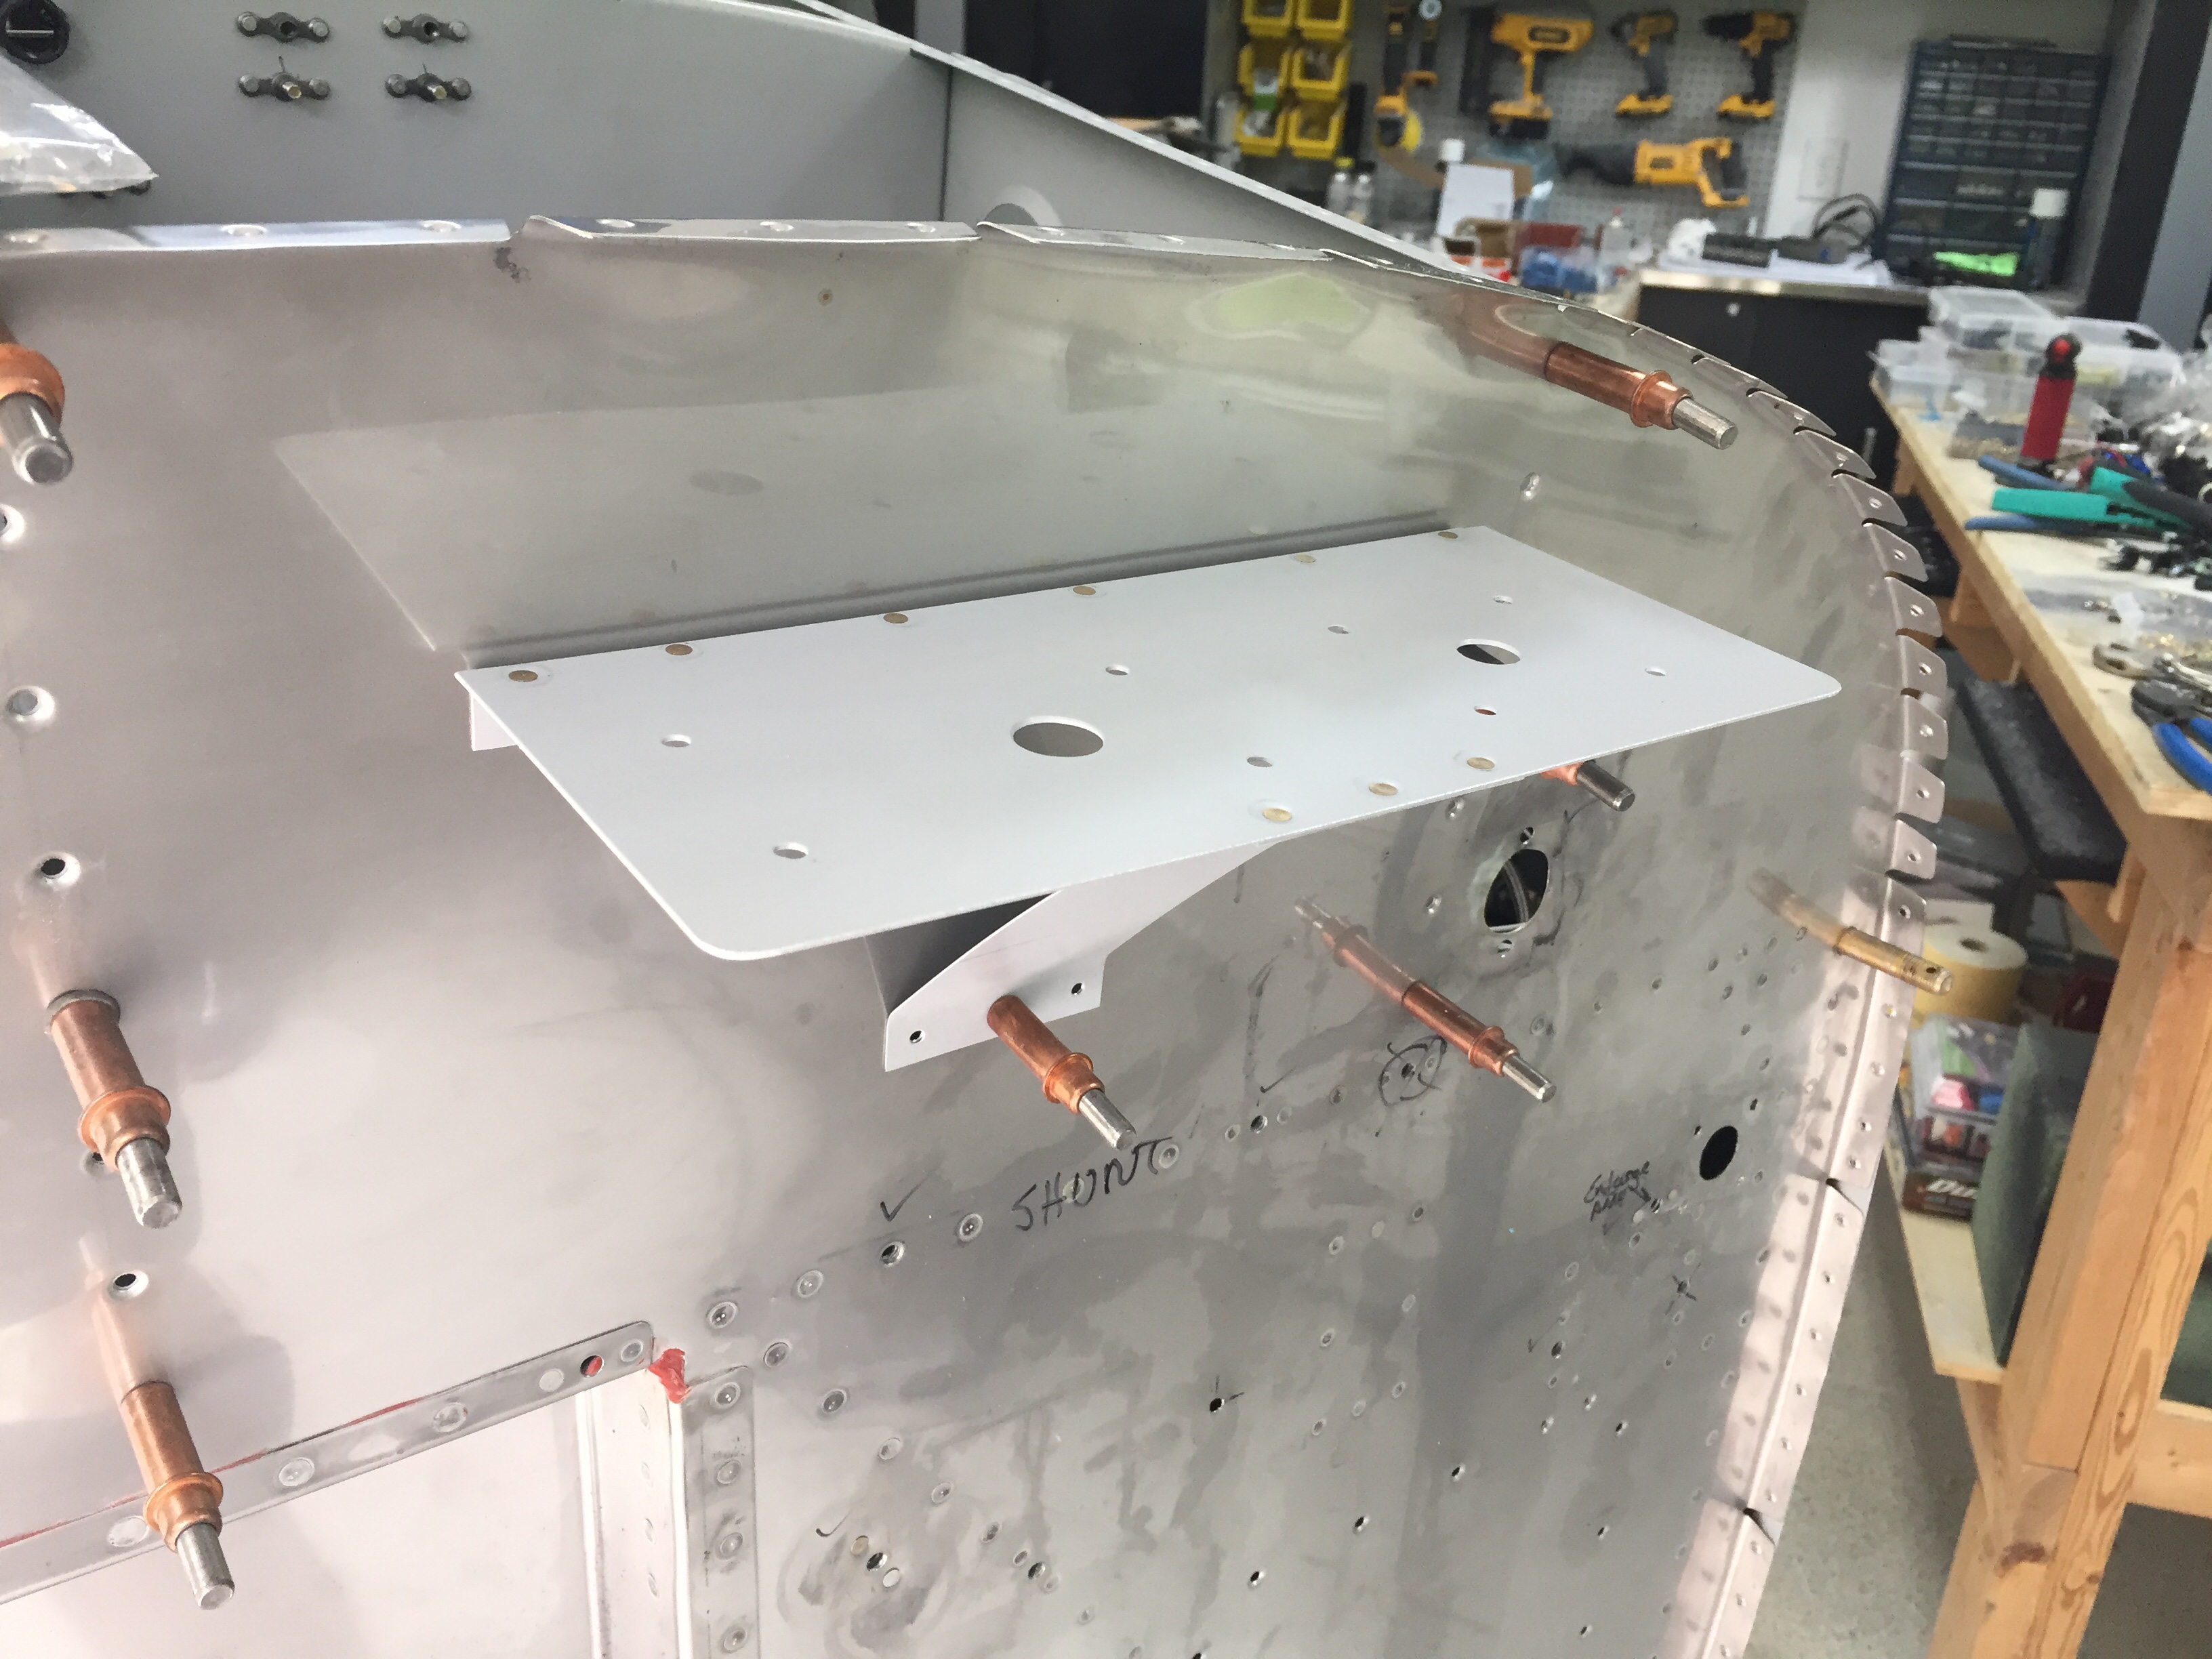
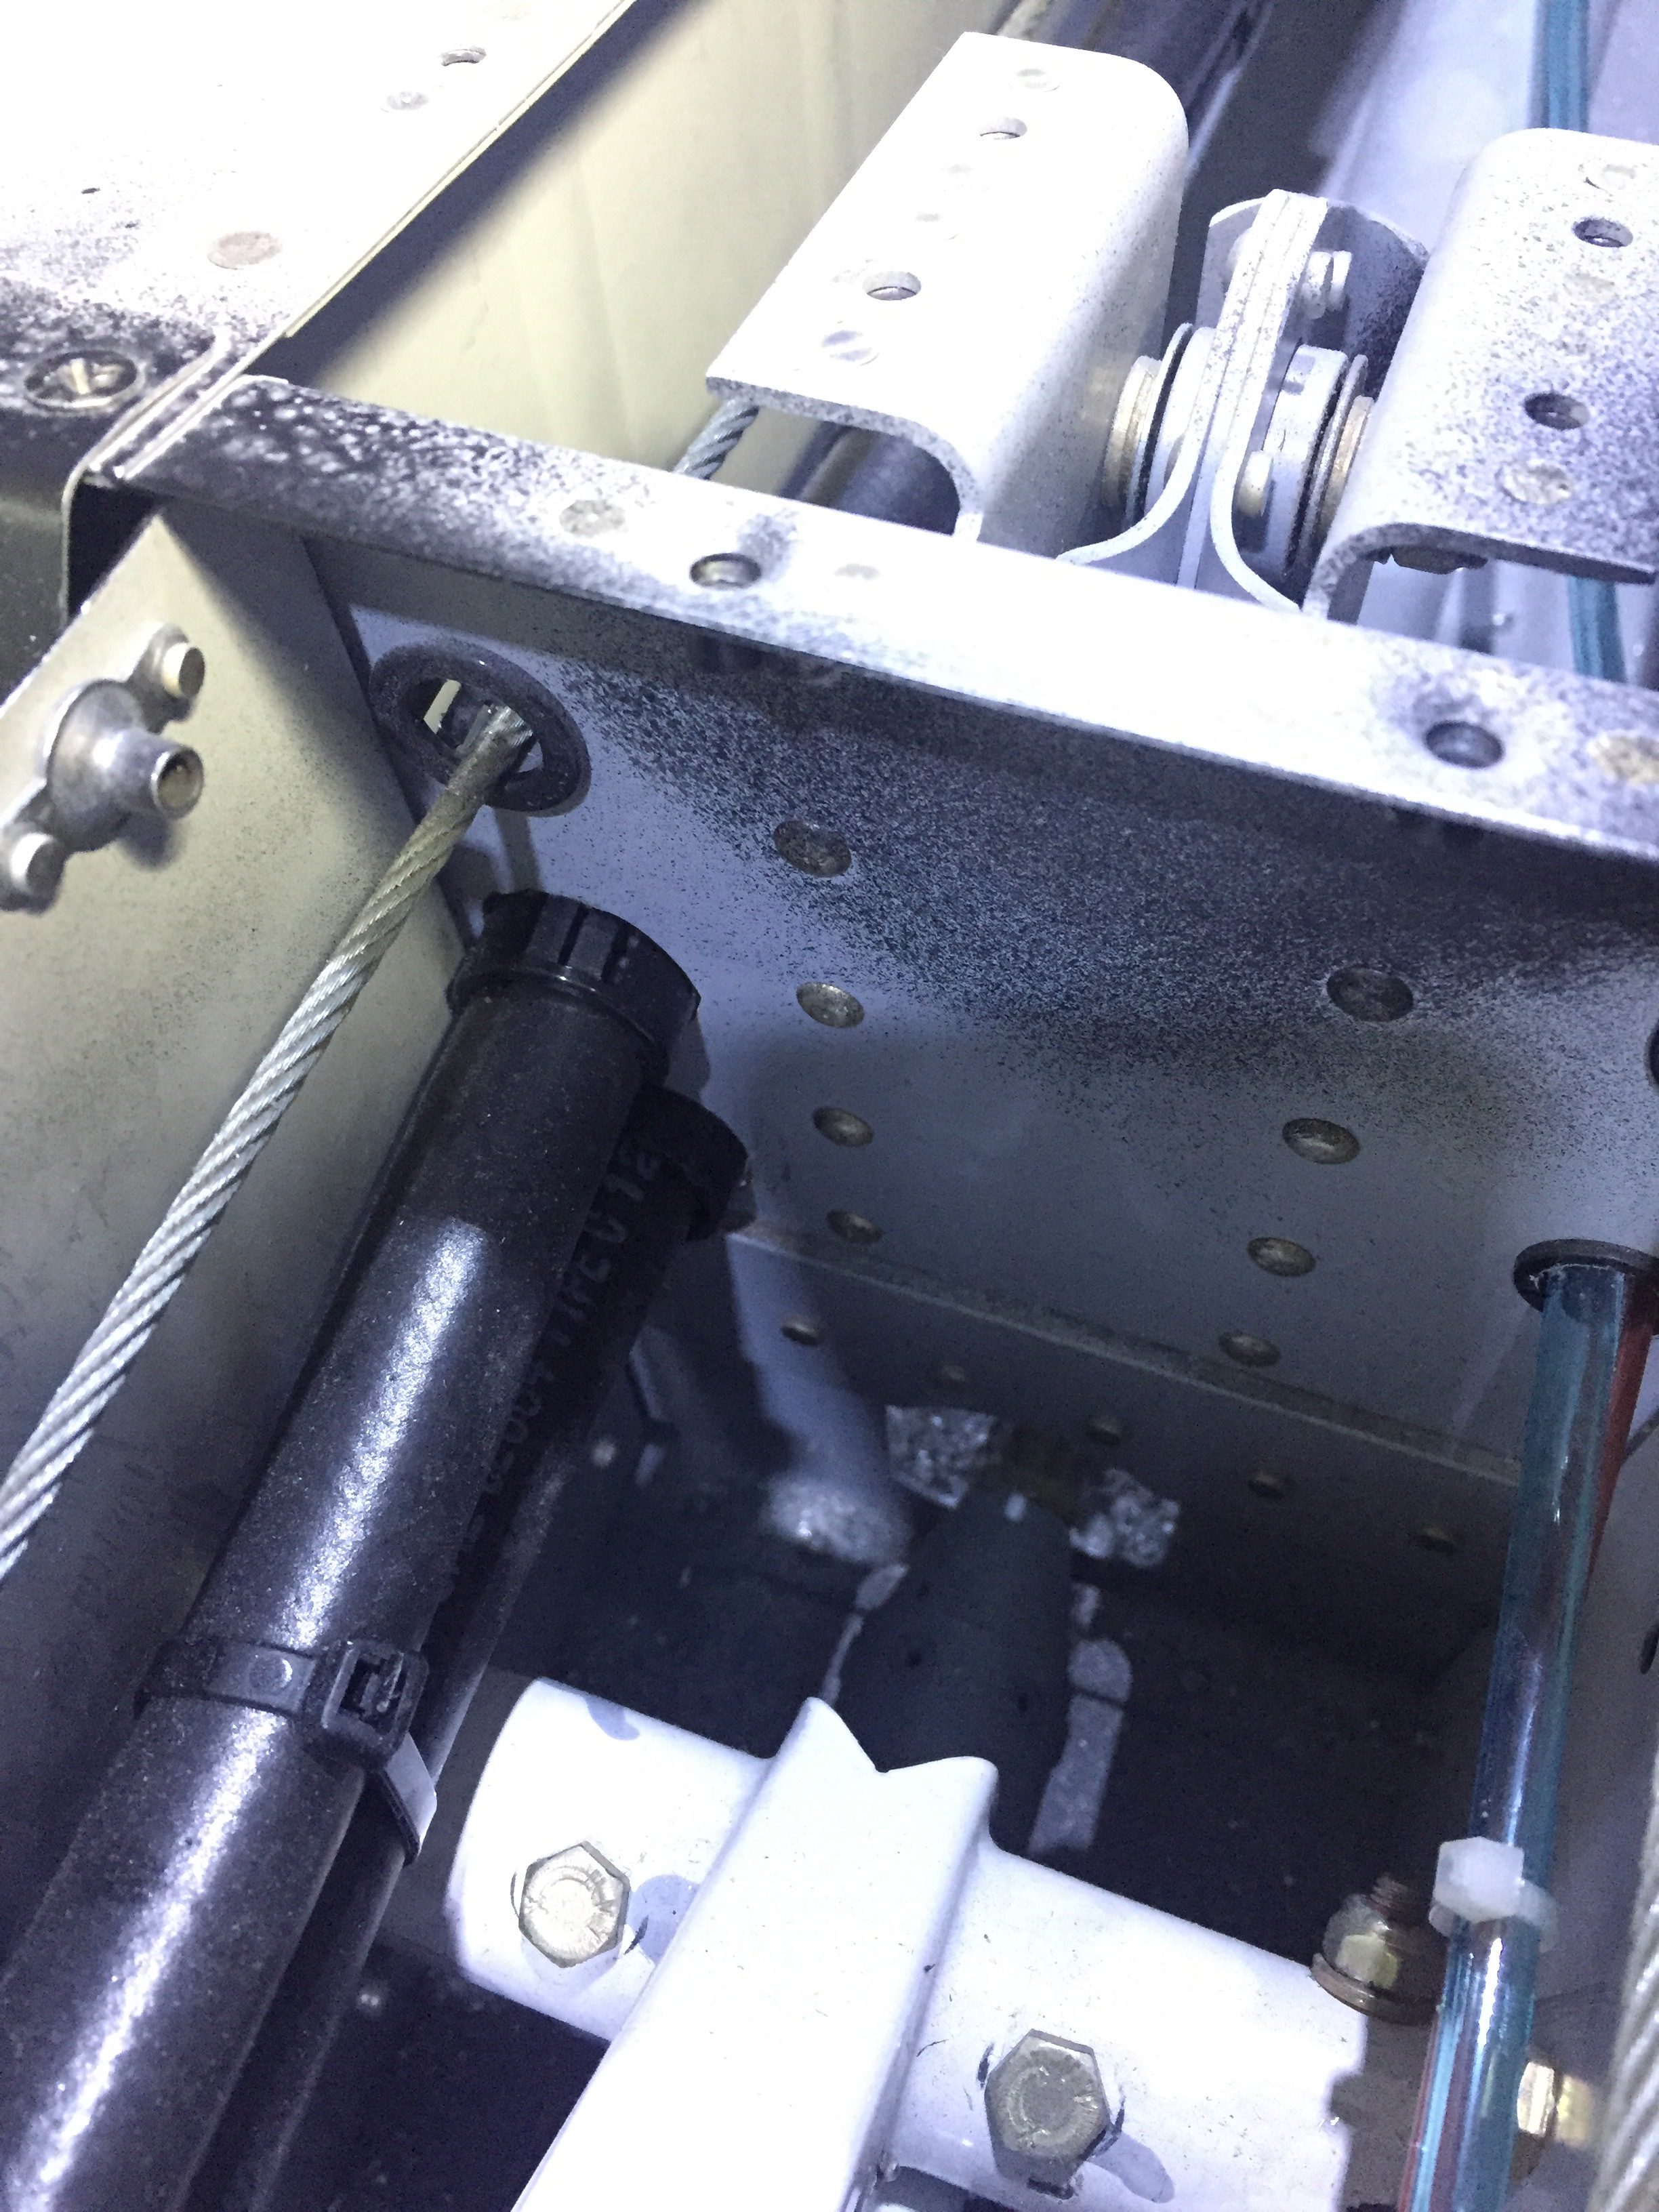
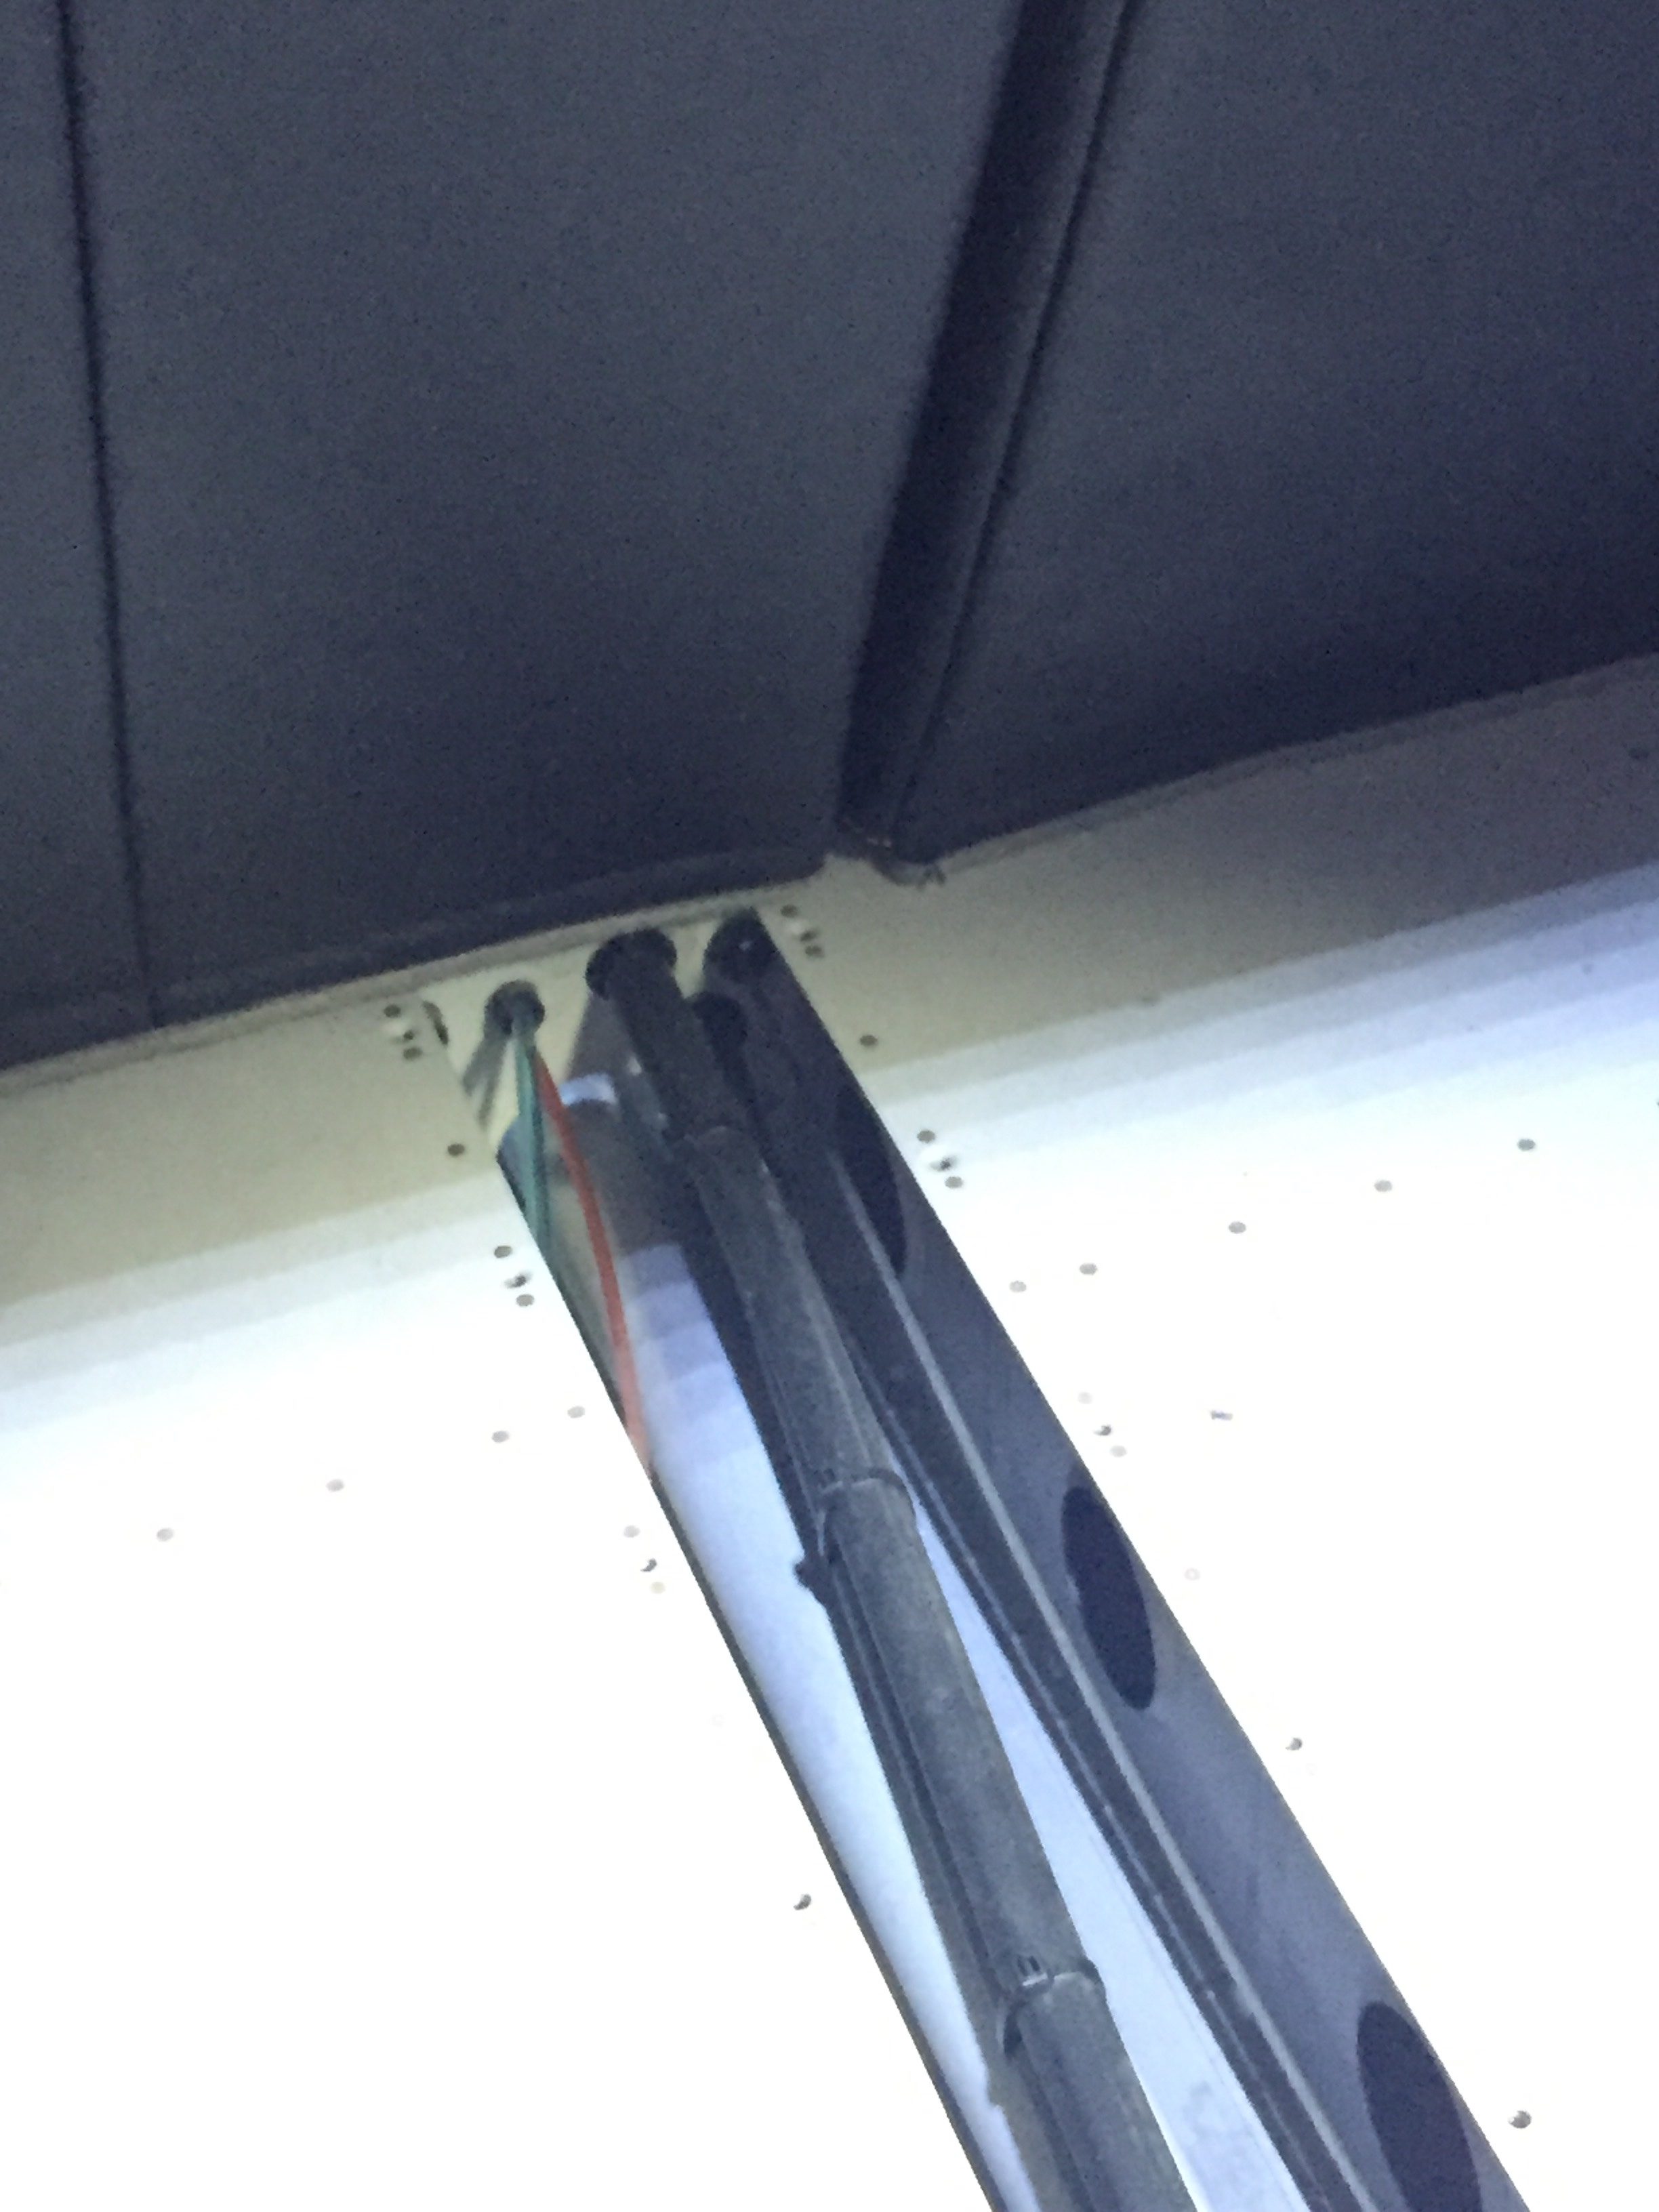
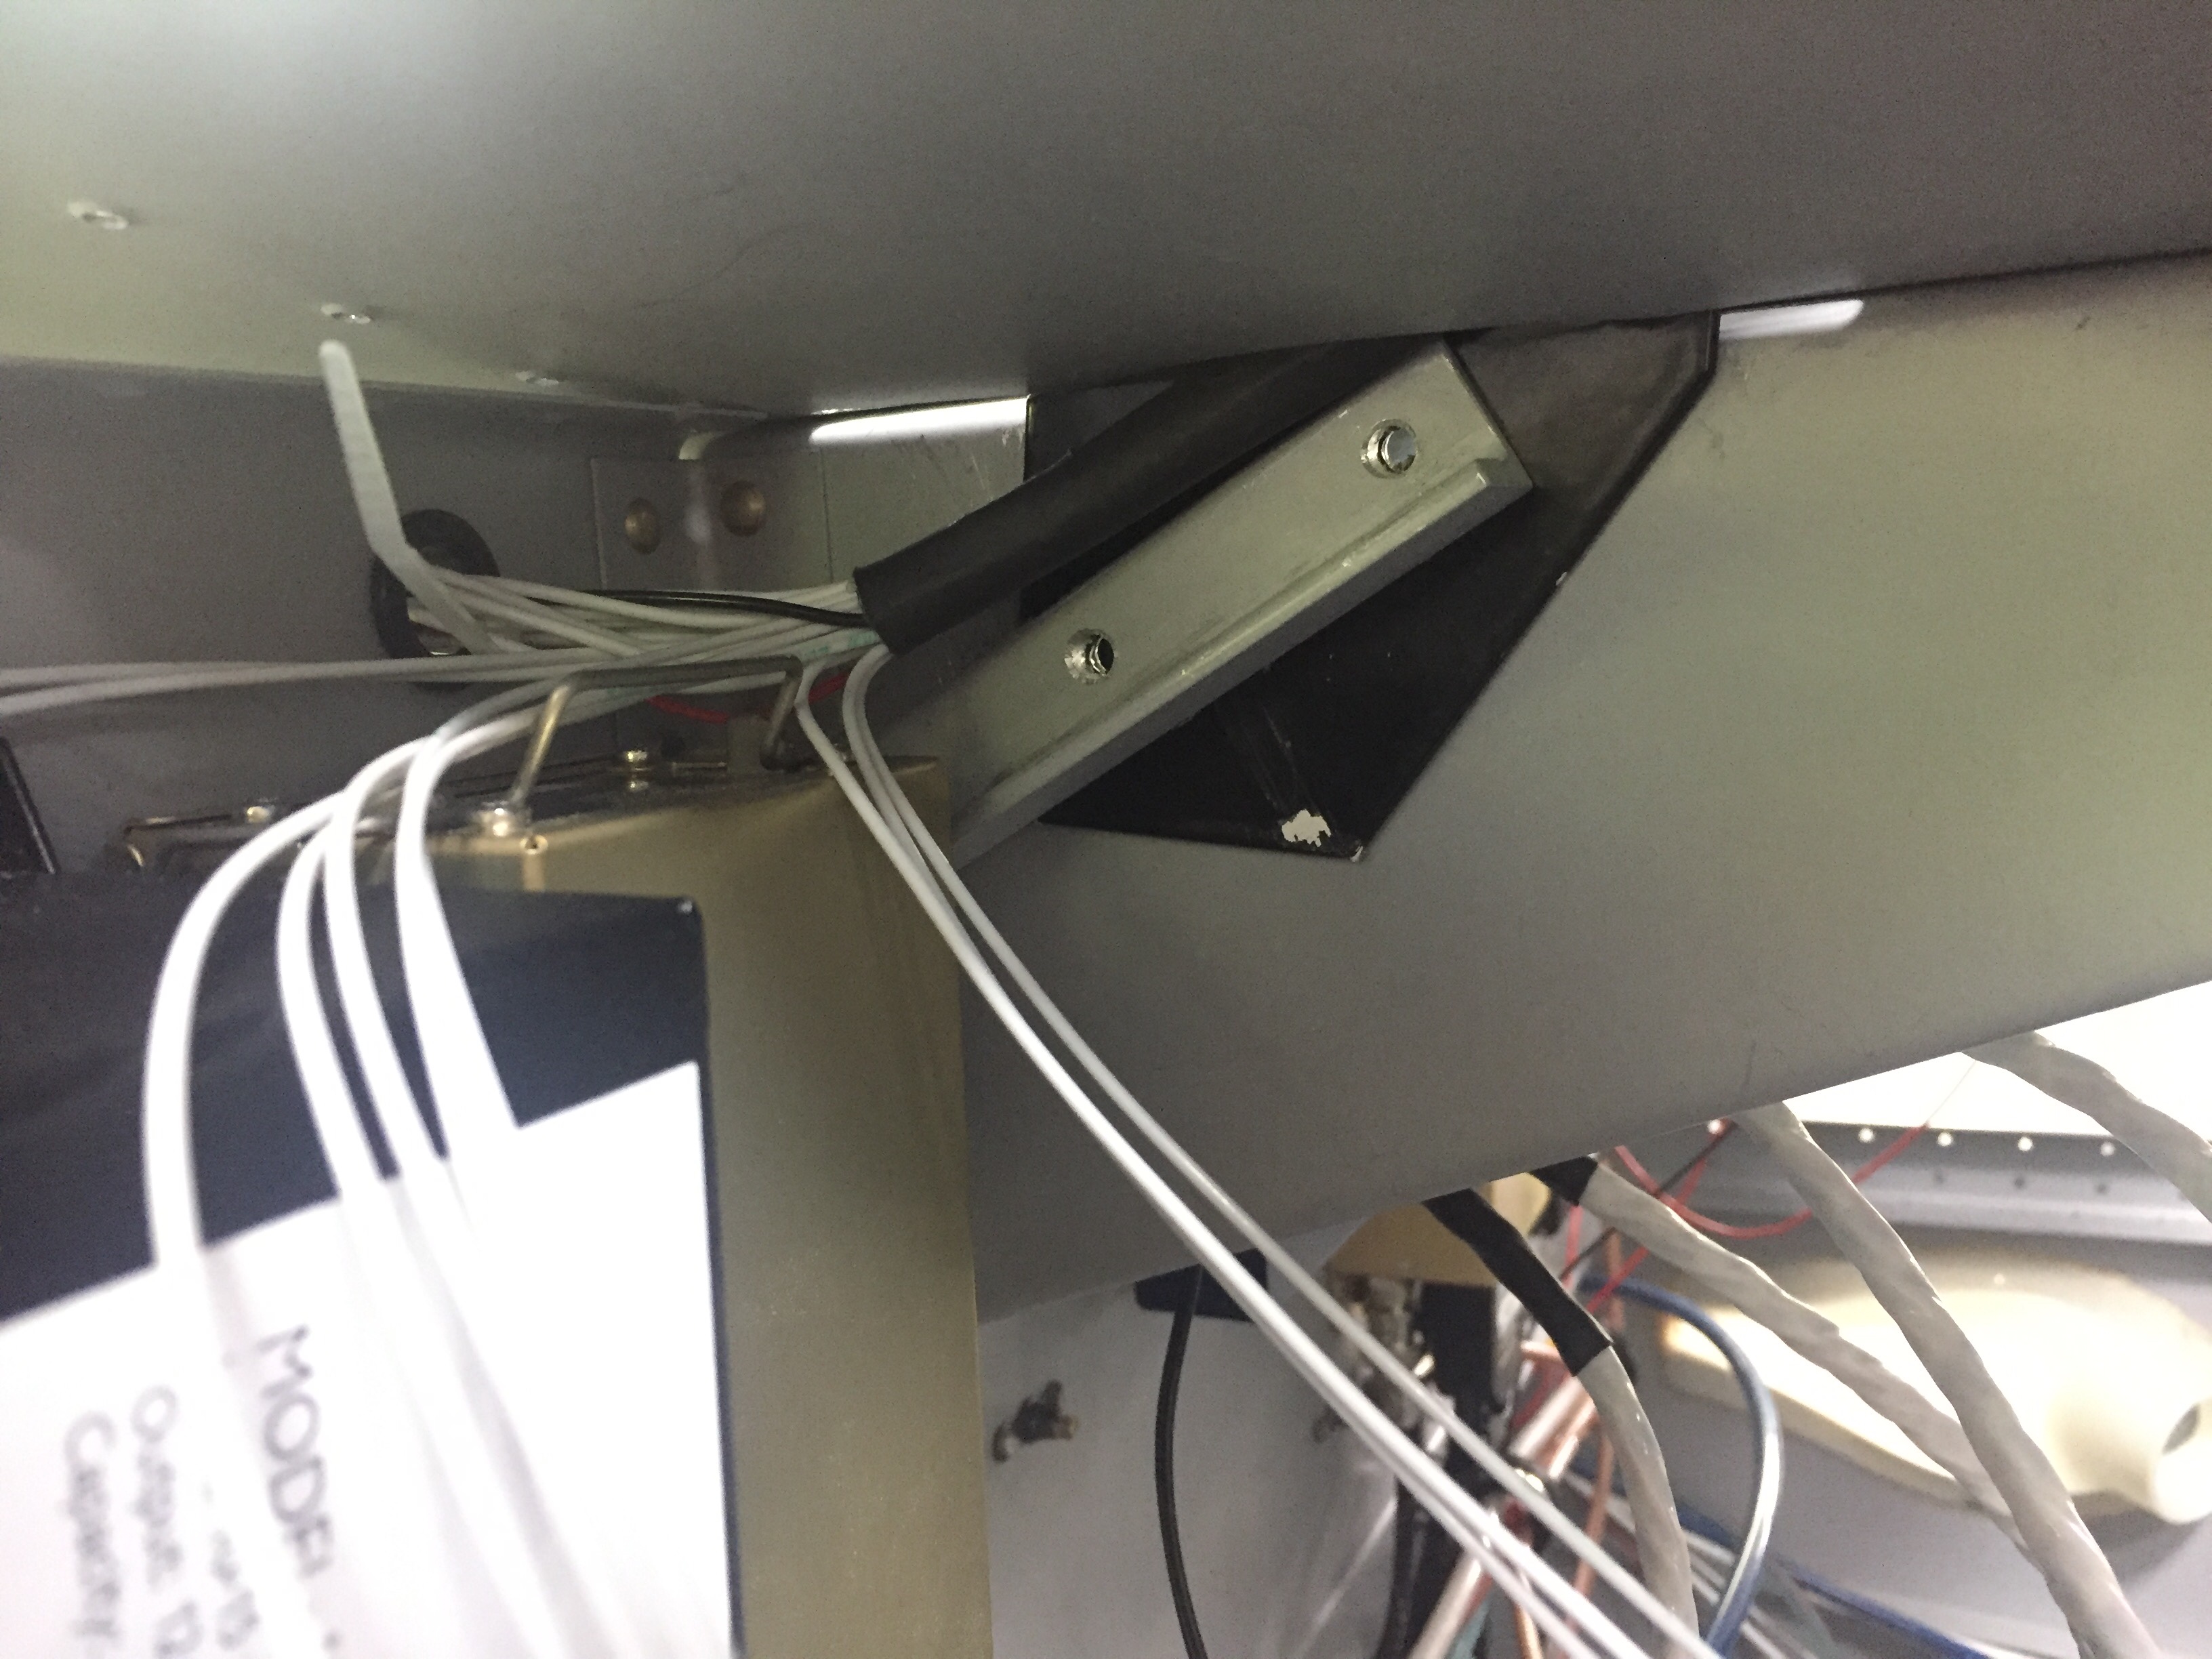
The last major task for wiring was the overhead console and lighting wire run.  The front structure (now in) and skin has to be installed before I can run the wires down the support bar (powder coated black with the engine mount).  I wanted to keep as much access open as I could to finish up the avionics so I worked out a way to bend the skin upwards by riveting the center rivet line only.  Laura came out to work her magic behind the rivet gun and assisted in getting the wires through the bar and the bar installed.  It was a bit tricky feeding everything through the skin but worked out well in the end.  I did elongate the slot in the skin since my overhead switch panel prevents the bar from going in at the bottom first.

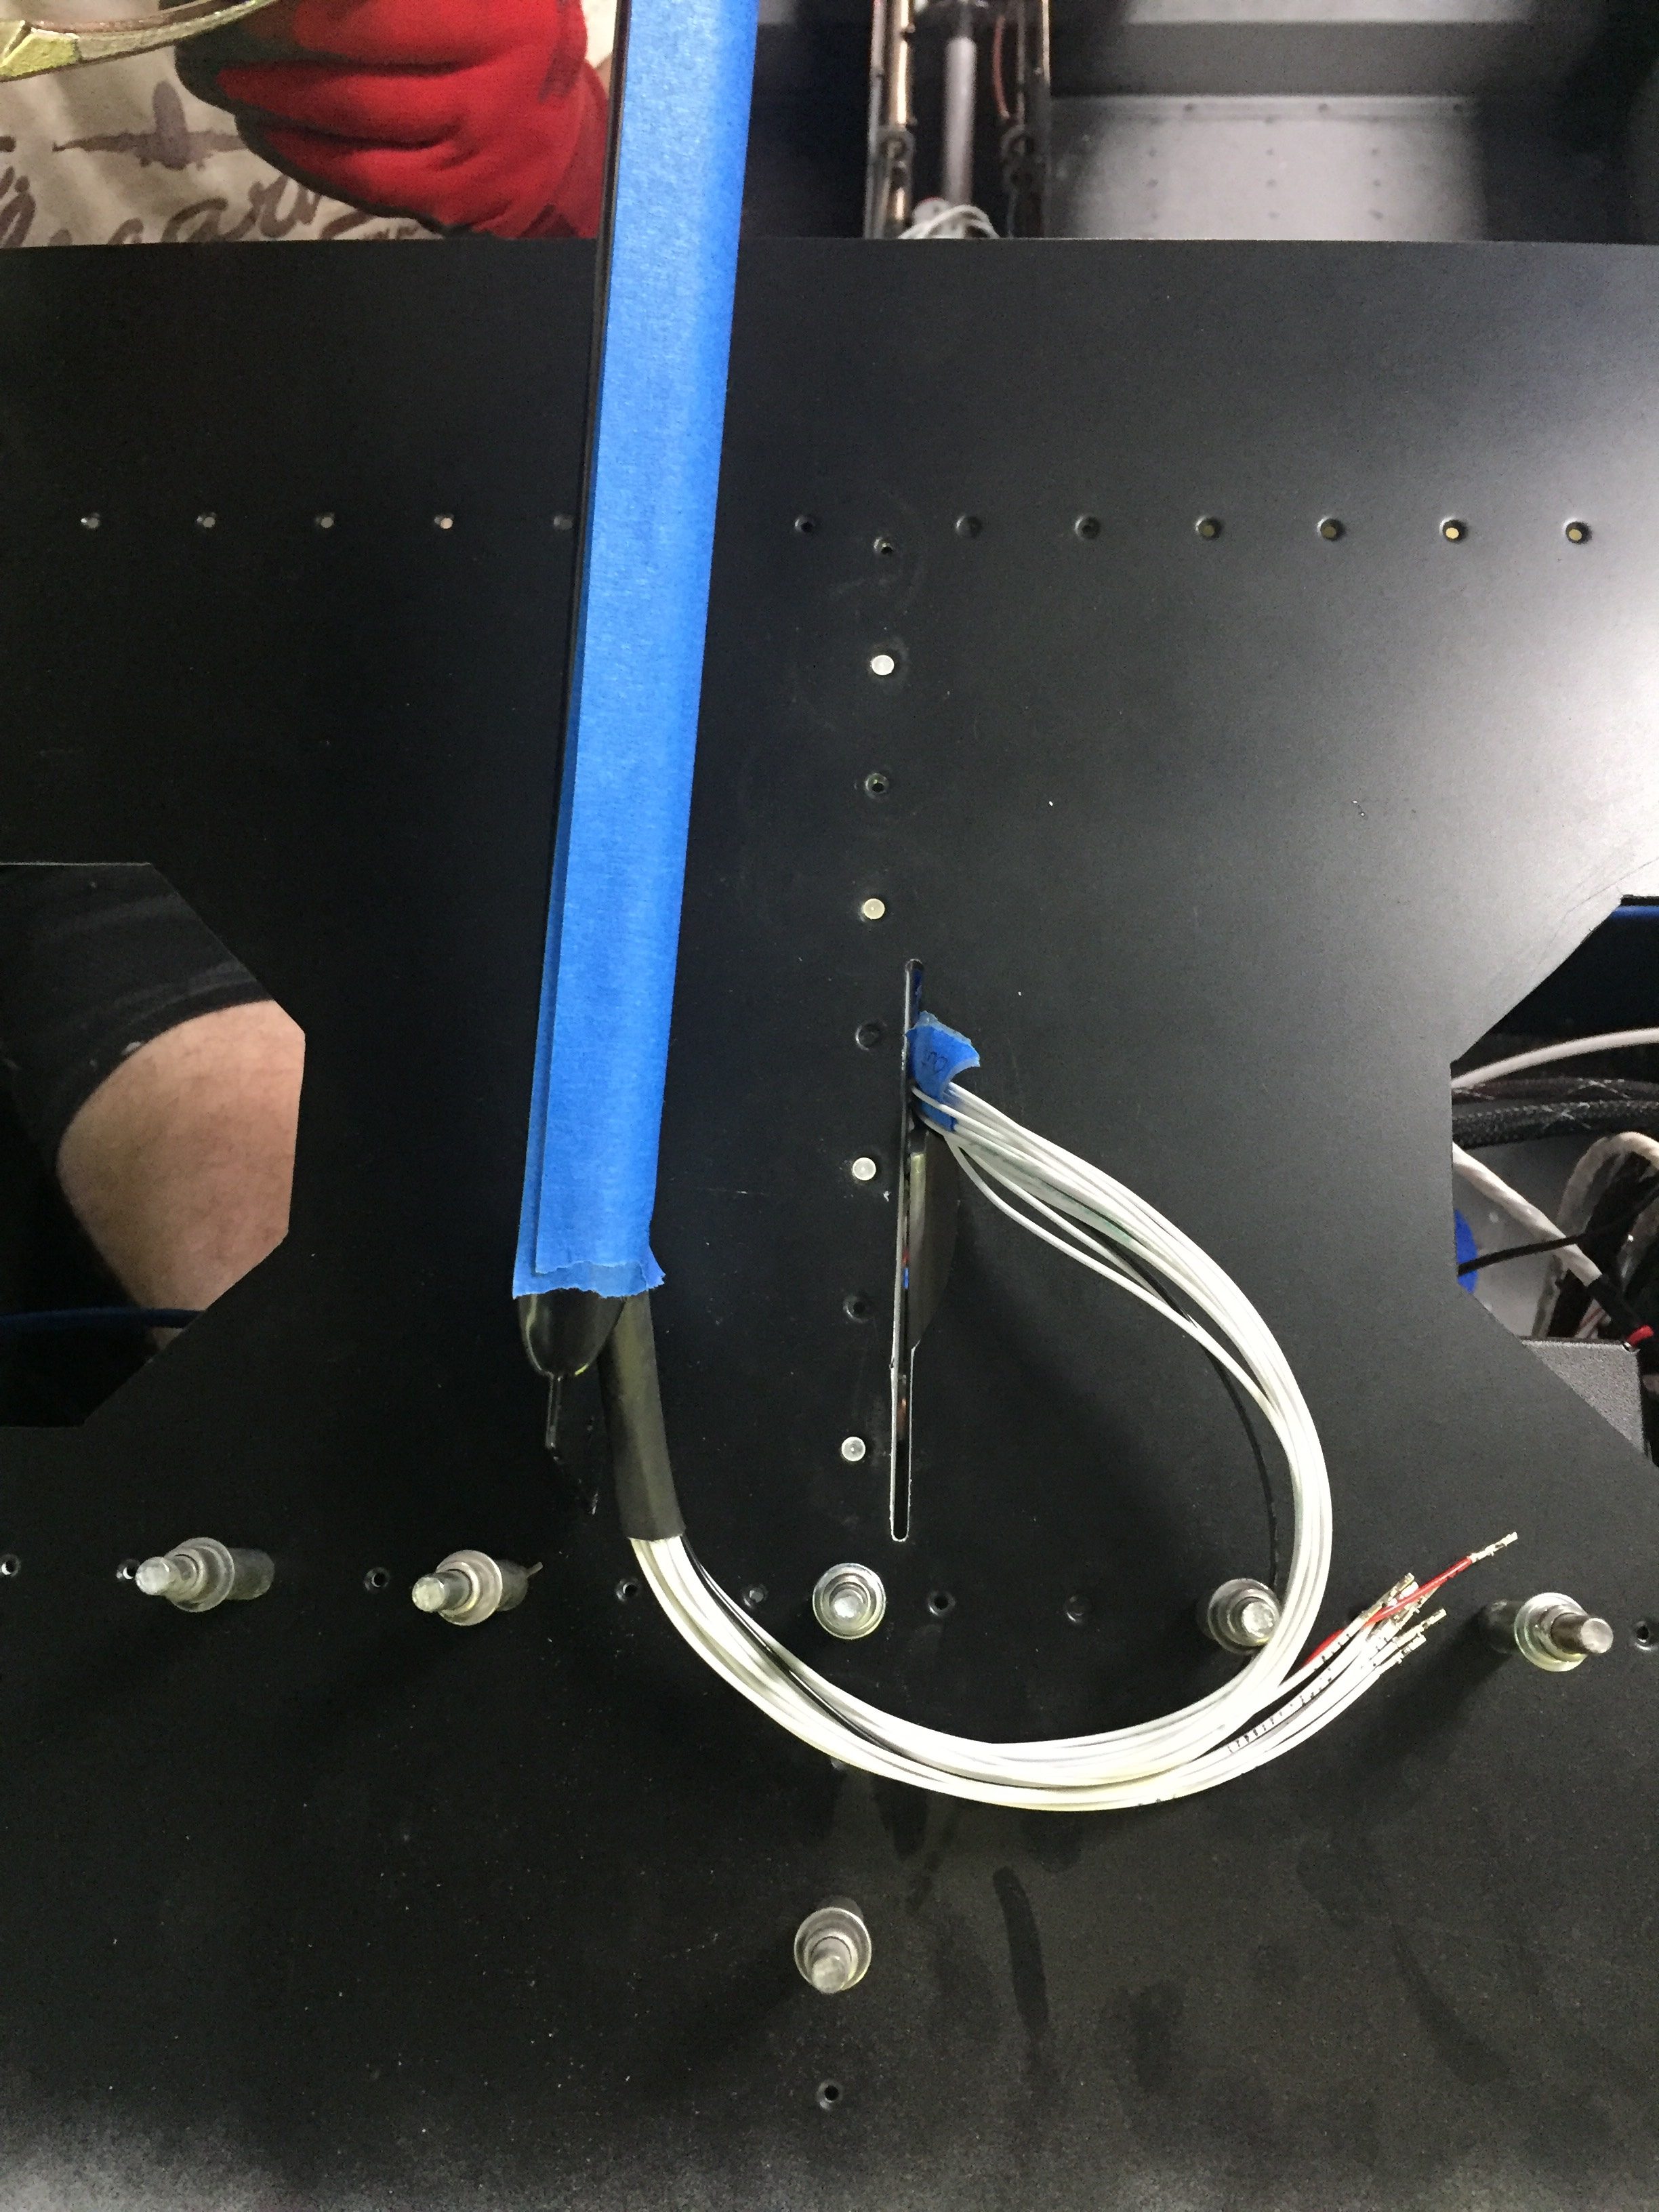
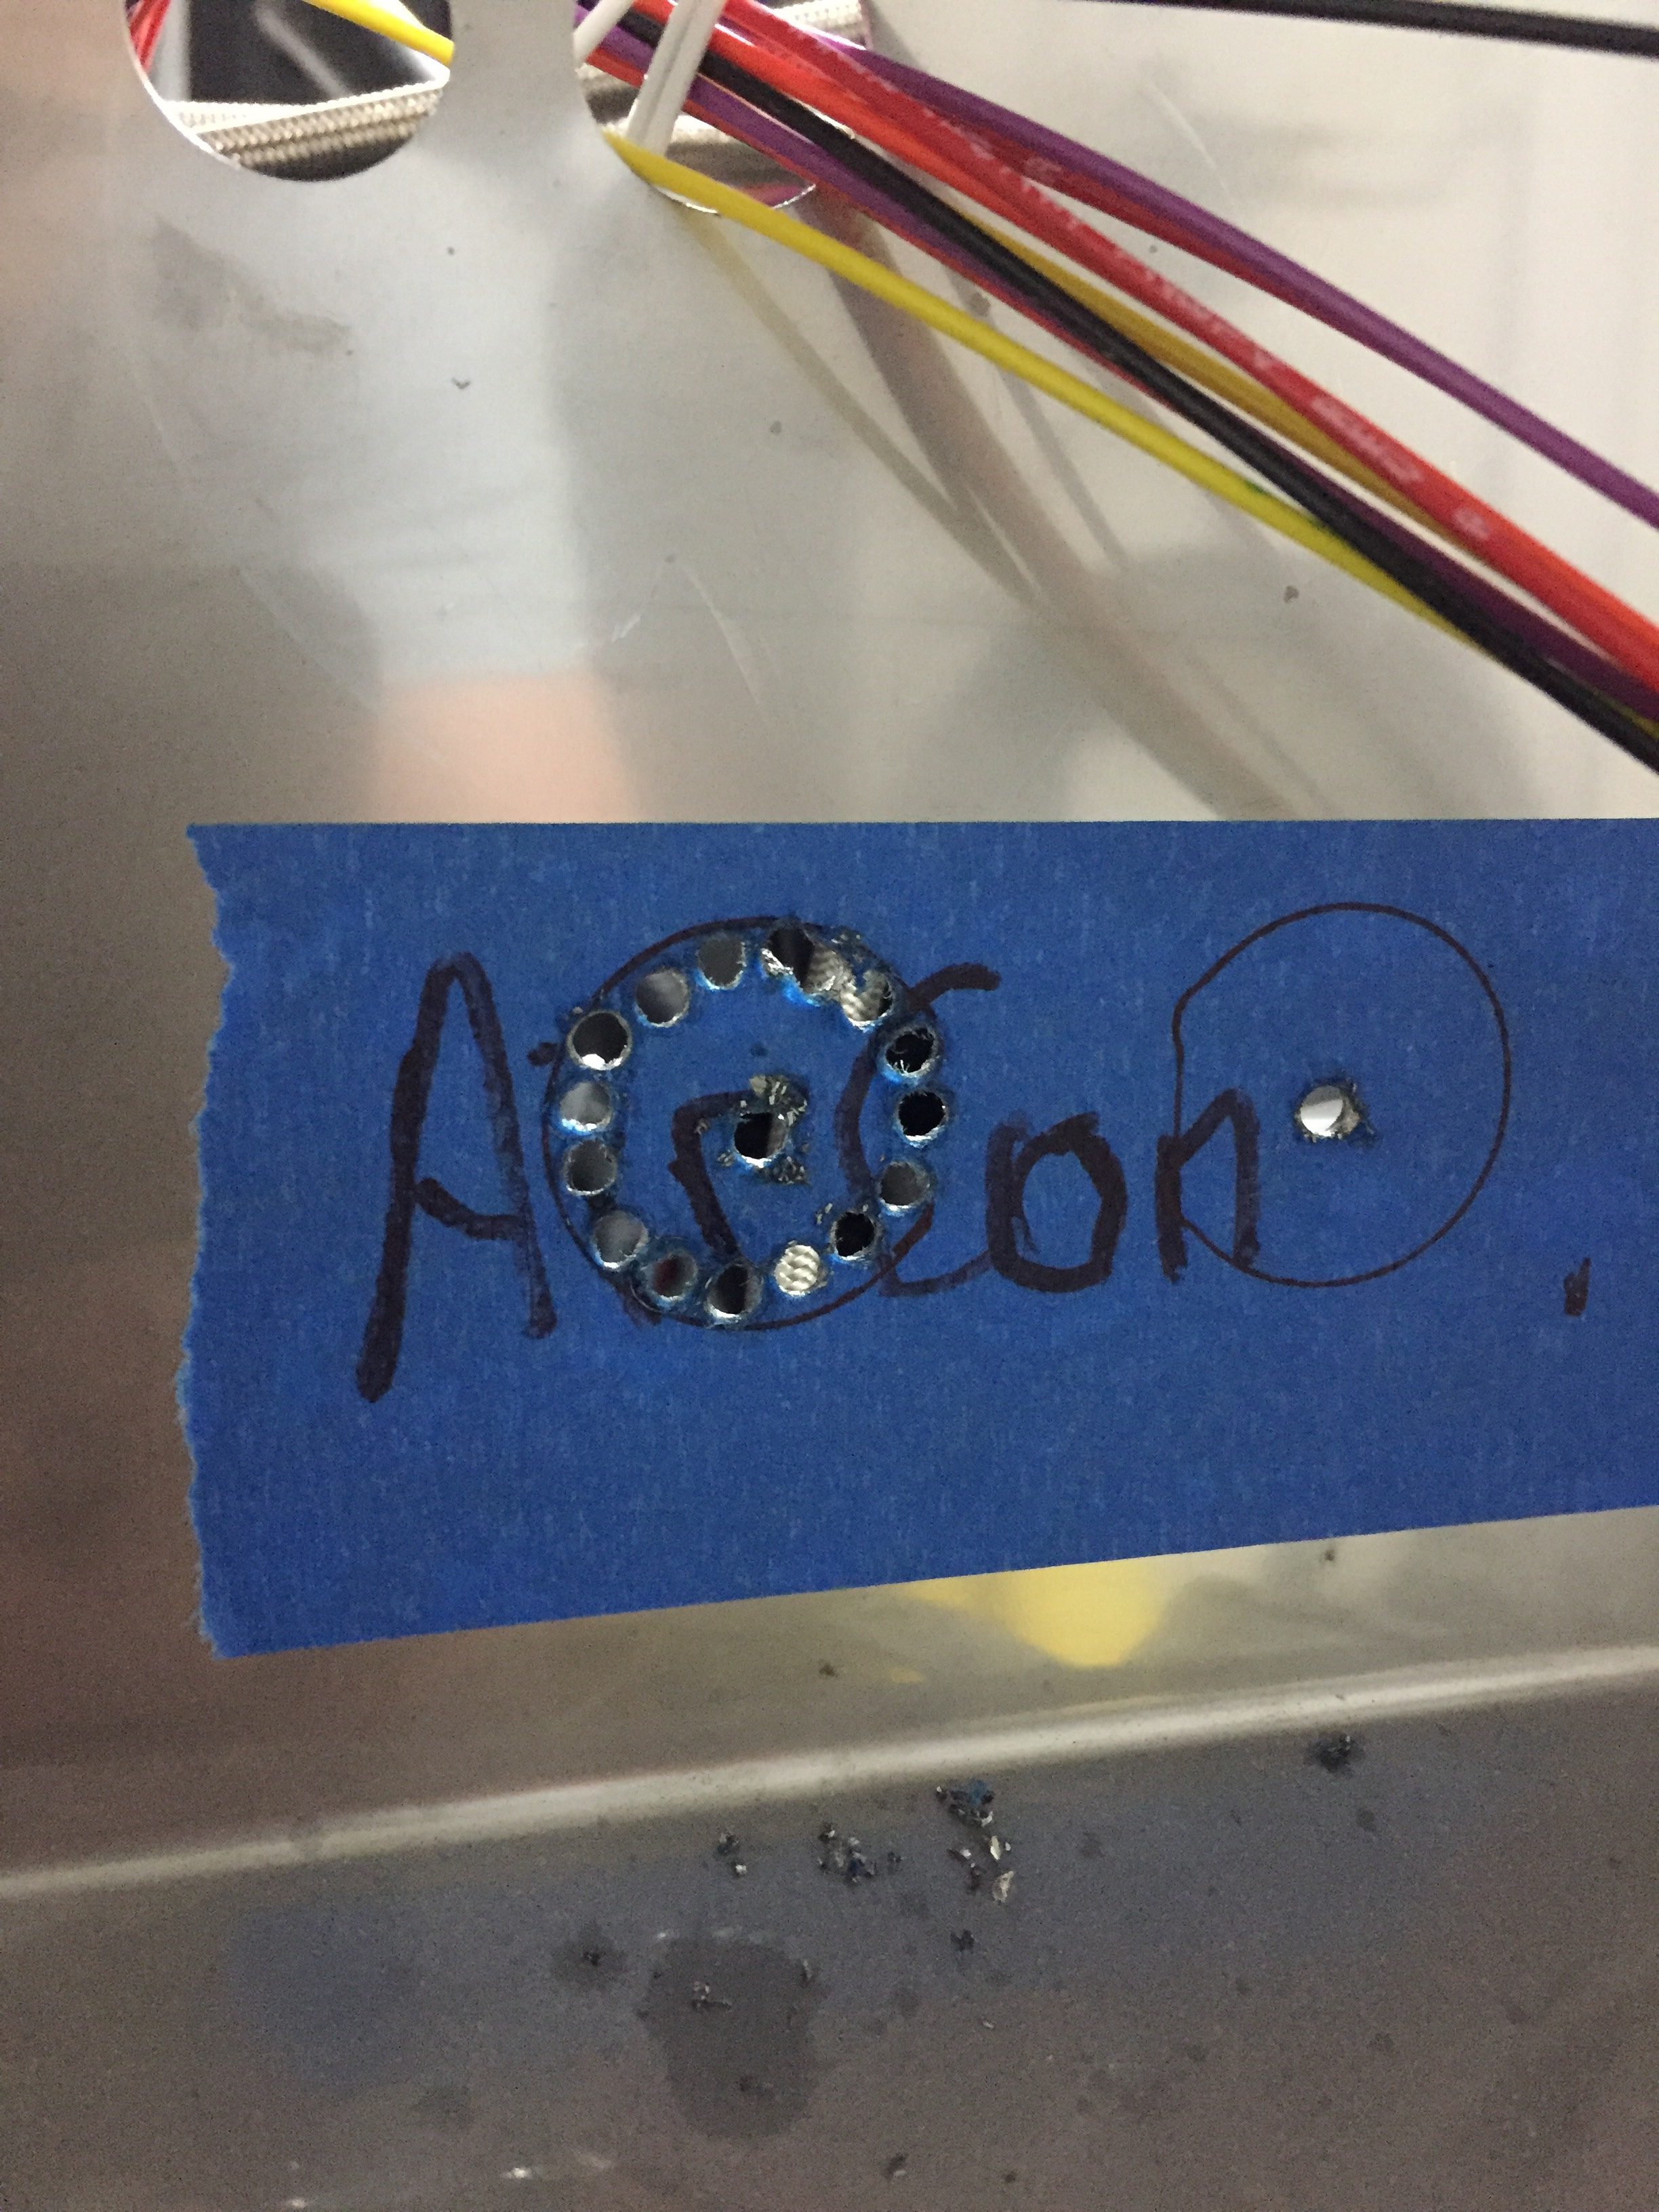
I set about connecting the wires from the overhead since I had already pre-routed them and installed terminals as needed since access would be difficult once the forward skin is in place.  Glad I did that, because I could never have pinned them out as they were after the skin and bar were installed.  The back lighting wires were all solder sleeved together to the power supply and the positive wires for the power supply, start switch, and O2 controller back lighting were all ran to the dimmer.  After a lot of observing and double checking, the only wires left unterminated are those going to the EMS/ECUs (I won’t have the ECUs until July) so nothing left other than starting to test stuff out!

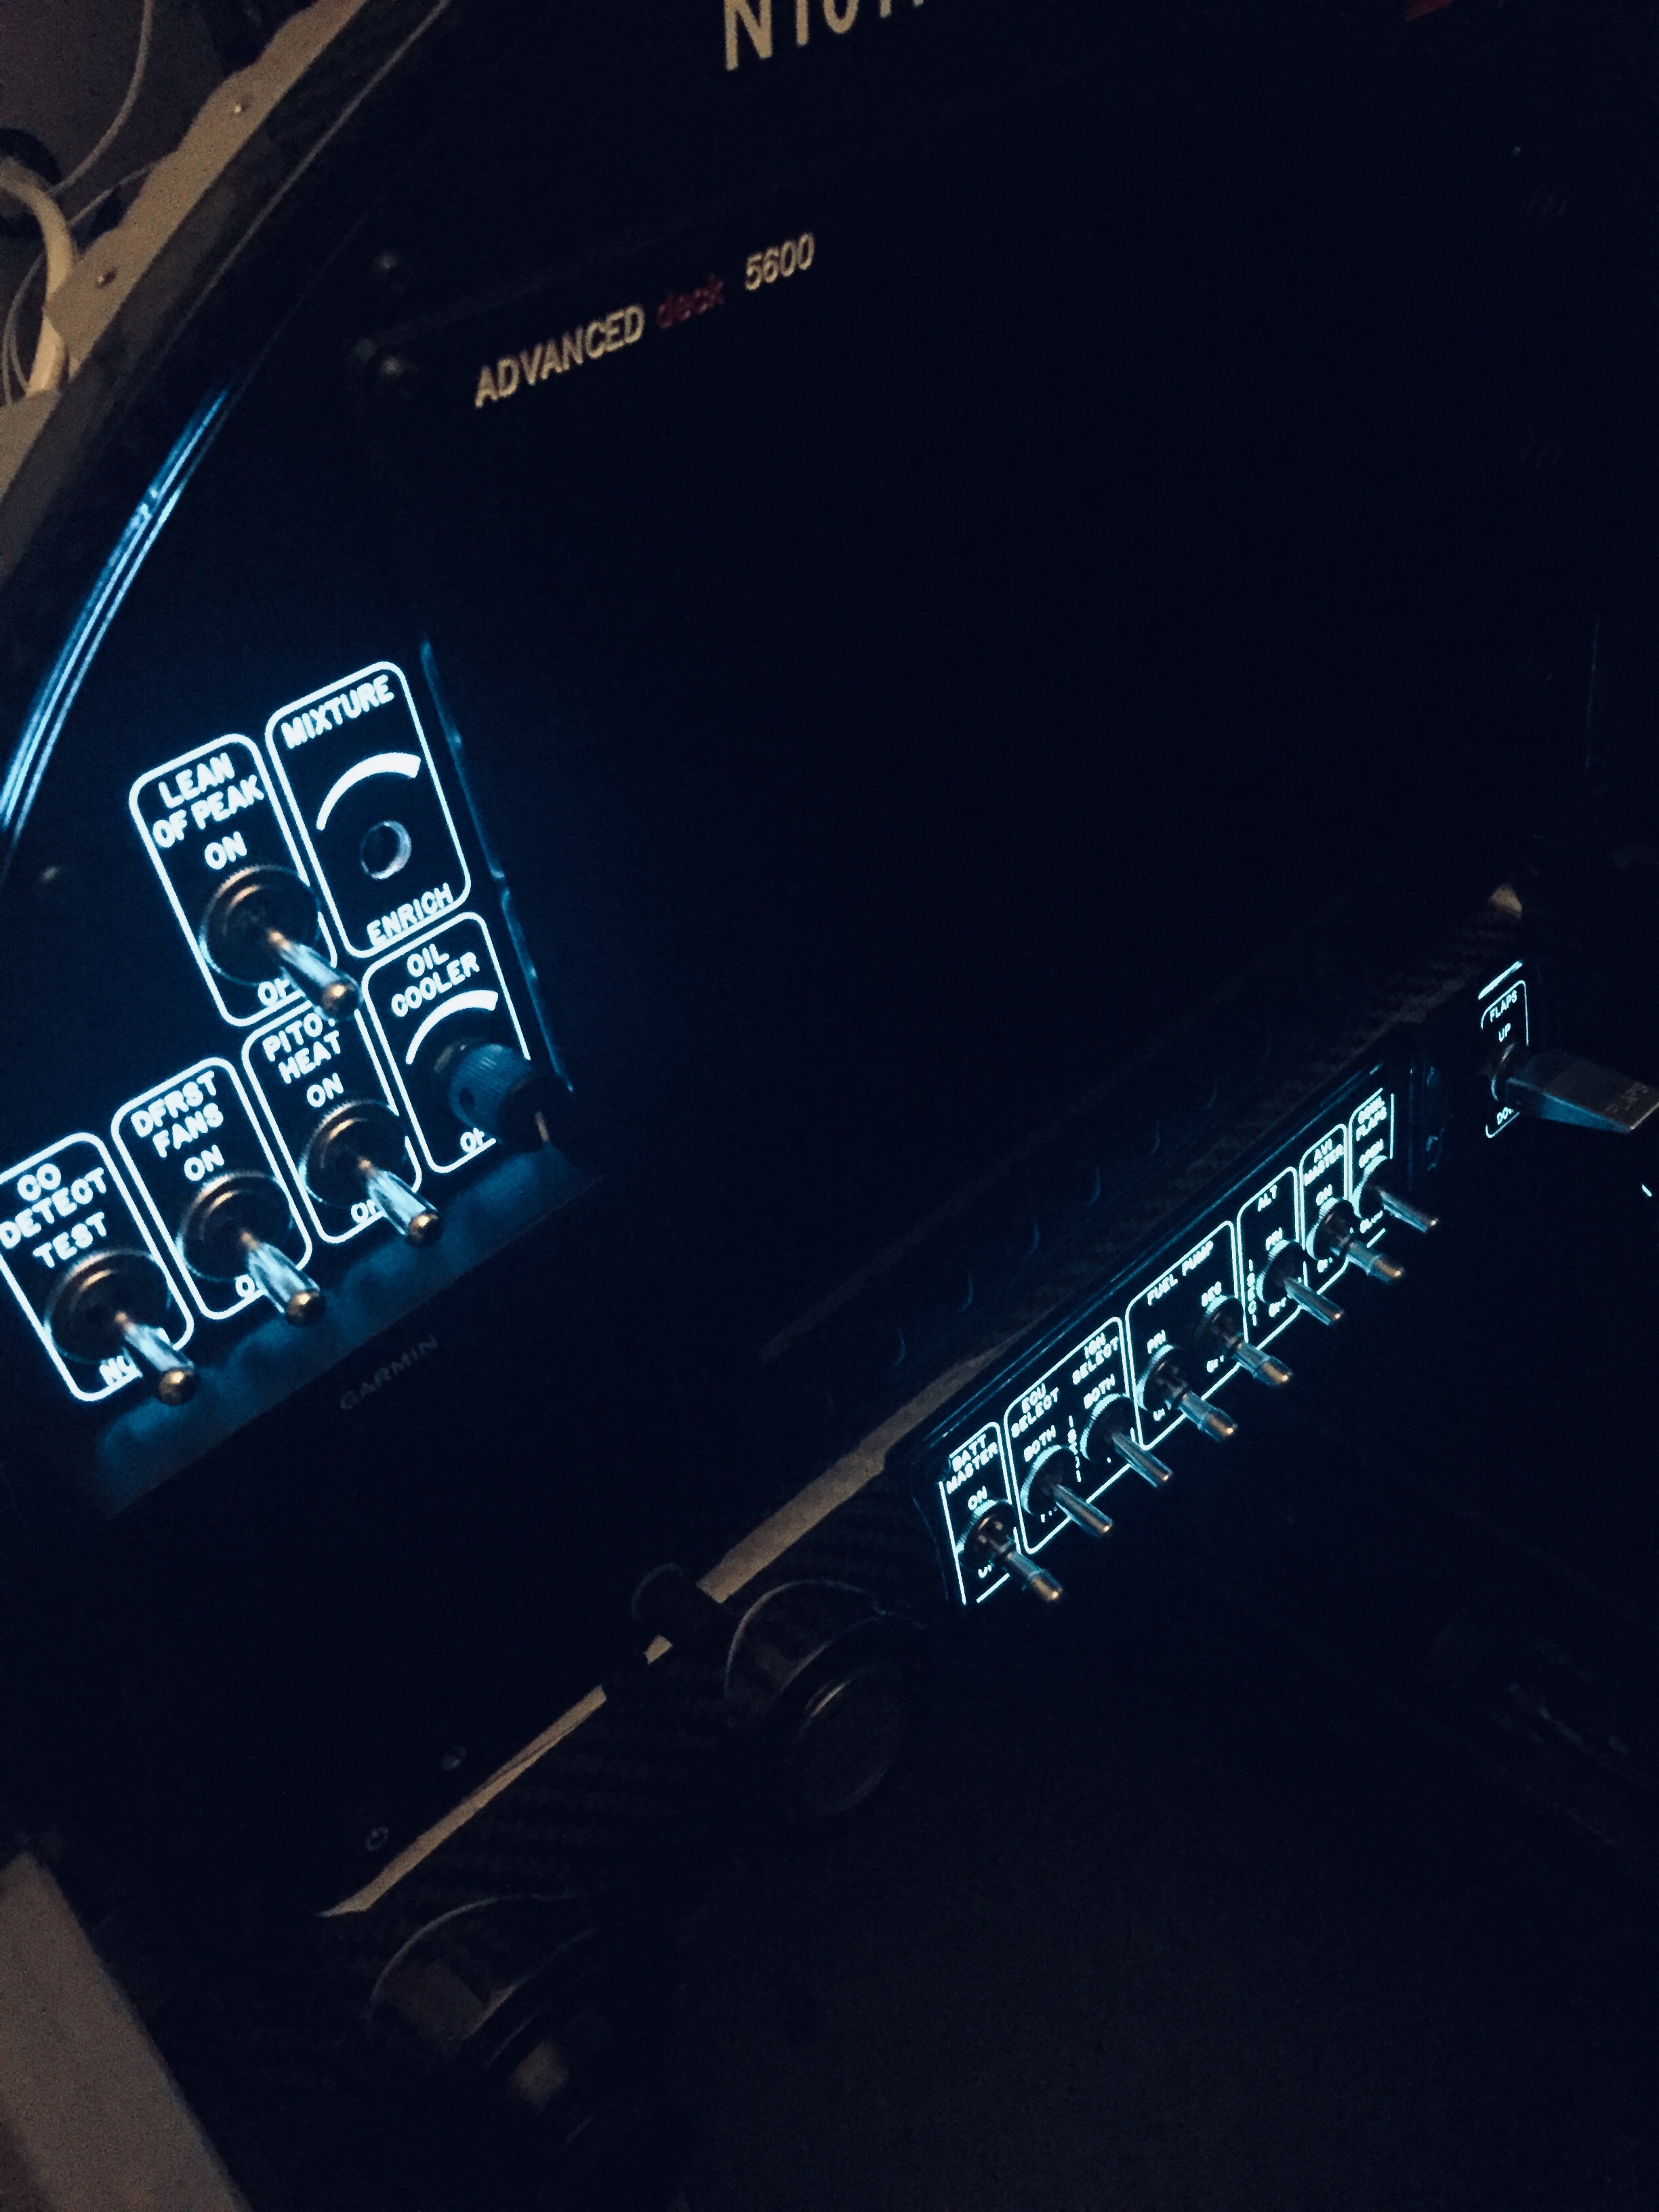
The lighting control module (LCM) and instrument back lighting will be on the always hot bus so I was able to hook my bench power supply up to test it.  I was pretty nervous as there are a lot of complicated wires on the LCM and I was afraid of knowing where or how to troubleshoot an issue.  I shut the doors, turned on power and held my breath.  Opening the door should have turned all the lights on but it just made them flash.  The foot well dimmer was hooked up to the overhead and the back lighting didn’t work at all.  Fan-f**king-tastic.  Great start, Tim.

My skills at troubleshooting are more advanced than my confidence, and I was able to correct the wiring on the dimmer module (I had mislabeled the potentiometers) and figure out the back light power supply had a solder sleeve that didn’t solder all the way causing a bad connection.  Those were corrected and I had two out of three working.  The back lighting looks magical (yes, I said magical) and I sat in the dark for five minutes ooohing and ahhhing at myself.  The overhead dimmer and foot well dimmer circuits were now working and I could see how well Sean’s (Plane Around) LEDs illuminate the cabin.  The door lights and switches were still not working, though.  As soon as the door opens, I could hear the relay click causing the lights to turn off.  It turns out I had added an extra ground to the override switch and it was immediately overriding the timer in the LCM.  I corrected that and at the end of the evening got to see the fruits of my labor on the LCM as everything worked exactly like it should!

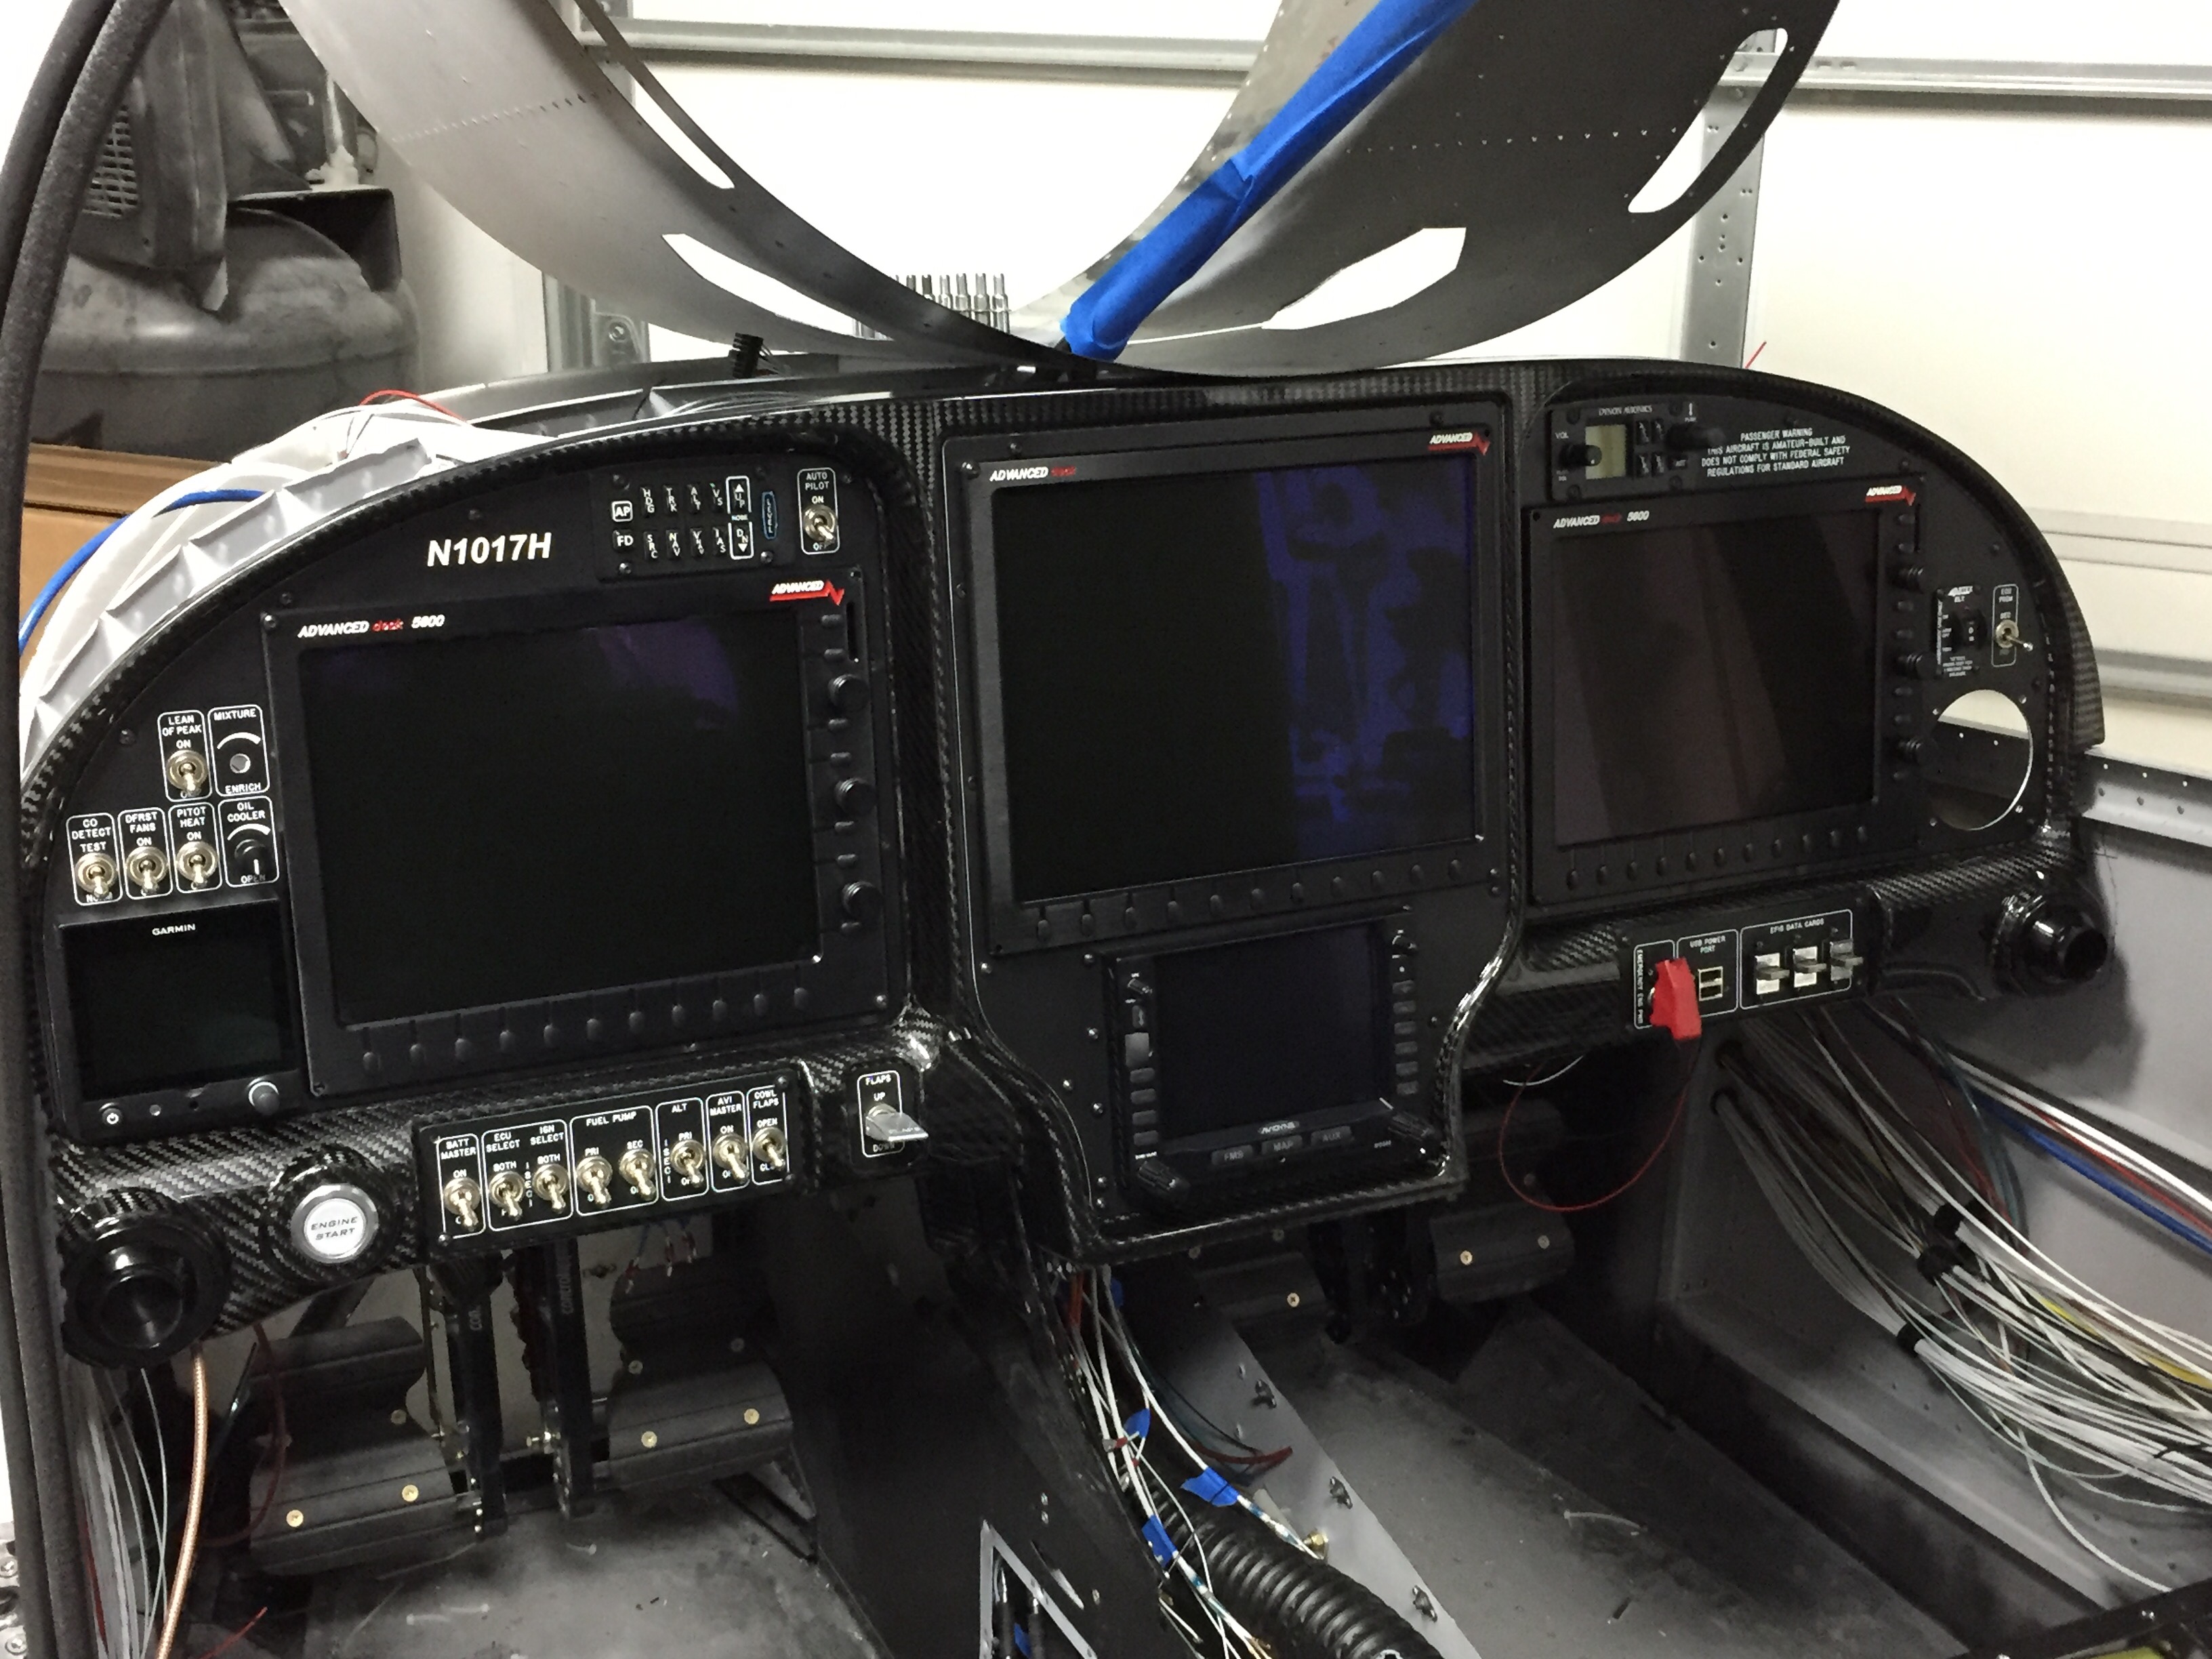
It’s finally time to slide all of the pretty glass screens in place and see what it looks like all fired up.  The cutouts on the panel inserts are exactly the size needed, so clearance was a bit tight.  Pretty soon, I had all three screens in place along with the IFD slid into the tray.  The G5 was installed and I hooked up the last two fittings for the pitot static system and got the tubes plugged in.  The PFD was a tight fit and required several attempts and getting all the wire bundles situated just right on the ACM to allow the connectors from the screen to fit without crimping.

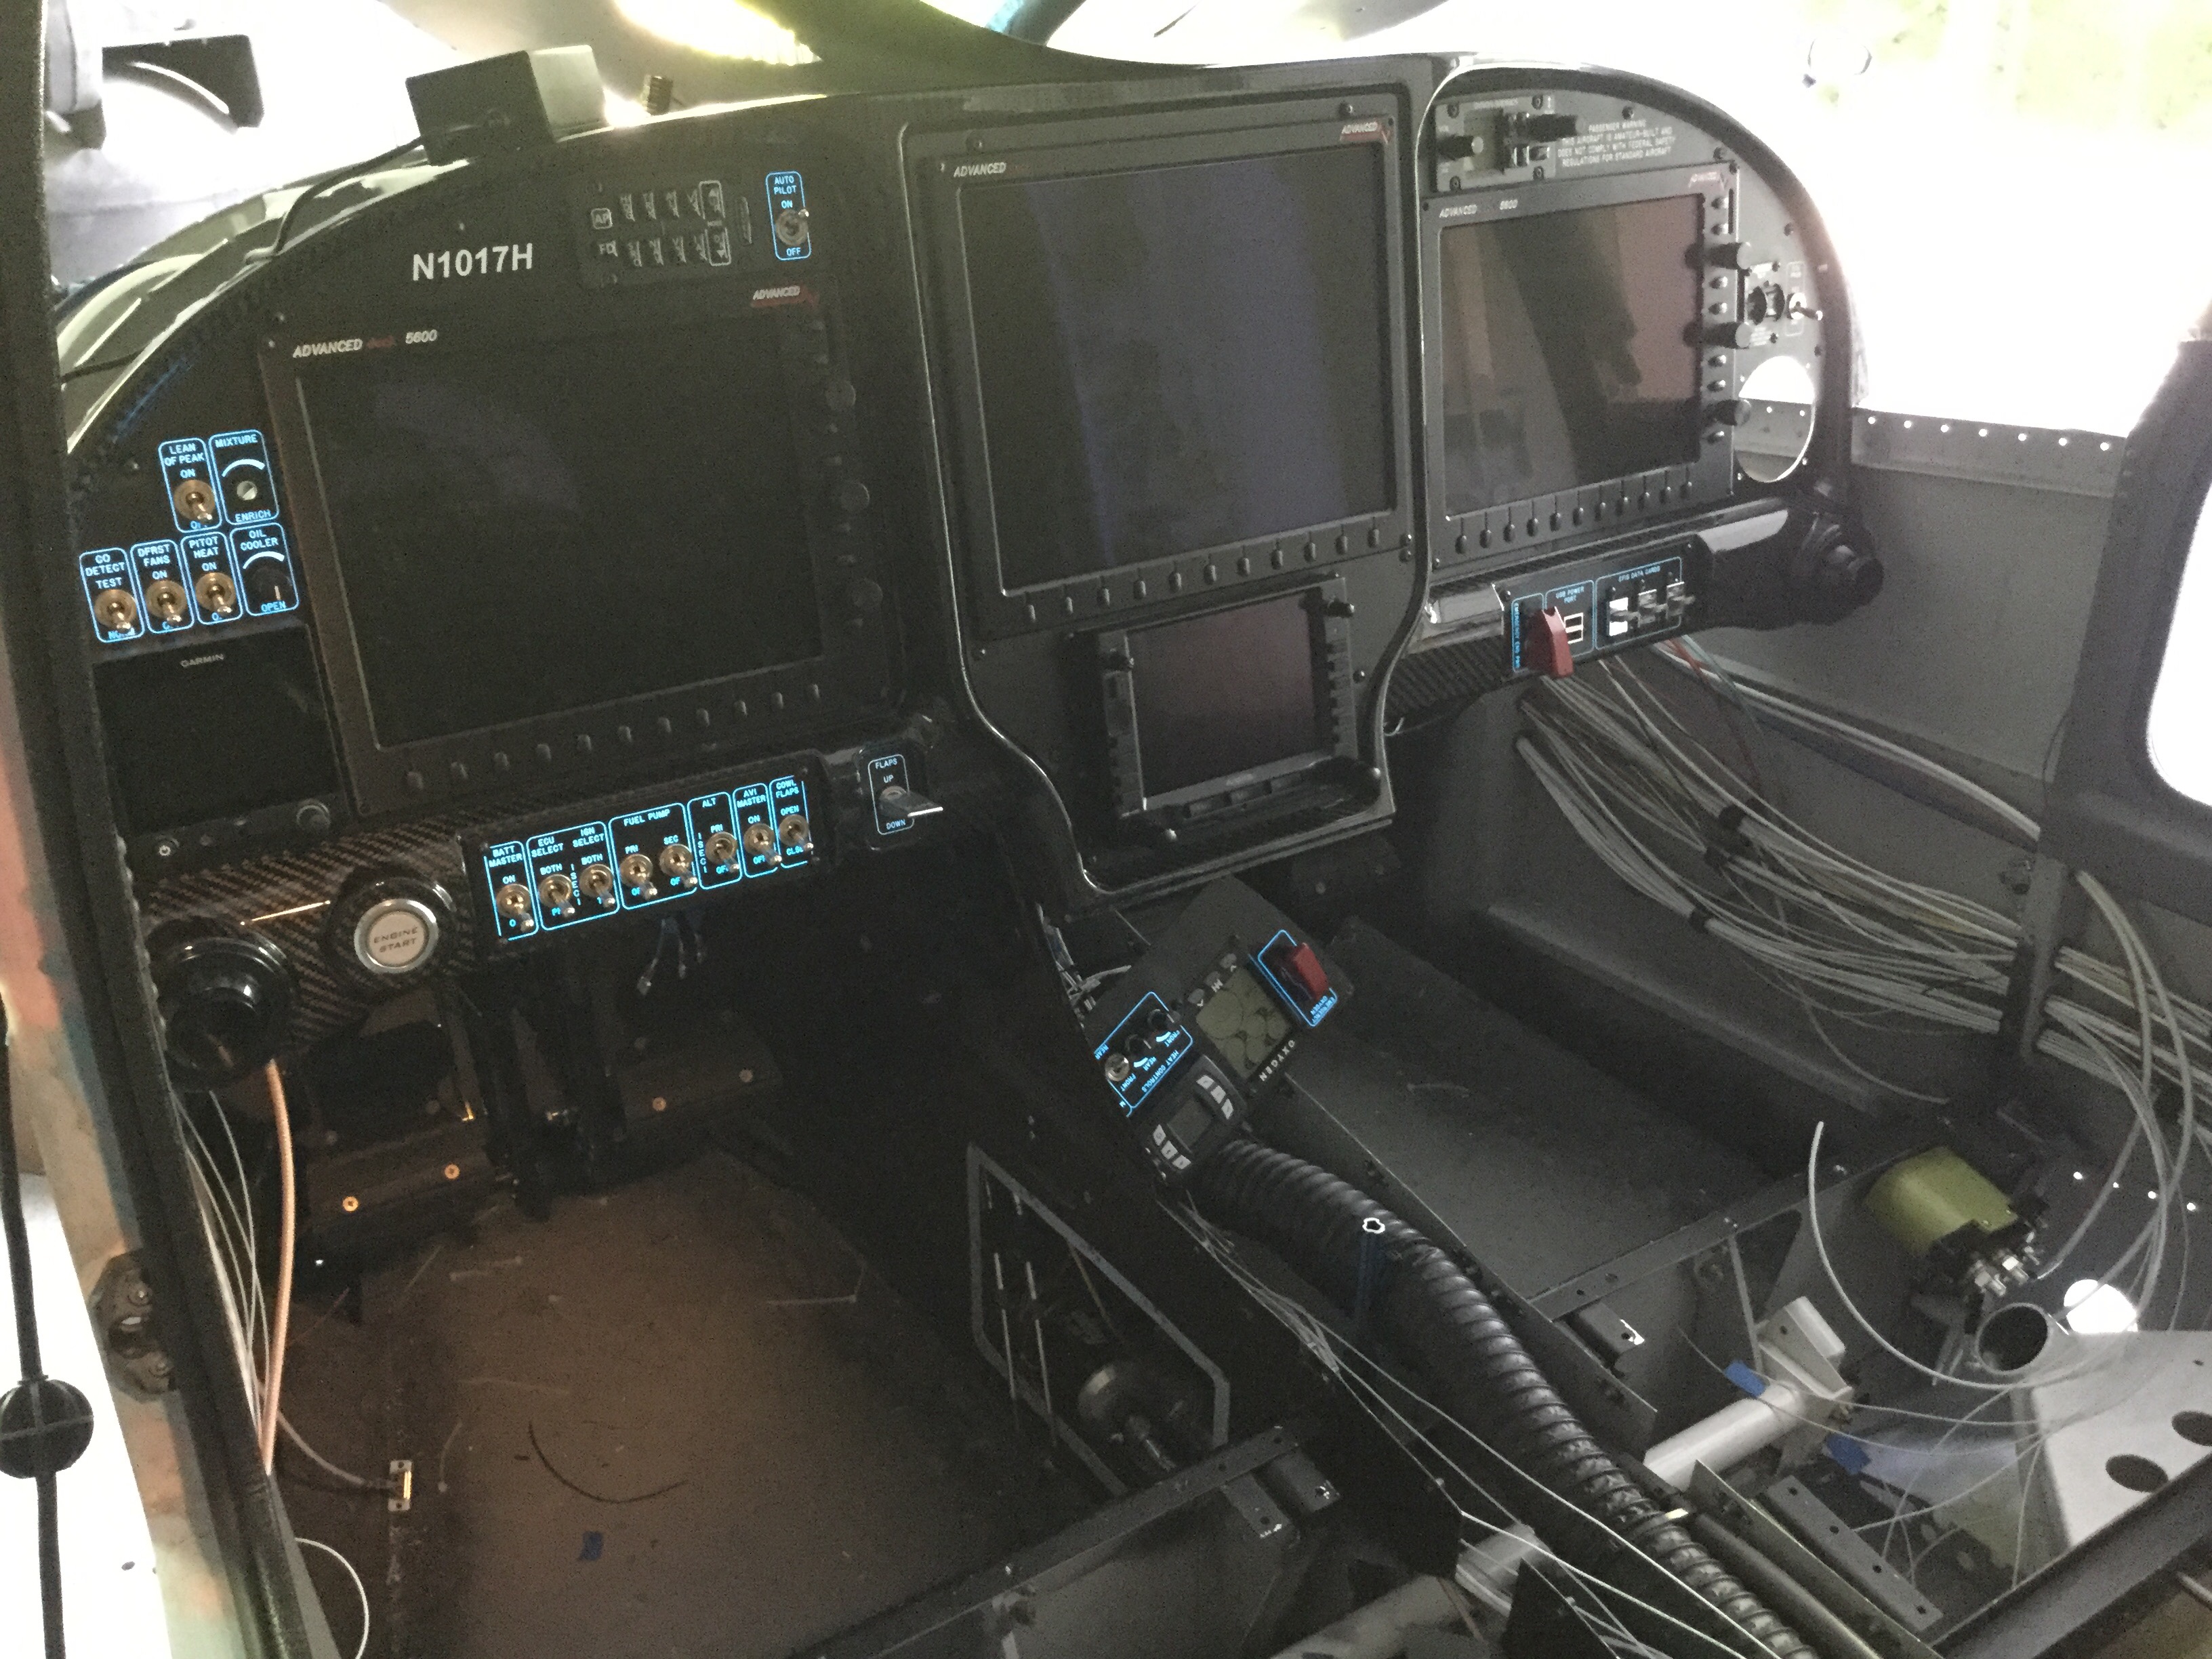
Man, does this panel look awesome!!  I have spent literally years designing the layout and dreaming about this very moment.  I couldn’t be happier with the way it turned out.  I’m really looking forward to sitting behind it and having great adventures with a massively capable avionics suite that is just as suitable for fun VFR flights as it is hard IMC.  The carbon is a great look, the overlays are perfect, everything is in reach, and it is a real show stopper!

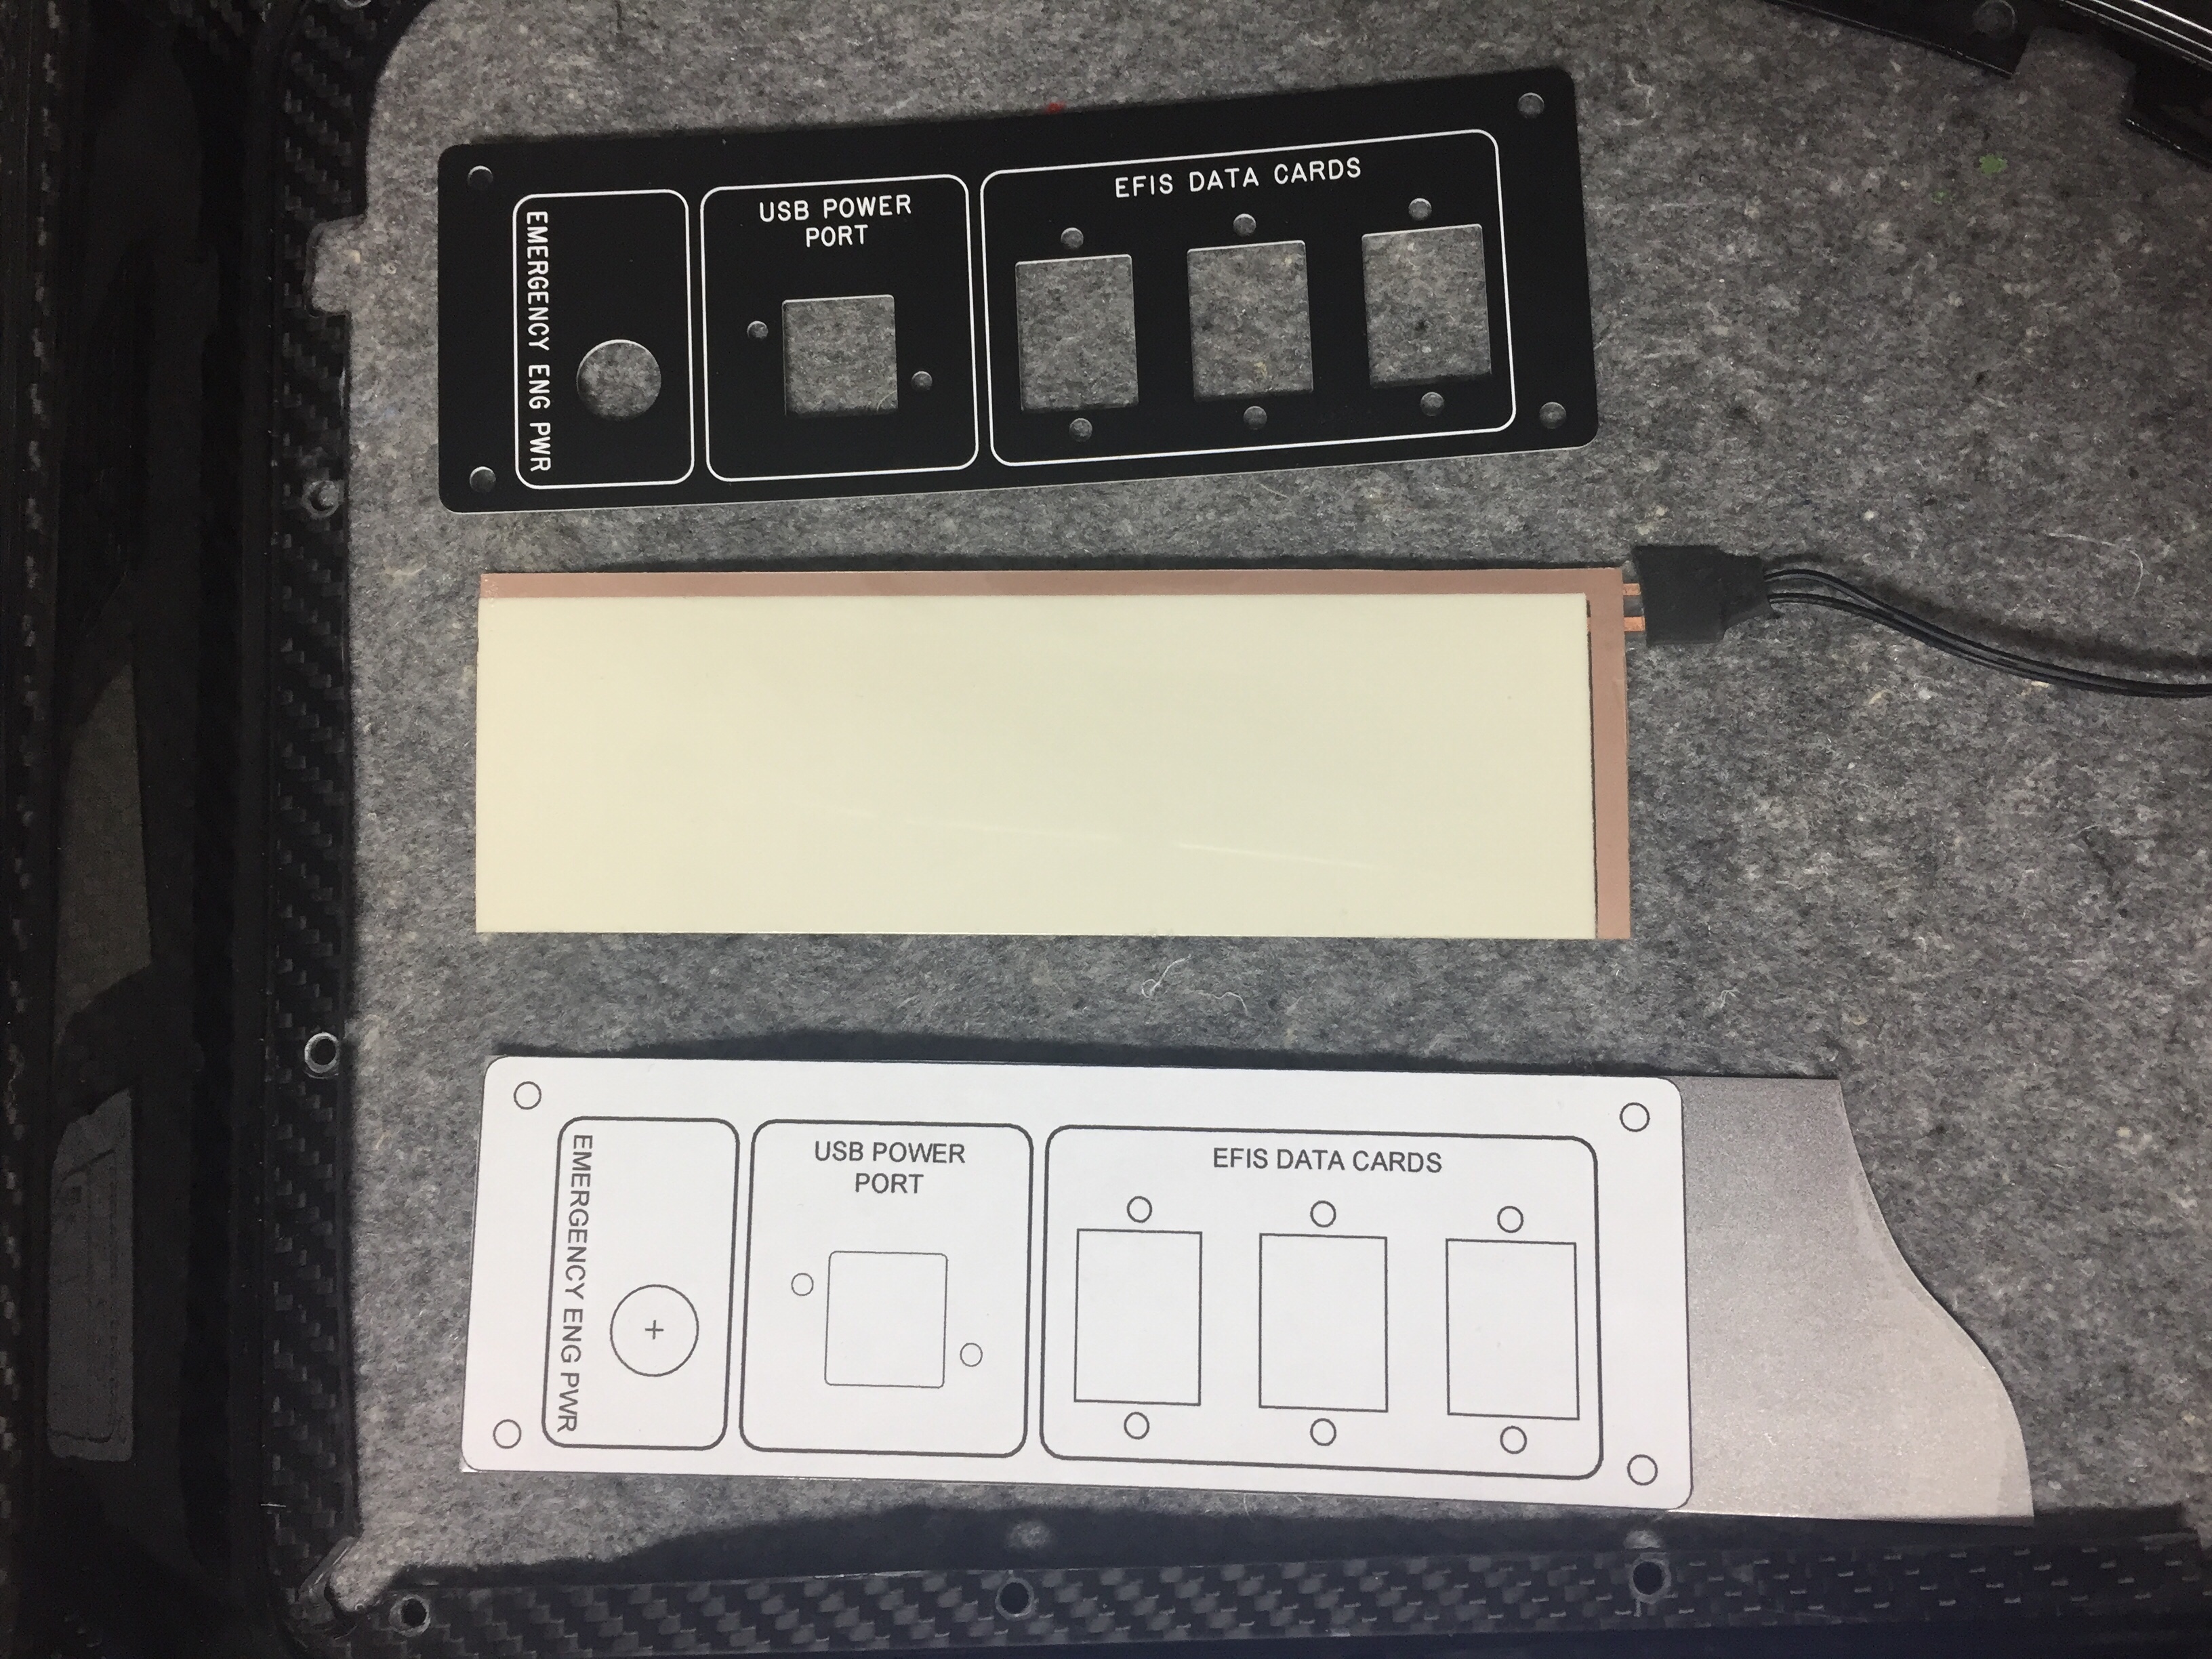
I also hooked up the lower console panel back lighting just to see how it works but won’t get the rest of the components connected until after power is applied.  That is the next big step, so stay tuned!

More wiring plus some more wiring then more wiring

Wiring continues as I think I’m nearing the end only to discover more runs that need to be installed.  I reworked the nutplates for the back up battery on the subpanel and have the subpanel back on the fuselage temporarily to continue bundling wire runs.  The amount of wire I hadn’t thought of is a little higher than I was expecting, as I thought I had a good handle on the “pre-work” for the avionics.  Rudder trim board, a few relays, the lighting control module, and a few others all popped up as I put components in place.  I’m working hard to keep the runs neat and tidy as I go.  I’ll ziptie everything in place once I feel that I’m done with wiring but I’m sure I’ll forget one or two and need to redo the zipties.

I had to have one of my panel overlays re-etched since I decided to add an emergency power switch for the engine bus.  I had originally designed a two relay system that would automatically provide backup power directly from the battery to the engine fuse block (bus) should the main power supply fail (master contactor, etc.).  A three position switch would be off, armed, and test allowing the system to be tested before flight.  I decided it was too complicated and didn’t design the panel or schematic for it, but now regret that.  Essentially, it is only redundant for the master contactor, but now that I’m visually seeing the path of power all going through the contactor as a single point of failure, I want a backup.  So I’m running a DPDT 40 amp relay from the battery to the engine buss.  I had considered a diode which would isolate a short in the main system but decided to not plan for multiple modes of failure.  The switch will be red guarded and the second pole will have be an input for EFIS annunciation to verify the relay’s activation.

I also forgot about the control stick wiring, which is the last connector needed for the ACM to be fully plugged in.  I don’t want to fit my control sticks until I rig the surfaces, as the throw of the stick as is now is greater than when properly rigged.  So I pulled wires, labeled them, and terminated them on the ACM side.  This is when I realized I went a bit overboard on the number of switches on the sticks.  I had planned on the typical Coolie hat trim switch, PTT, AP disconnect along with a TOGA, rudder trim toggle (horizontal orientation), and possibly a IDENT or comm swap.  It’s a lot, I know.  The Tosten grips have all that but I found out that I can’t use all of them!  The AFS/IFD setup doesn’t have an input for a TOGA as discovered after a lot of research and question asking.  The AP simply auto sequences the MAP based on the flight plan so no need for a TOGA.  The downside is not being able to go missed earlier than the MAP while on AP, something I’m used to in the Diamond with the G1000.  Not the end of the world.  I decided against a IDENT and comm swap switch as I just think they are not needed since I have to touch the panel anyway and I mean seriously, am I that lazy??  Ha, yes I am, but those two features still didn’t make the cut.  So, I wound up with three axis trim, PTT, and AP disconnect (AFS calls this CWS which it’s not but whatever).  A TOGA is reserved as a coming feature from AFS.

The GPU receptacle is also wired up now in its hidden location under the copilot’s seat.  I wired the GPU contactor such that it will power the full system but not charge the battery, as the Shorai will have it’s own balanced lead to connect the dedicated charger on the ground if needed.  Because I’m electron dependent, I will never jump a dead battery and take off, so no need for external access.  The GPU will be in the hangar for maintenance and/or learning the avionics.  I cut a little flap in the seat foot well wall and mounted the receptacle to the seat rail support.  It worked great and will have one bolt on the seat bottom to help secure once that area is all complete.

The big wires were taking up a lot of room on the shelf and with the components on the firewall all mounted, I could get the thick stuff installed.  I took some time to determine what size lug would be needed at each end of wire and ordered all the supplies in.  Great move because I had all I needed plus a few spares of everything.  The crimper I bought from Amazon worked well and it was a pretty easy, fun job overall.  It helps me visualize the power system now even better and I’m happy to say that I feel safe and secure with the architecture providing power for the plane.

After receiving the newly etched panel, I could fabricate the last of the switch panels so the avionics would be ready for final install.  Just like all the others, I started with a printed 1:1 image of the panel I had designed spray glued onto the aluminum sheet.  I cut that out then final trimmed it using the acrylic overlay before painting it black.  The back light panel is placed on the aluminum panel and positioned using the overlay to get it just right before trimming for the switch and USB ports.  This one was pretty easy with large cut outs.  I use 3M double sided tape to secure the back light panel then lay the adhesive backed overlay on top to finish it all out.  I use a Sharpie to color the white on the edges of the overlay to help control bleeding from the back light and give it a nice finished look.  I did have a little trouble with the wires on this panel and wound up replacing it all together with 22 AWG Tefzel soldered on the panel itself.  I wish I had done that with all the others, as the wire used from the panel is crappy and hard to terminate using the micro-molex connectors.  It turned out great, though, and is the last piece of the instrument panel.

Finally, I worked up two brackets for the micro switches on the doors and wired those along with the one on the baggage door for the lighting control module.  I also used the micro switch on the baggage door as the safety switch input for the EFIS annunciation.  More wires to run, oh boy.  A pretty quick job that should work just fine.  I did have to run an additional wire up to the overhead as I had picked up power and ground for the door lights from the overhead lights and that’s not how the lighting control module is set up.

While my plane does have a lot of wiring, it’s nothing compared to the big boys at work.  This shot is behind the port side avionics bay in the C-17.  Now that is a lot of wires!

Light at the end of the tunnel

I have rearranged just a few items on the firewall and after getting confidence in drilling several holes, nothing was stopping me from drilling the remaining locations.  The toughest was the large hole for my insulated pass through for the main power wire.  I made the mistake of using a unibit and it really made a mess of the job.  In the end, it turned out okay, but I used that as a lesson to chain drill all future large holes in stainless with a #40 bit.  I needed to get the nutplates installed and all components temp mounted to ensure a proper layout so I could move on with the firewall insulation.

My two GPS antennas will be firewall forward just below the cowling as others have done, so I built a shelf for the AFS and IFD antennae.  The cables and wires will go through a dedicated pass through just below the shelf.   I ordered and will be using high-temp silicone grommets from ACS for these and the control cables going through the firewall.  They will be sealed with Firestop per the plans.

I decided to have the engine mount powder coated black just for a little extra pop and get rid of the white.  It came out nicely and I went ahead and drilled the holes to get it ready to mount.  I didn’t have to do too much finessing to get the holes lined up and it proved to be a quick job.  That also allowed me to position the battery box and ensure clearance for the battery to come out without having to remove the box from the firewall, again thinking about maintenance down the road.  The box is insulated and made by EarthX but is about a 1/4″ too shallow for the Shorai battery.  I used some spacers and high temp foam to stand it off from the firewall and allow just enough room for a snug fit.  The retainer of the box has a bracket to mount a 1″ blast tube which will come from the rear baffles for battery cooling.

The Shorai battery was a last minute decision over the EarthX for a few reasons.  I spoke to a few other 10 flyers who have had EarthX failures and while the service to get them replaced was excellent, no root cause could be found.  Further more, the batteries have the internal BMS which will protect the battery’s voltage from dropping too low.  There are a bunch of pros and cons that I won’t get into about BMS but I decided I’d rather kill a battery than killing myself because my electrically dependent engine quite to preserve a $300 battery.  The Shorai also has a higher aH rating, at 36 meaning in theory I’ll get more power for longer than the EarthX.  It does not have an internal BMS so will die giving it’s last bit of power to me, which is what I want if both of my alternators fail and I need to keep flying.  It’s about the same size, the same weight, and cheaper to boot!

Once everything was drilled and nutplates installed where needed, I made a template of the firewall and holes on poster board to transfer over to the lava shield insulation mat.  I got the product referral from John Walker and have seen his up close really looking and performing well.  Plus, it’s a lot easier to install and work with than the fiberfrax sandwich, in my opinion.  The lava shield is a carbon fiber material with a self adhesive backing.  I trimmed most cutouts with a razor and decided to just match drill the small rivet and bolt holes once it was on the firewall.  It was pretty easy to apply the mat to the firewall, taking my time and treating it like a big sticker.

I cut out the area covering the recess and used scrap material to fill in the edges of the recess.  I chose to glue the edges, as the material is a bit stiff and didn’t like the sharp outside radii.  I’m really happy with the finished result, not only aesthetically, but functionally.  It should provide a nice barrier for heat transferring to the cabin and gives the firewall a nice finished uniform look.

It was finally time to bolt all the stuff to the firewall and get my workbench cleaned off.  Again, having the forward fuselage section removable at this point really made the job easy as I could just reach around and secure nuts, etc. on the cabin side of the firewall.  I used nutplates on everything that would have a good chance of needing removal but used nuts on the few items that would only come off once or twice in the plane’s lifetime or could be serviced while installed.  It’s pretty cool to step back and look at all the components up there and seeing how it’s all going to fit together.

I am pretty confident the locations will allow clearance with the engine except the oil separator.  I’m afraid it’s going to hit my stand by alternator, but only time will tell as the measurements I’m getting from others is a bit misleading.  We’ll see and if need be, it’s a easy fix.  I have the main power pass through on the upper right, a 3/4″ pass through on the left and right side, grounding tab and main grounding bolt on the upper left, and GPS shelf on the upper right.  The two contactors on the left side are GPU (on top) and batt master on the bottom.  Two ANL fuse blocks are below those, one for each alternator.  The prop and throttle cable (no mixture with SDS) come from the center and I’m using the third hole for the heat vent servo wires.  On the right, the AFS shunt will measure alternator current going into the system and the starter contactor is at the stock location.  The fuse block is for all of the engine components related to SDS including coils, ECUs, fuel pumps, etc.  Finally, the oil cooler has been modified to fit the larger 2007X oil cooler and will have a damper controlled by a TCW servo just like the heat vents.

Lot’s of progress that is really rewarding as I’m slowly emptying all the boxes and cabinet shelves holding purchase but uninstalled items!  Next up will be attacking the throttle and center console along with the rest of the instrument panel and putting the forward fuse section on for good.

Tunneling toward the fire(wall)

The tunnel has been somewhat neglected for quite a while, so it is time to tackle it and put the cover on.  The first main task was to finish the fuel lines and install the fuel filter and pump assembly.  I got Ross from SDS to send me the dual pump assembly as well as the filters so I could go ahead and install them prior to getting the engine.  Tom at TS Flightlines has a great setup that puts the filters on top of the pumps with adel clamps using hard lines.  Flex lines are used in the rest of the fuel line system.  Tom was super to work with and we soon had all the details worked out to get the lines ordered.  I set about building brackets to mount the pumps on and it will ease removal and installation (somewhat, it will still be a pain) in the future once it is all covered with the interior.

I also got a plate made for the fuel pump to mount on since the Andair bolt holes don’t line up with the stock bracket quite right.  I turned the face plate such that the left and right wording is on their respective side of the aircraft which should help in muscle memory and recognition during my scan.  An easy fix which lead to a lot of sweating and cursing fitting the lines and torquing them in that tight space.  Unfortunately, two lines didn’t work from Tom on the initial fitting.  He really goes above and beyond, however, and will re-make the lines until everything fits for free.  These aren’t the cheapest option, but they sure are nice and pressure tested as an added benefit.  Something I couldn’t do until putting fuel in the system and creating a big mess with a little leak.

The second main task was to finish the aircon hoses that I chose to route down the tunnel instead of the sidewall to make more room for wire runs.  It also eliminates some bulging on the interior panel up front near the rudder pedals.  I measured out the hole size needed including the grommets that will allow for the hose to pass through with minimal clearance.  Then I cut out some templates to help position them on the bulkheads that needed to be drilled.  This allowed me to play with edge distance and place them where edge distance is maximized as much as possible.  I got a cool new 90 drill adapter tool for this task and used it with my cordless drill to get the holes made.

Up on the firewall, I chose to chain drill the large holes for two aircon hose bulkhead pass-throughs which worked really well and saved a lot of work with a big bit in the stainless steel.  The lines fit very nicely between the rudder cable arms once secured vertically.  The hoses route on the right side of the tunnel over the spar and clear the rudder cable just forward of the flap motor by being secured to the rudder cable guide bracket.  I’ll clean up the rear tunnel area later with a few more secure points and edge grommets to protect the hoses.

I also routed the heating ducts and actually fit everything where it needed to be!  I mashed the rear duct a bit to mold it around the fuel valve stem.  I also put a piece of vinyl tubing around the stem to avoid any interference against the duct.

With the newly made lines from TS Flightlines installed, the tunnel is all ready for the cover and to be buttoned up.  I reached out to Vic Syracuse, who I plan to use as my DAR, to ask what all he needs open for the inspection.  He advised the rear tunnel cover needs to be off but the front can be on so that fuel valve, throttle quadrant, and center console can be installed.  So, the front cover went on after a good cleaning and ideally won’t come off again for a long long time!