Not much to say, but a lot to look at!
Scheme designed by Plane Schemer
Paint by Evoke Aviation
Photos by Jonathan McCormick


Not much to say, but a lot to look at!
Scheme designed by Plane Schemer
Paint by Evoke Aviation
Photos by Jonathan McCormick
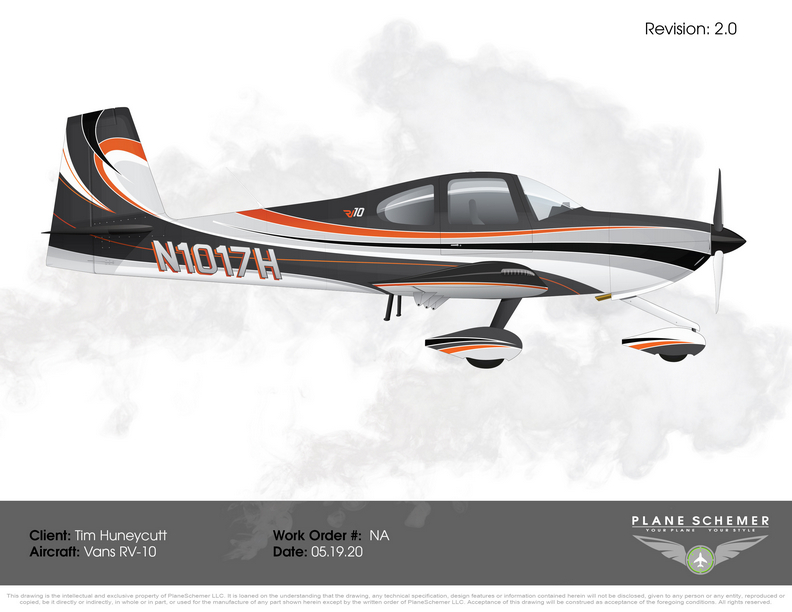
Several (four-five?) years before first flight, I met this little guy named Jonathan McCormick who has a scheme design and paint business in Alabama. Plane Schemer and Evoke Aviation are his life’s work and they are simply put amazing. Here’s a brief story of how we got Tess all dolled up.
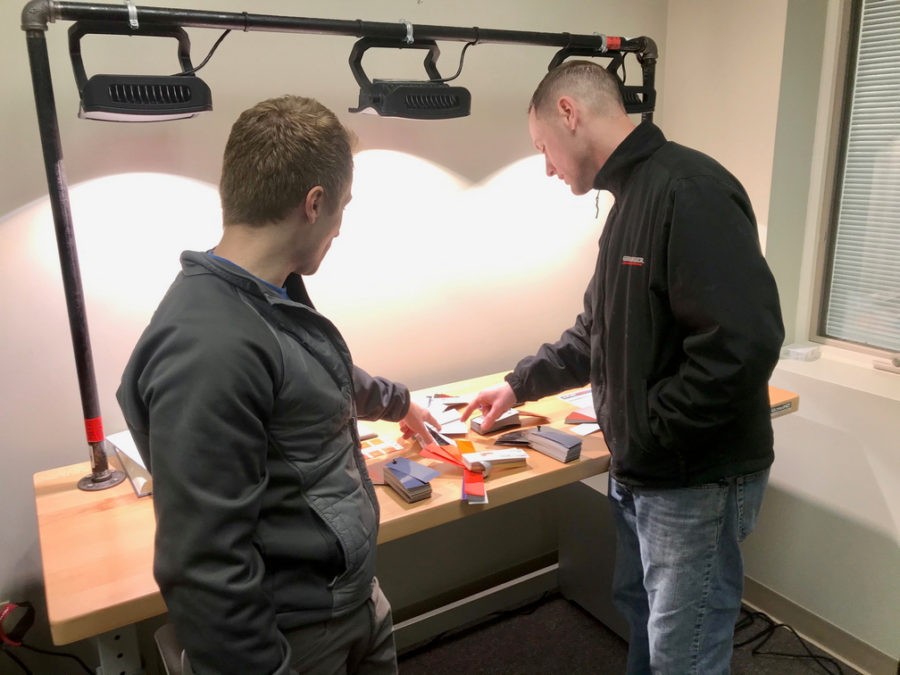
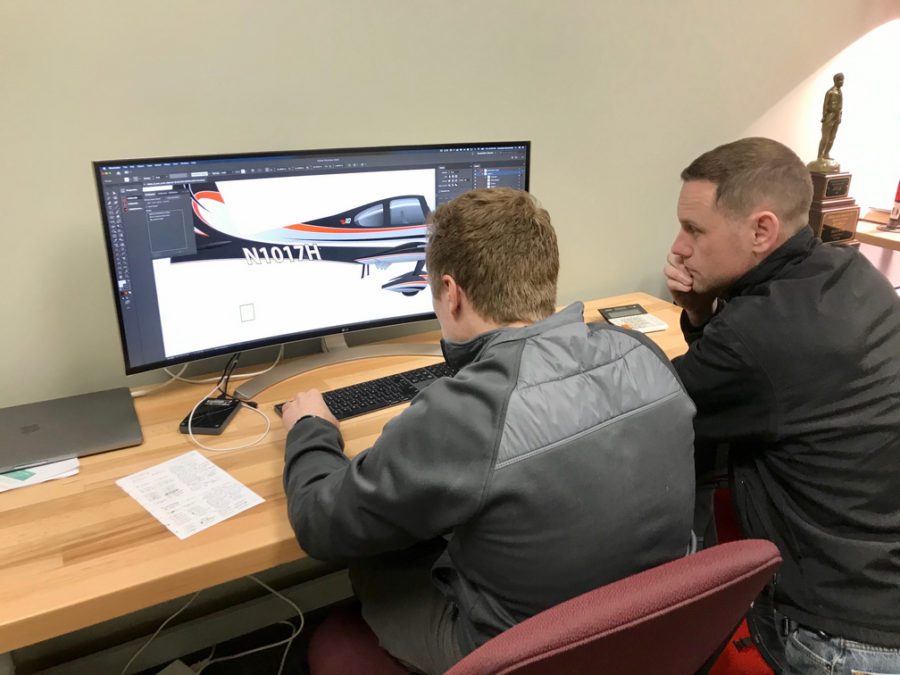
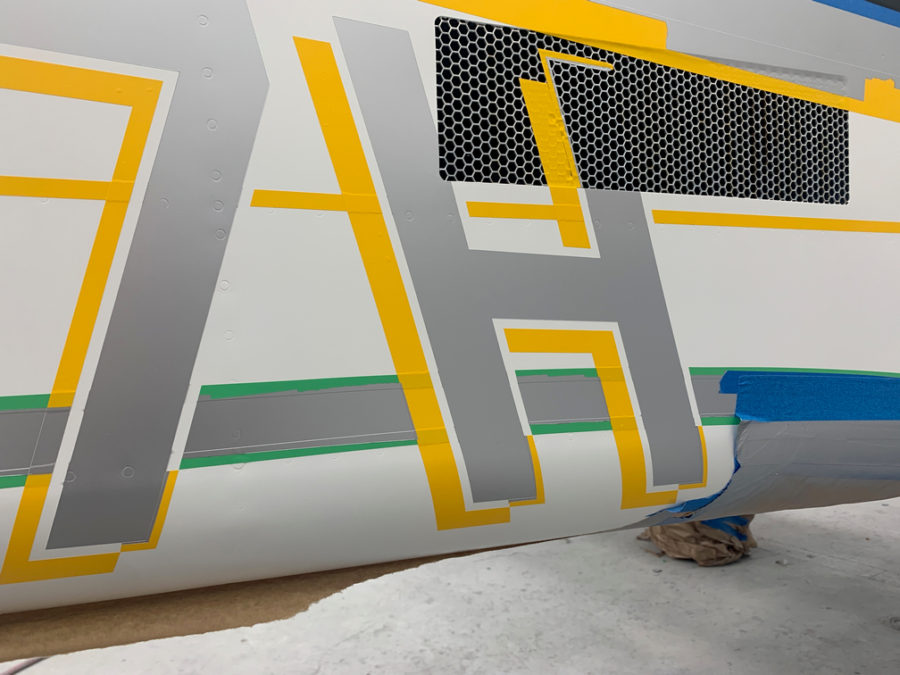
I met Jonathan at Sun N Fun in 2015 and got to work with him on designing a scheme. I was early in the build but wanted to have some motivation and vision on what we were putting together in the garage. He was great to work with for a reasonable fee and didn’t stop until I gave the final approval on every little detail. We started with some inspiration photos that I sent him and some descriptions of each aspect that I like and wanted to incorporate. He then took this and put his artistic skills to work creating a truely unique and exiting paint scheme.
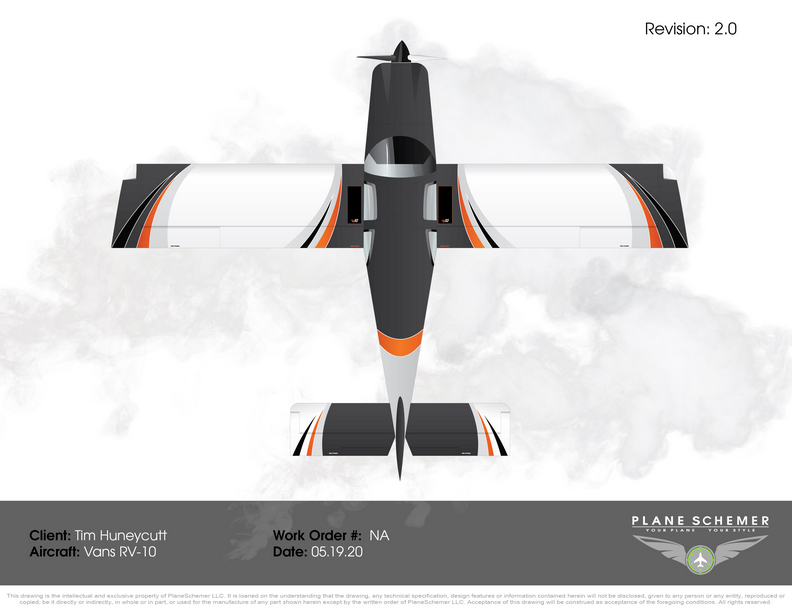
We wanted something no one else had and something different than a typical cheat line or a few swooshes. My main inspiration came from another RV, this one having 8 wheels and two slide outs used on the road. He really nailed the design with the tail and the whole scheme grew from that feature. Laura loves orange, and it’s high on my list of favorites, so we decided that would be the splash of color in the scheme. We went back and forth with a few things, lines here, swooshes there, wheel pants reversed, etc. When it was all said and done, we had a one of a kind paint scheme that was going to be a head turner. I also had motivation to stop cruising the internet for plane pictures and finish building.
But wait, there’s more! Sam, Jonathan’s girlfriend and business partner, has a side business creating custom artwork. Laura and I wanted a little logo we could use for the plane, shirts, cups, seats (didn’t get to put it on the seats), pillows, basically anything that can be embroidered! She and I worked together to create a custom logo for the plane and I couldn’t be happier with the result. We will incorporate that into the paint as well as all kinds of fun stuff. I do politely ask that our logo not be copied, as Sam earned a commission on this artwork and Laura and I would like to keep this unique to our plane.
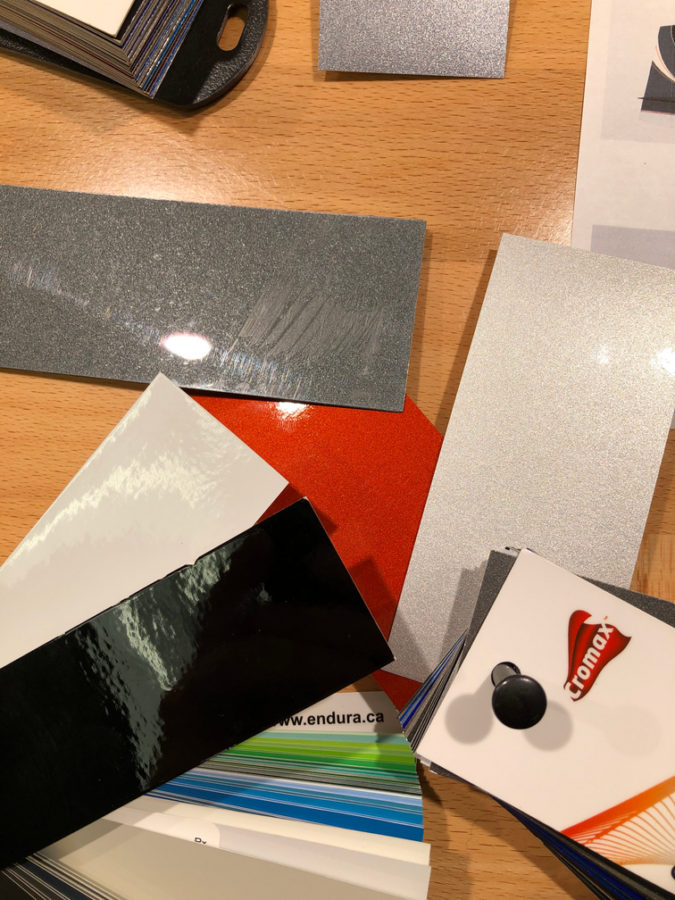
Fast forward a few years and airshows later with a random meeting in Raleigh NC on the ramp, I reached out to Jonathan about getting a slot for painting the plane. He and I agreed it’s best to paint after flight tests, as stuff comes on and off a lot plus a few adjustments can be made without messing up the paint. In March of 2020, I flew Tess down to Gadsden, AL (KGAD) airport to drop her off for paint. Jonathan and I spent the morning doing a tour of his two facilities, checking out other projects, and poking our heads into warbird jet projects on the field. He also finalized the actual colors in his office and did just a few tweaks on the scheme after having a few years and hundreds of other designs now under his belt.
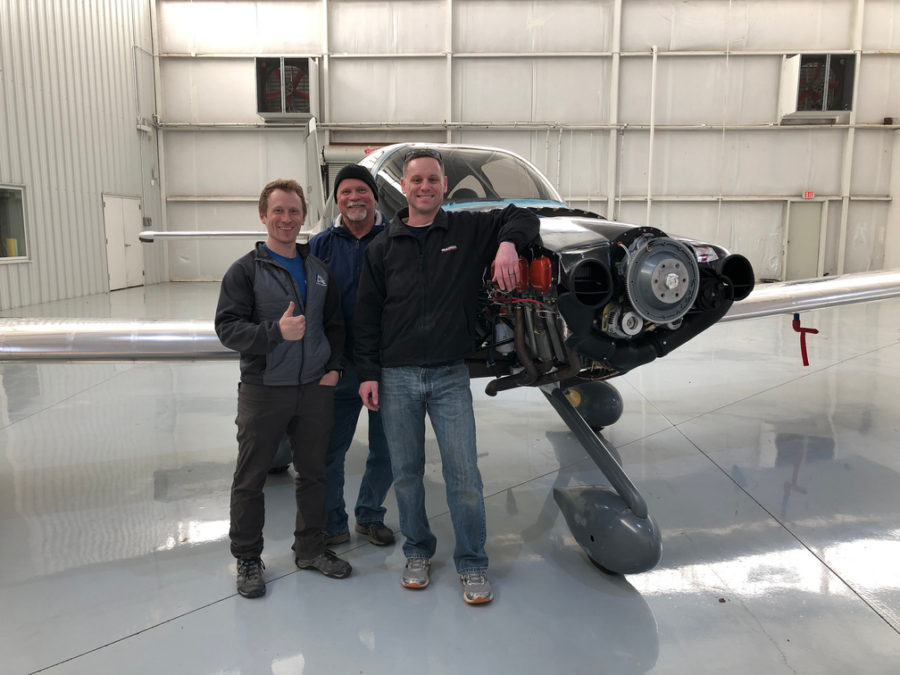
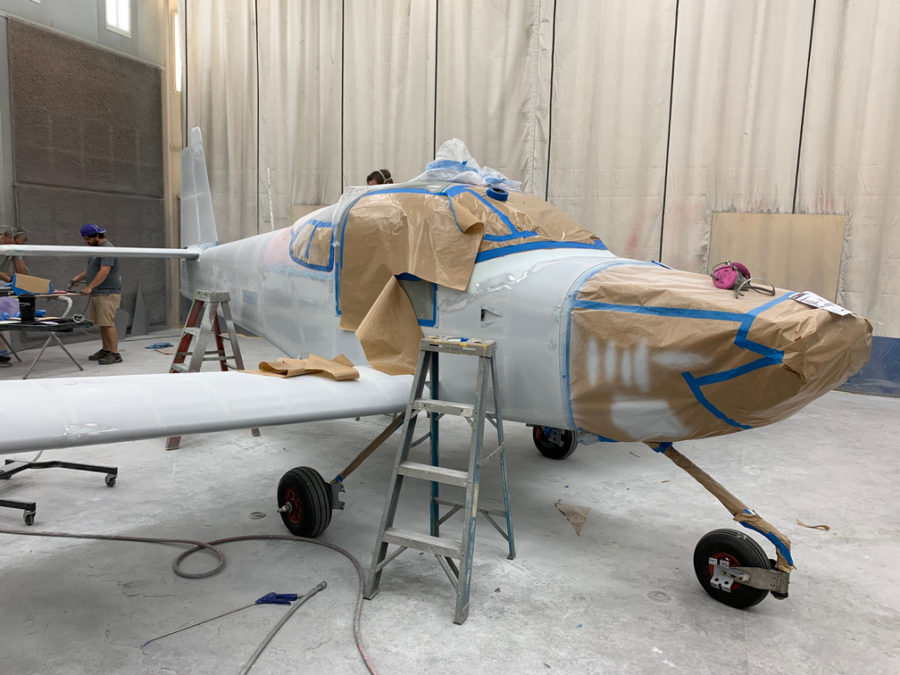
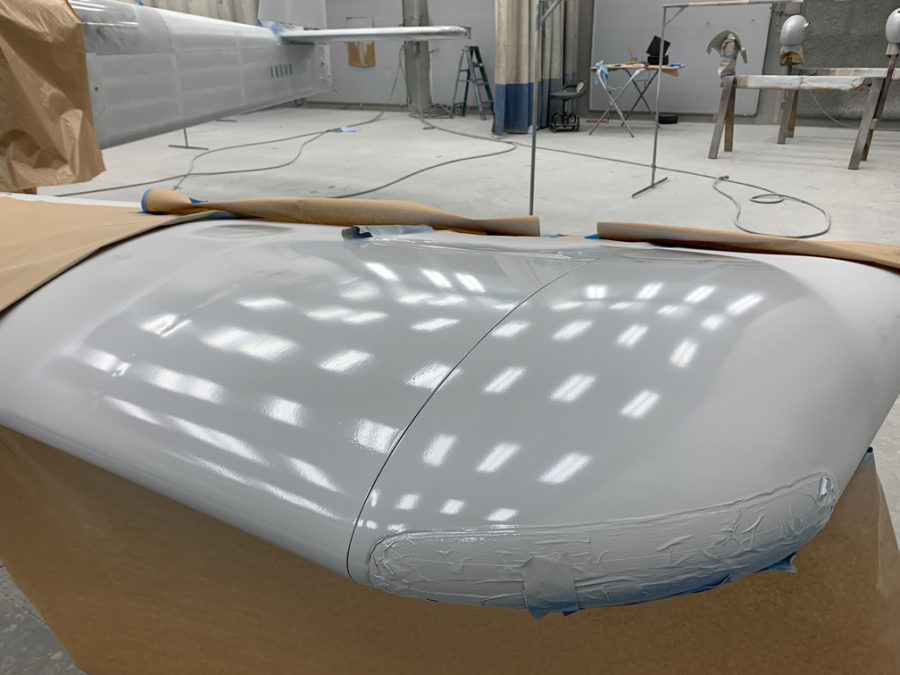
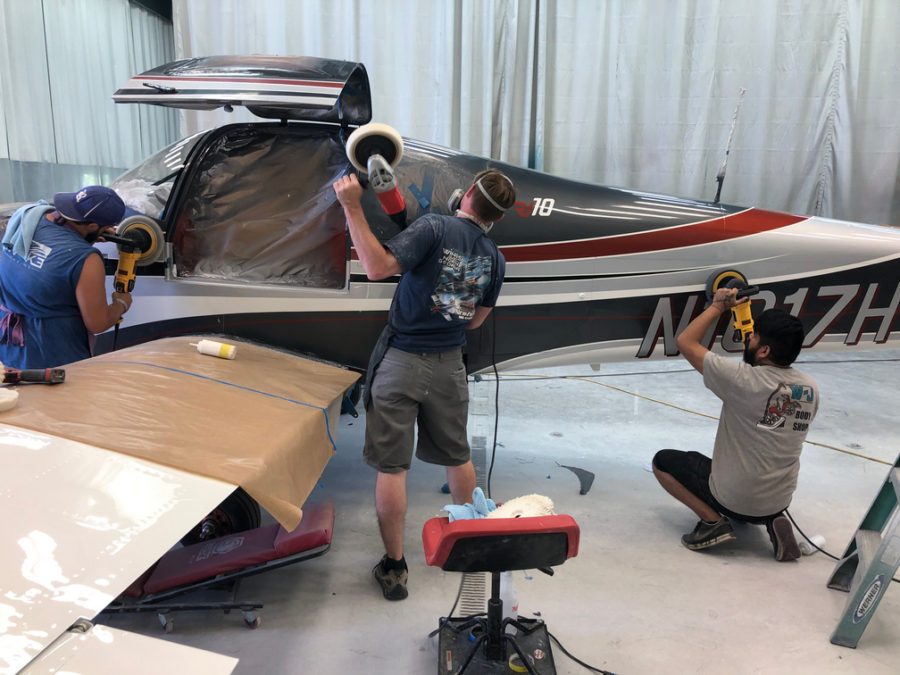
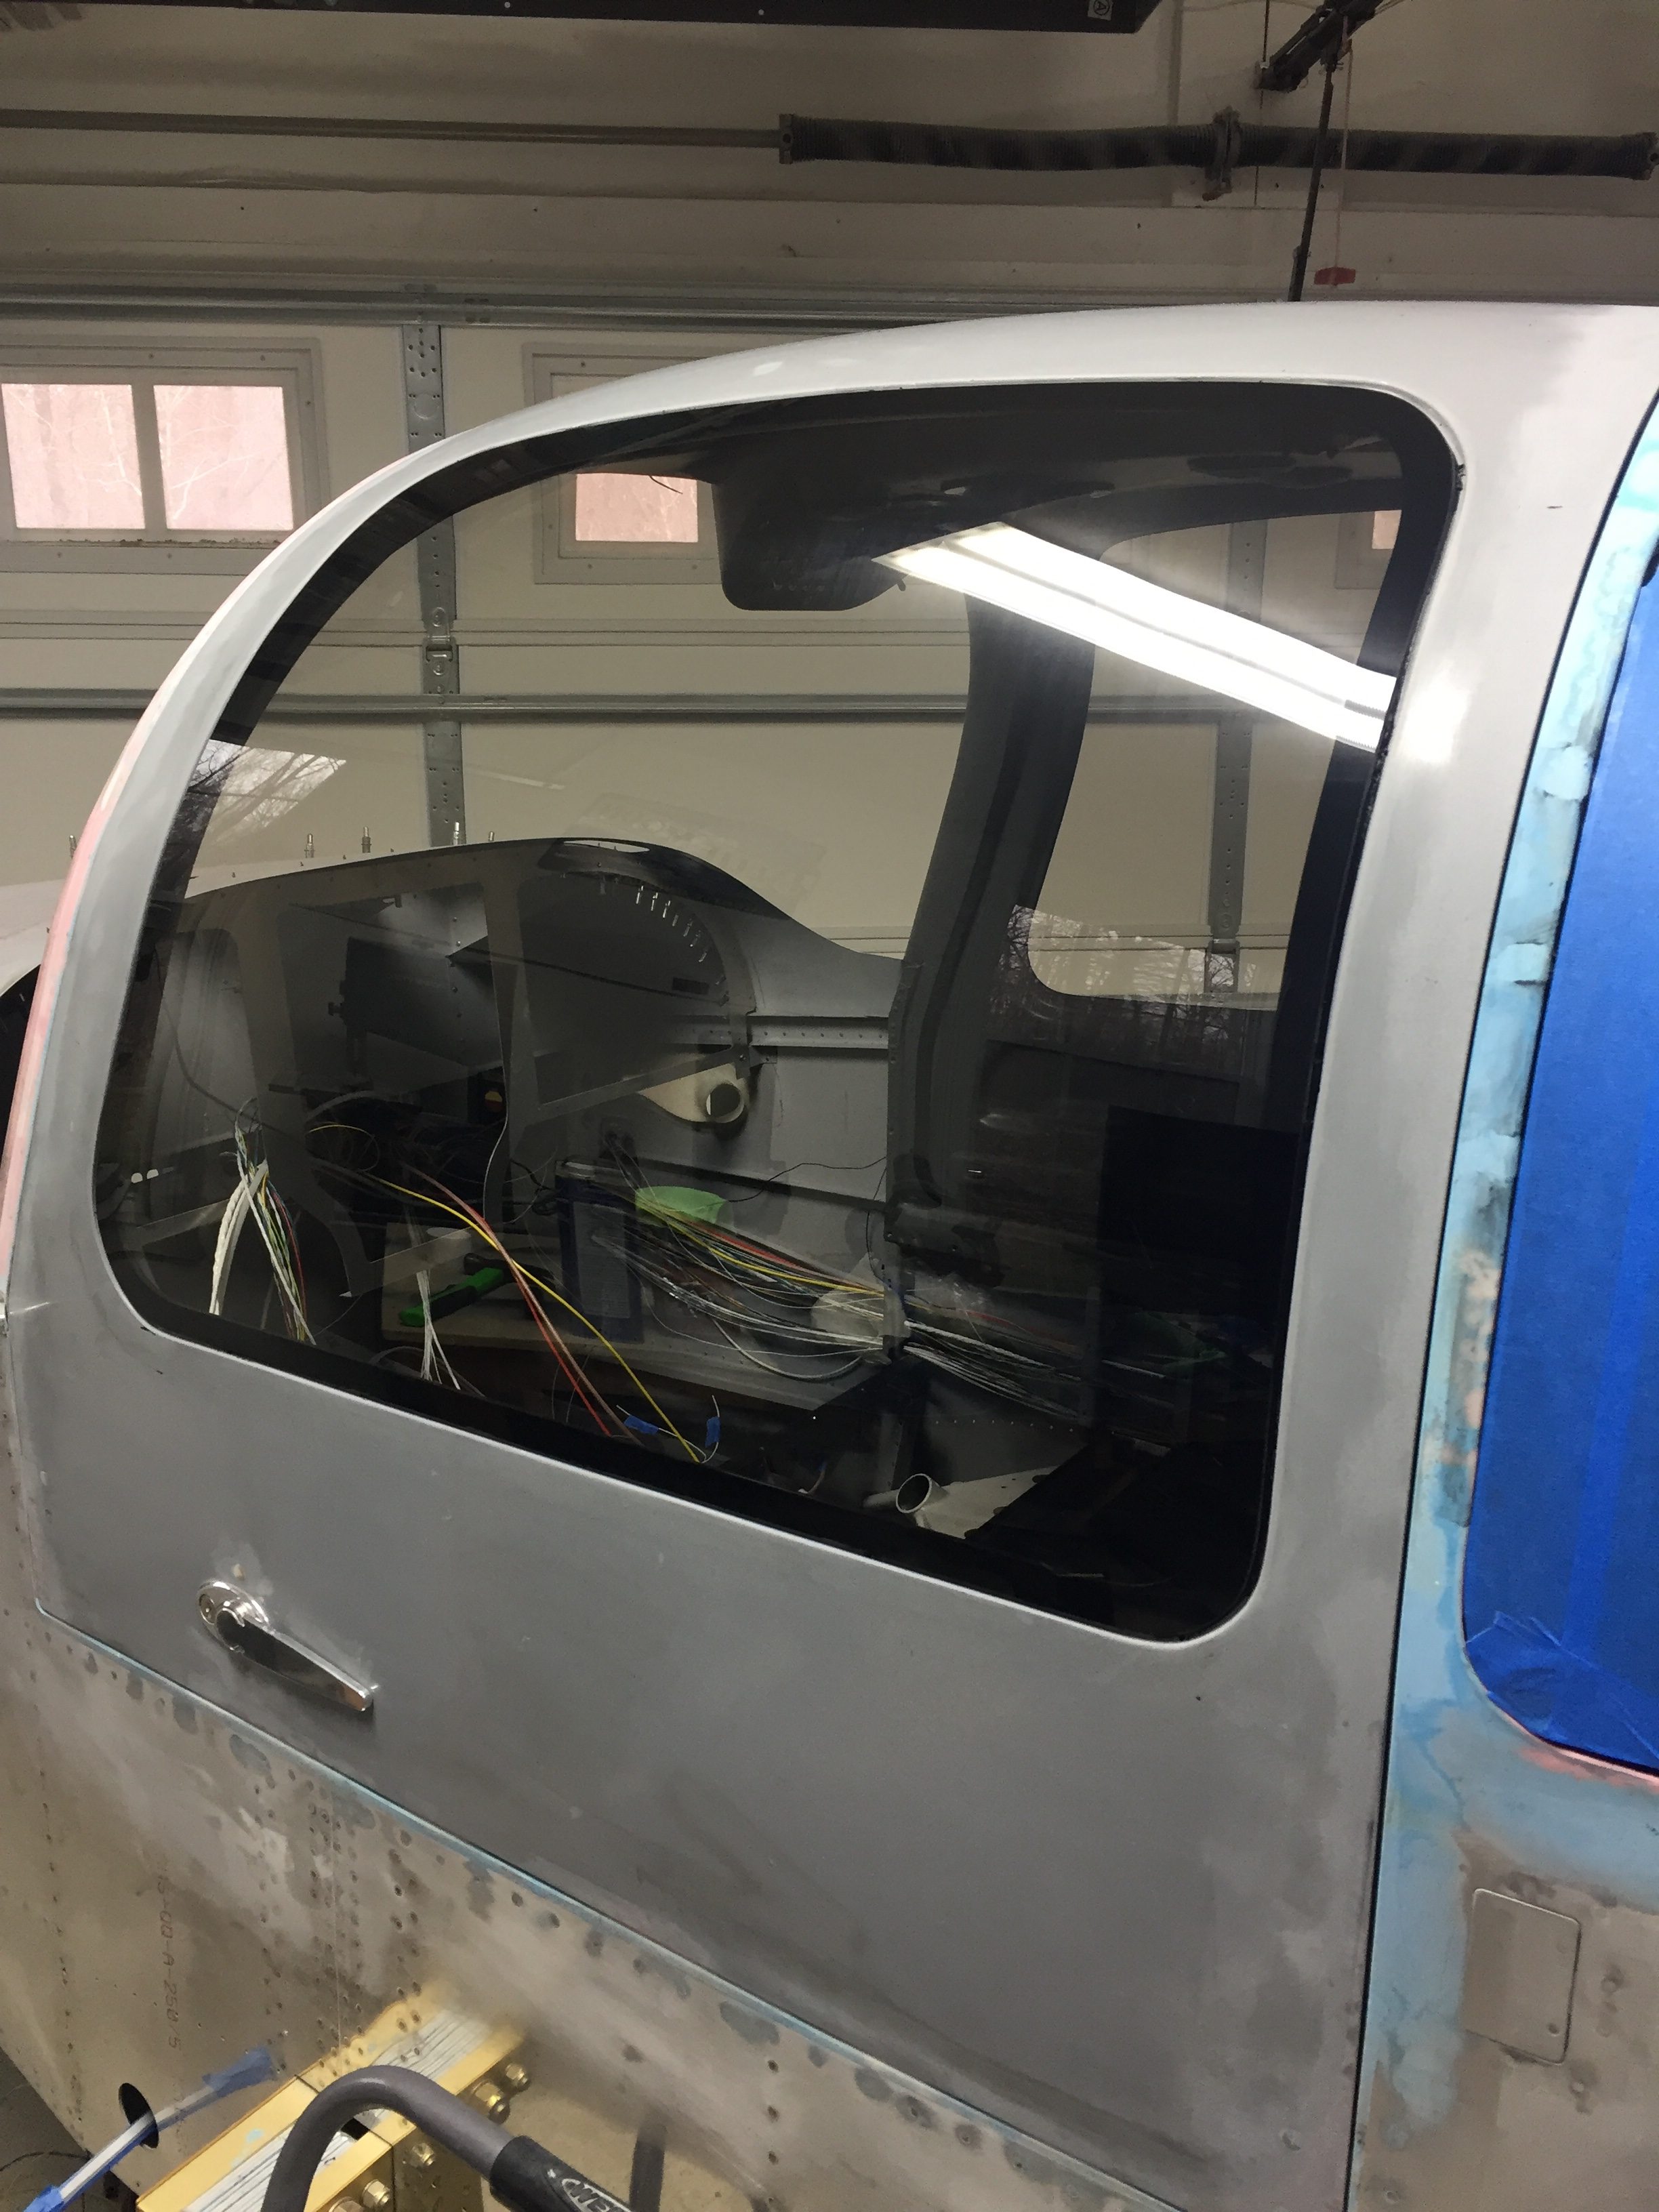
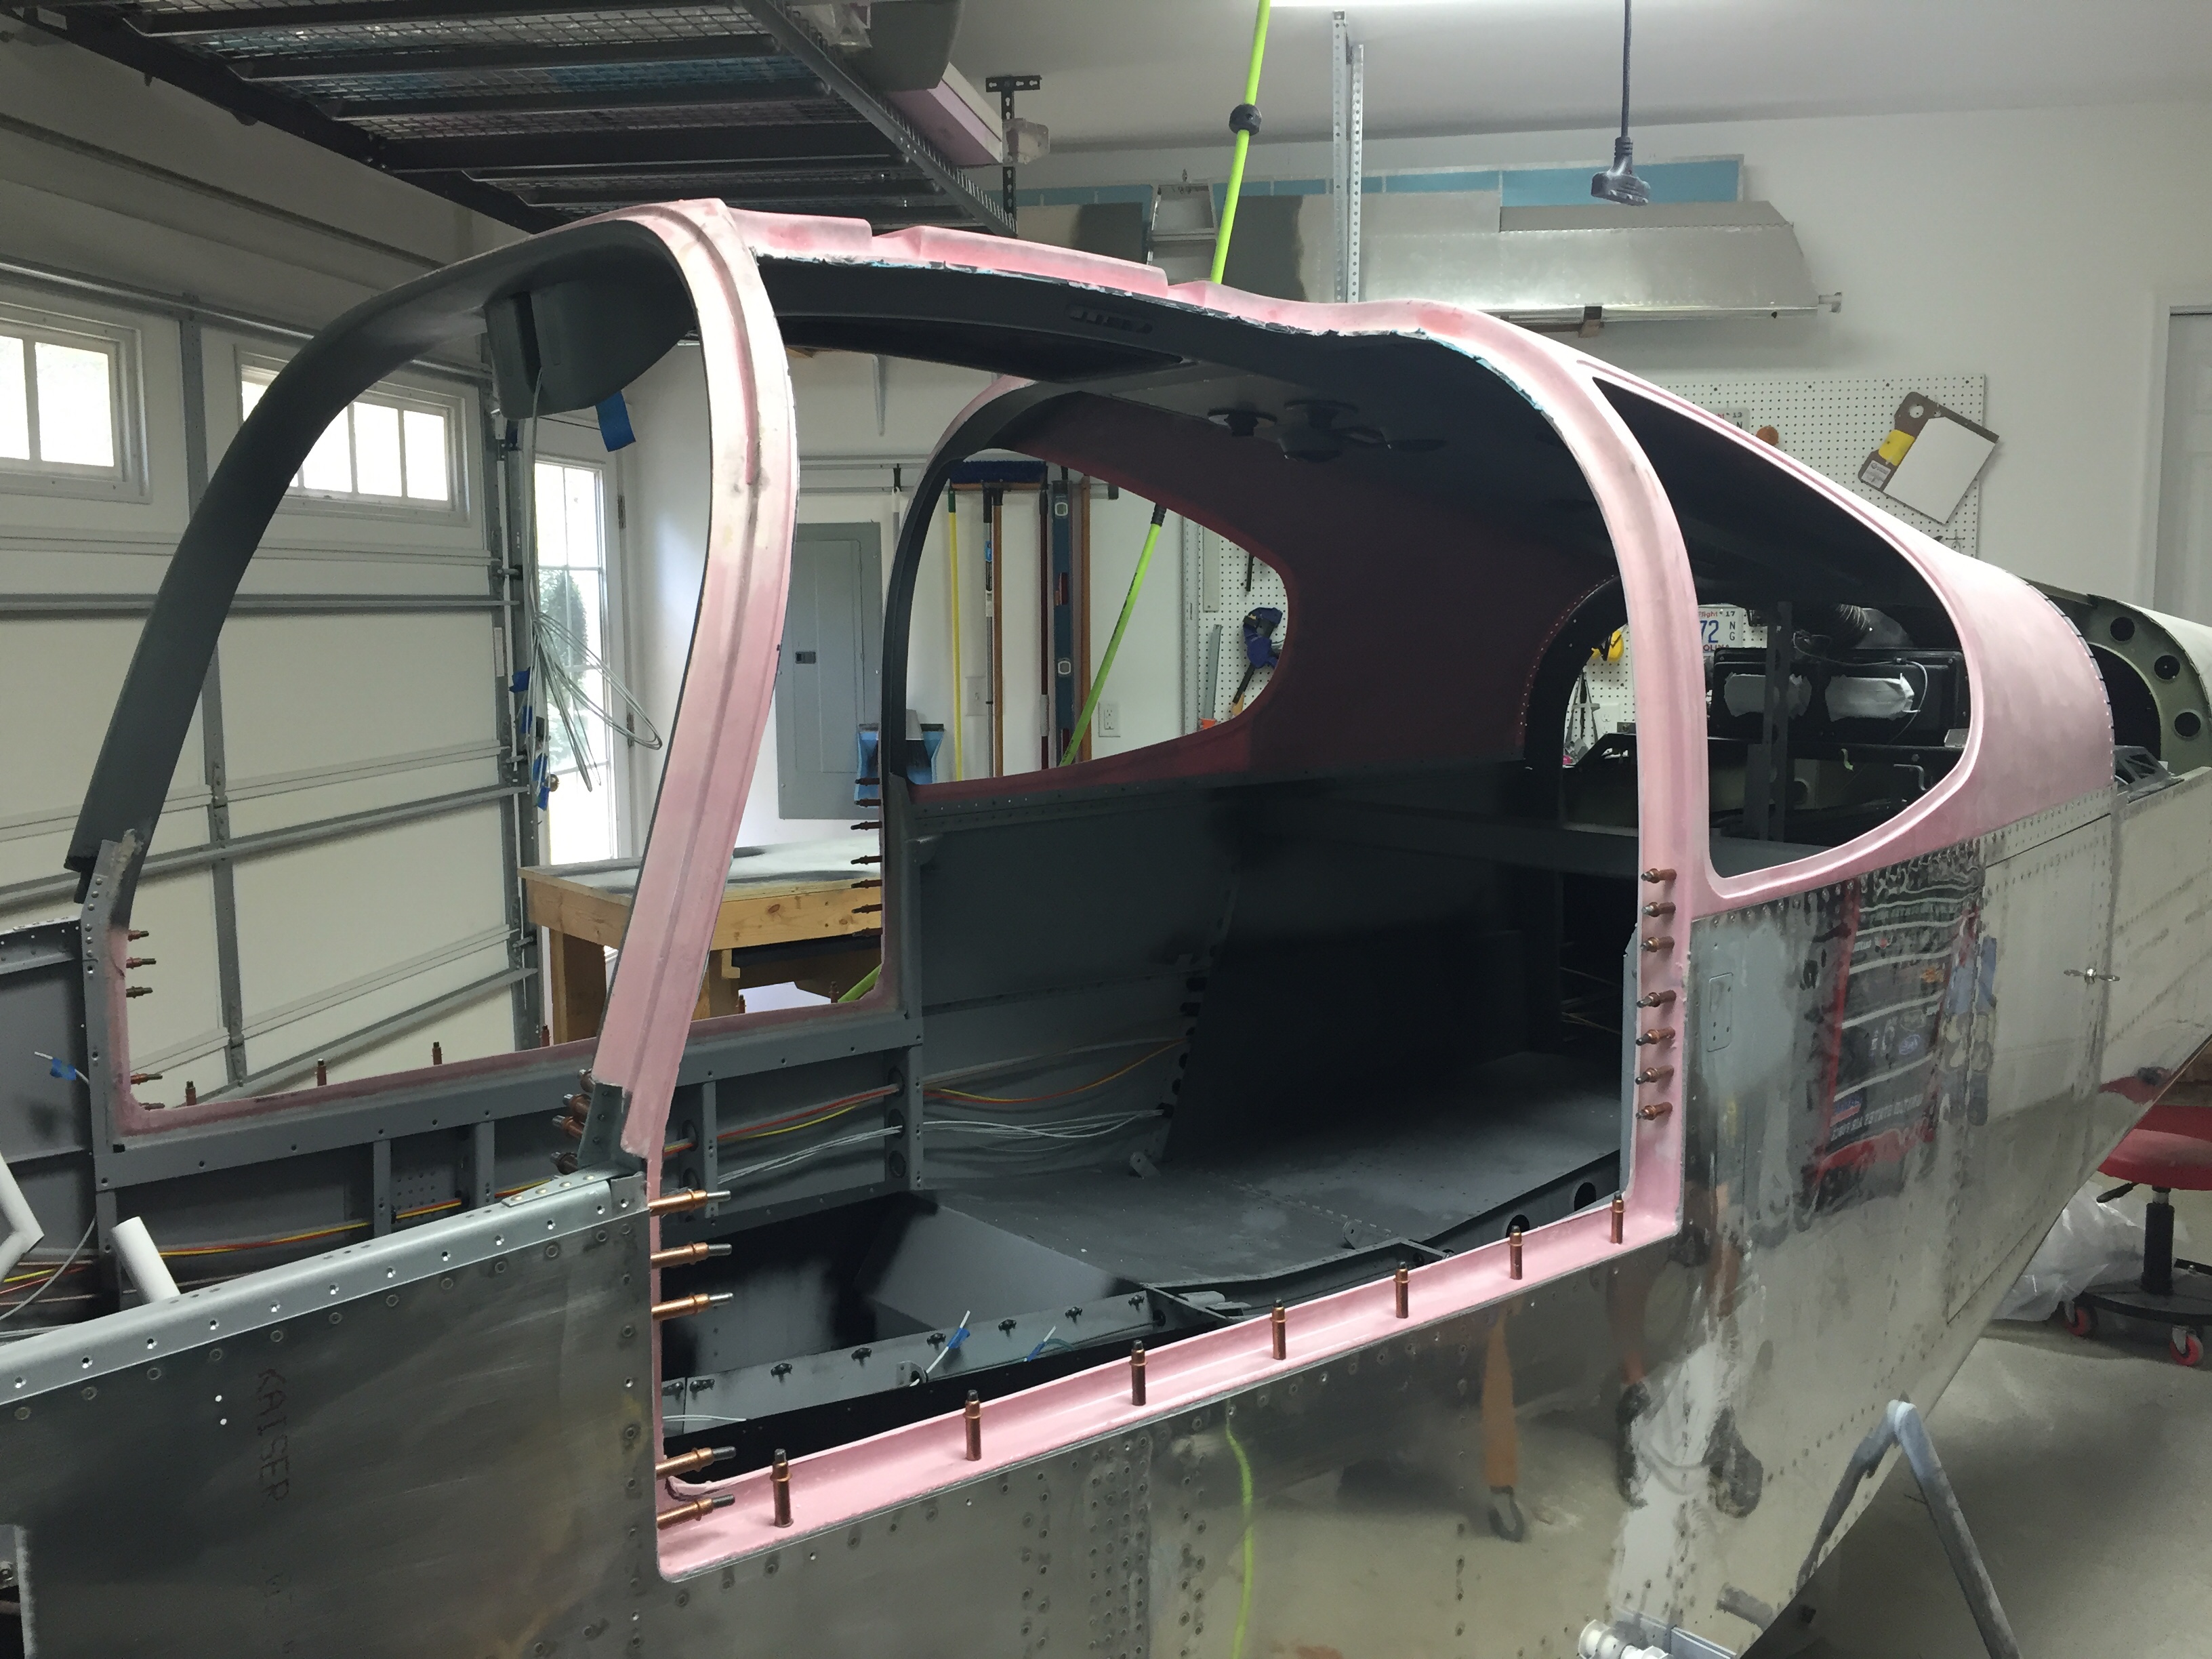
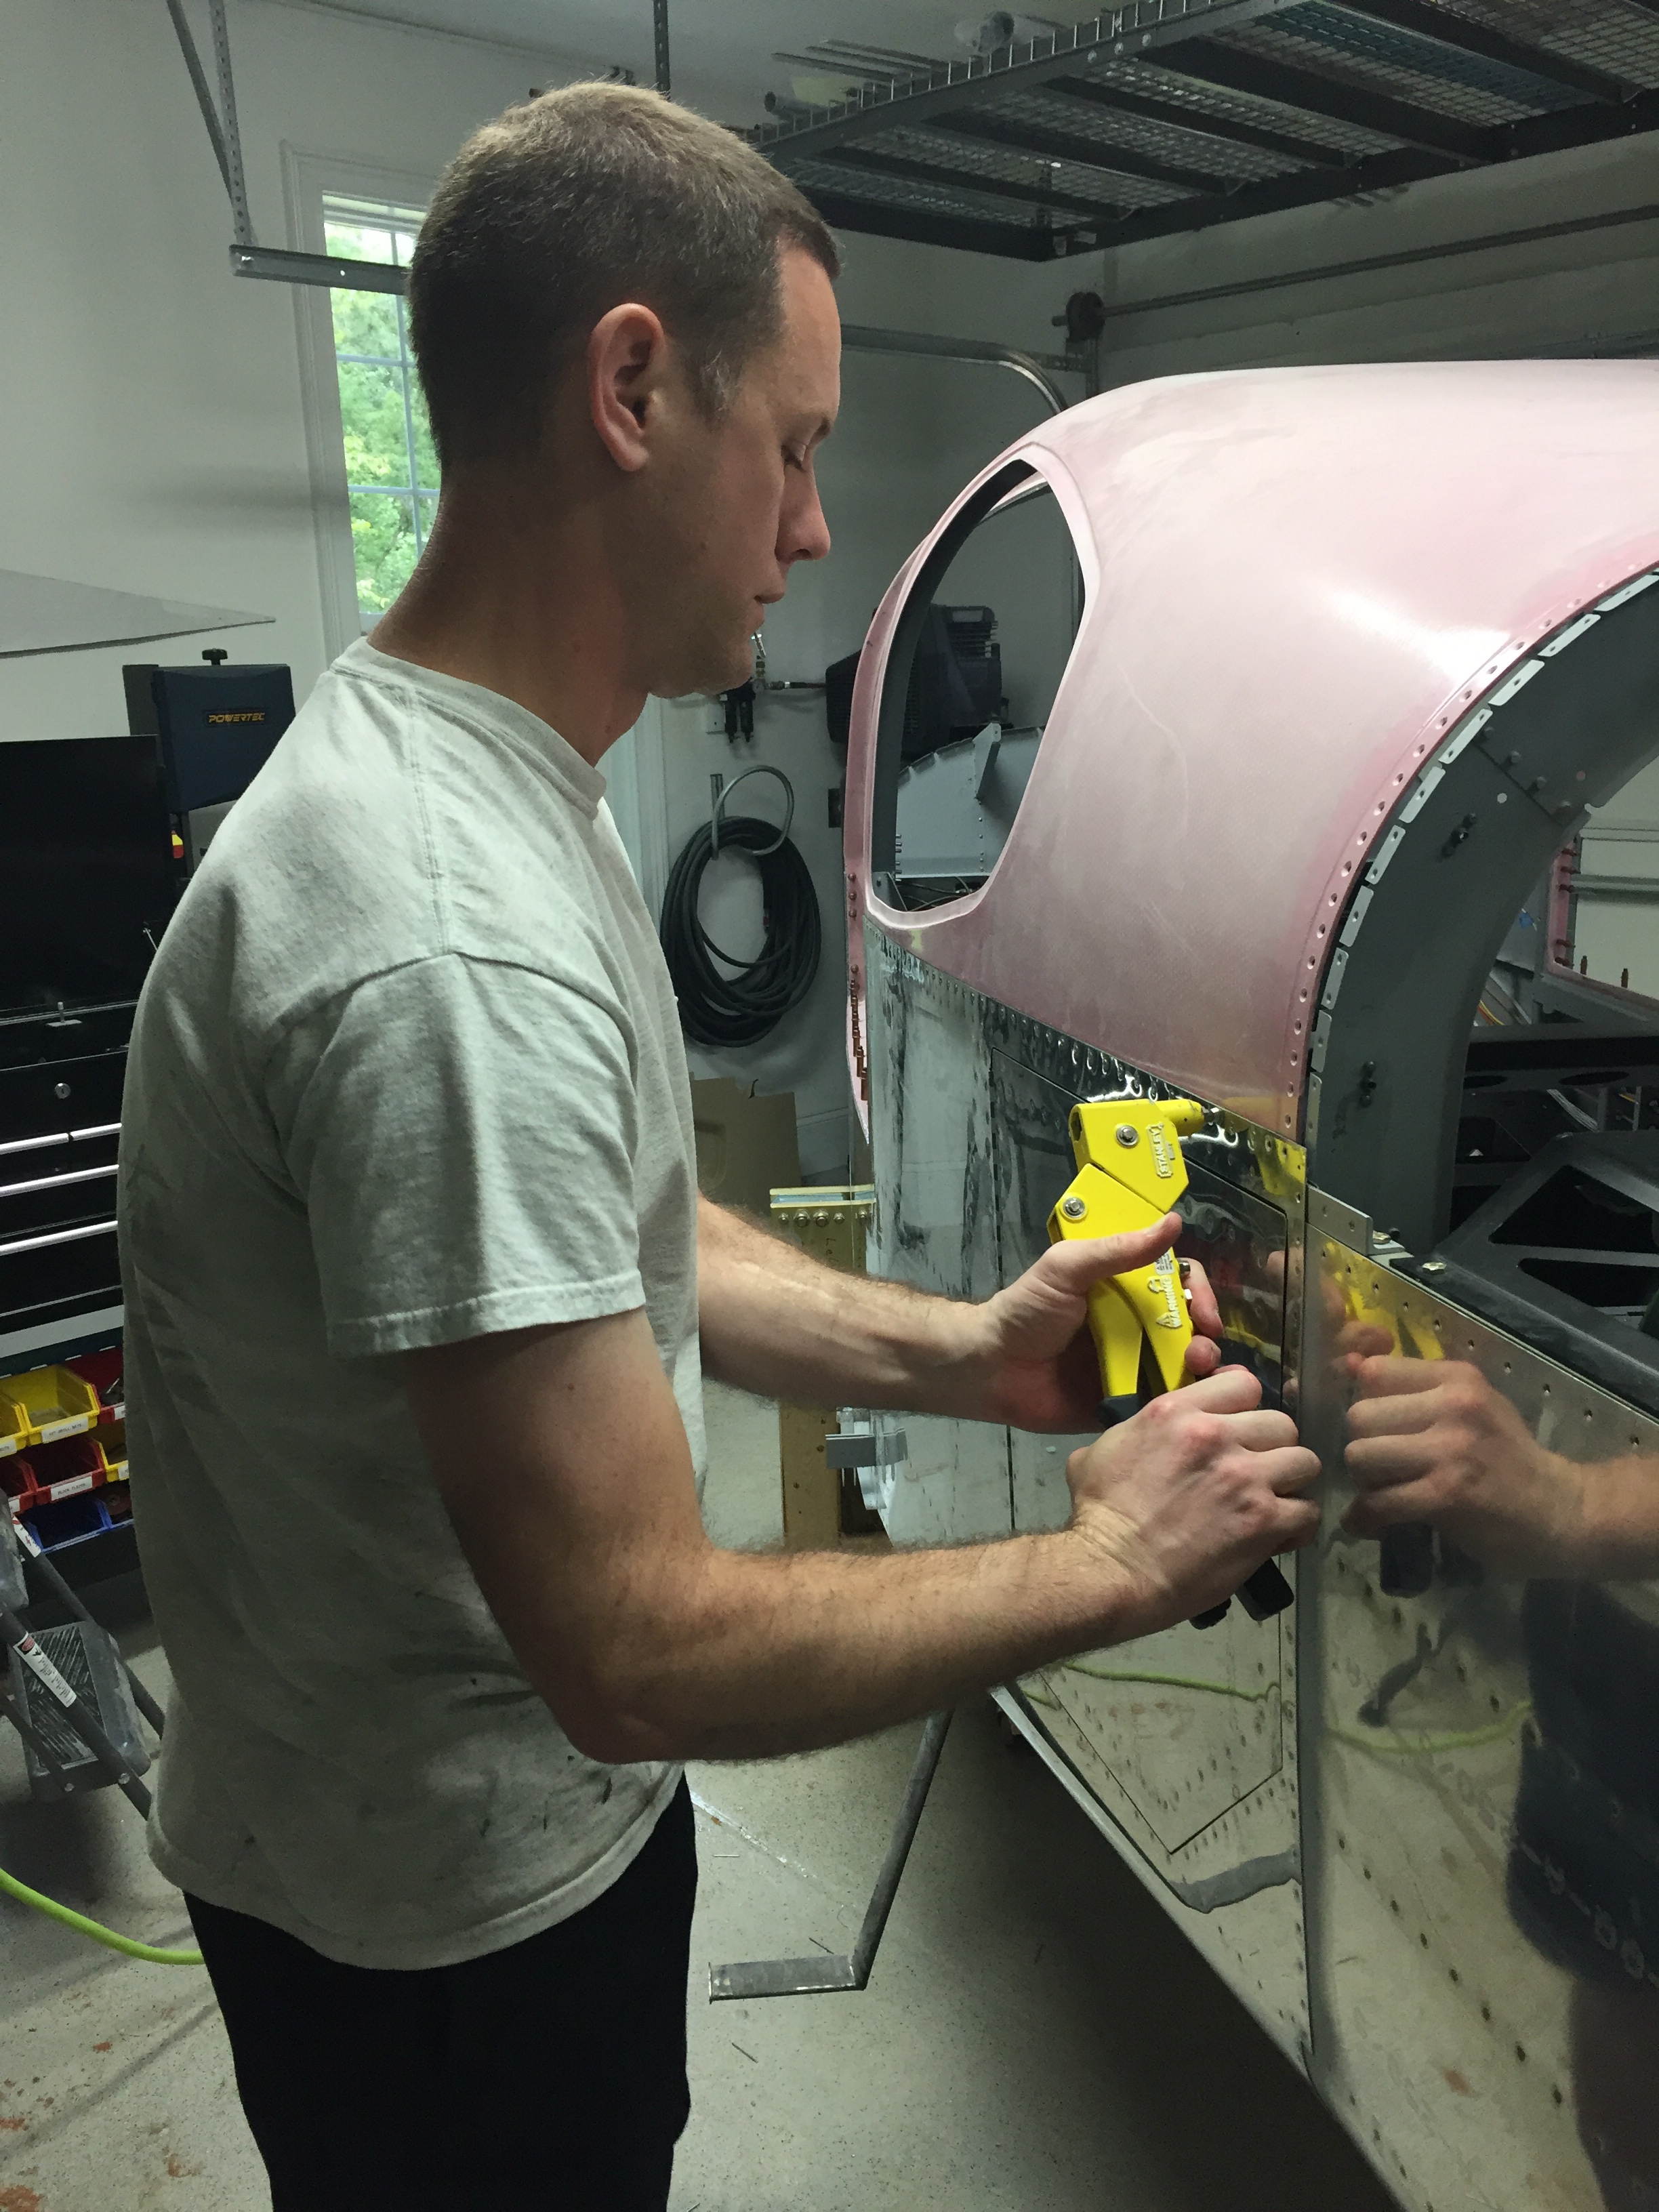
I left knowing it’d be a few months before it’s all finished up and let him and his team go to work. This website doesn’t have room to describe all the work they did! It does have room to say how good the work was! Wow, they dove in deep and with a vengeance for perfection. All of my stupid little new builder mess ups were corrected, they smoothed and perfected the fit of the wingtips which needed a lot of work, and they did an amazing job prepping each and every surface for a perfect paint job. The amount of filling and sanding was mind blowing to me even after I thought I had done a decent job of prepping. With the amount of colors and layout of the scheme, it was also a ton of work to get the color on the airplane. I still can’t figure out which order they put the colors on but the results were mind blowing. With the status pictures coming in with all the color on, I thought we were close to the finish line, but that’s where even more work comes in. They wet sanded the entire airplane, knocking each line down between colors and eliminating all waves, orange peel, and imperfections. Then, they cleared the entire plane. One smooth consistent surface makes a massive difference on the quality and longevity of the paint job. Buffing and touch-ups were next and then I got to come down and help put it back together. We finished the windows with sealant filling the troughs in around the edges and a protective bead on the bottom of the windshield. The guys were great hosts, taught me a few things, gave me a lot of help, and lots of new shiny stainless steel hardware!
Even our tug got a cool paint job from a new painter learning his skills. Honestly, the tug gets more comments than the plan does at home!
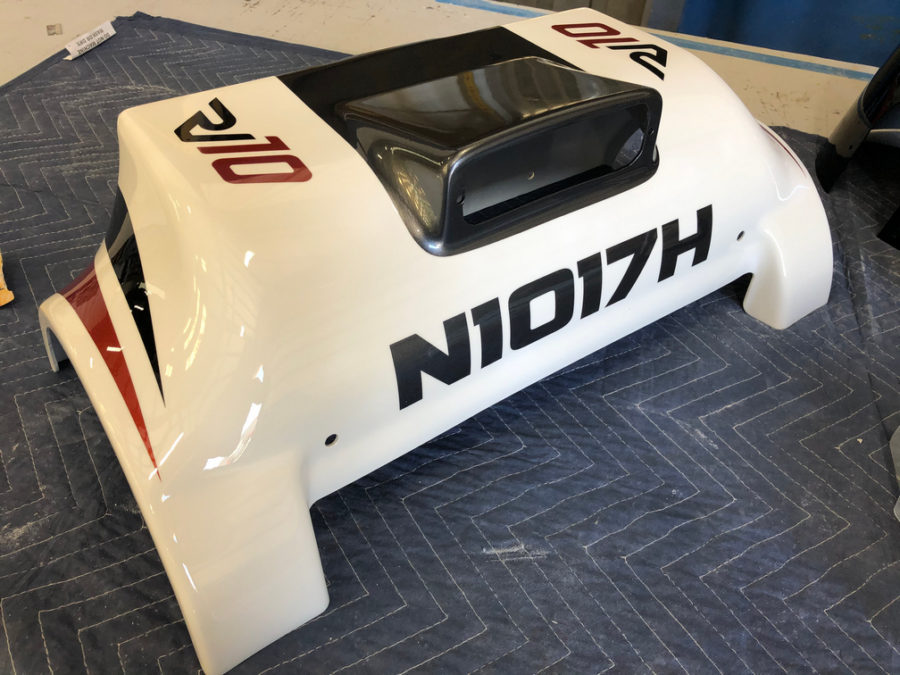
After several agonizing months without a plane, we rolled Tess out into the evening sun for a photo shoot on the taxi way. I was drooling the entire time! To say I’m happy is a massive understatement and the feedback from others is the same. Even after a year of flying and a few scratches, sorry Jonathan, I still get people coming up to it everywhere I go commenting on the paint.
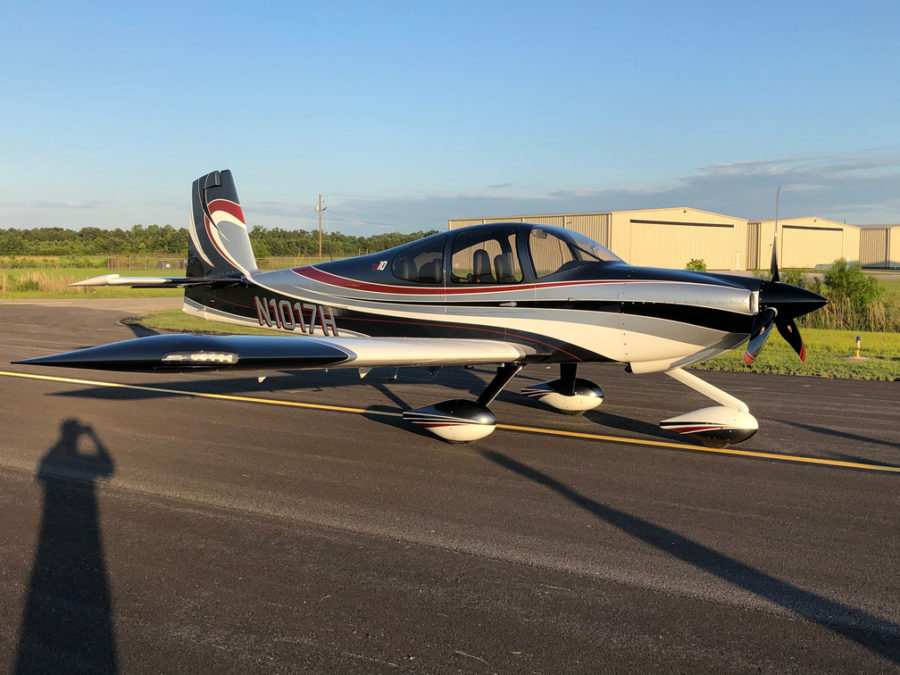
So, the nitty gritty of it all. It was expensive. Really expensive. It took a long time. A lot longer than I was told originally and was expecting. It is better than I could have ever imagined. It is worth twice what we paid for it. I’m realizing that even more with fellow builders struggling with paint quality issues. I have and will continue to recommend Evoke and the team of professionals to everyone because they doe the job right the first time.
Jonathan, you took our baby girl and made her beautiful. Thank you!
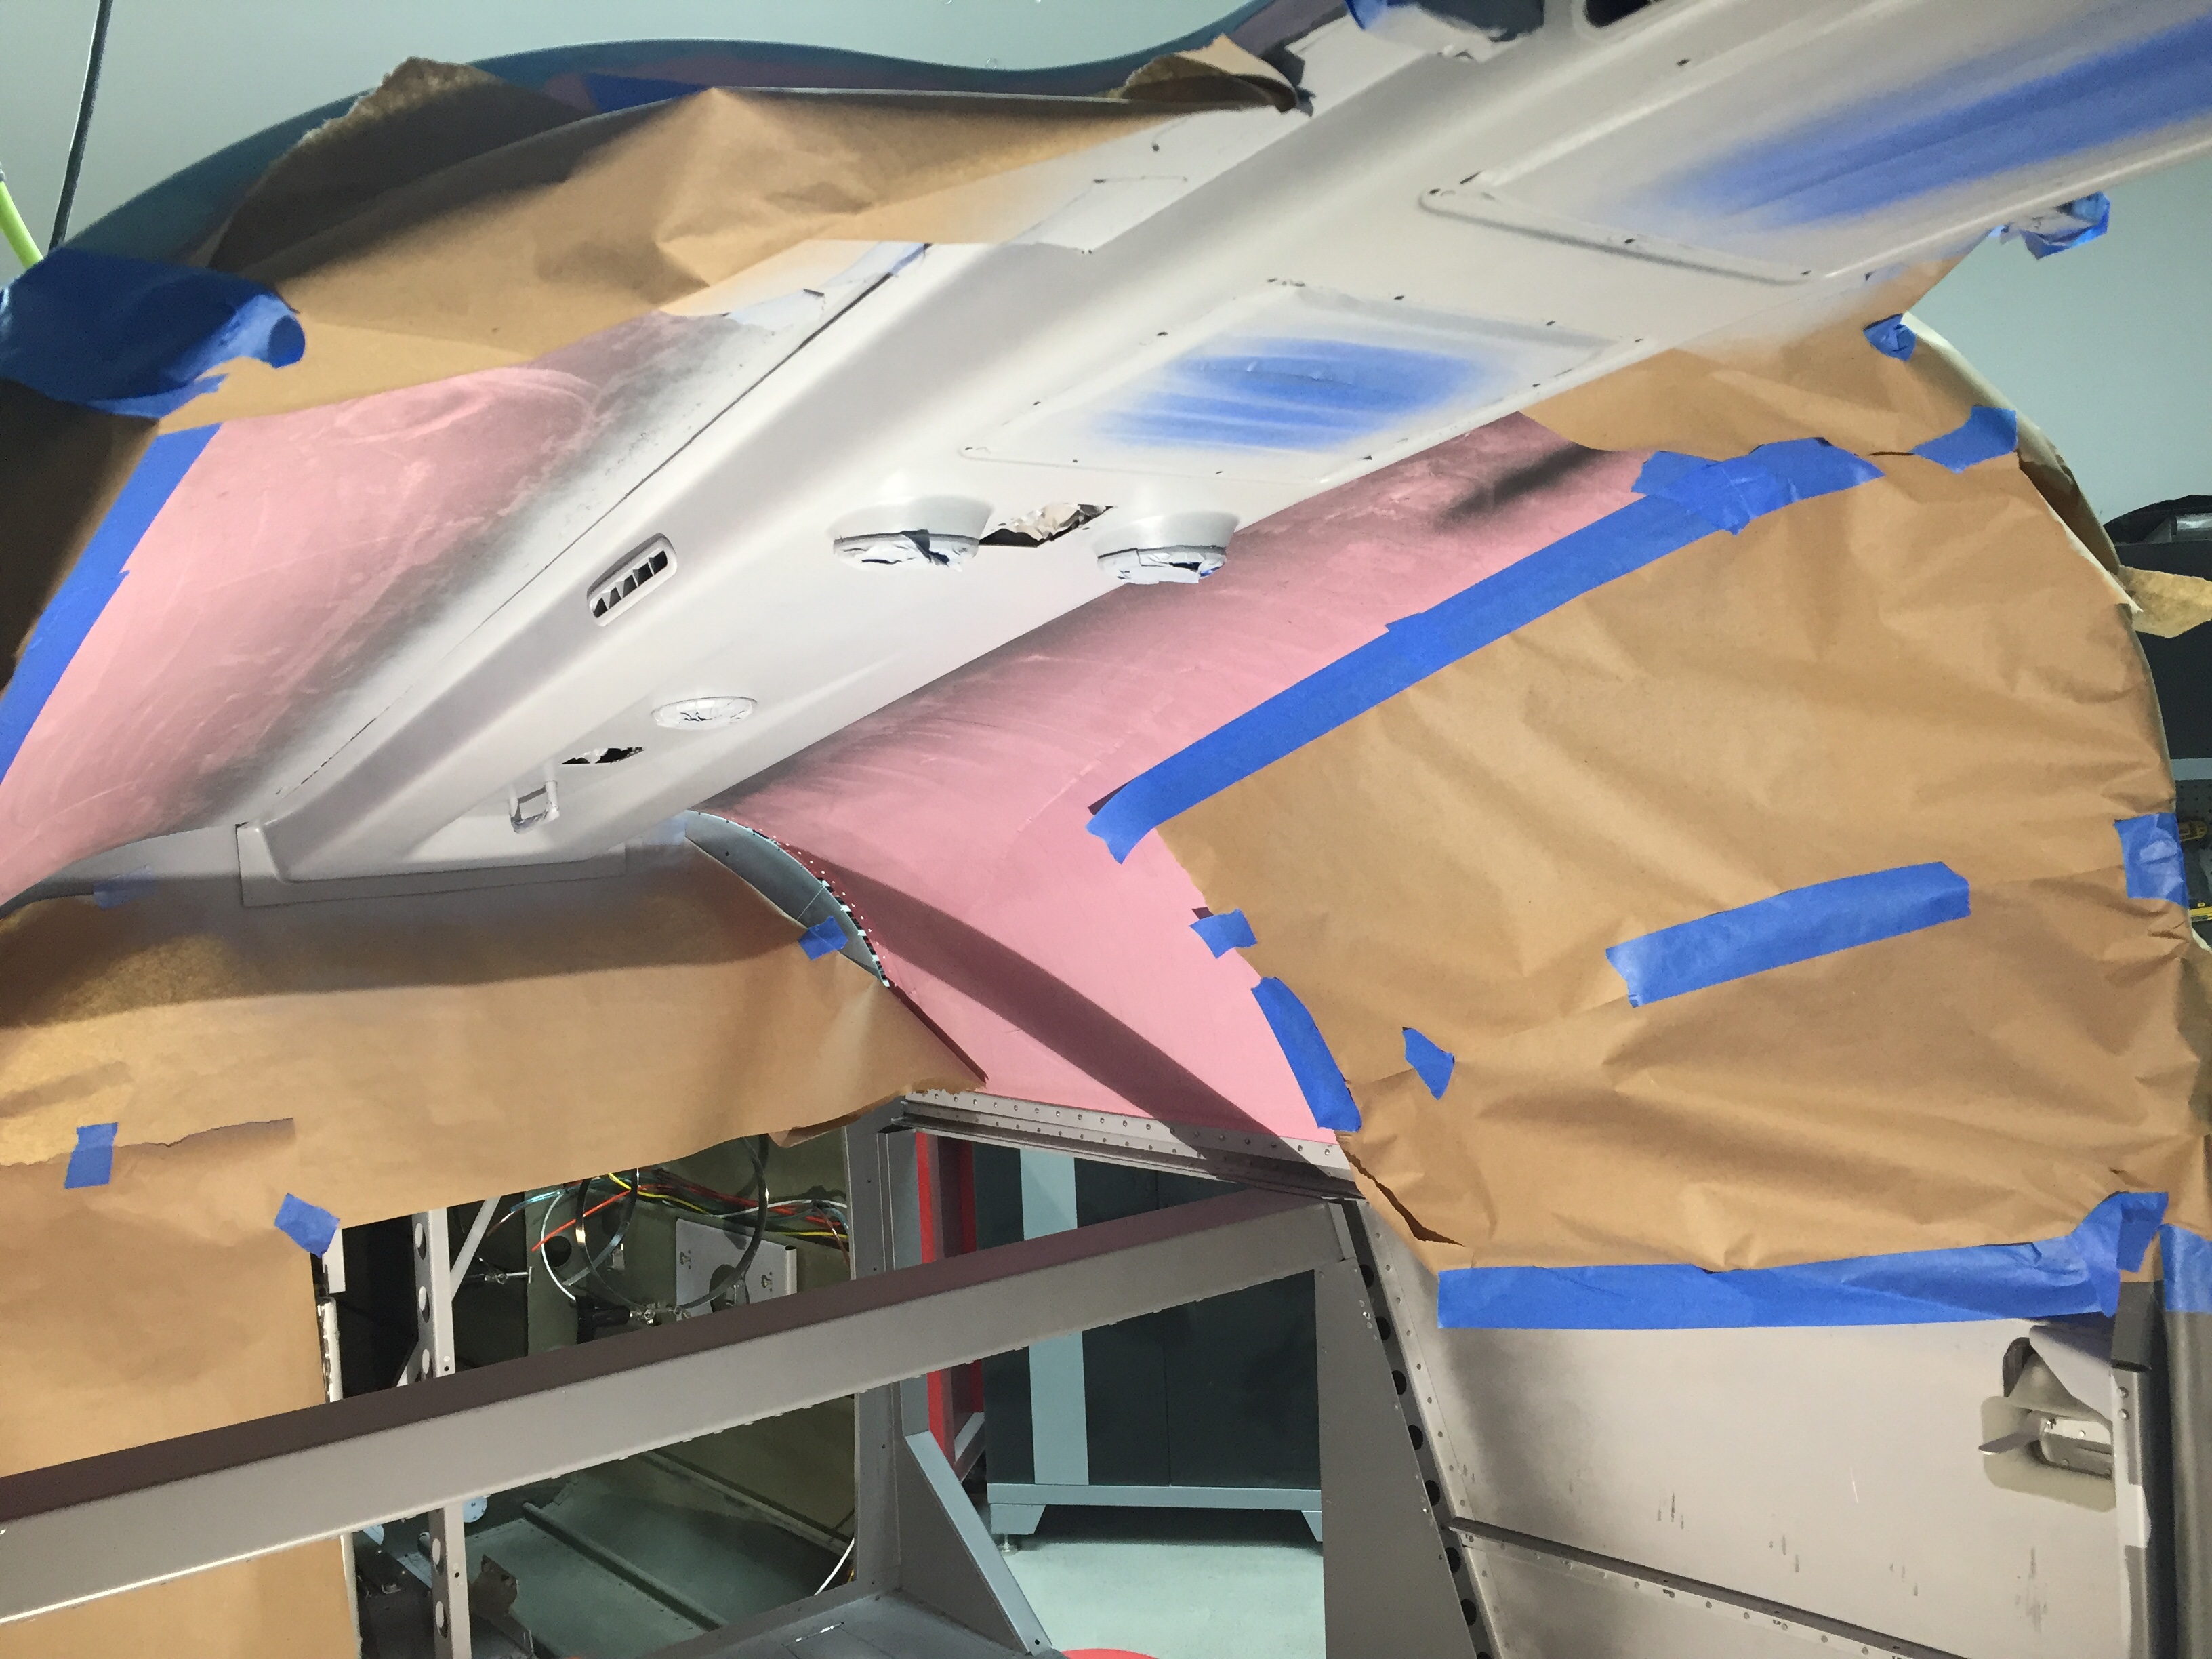
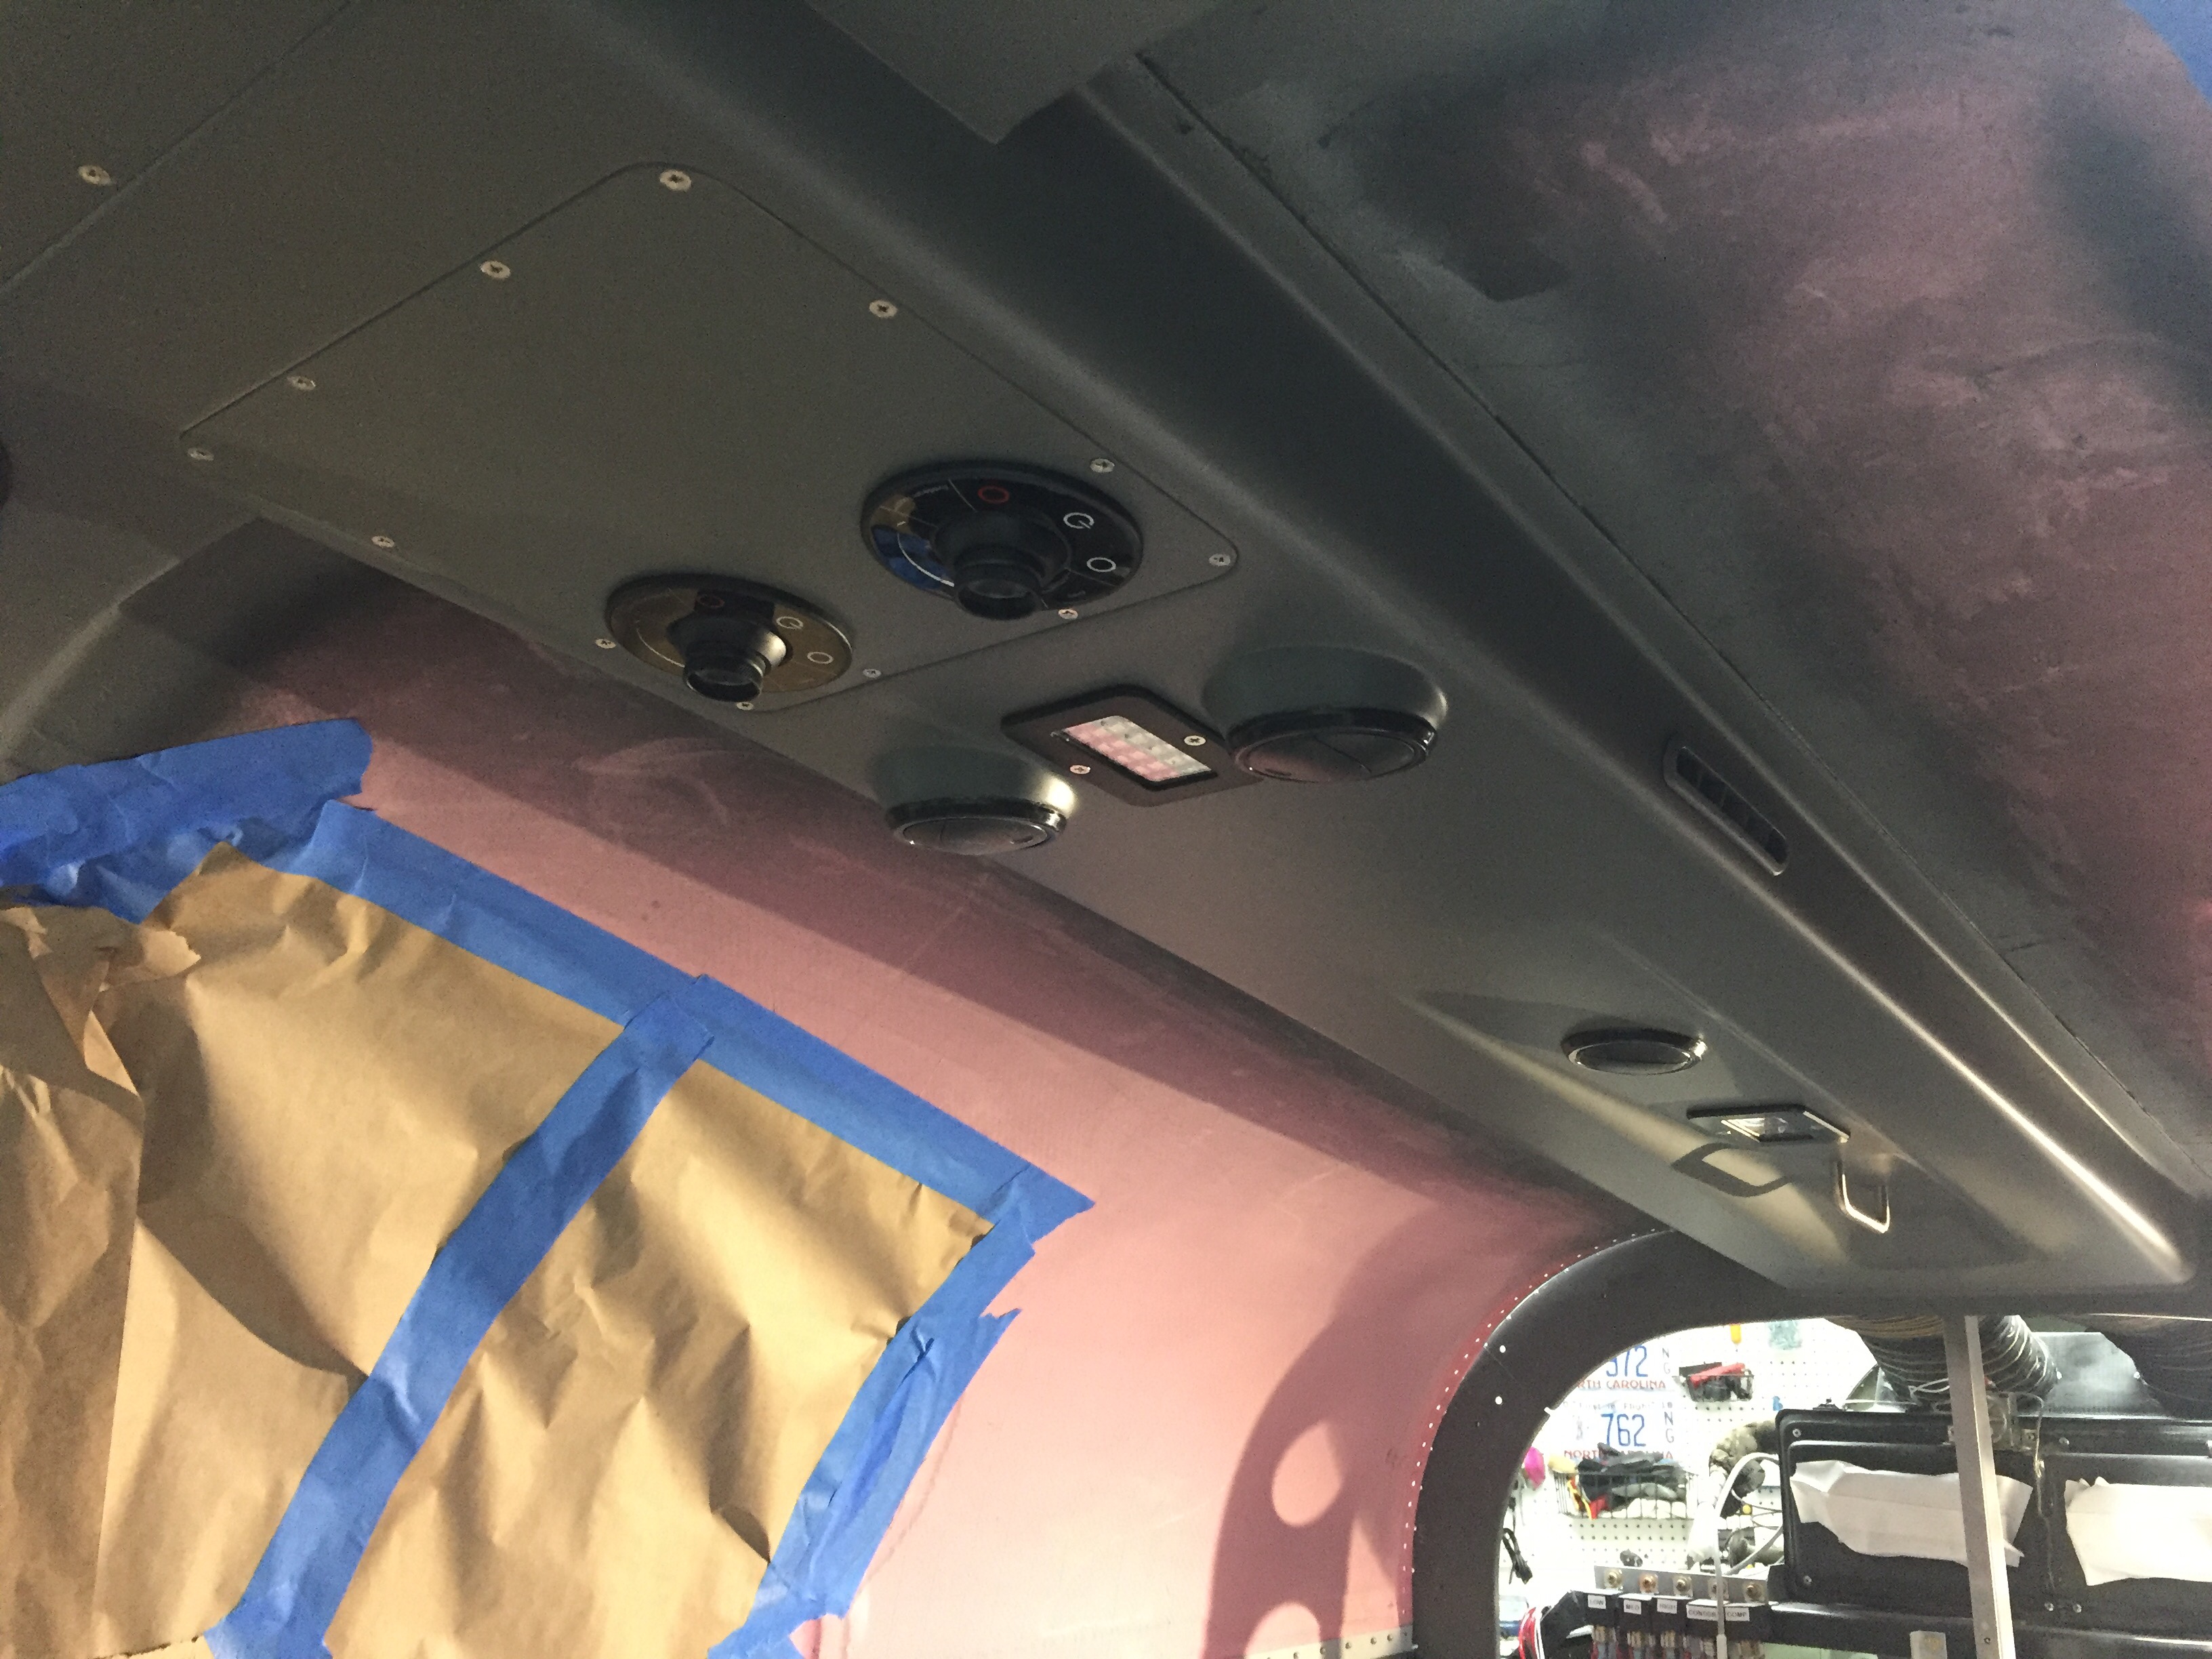
Doing things better the second time seems to be a driving motto for my project. The paint on the overhead console is a great example. With it properly prepped, I sprayed primer on it using the adhesion promoter and instantly saw improvement. Once the primer cured, I did some test scrapes and the stuff stuck like epoxy! After that, the color was easy, again using adhesion promoter after a good wipe down with tac free. I followed all of that up with two coats of the satin clear on the entire painted interior. It’s about time I replace the cartridges on my respirator.
I also fixed the rear foot well spar paint after cleaning the old stuff off and re-scuffing and priming the surface. I wound up test fitting a few pieces of the carpet just to get an idea of how much metal is exposed and what actually needs to be painted. The Aerosport carpet is nice, I couldn’t have done a better job myself, but they aren’t an exact fit which is a bit irritating especially for how much it costs. Not sure if all of the patterns are like that, but the floor carpet for the rear foot well is about 1/2″ too big on length and width, so one side or both will need to curl up a bit. Never noticeable once it’s flying, just being picky I guess.

The doors are finally done!!!! The last coat of color and clear went on smoothly and I’m calling them fully baked. What a royal pain in the ass they were. I am very happy with how they turned out, though. I put the Aerosport handle covers on and got the Plane Around center cam final installed with the roll pin. The door lights went in for good as well. I took my time putting the final door seal on from McMaster Carr and made the seam hidden by the strut and strut bracket. I used a bit of E6000 glue to ensure no gap in the seal lets water in up there. Holding my breath, I closed the door and much to my surprise, both closed with the seal on smoothly! The right side door is a bit more firm on the handle motion, but the wife is happy with it which is all that matters.
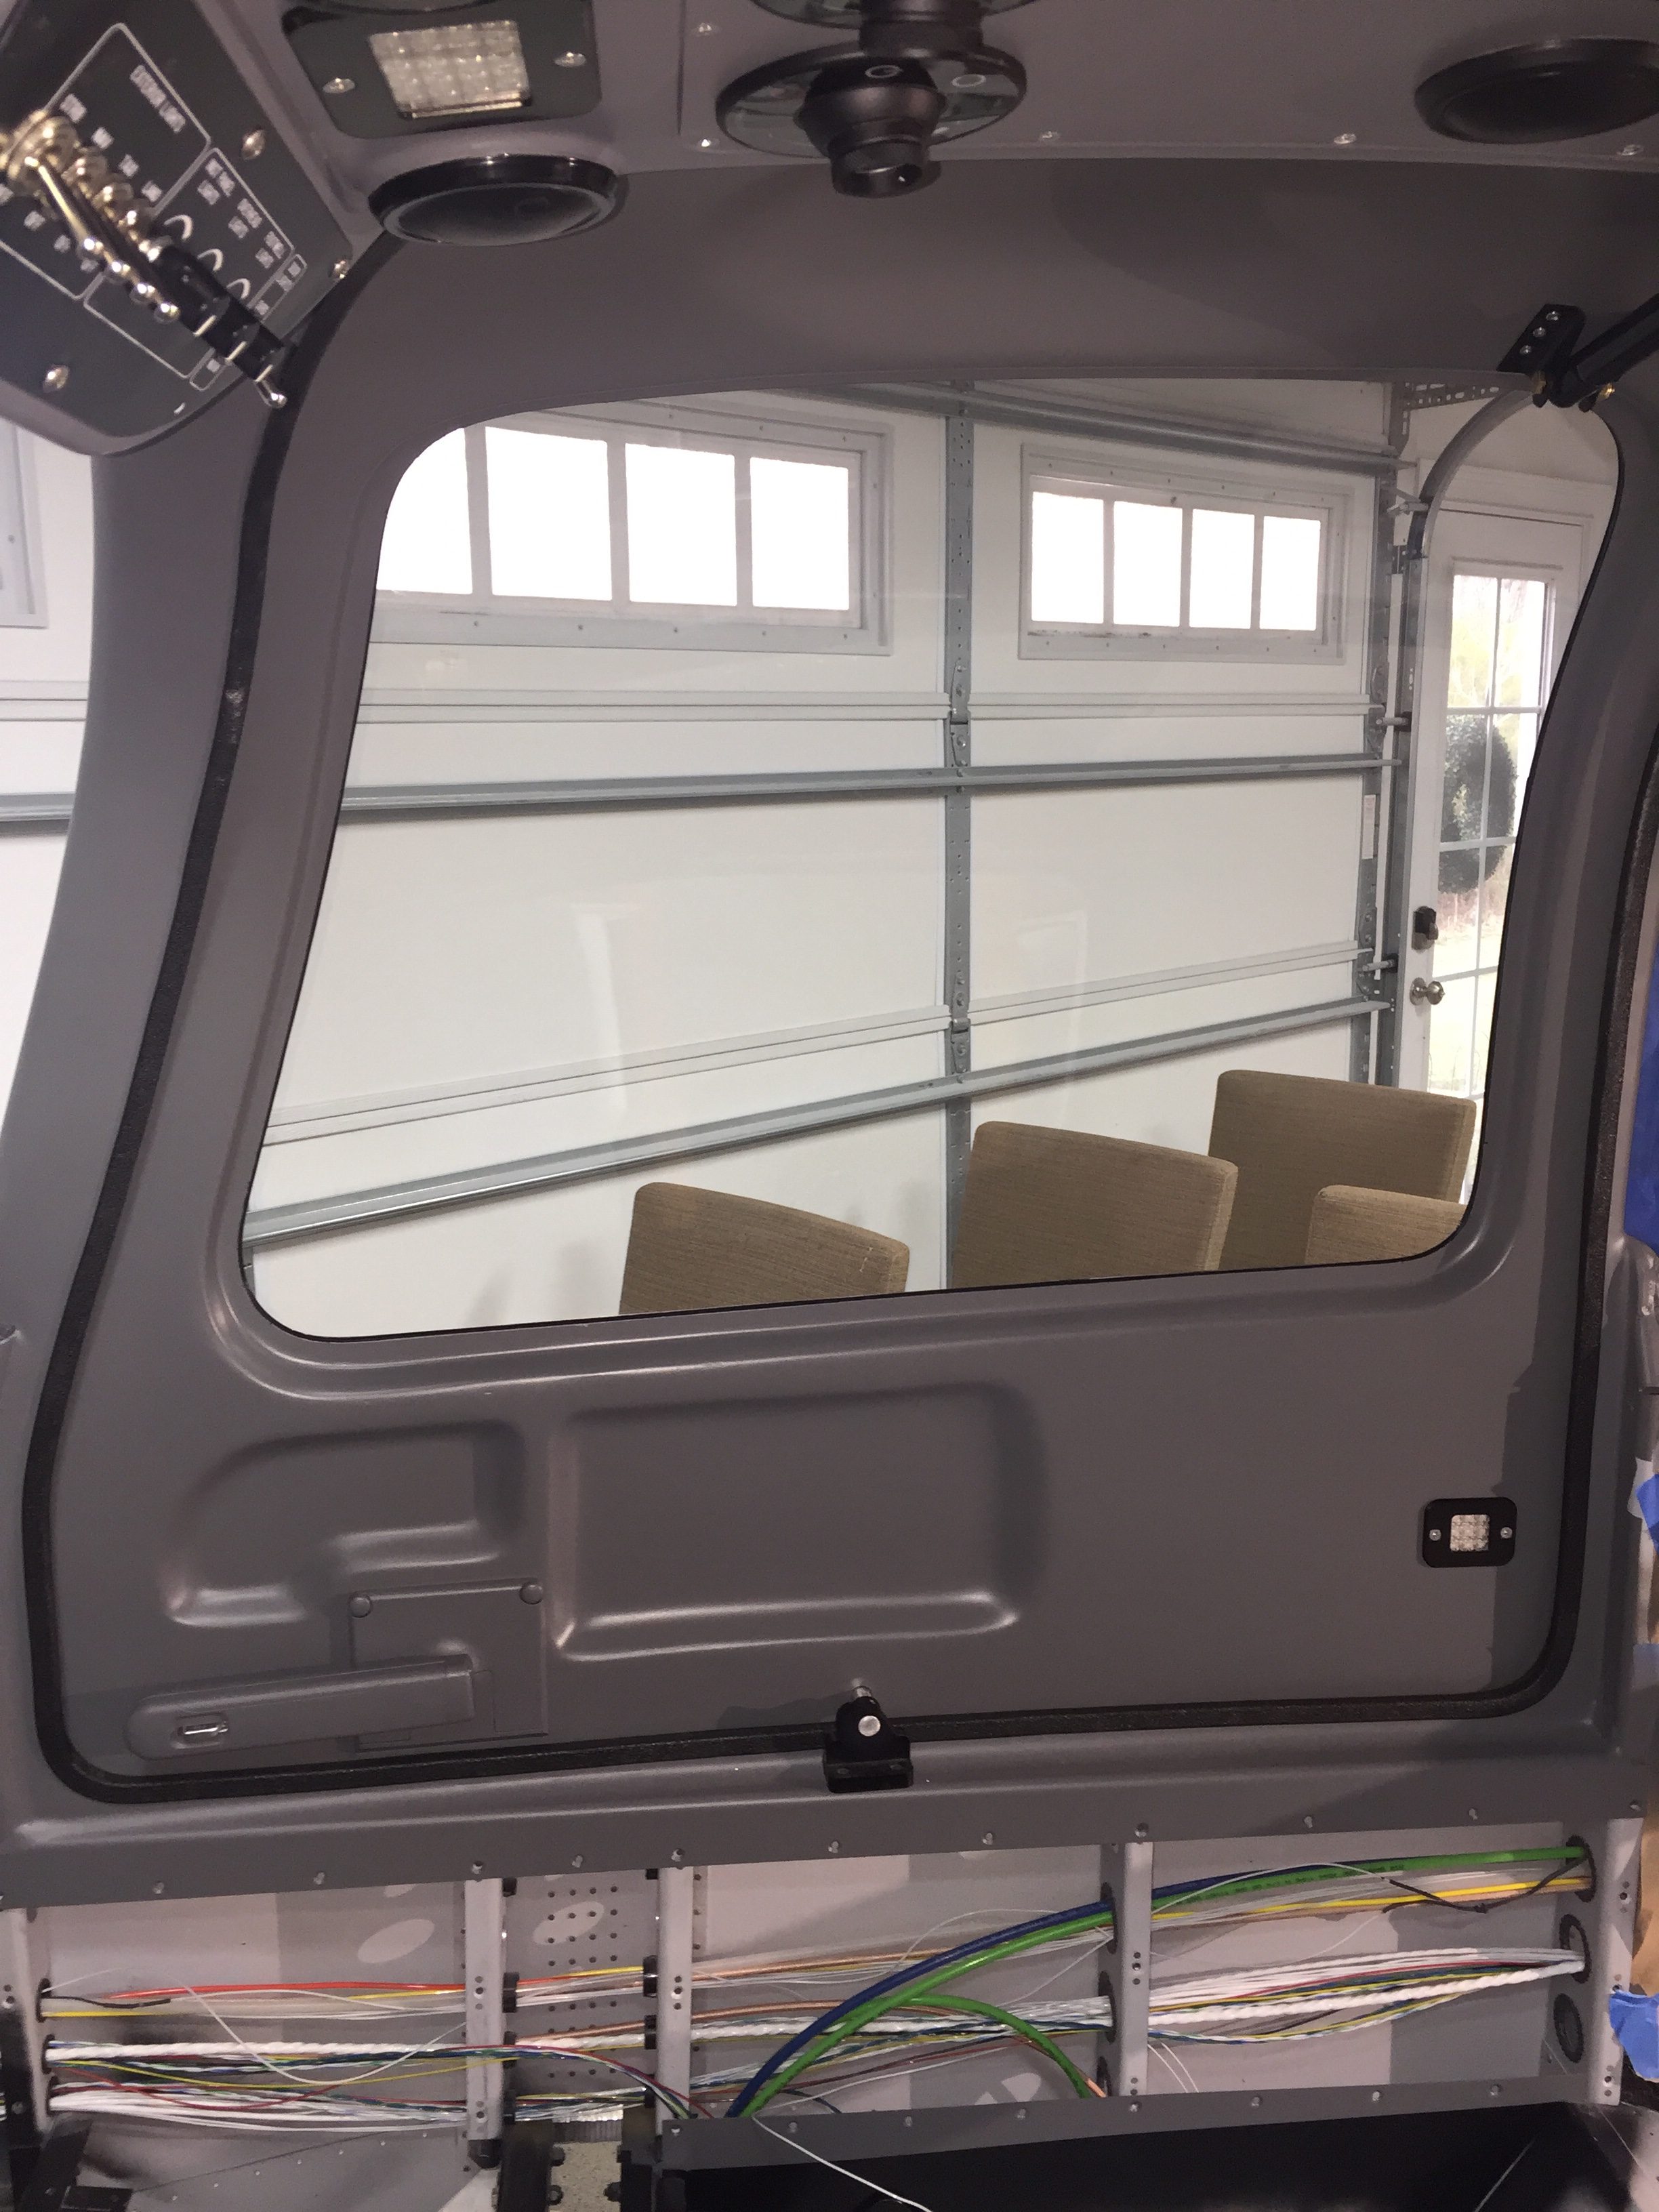
Now that the paint is all complete on the inside, I was ready to install the front windows. Repeating the process from the rears, the right window went in very smoothly and thanks to good prep work and patience, the inside finish is nearly perfect. I wound up with a very nice fillet of adhesive creating a nice finish around the perimeter of the door cutout transitioning to the window. I did notice that the strut now feels much better with the extra weight and doesn’t cause the door to fly open violently. If anything, it needs a bit of encouragement to go all the way up but has no problem keeping the door open once it’s there.
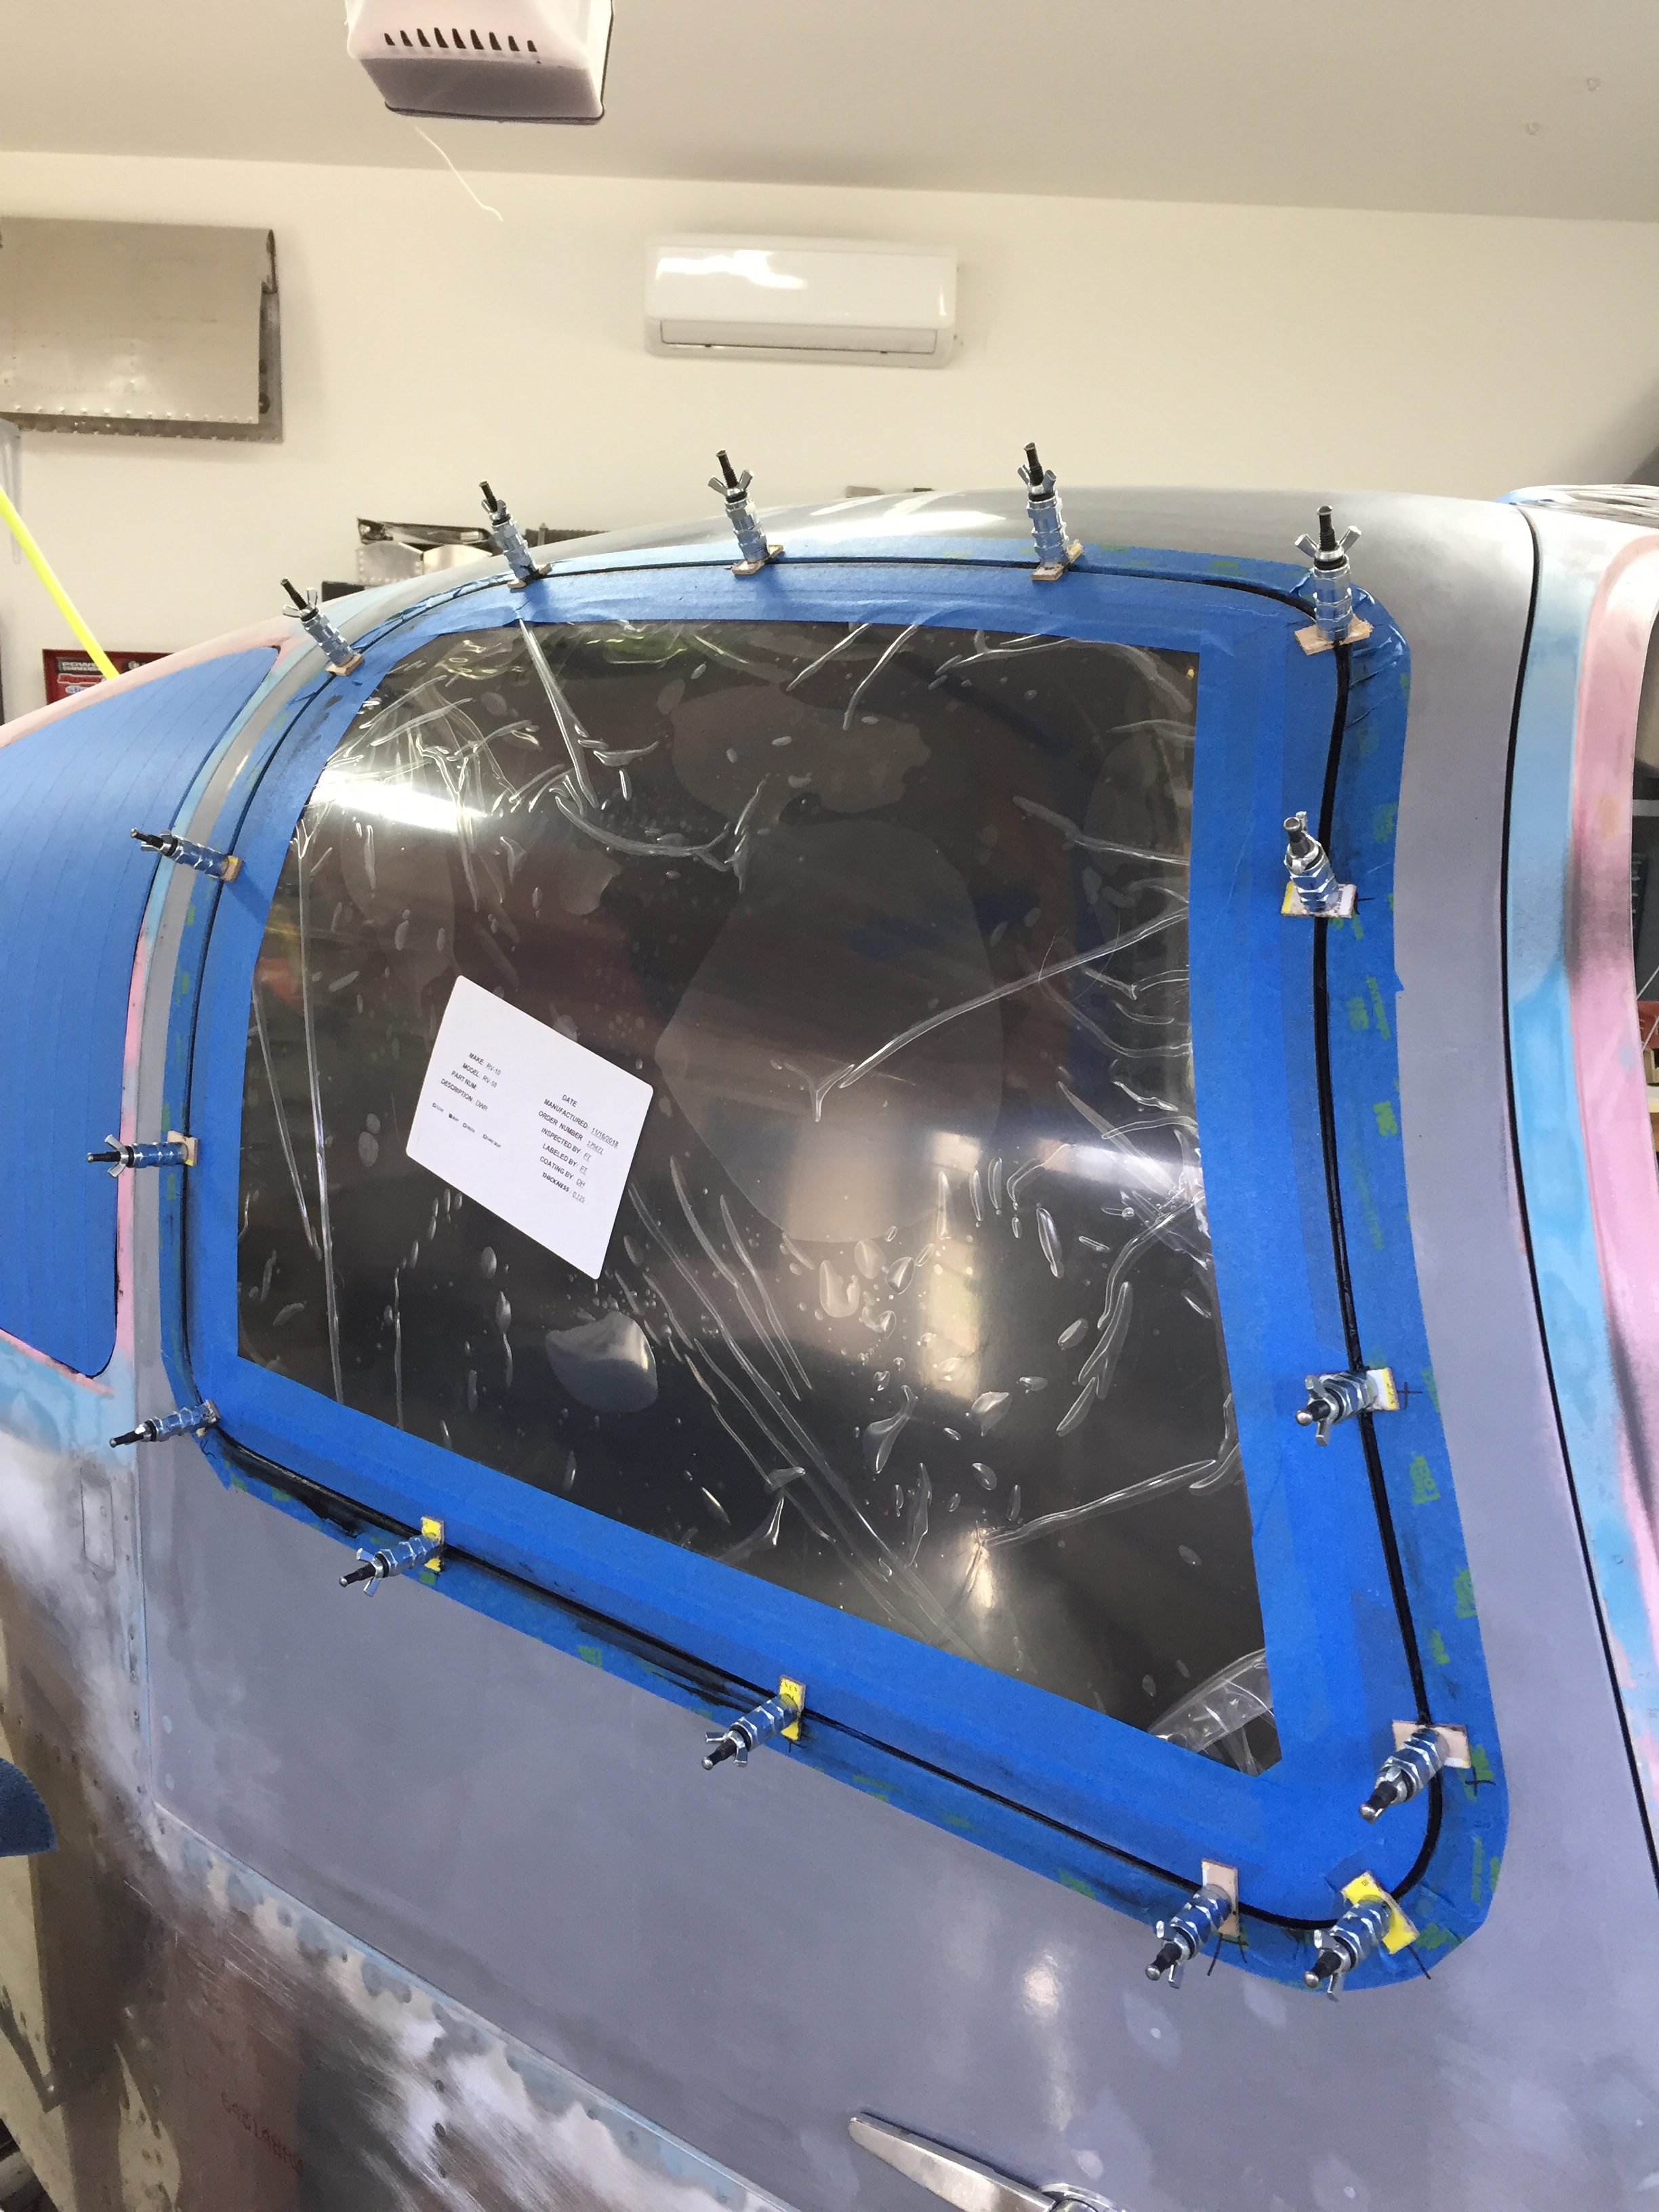
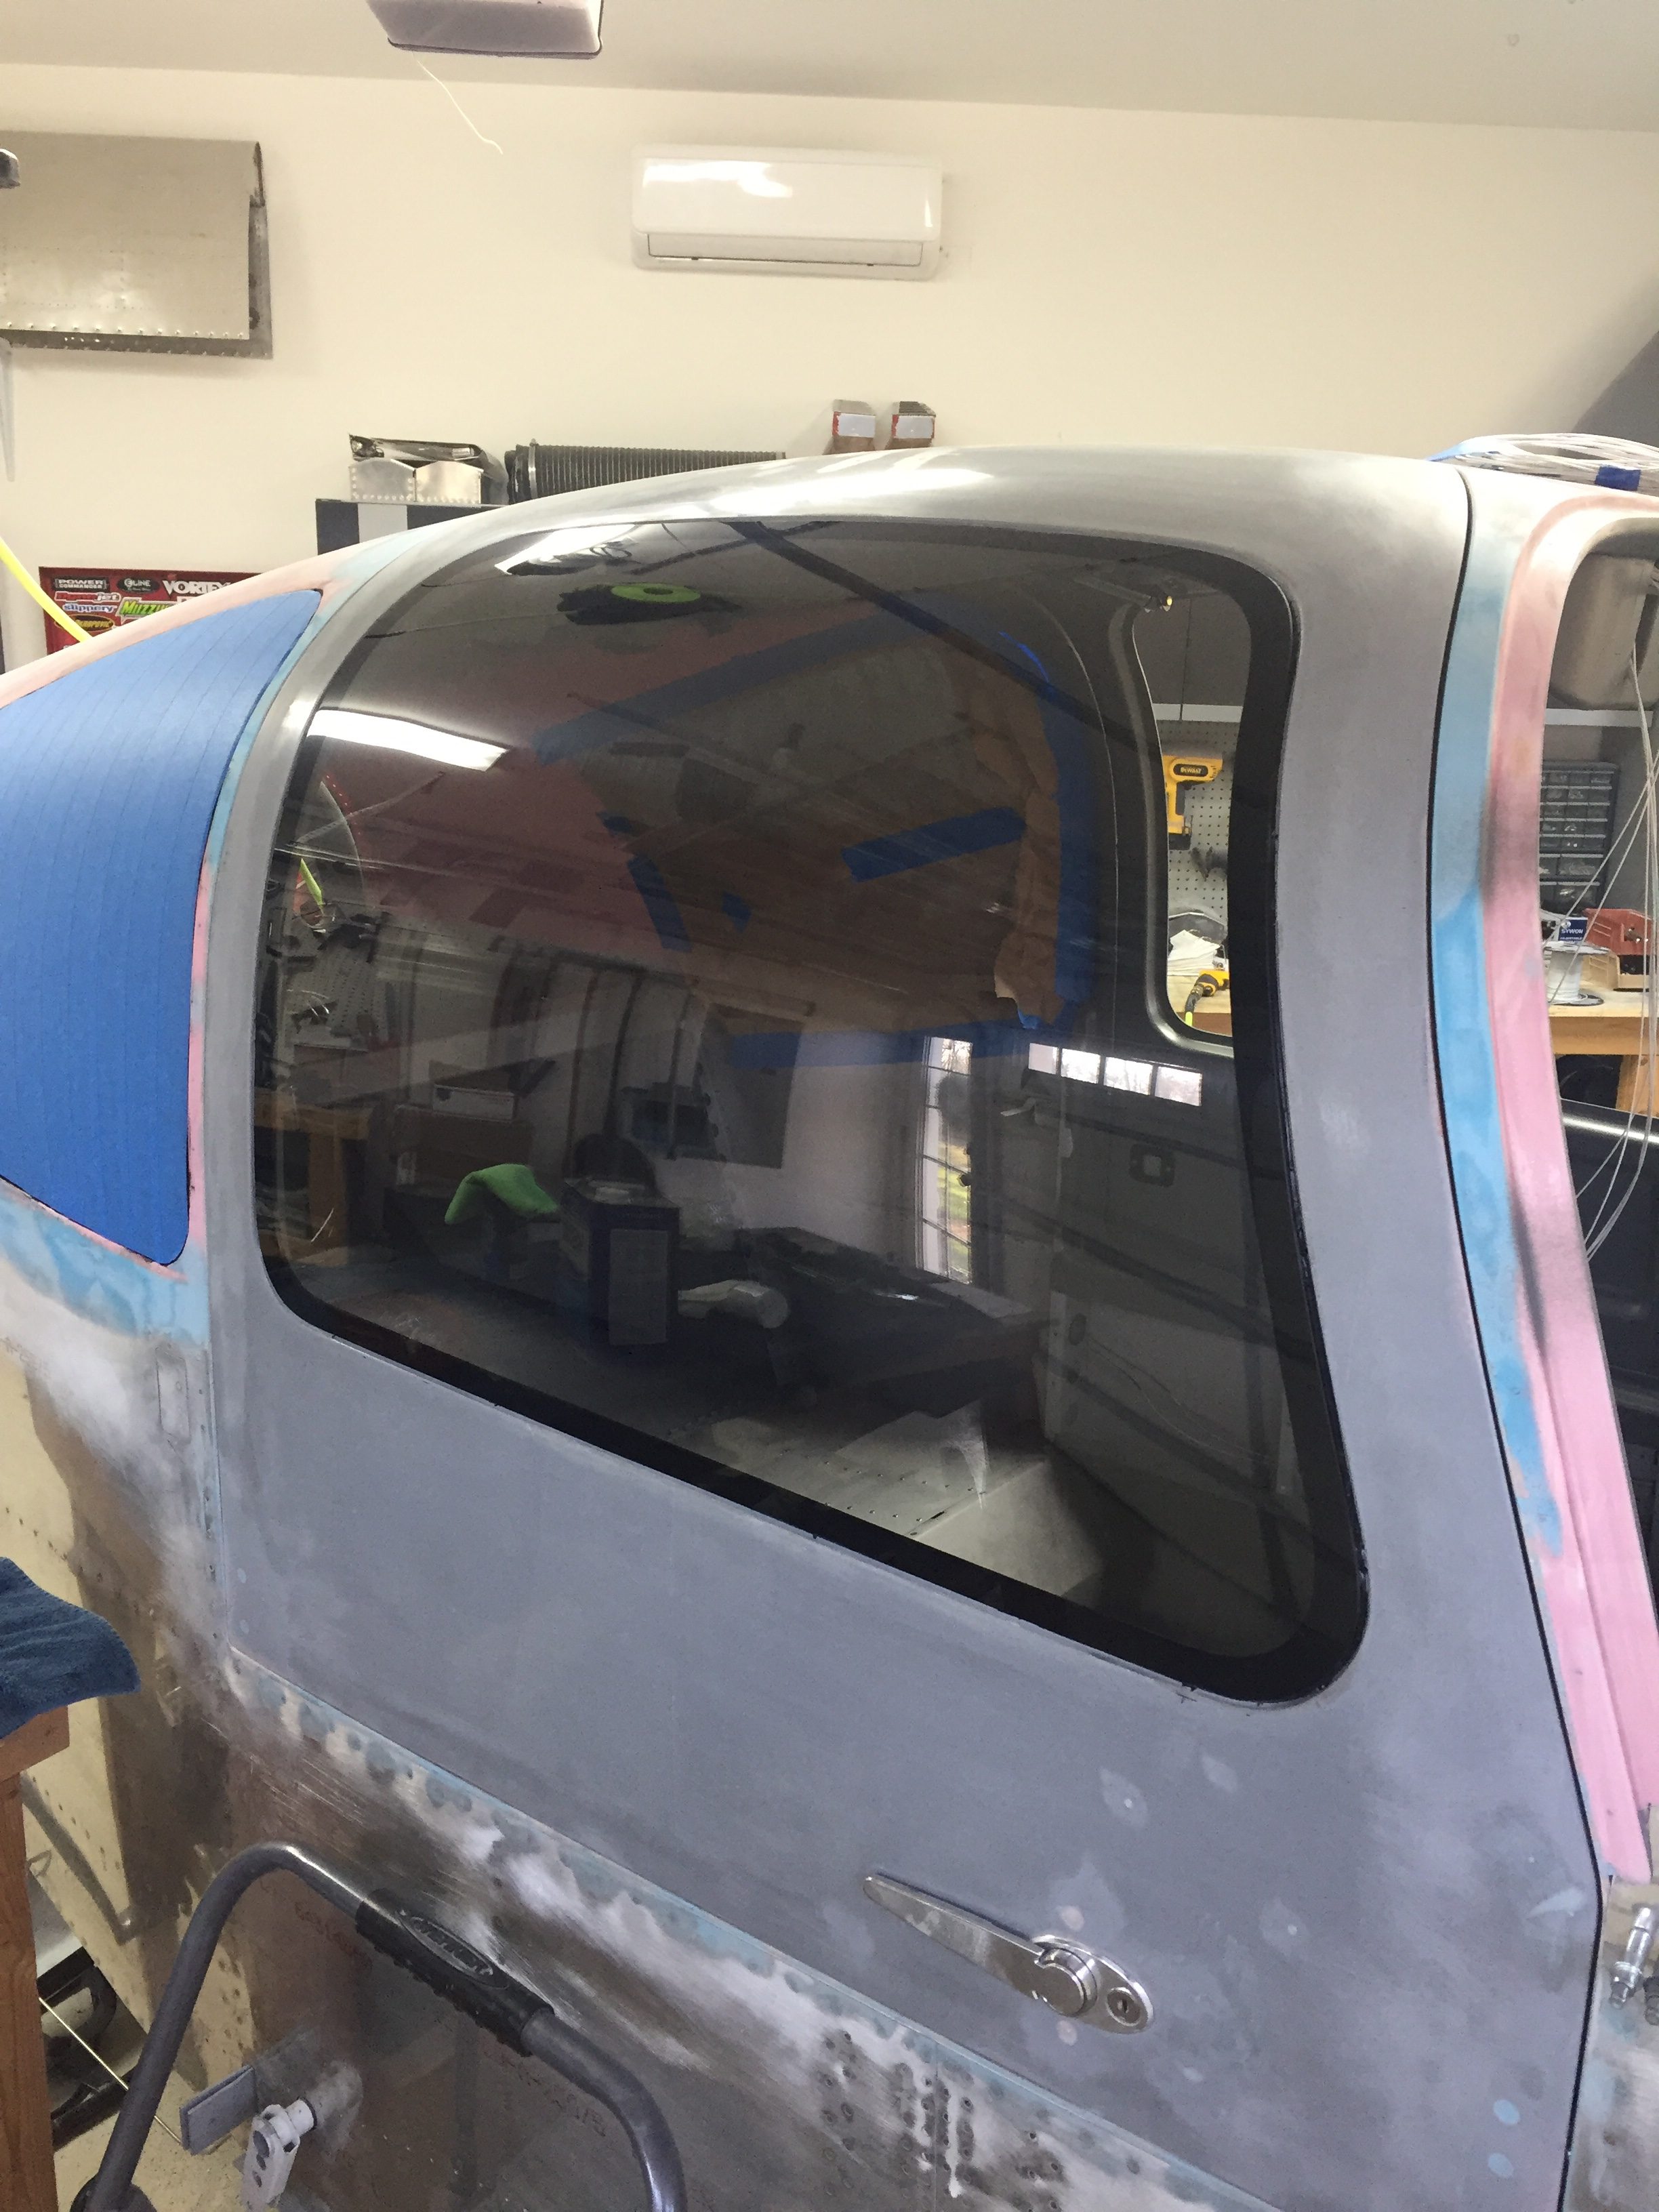
It took one more evening of work to get the left window in which again went very smoothly. One additional piece of prep was to put masking tape on the outside of both front windows to help clean excess adhesive from the gap. It will just make paint prep a bit easier and quicker. Again, that gap gets filled in with more adhesive after paint for a flush clean look and finish.
I’m back to cleaning up the inside, yet again, of dust and debris since the windows are now in and I can control what goes into the cabin. The seat belts and receptacles were bolted back in and I riveted on the baggage door panel and gas strut (which I keep forgetting is on when the damn door hits me in the stomach). Avionics are shipping soon so I need to get the wing root wiring harness complete to be ready to put the expensive boxes in next.
Another painting job is the Aerosport interior panels. Now that they are complete and I won’t need to take them in and out a bunch, I wanted to finish them up to put them in storage until I’m ready to fly. With some good information from SEM, I set about prepping them which was very easy and much simpler than prepping aluminum or carbon. I used Dawn and gave them a good soapy scrub first, allowing them to dry one full day. I then used SEM Sand Free to do a final lint free cleaning before spraying on the Plastic Adhesion Promoter. The first light coat of Color Coat is sprayed on while the promoter is still wet, which helps the color melt into the plastic. Then, it’s just a matter of a few more even coats of Color Coat to finish the color. The paint does a great job on plastics and the panels turned out really nice. I did not use clear on these, as I just didn’t see the need to. If they scratch, they’ll easily be filled or sanded and then touched up.
I painted two front panels, two rear seat panels, baggage area panels, screw button covers, door handle plates, and handle covers. I also painted and cleared the two metal panels below the doors and installed the foot well lights that I previously fitted nutplates for and cut out the mounting holes.
Since the headset jacks won’t fit on the center console, I ordered some recessed mounts from ACS for the rear metal side panels. I saw another build with these and really like the look and functionality. The only downside is I had to cut and bend the mounting side since it didn’t allow the Bose plugs to go in. The jack mounting surface is perpendicular to the flush mount surface instead of the angled wall so if you have long headset plugs, these won’t work out of the box. I used flox to fill in the corners and added a bit of poly fill to smooth them out, even though they won’t be seen. I touched up these two panels as well and then cleared them along with the other metal panels.
I let the paint cure with the heat on in the shop overnight and then set to work installing the webbed pockets up front. I wound up using blind rivets instead of screws and nuts which should hold just fine for the checklists and little trinkets that will wind up in them. I also put the cup holders in place, finishing up the front side panels. Part of my upholstery order will be leather covered inserts for the front and rear panels to dress them up a bit more.
I’ve had the baggage door panel sitting collecting dust, so I brought that down and fitted it for install. The plans have you velcro it to the door or something, I don’t know since I didn’t really read the instructions. I decided to blind rivet it, so drilled the holes and clecoed it in place while positioning the strut that will keep it open. I didn’t get it cleaned and prepped in time to spray, so I’ll have to paint it down the road. I’m also waiting on Parish’s order of matching lock cams to his fuel caps, as I may swap out my door locks for a single key matching my fuel caps as well. If so, I’ll need access to the baggage door cam lock.
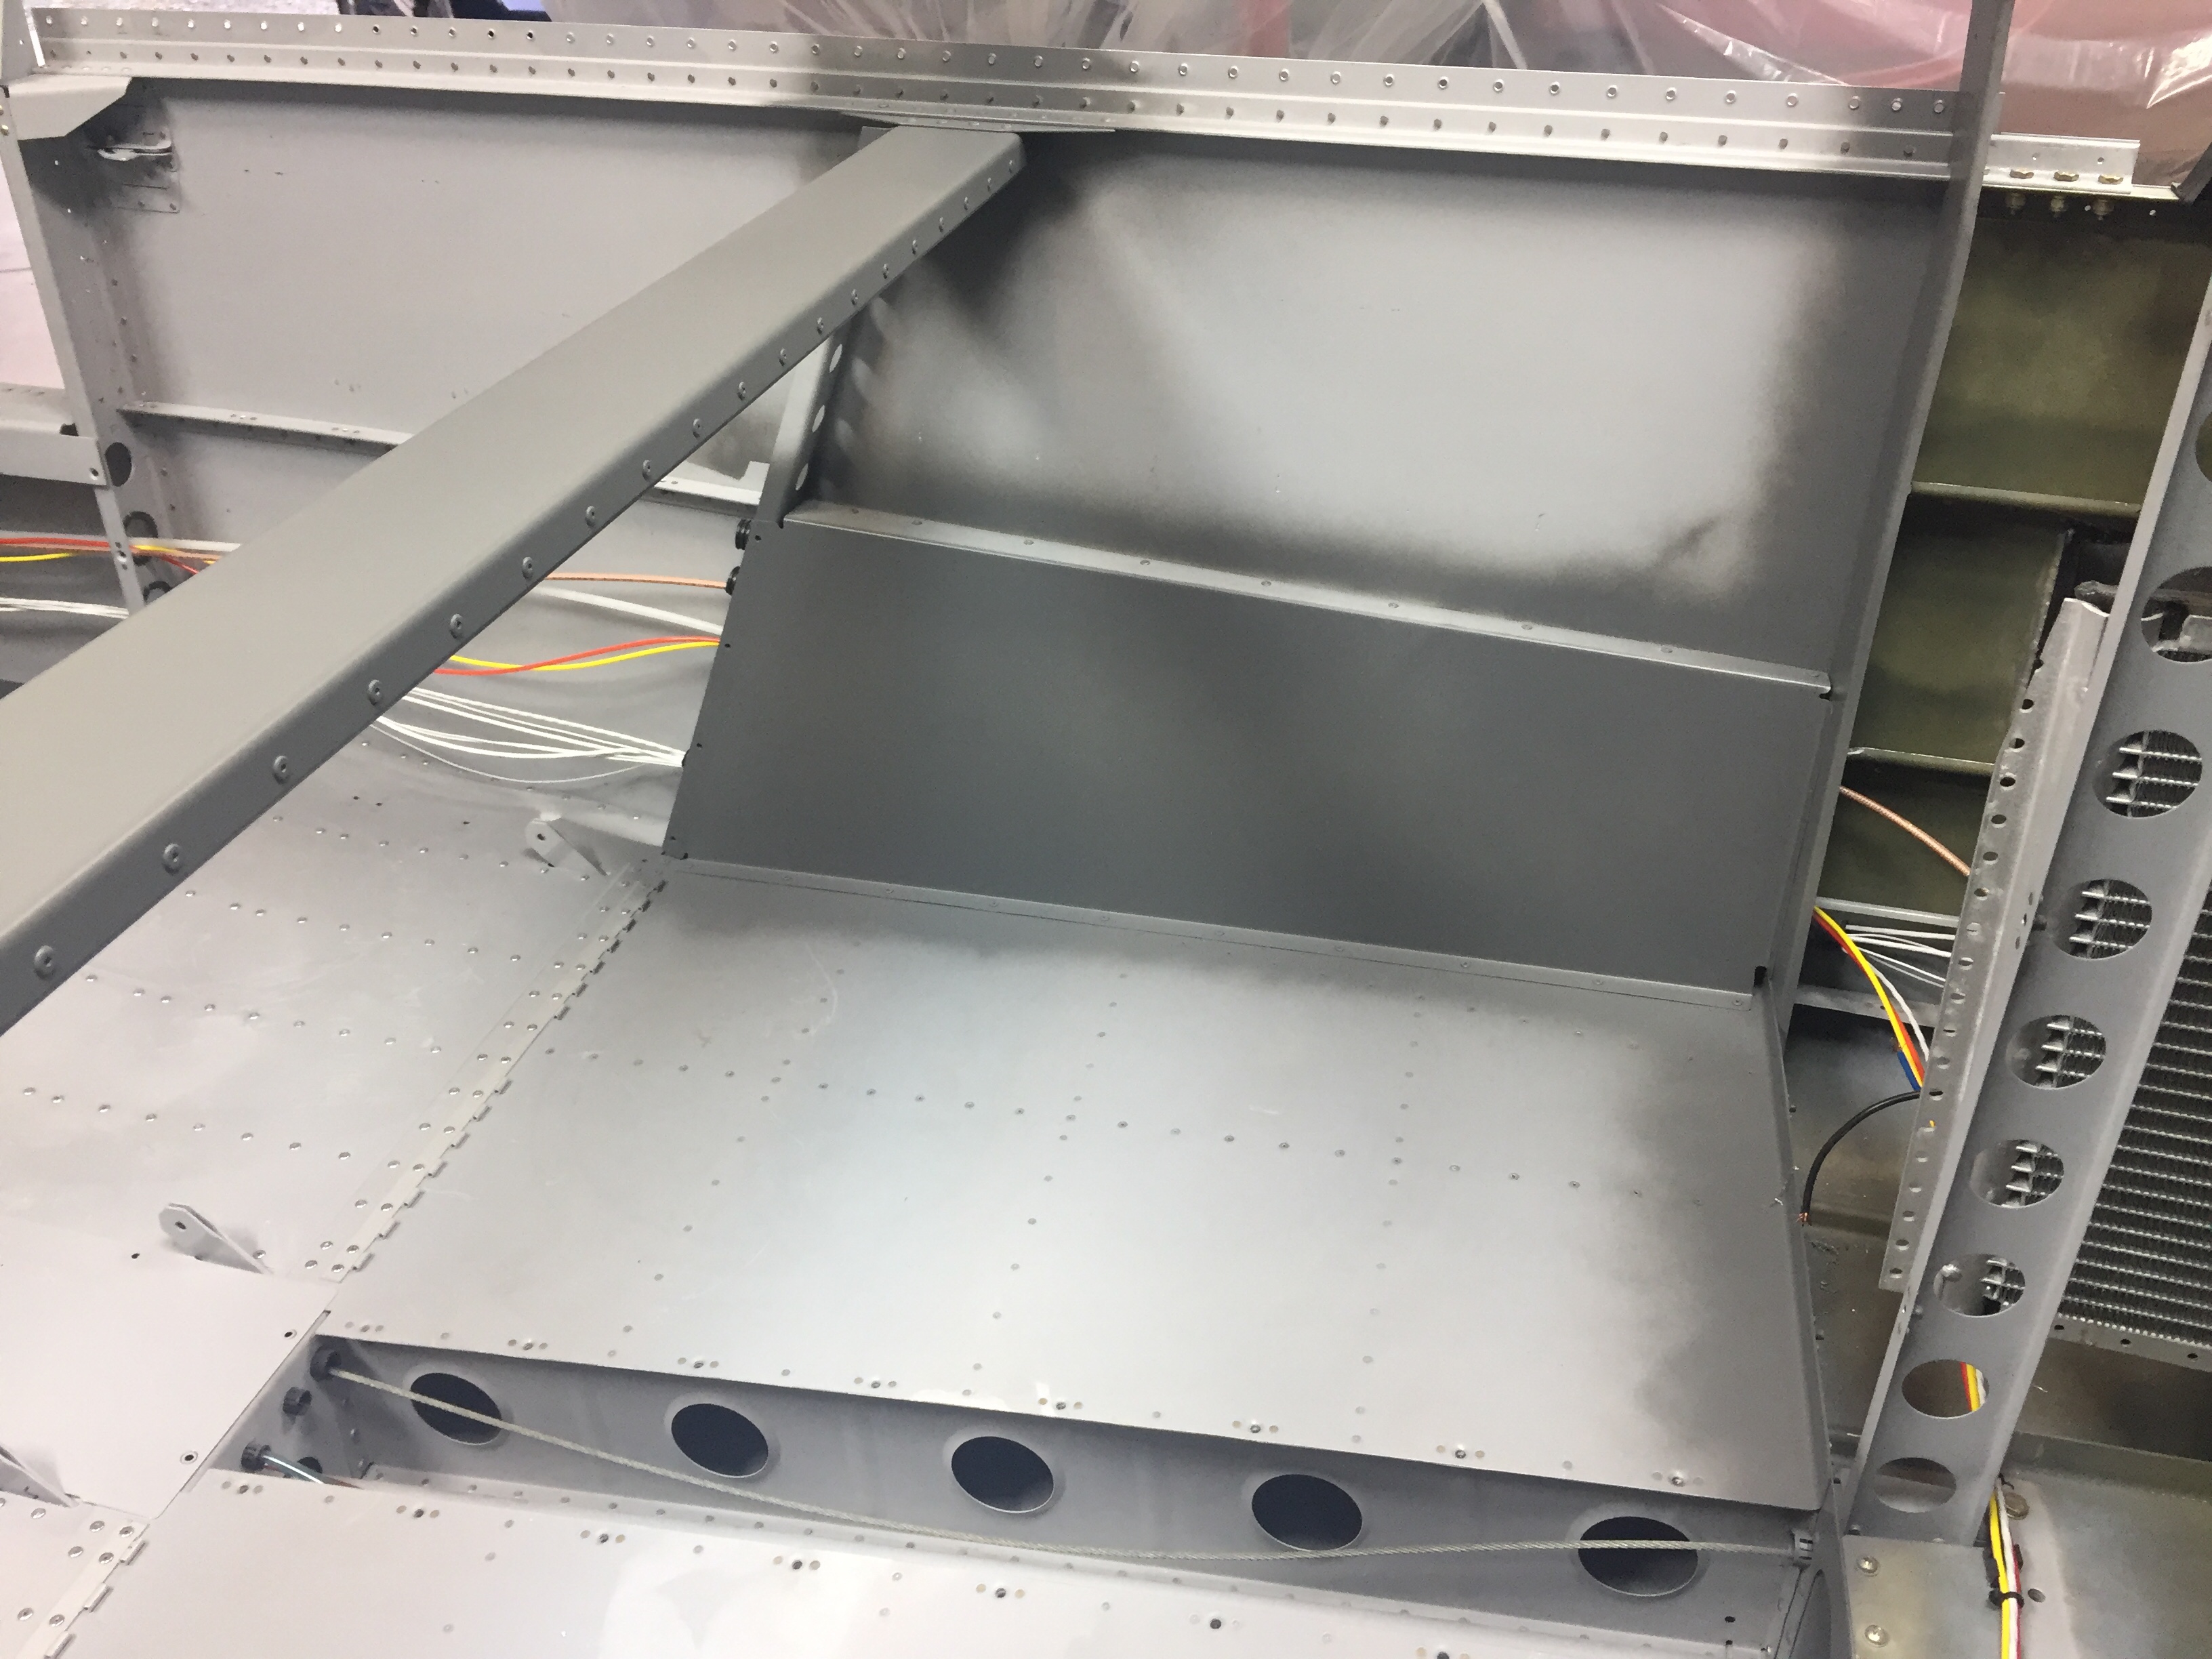
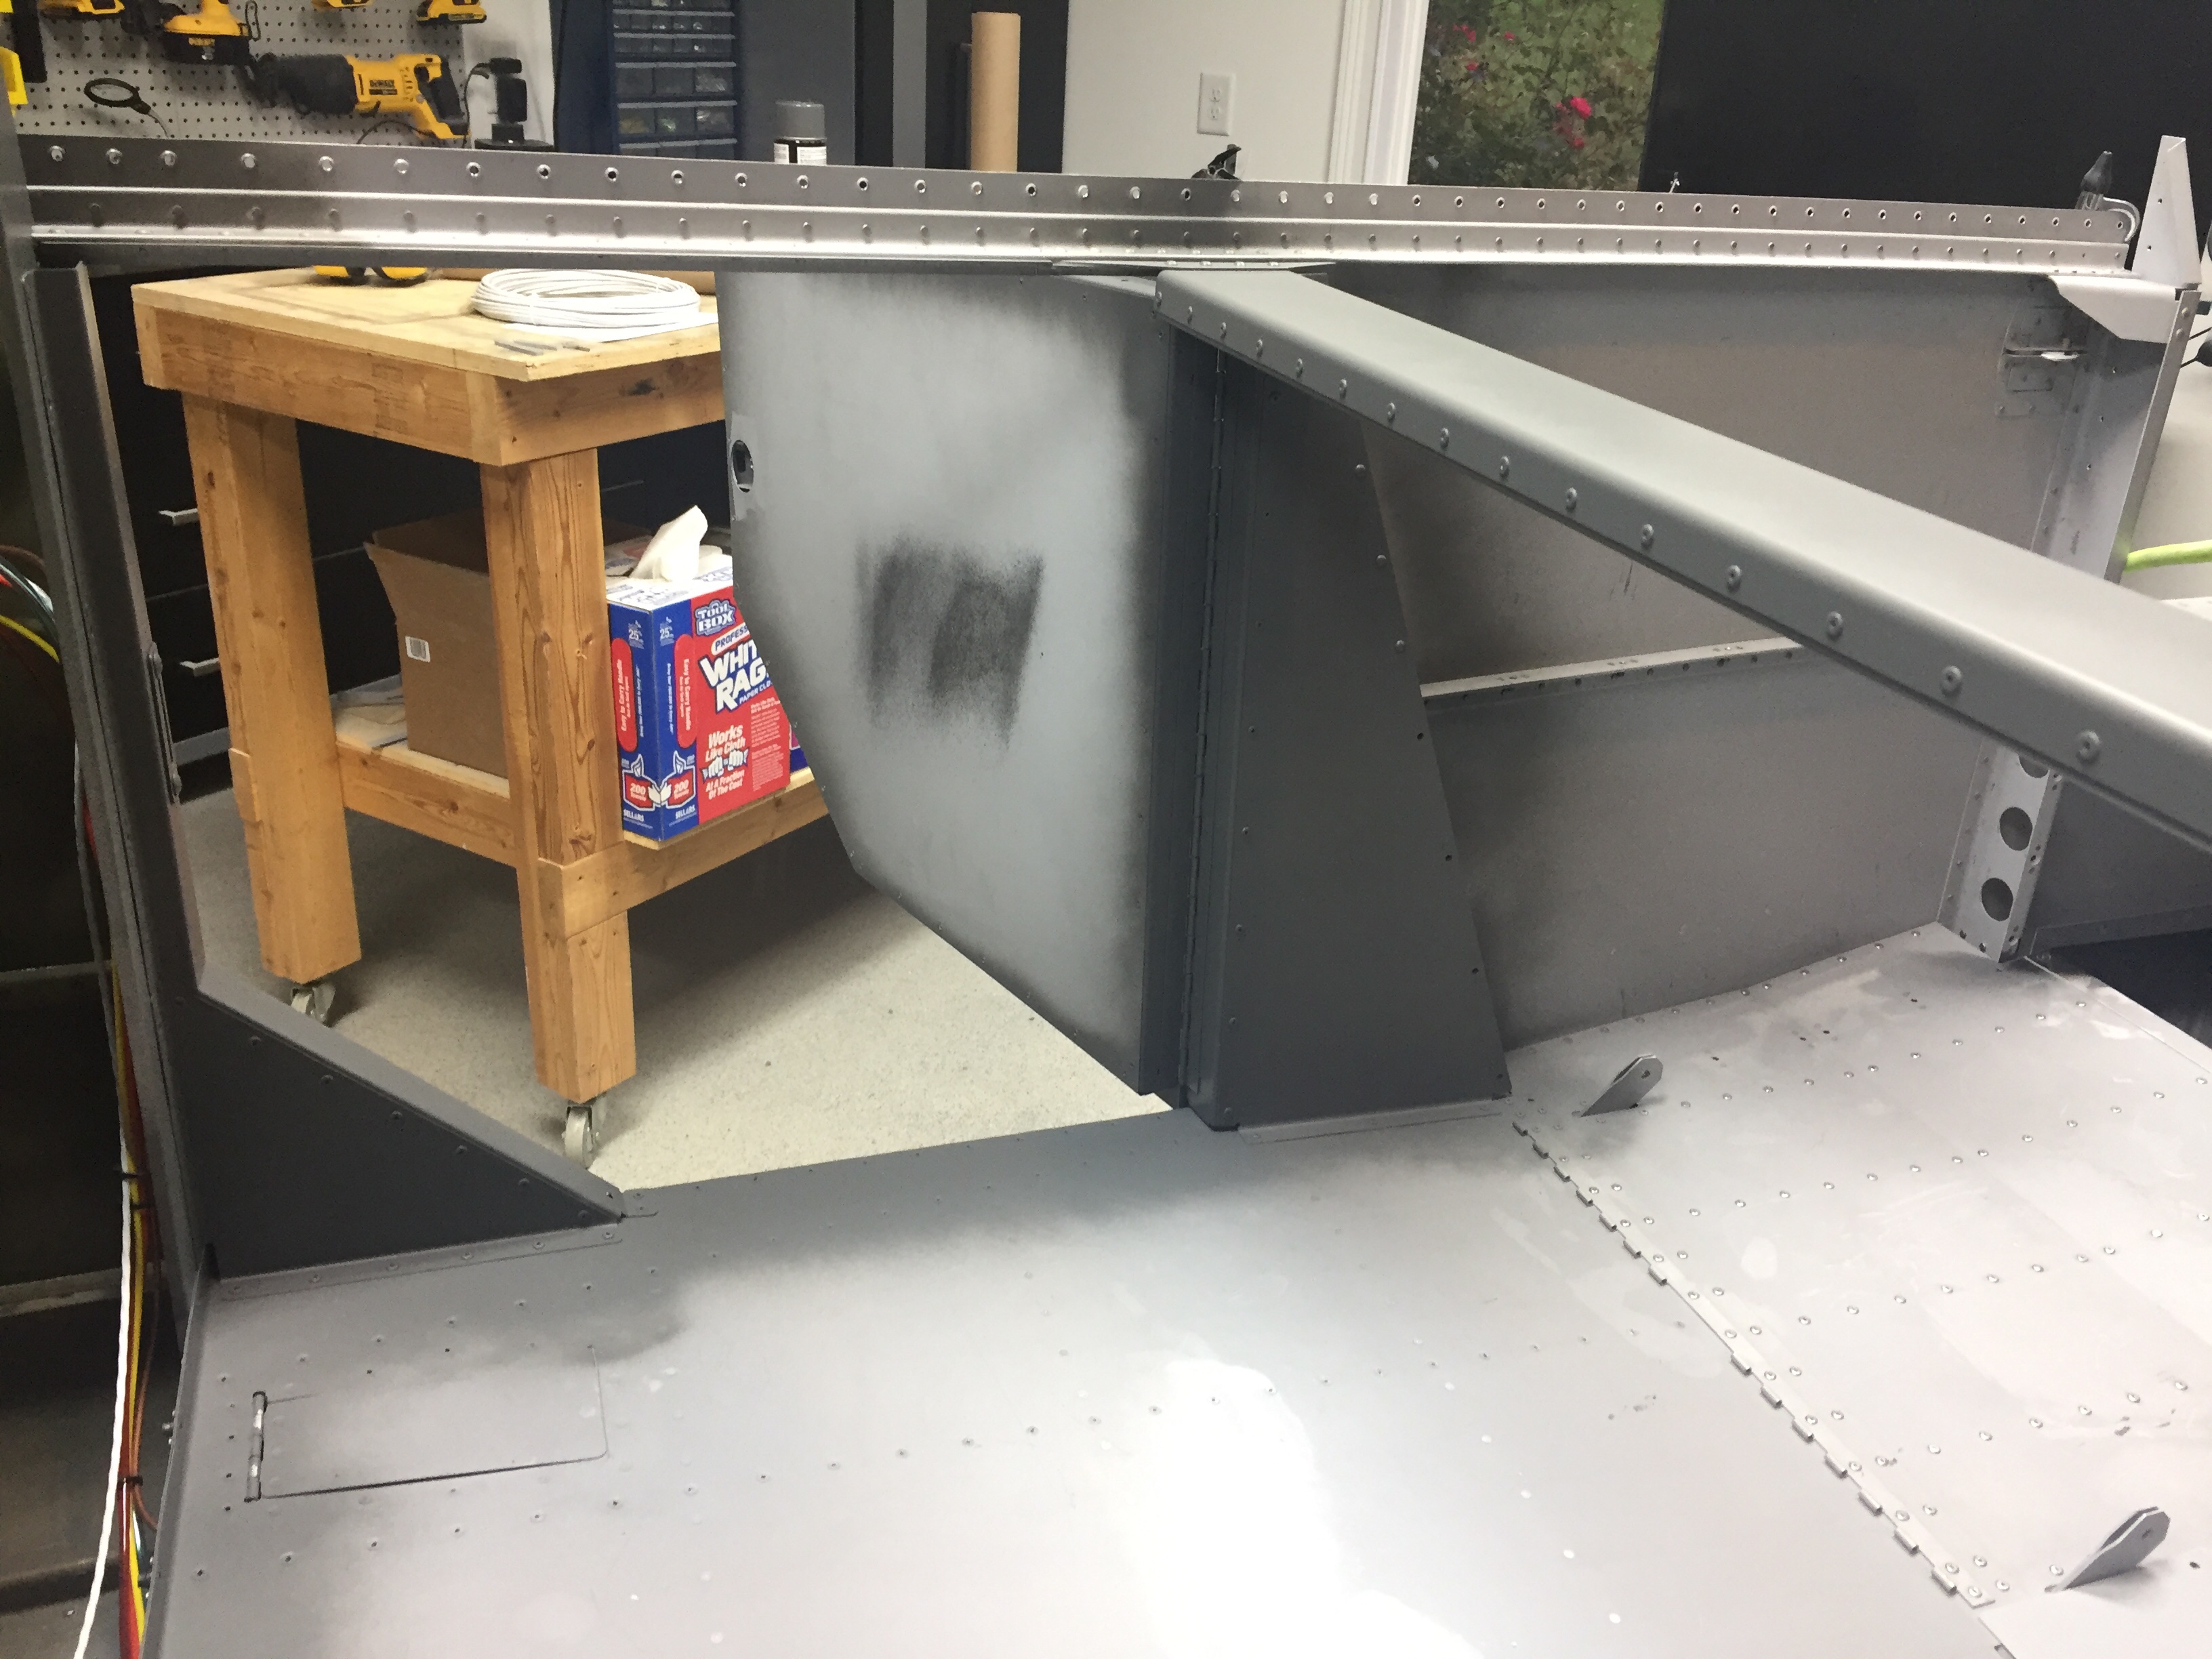
Painting the inside of the cabin is much easier when the cabin top is removable, and with only a few items left to do before permanently installing the cabin top, I took the opportunity to put some color on the project. As mentioned earlier, the cabin interior will be a dark grey and black. I started by cleaning and prepping the tunnel walls and footwells. Most of this will be covered by the black carpet, but I wanted to make sure any areas not covered would be black. The SEM is really easy to work with and two nice coats provided plenty of coverage. I then used a low luster clear to help provide some further protection and sealant. I didn’t worry about overspray since the carpet will hide the imperfections.
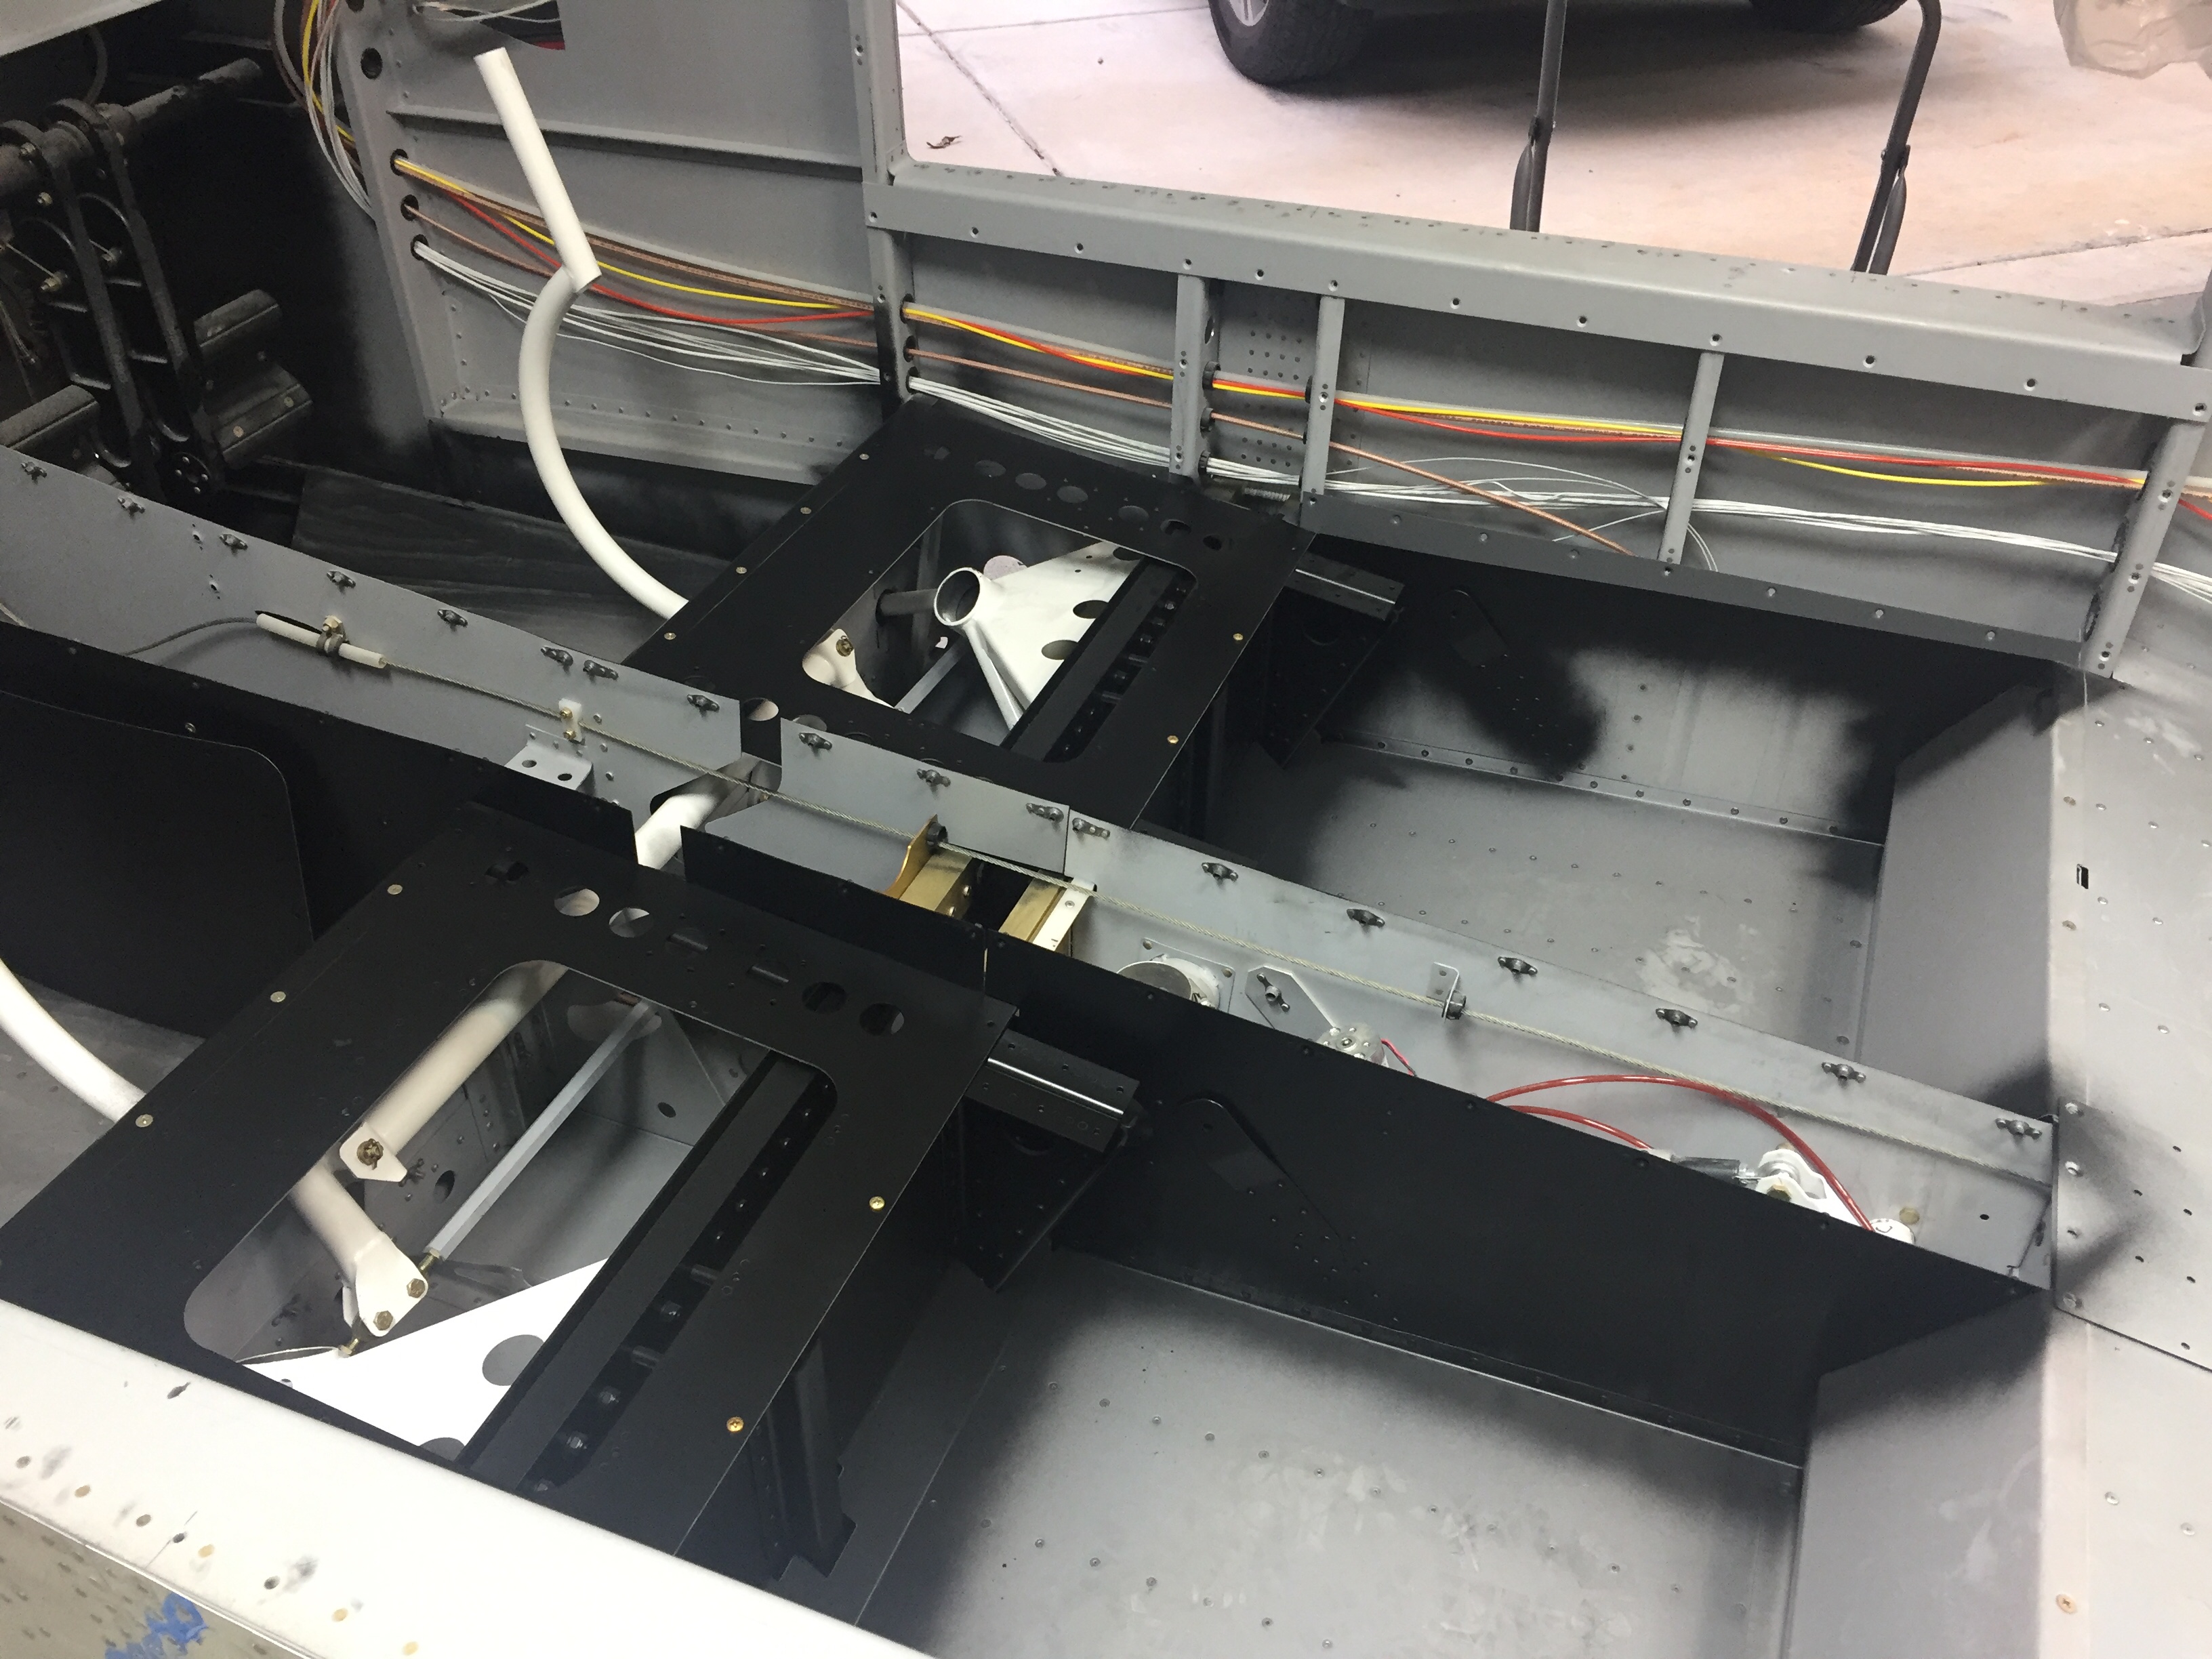
The rest of the interior is the dark grey so I prepped again and sprayed the remaining parts of the cabin which will not be covered by Aerosport panels. I’m not a huge fan of painting because it’s so much prep work, but the results are rewarding. It’s nice to see a finished surface finally.
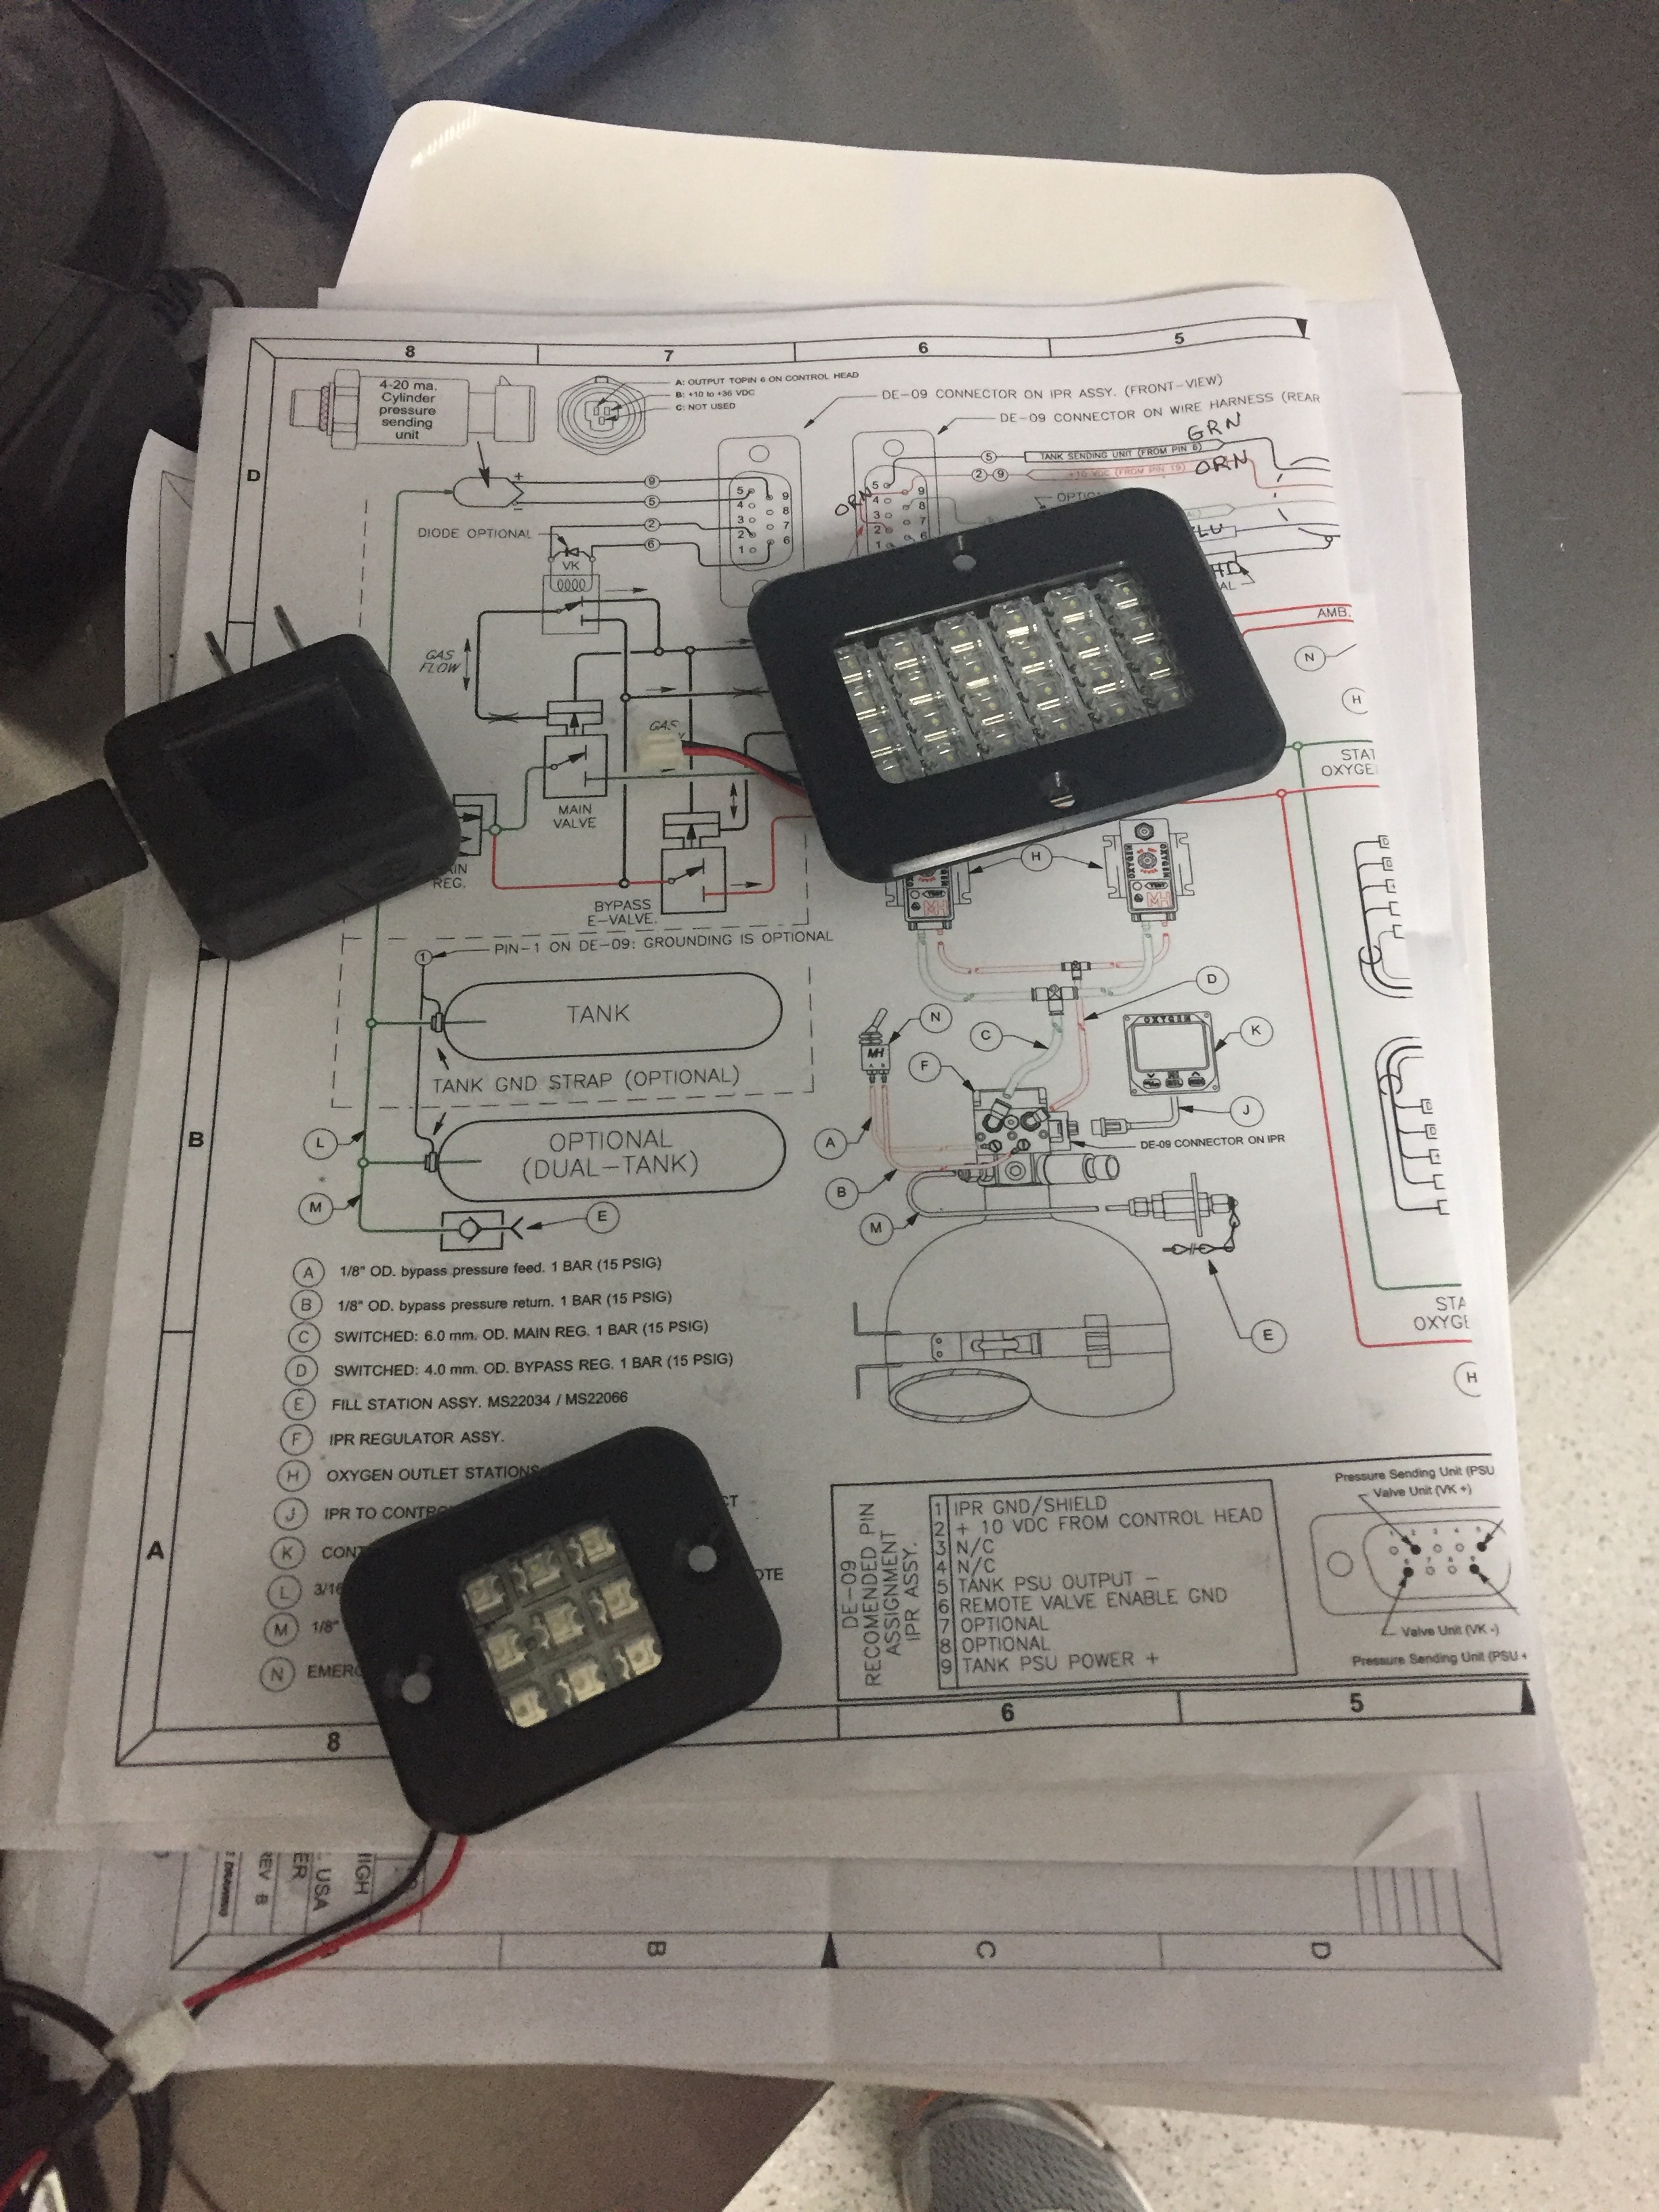
Sean also sent me his updated LED lights for the overhead so I got those wired up and installed using nutplates and the standard micro-Molex connectors. I really appreciate working with fellow builders as vendors because they provide great support. Upon receipt, there were a few LED boards that didn’t work properly. I gave him a quick text and new ones were on the way in a few days. He later did some troubleshooting and found out the wire used to secure the boards was shorting them out. So I pulled the wire and simply filled in the back with black silicone and had no other issues. The lights are great quality and very bright, providing a nice pattern of light. Night loading should be very easy with these on the overhead and in the doors.
As typical, the big moment of putting the cabin top on for good was somewhat anti-climatic! I am glad I won’t be Atlas-ing the thing on and off anymore, as that was getting a bit tiresome. It is secured with a ton of pop rivets on the rear and screws up front. The challenge to it, however, is setting the frame in a bed of flox all around the door areas. I had the Mrs. come out to help mix epoxy and spread it on the fuselage. Even with slow hardener, we were pushed for time getting it all mixed, applied evenly, and positioning the top on just right. I chose not to drill the screw holes yet and clecoing the cabin top was much quicker and easier at this point.
I cleaned up the remaining flox from inside and and put the rivets in. All in all, a bit stressful for us but a rewarding step seeing the canoe form finally disappear! The finish kit is coming next and I’m pretty pleased with the amount of progress I’m making this year.
With the plans calling for painting the interior at this point, we needed to make some decisions about our color scheme for the cabin. With the paint scheme already finished (yet to be revealed), we know the exterior will be a mix of black, white, silver, graphite, and an accent deep burnt orange. We want the interior to resemble a luxury sedan but include a few splashes of accent color to lighten things up. I already know I’ll be using the SEM rattle can Color Coat paint for the interior covered by the Top Coat low luster clear. I sprayed a few test pieces and am really happy with the appearance and durability of the SEM. Plus, it’s super easy to apply and doesn’t require special skills and or equipment. It will be a tad more costly in the end, but on the big scale, it’s immeasurable.
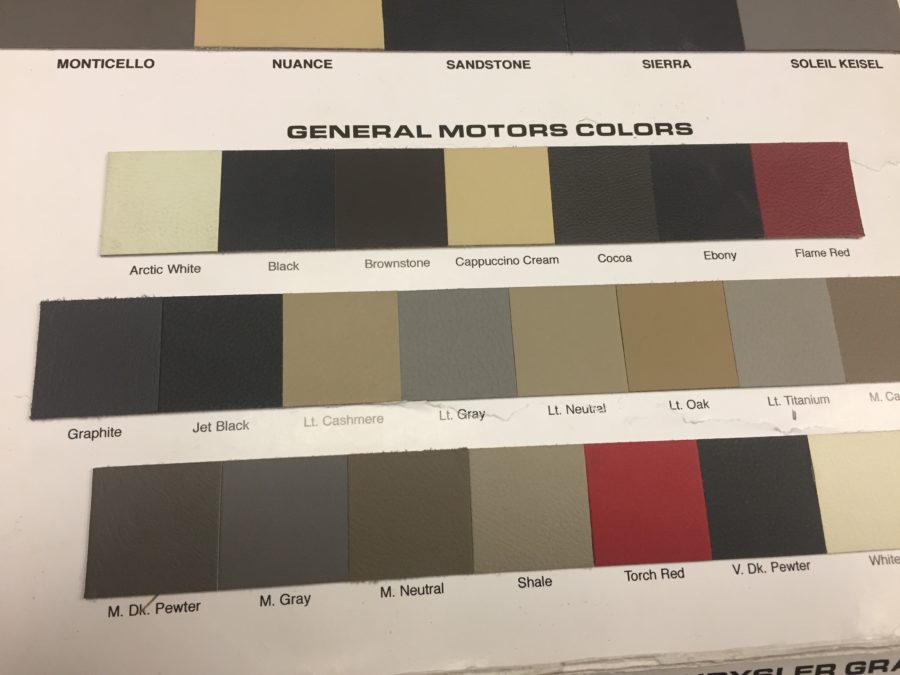
I called Zac at Aerosport who sent the leather color sample board out. I ordered the SEM color chart and used both to play around with combinations and choices that we liked. A few back and forths, hos and hums, and a few nights to sleep on it later, we had our choice made.
The carpet will be all black with the panels and structure below the door sill painted Landau Black. Above the door sill, we will use the Presidio on the remaining exposed surfaces. All of the carbon fiber components will be simply cleared over with the same low luster clear coat. The panel inserts will be the Landau Black. The headliner will be a medium gray. The seats will be black leather with burnt orange accents. We’ll be wrapping a few side panel inserts with the accent and black leather as other builders have done. I’m hoping to integrate the orange in other small spots as well.
Color is a very unique decision based on each builder and it’s somewhat overwhelming at the possibilities. Combined with not being able to see all materials in hand makes it a bit of a leap of faith. Zac will be sending out actual samples of the colors and carbon fiber now that we have the colors narrowed down. But I’m confident that the look will be what we are imagining and should make for a very luxurious and modern appearance inside the aircraft.