Fans of all shapes and sizes

Two jobs still linger before I can rivet the front skin on; defrost fans and bolting in the support bar.  The defrost fans were pretty simple, as I already had the wiring in place and holes cut.  I just needed to drill screw holes and mount them up.  Although a bit tough to get to, they were eventually bolted in and tested out.  I probably could have gone smaller or lower CFM, but go big or go home.  I shouldn’t have any fogging issues!

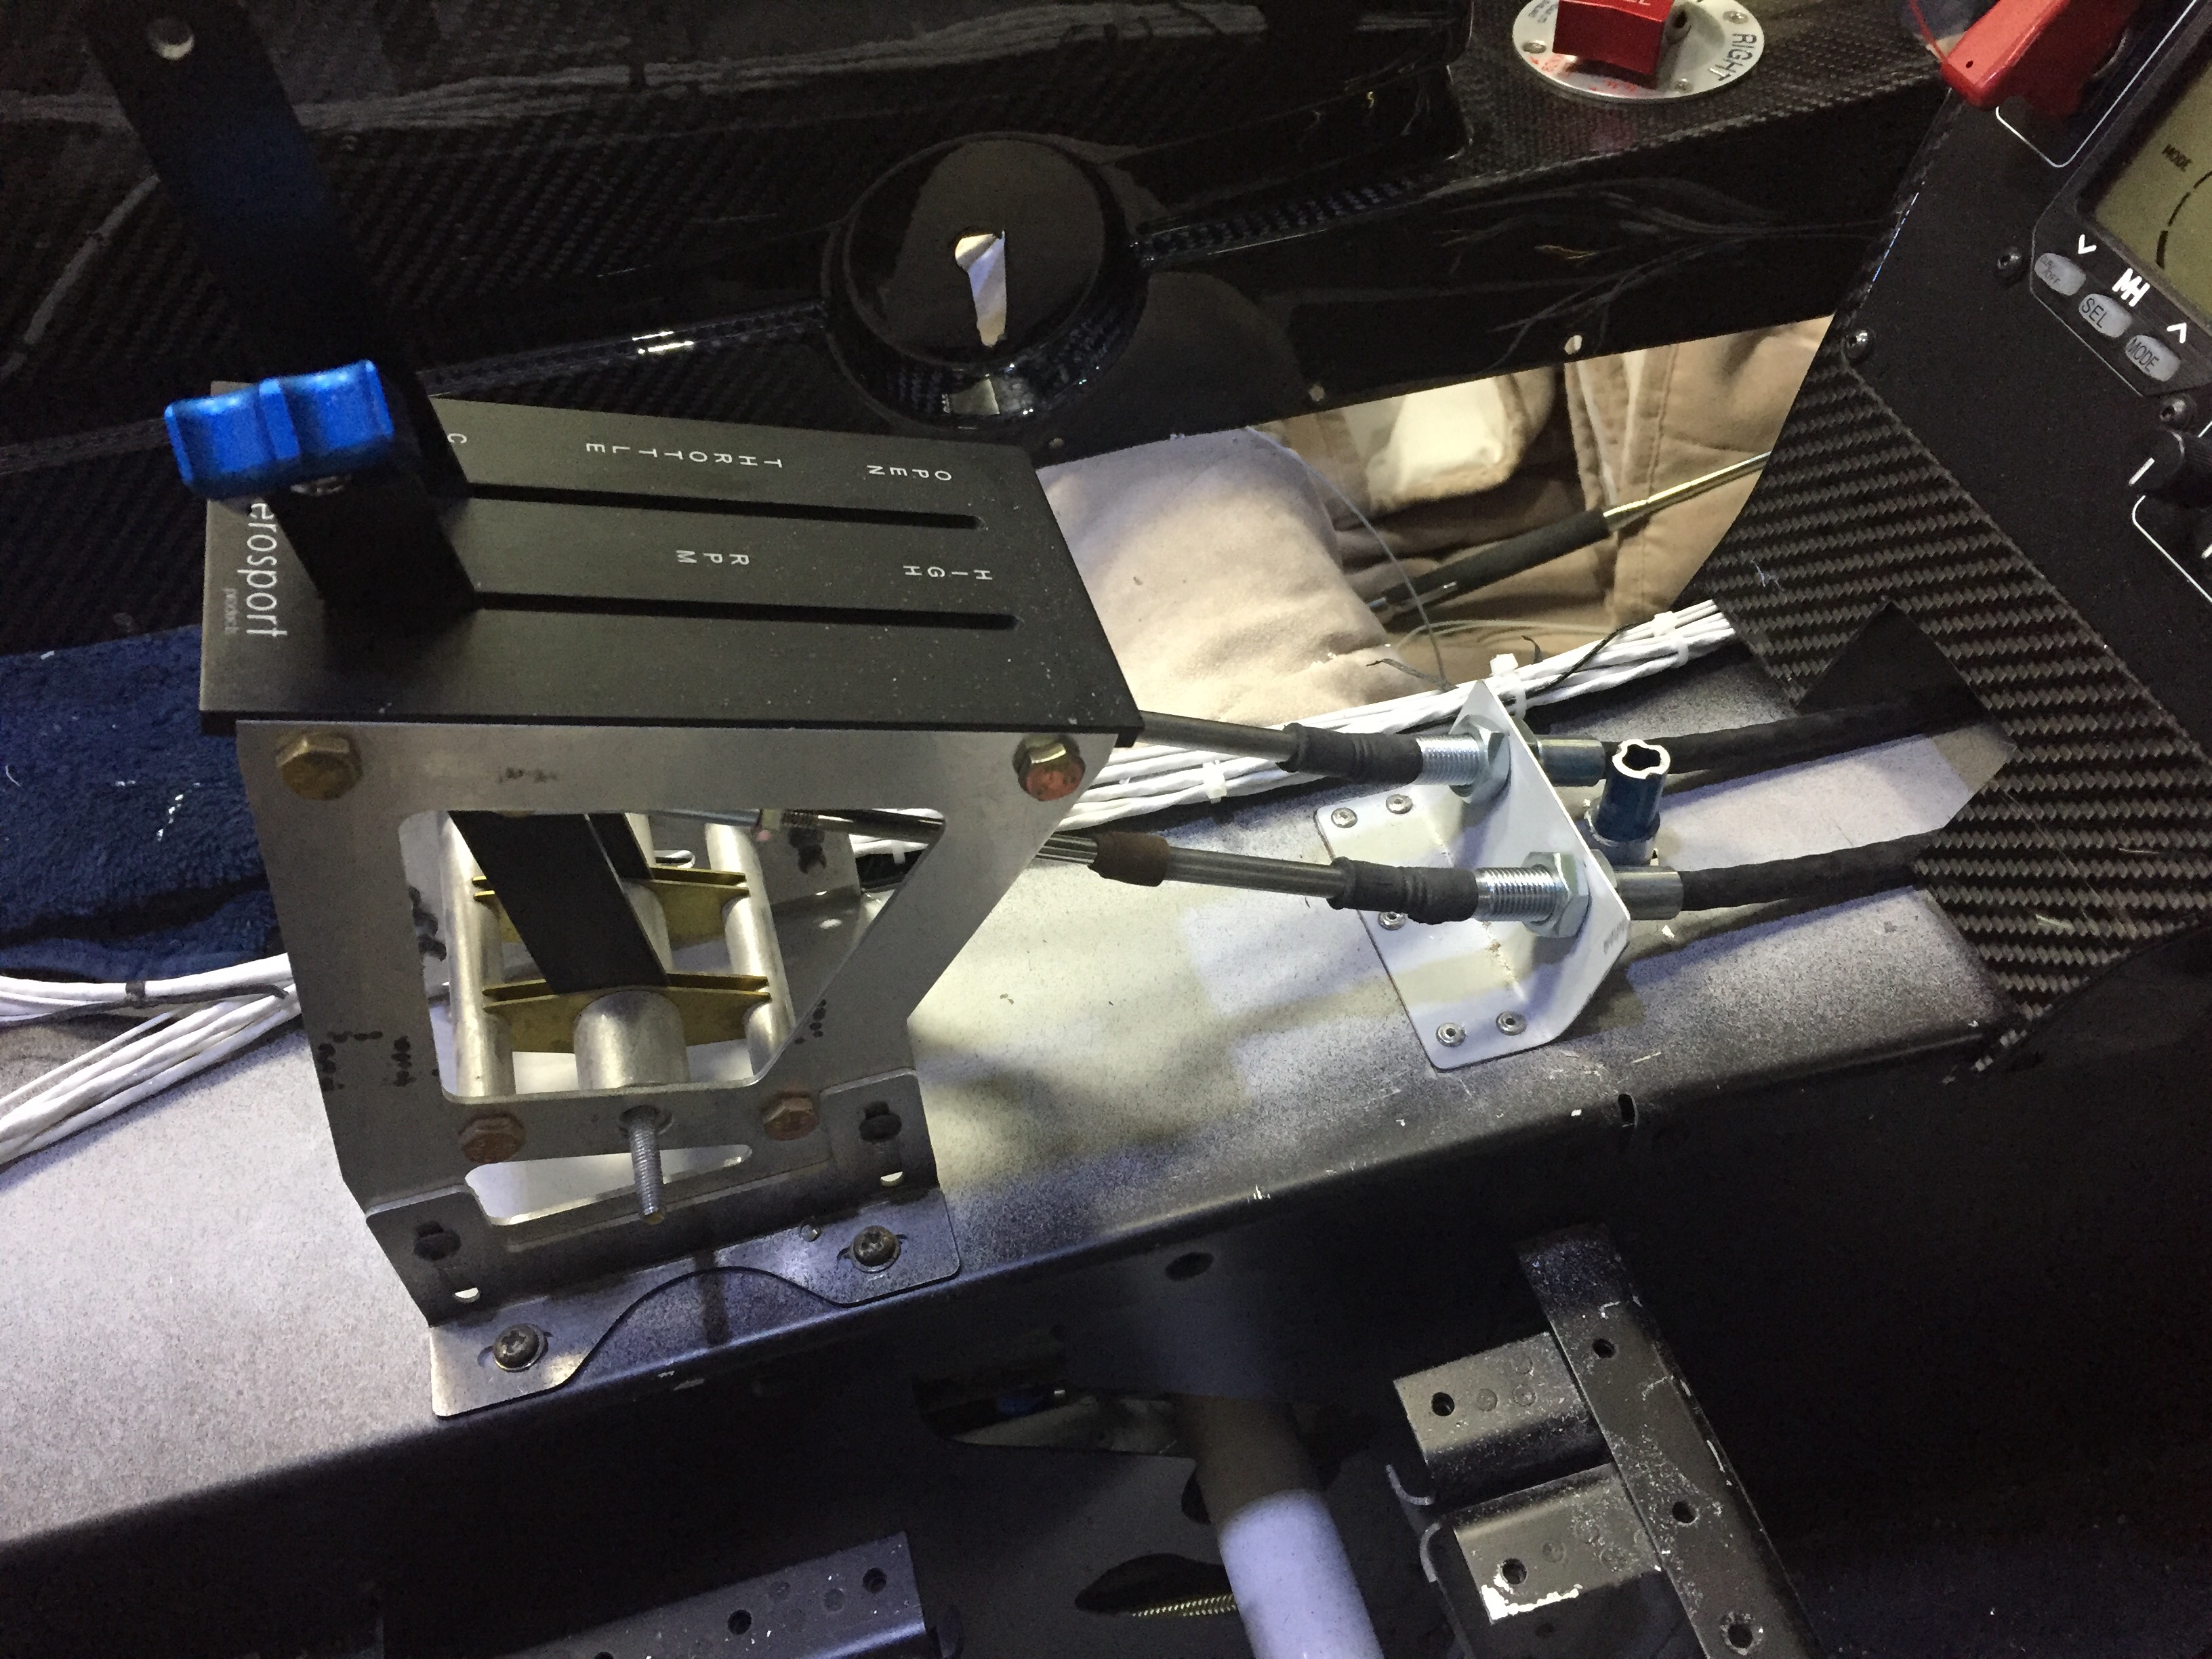
The support bar was one of those jobs that I have put off due to dread.  Since I molded the overhead switch panel into the cabin top and overhead console, the access to the four screws going through the cabin top is extremely limited.  Added to that is the hunky chunk grip of wires I have running up the bar to the overhead.  My dad was in town for a few weeks so I decided to get his help and tackle the task.  We were able to get the first two screws in pretty easily by sliding the wire harness to the empty side.  I put the nuts on finger tight and then had to mulitlate two sockets to fit up agains the switch panel since it was so close fitting.

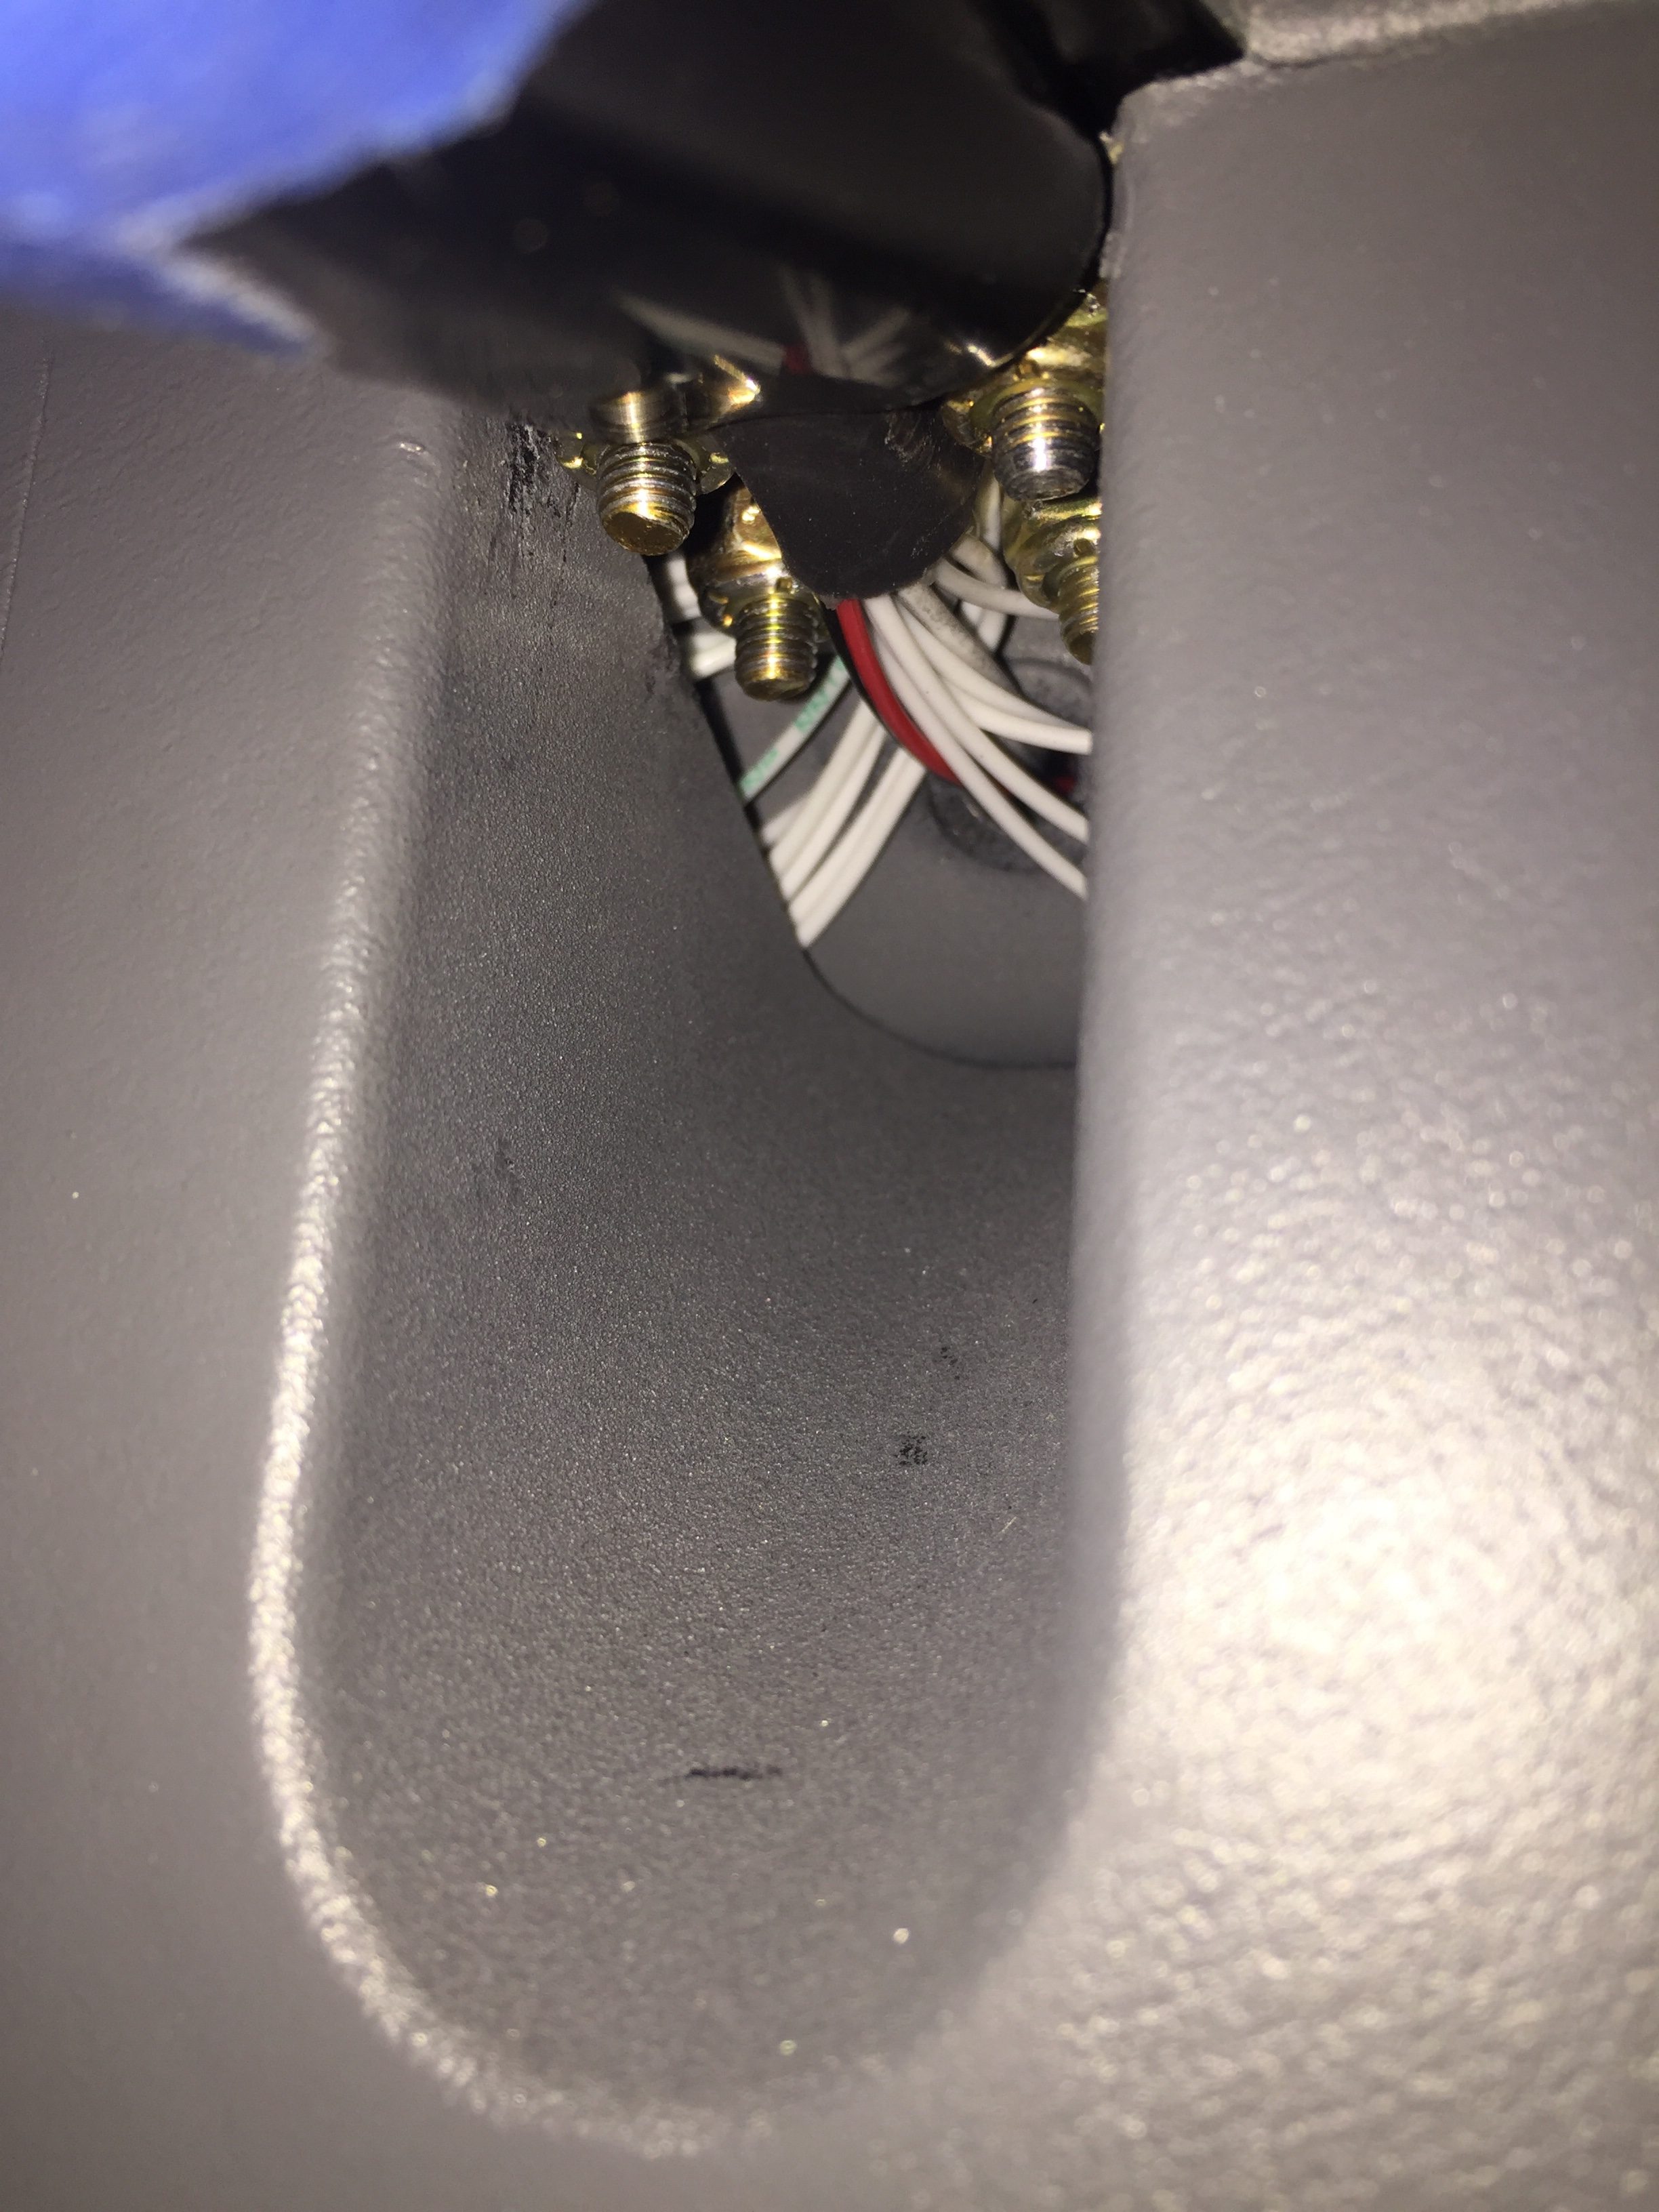
The other two screws were a bit more challenging, as I had to slide the wire between the screws now and wrangle the washer and nut around them but beside the switch panel.  As with a few jobs, a lot of cuss words were uttered, a tool might have gotten tossed gently onto the floor, and after a lot of sweating and questioning why I didn’t just buy a Cirrus later, it was completed.  I’m glad I won’t be taking this apart regularly.

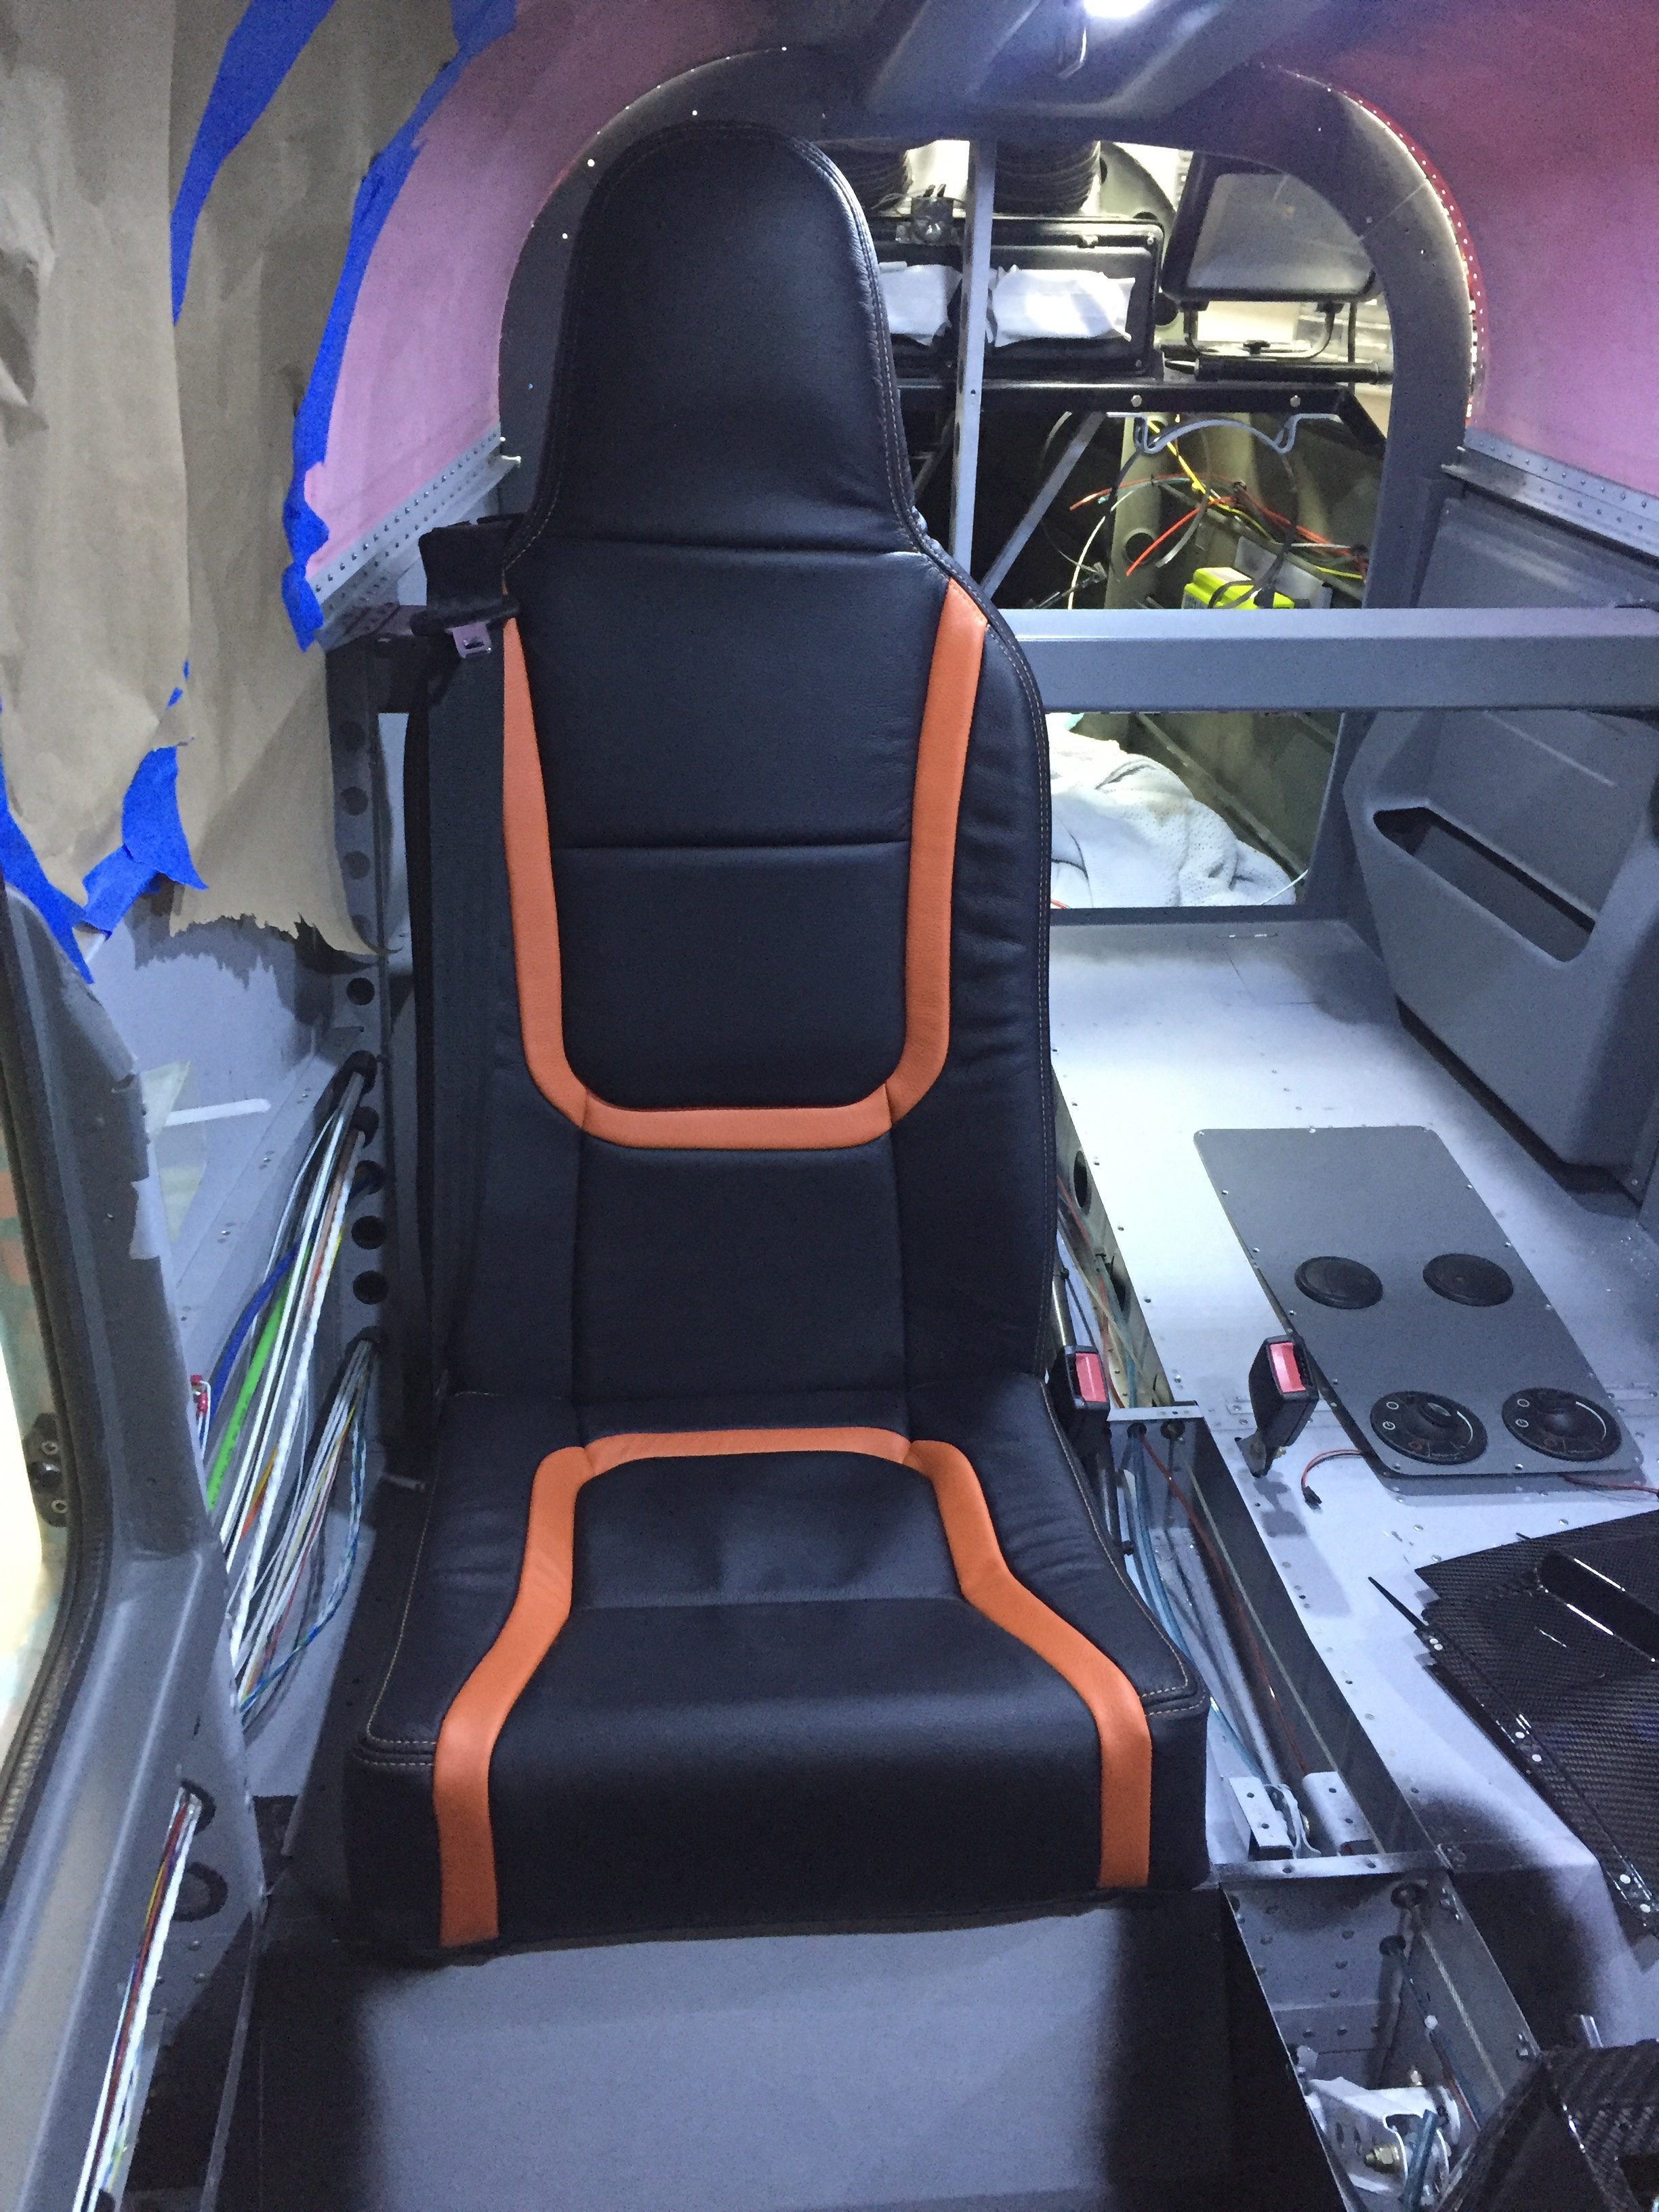
All that cussing and sweating just primed me up for the next job, riveting the upper forward fuselage skin onto the structure.  Since dad was here to shoot from the outside, I grabbed my PPE and dove under the panel in one of the most uncomfortable positions I’ve ever been in since I was born.  The rivets went in smoothly and we were able to knock it out together in a few hours, but man it is literally a back breaker.  I had positioned all of the avionics so I could reach the rivets, but it was still tight.

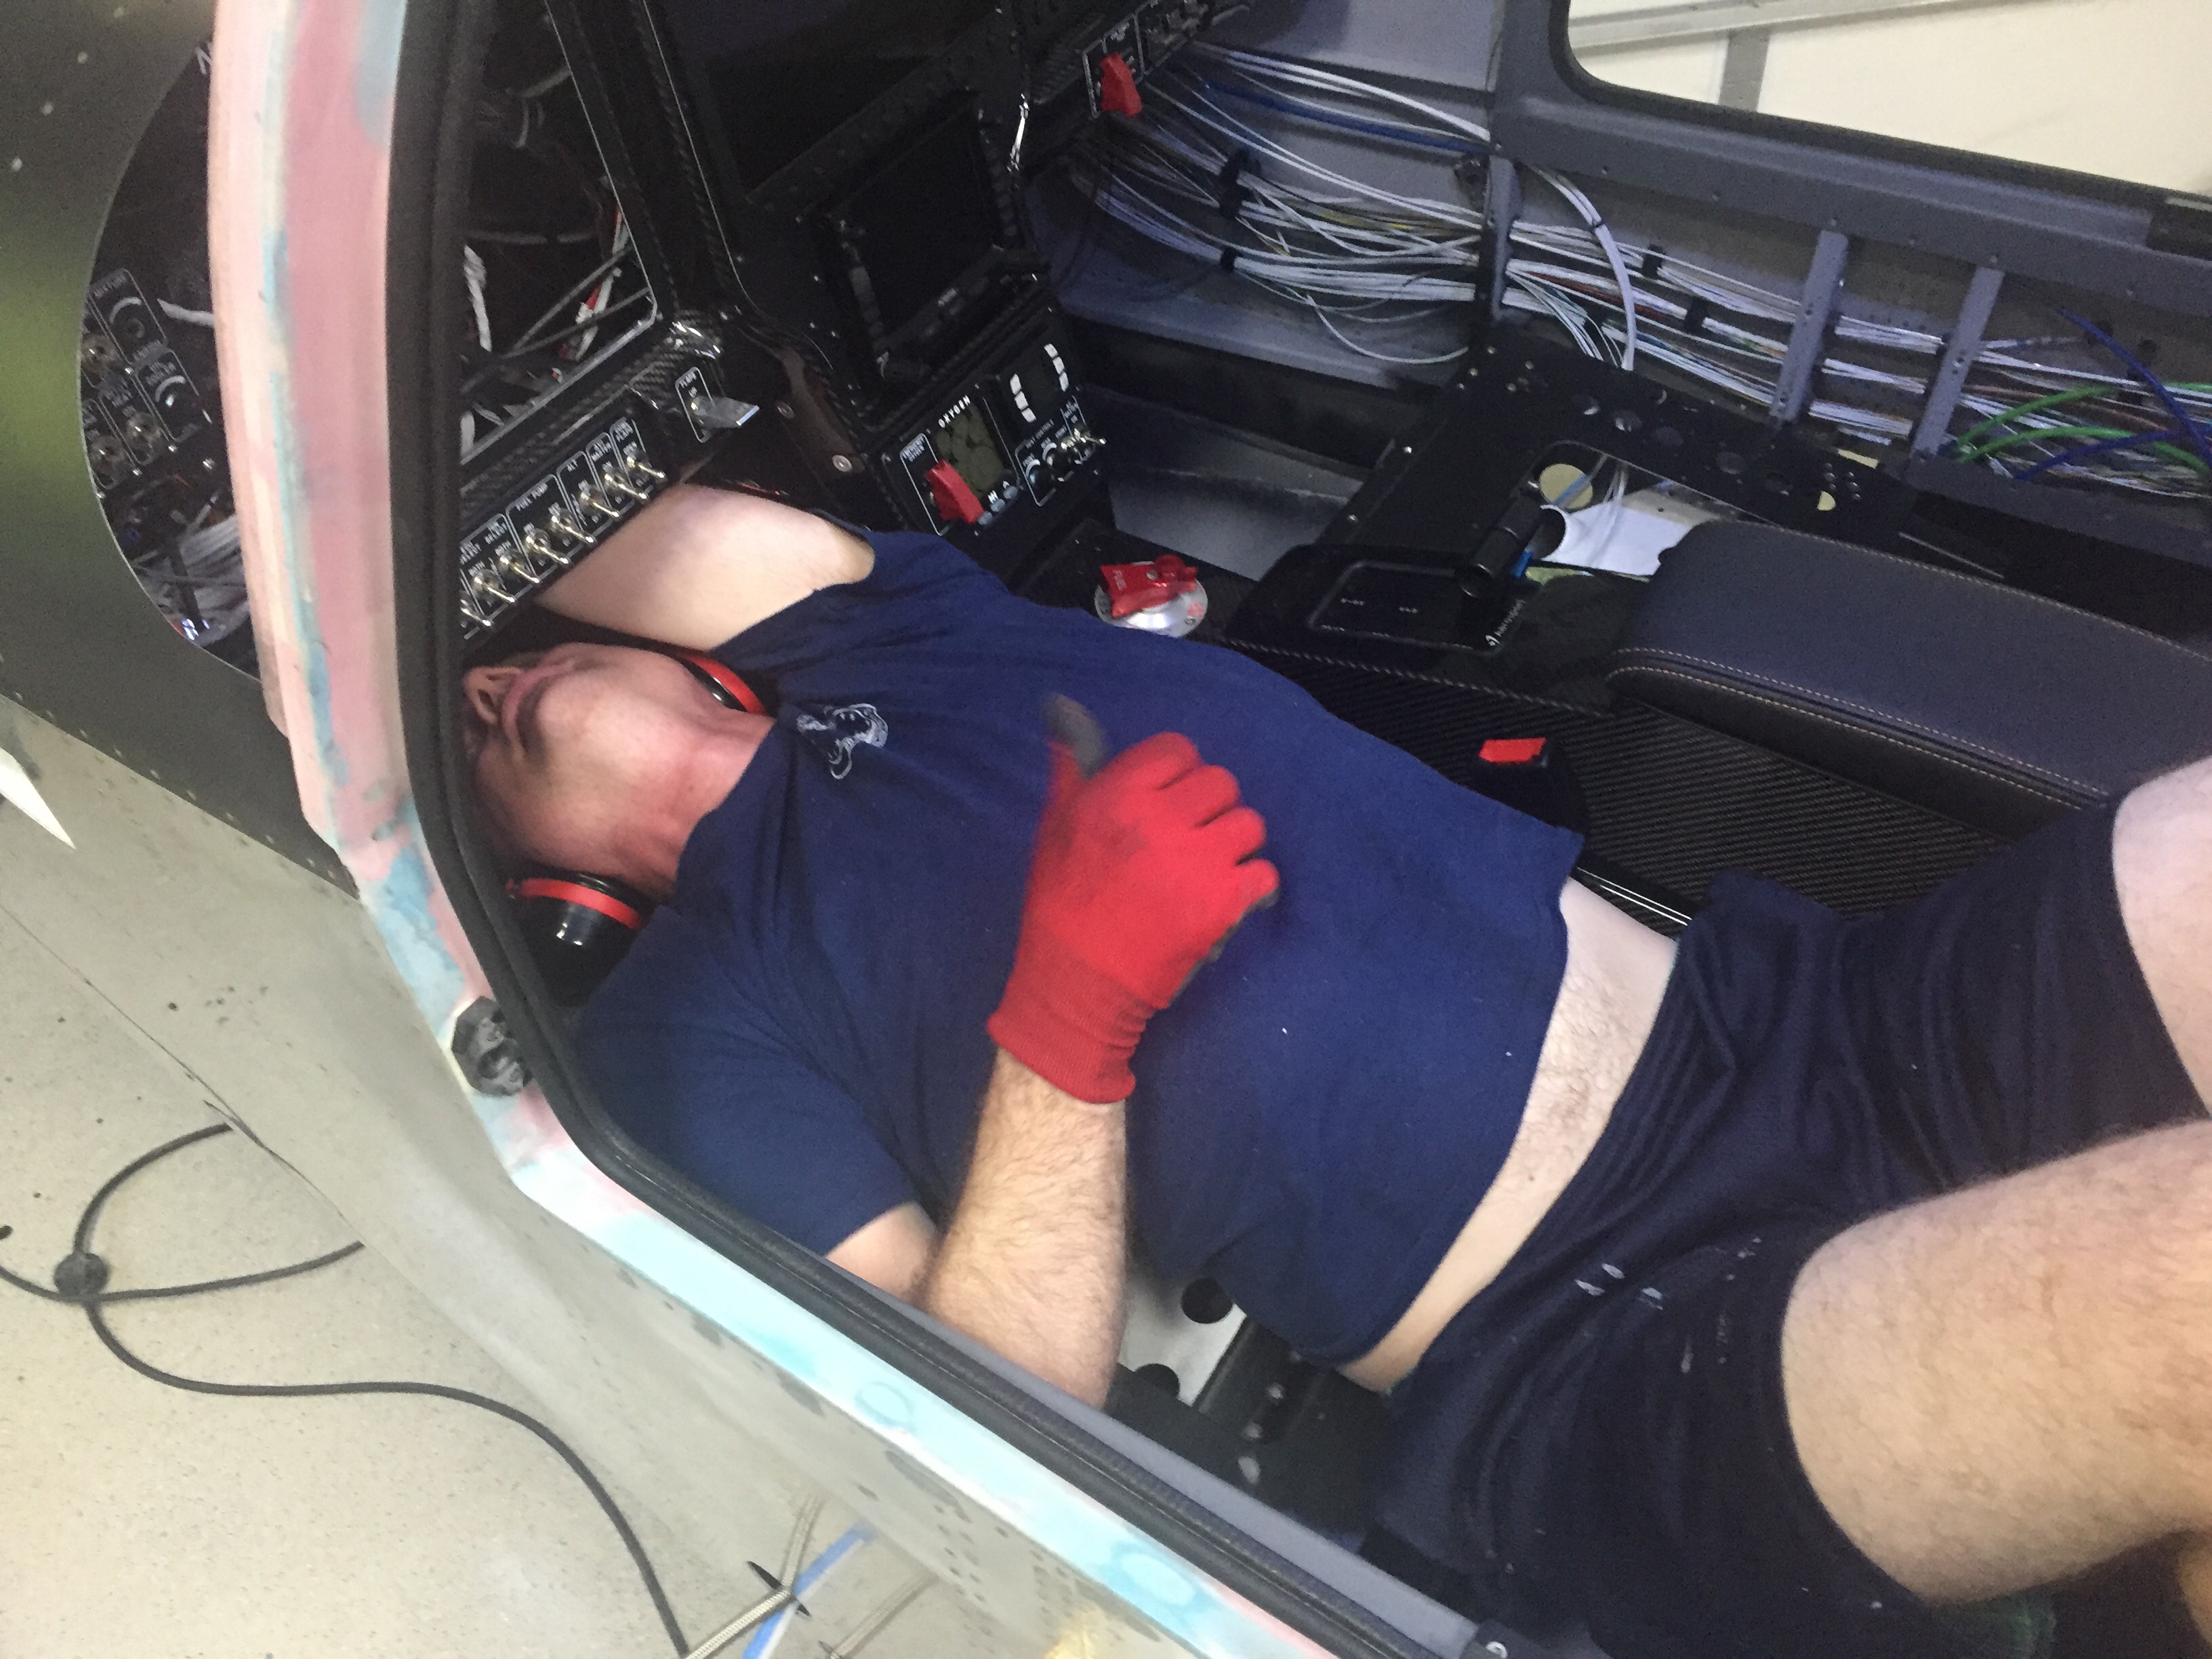
For anyone reading this that hasn’t reached this point or is considering building a 10, PLEASE TAKE THIS AS A PIECE OF WISDOM HANDED DOWN!!!  Do NOT rivet the forward fuse / skin on until AFTER you have all of your avionics and wiring in!

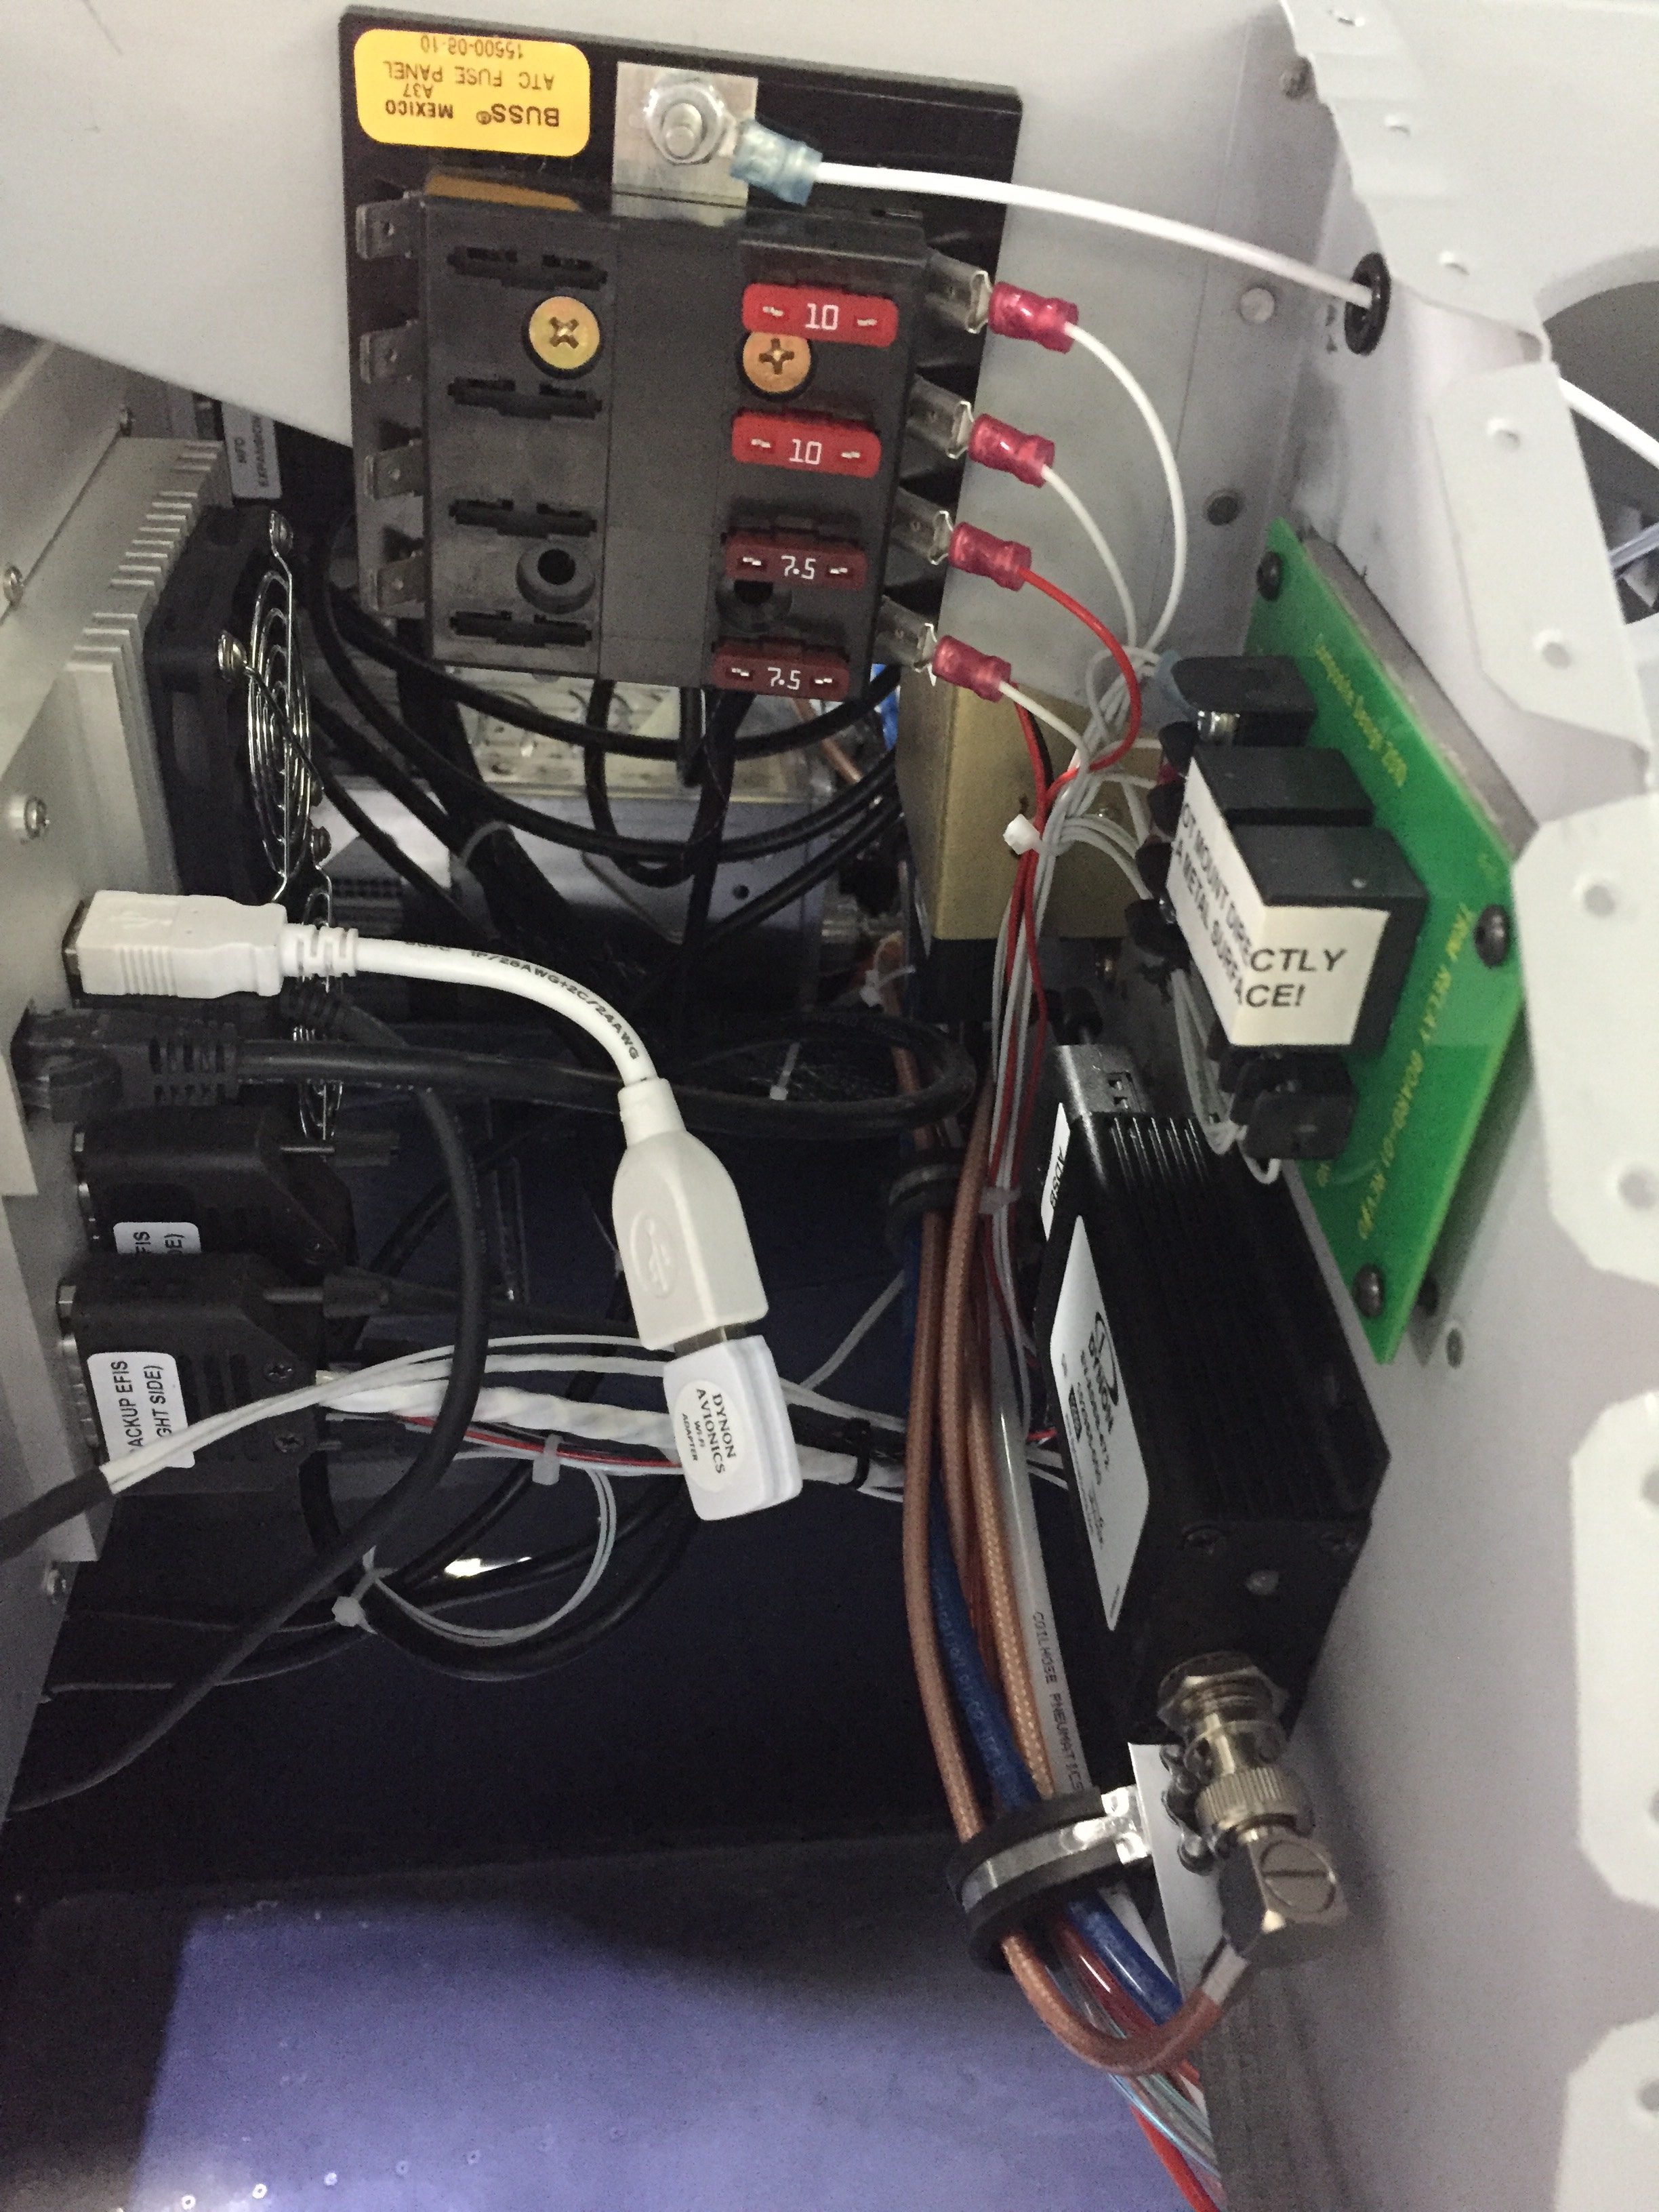
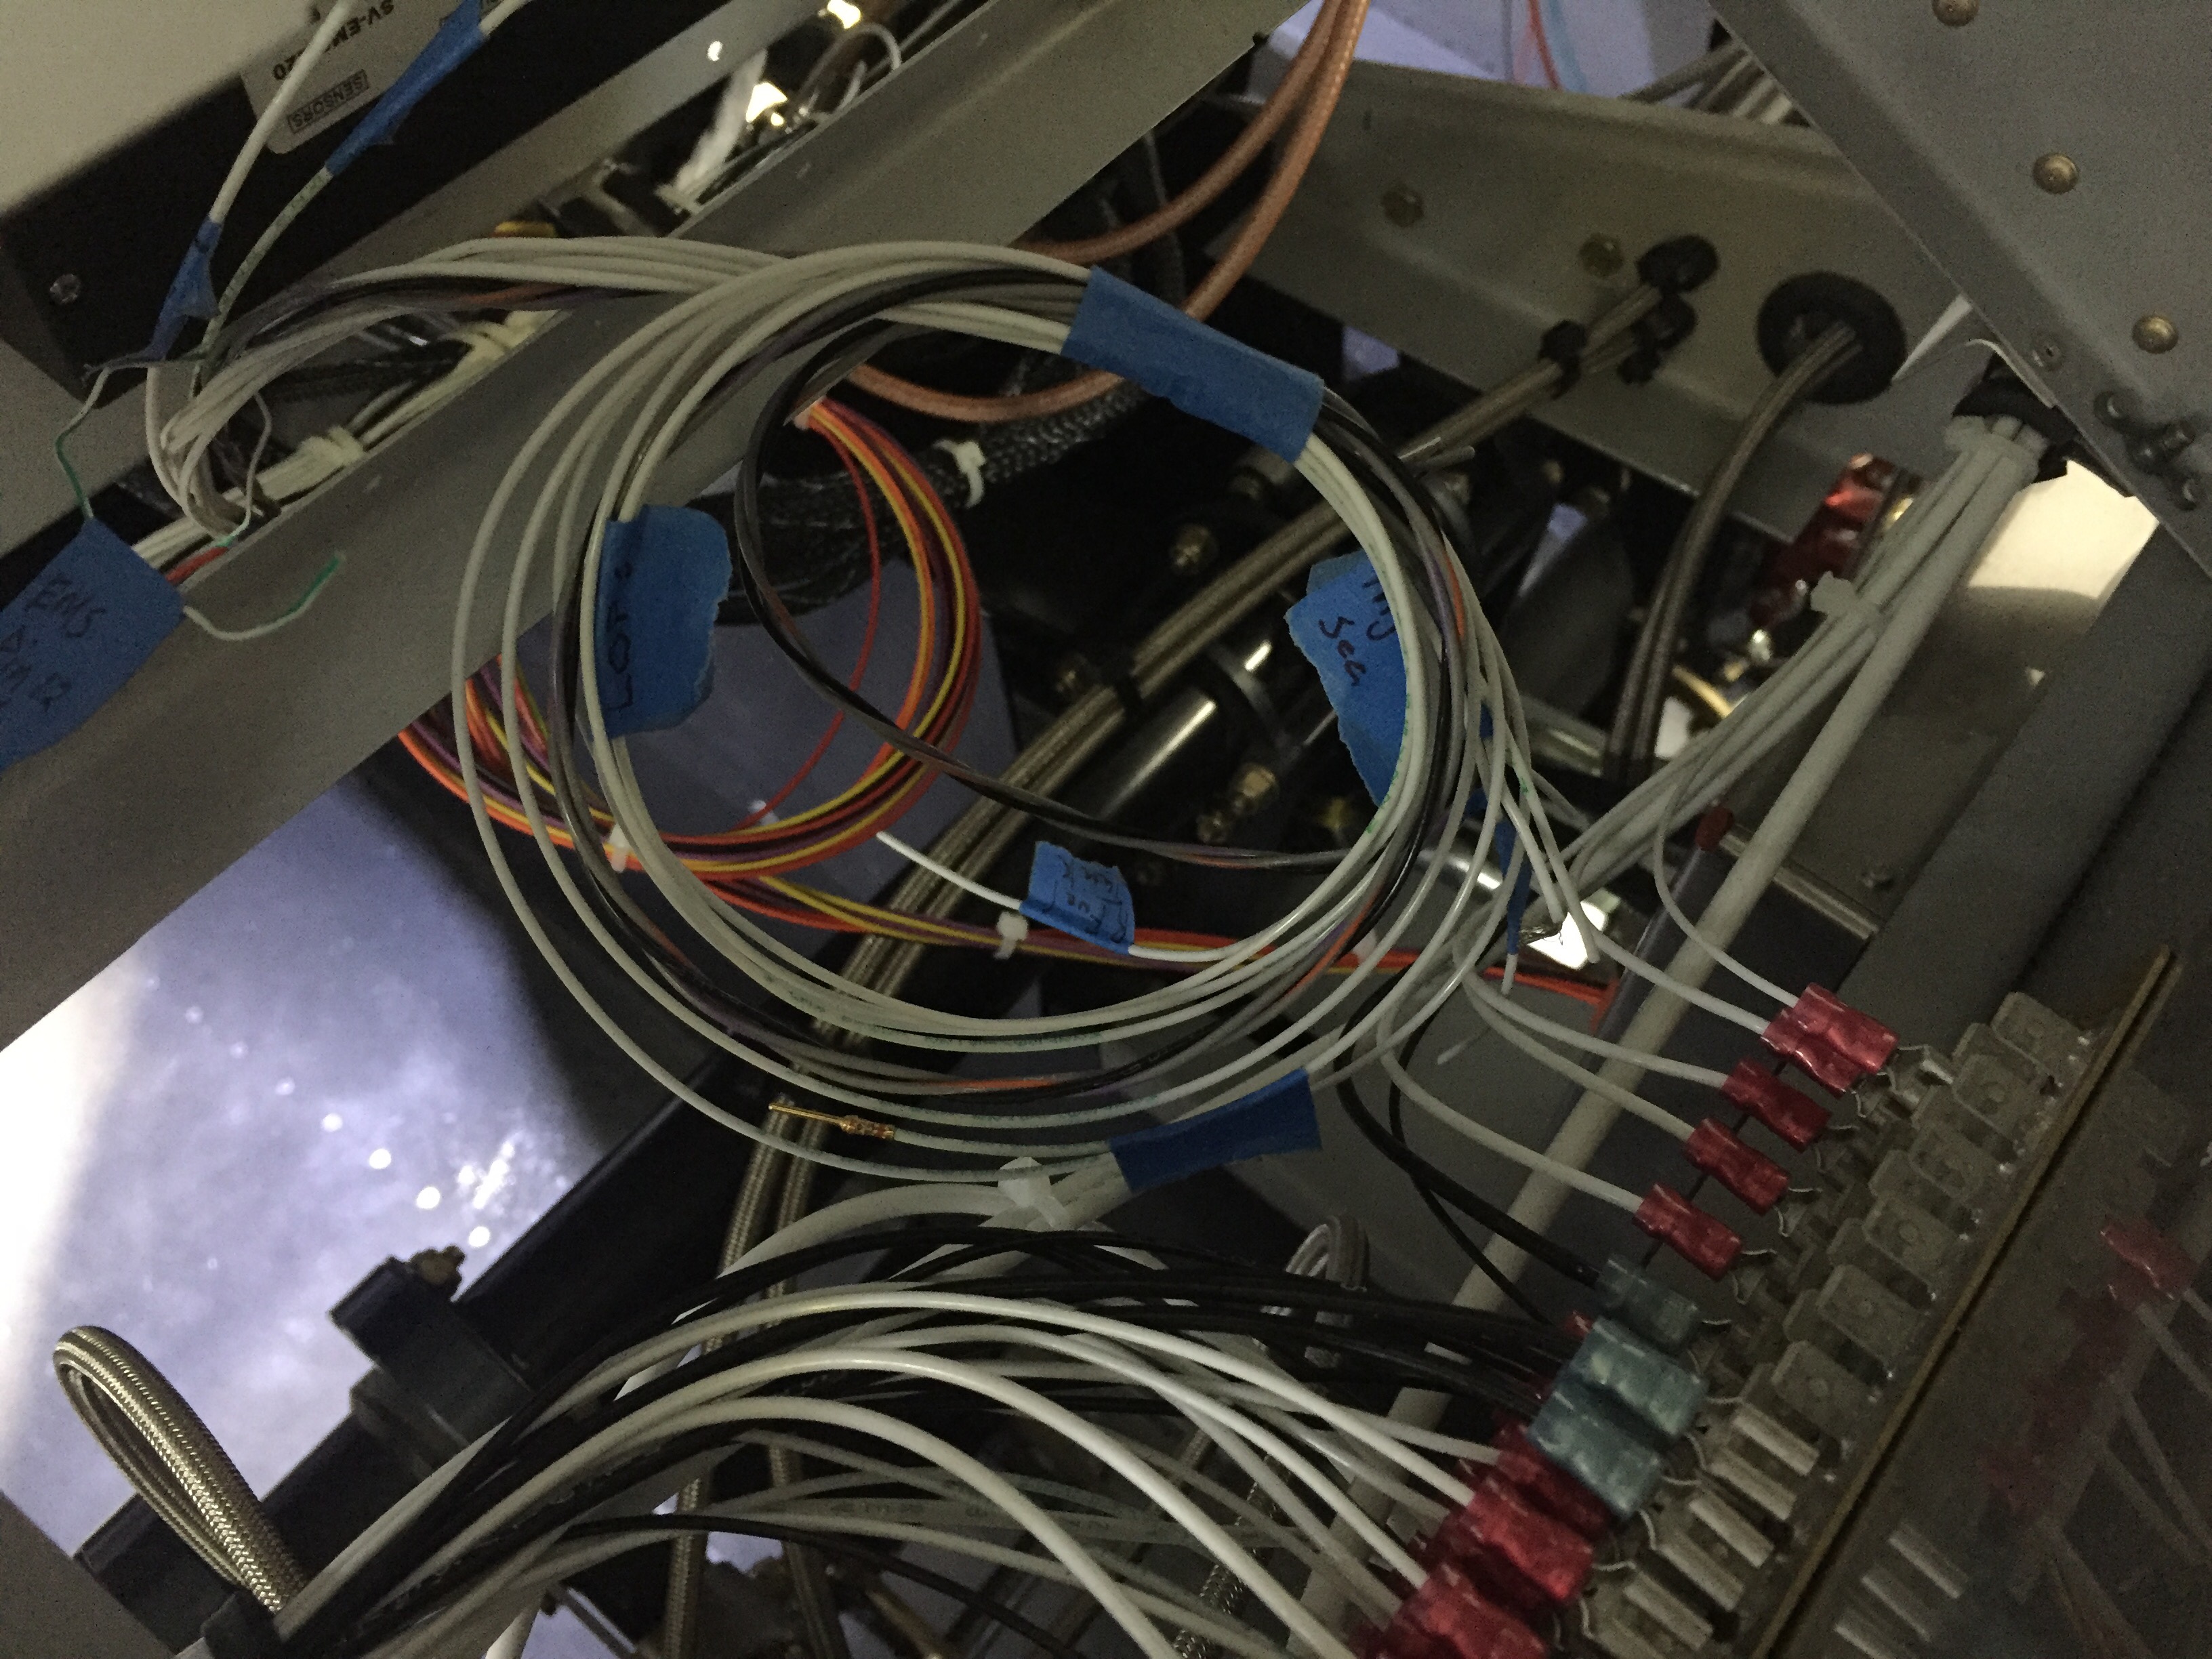
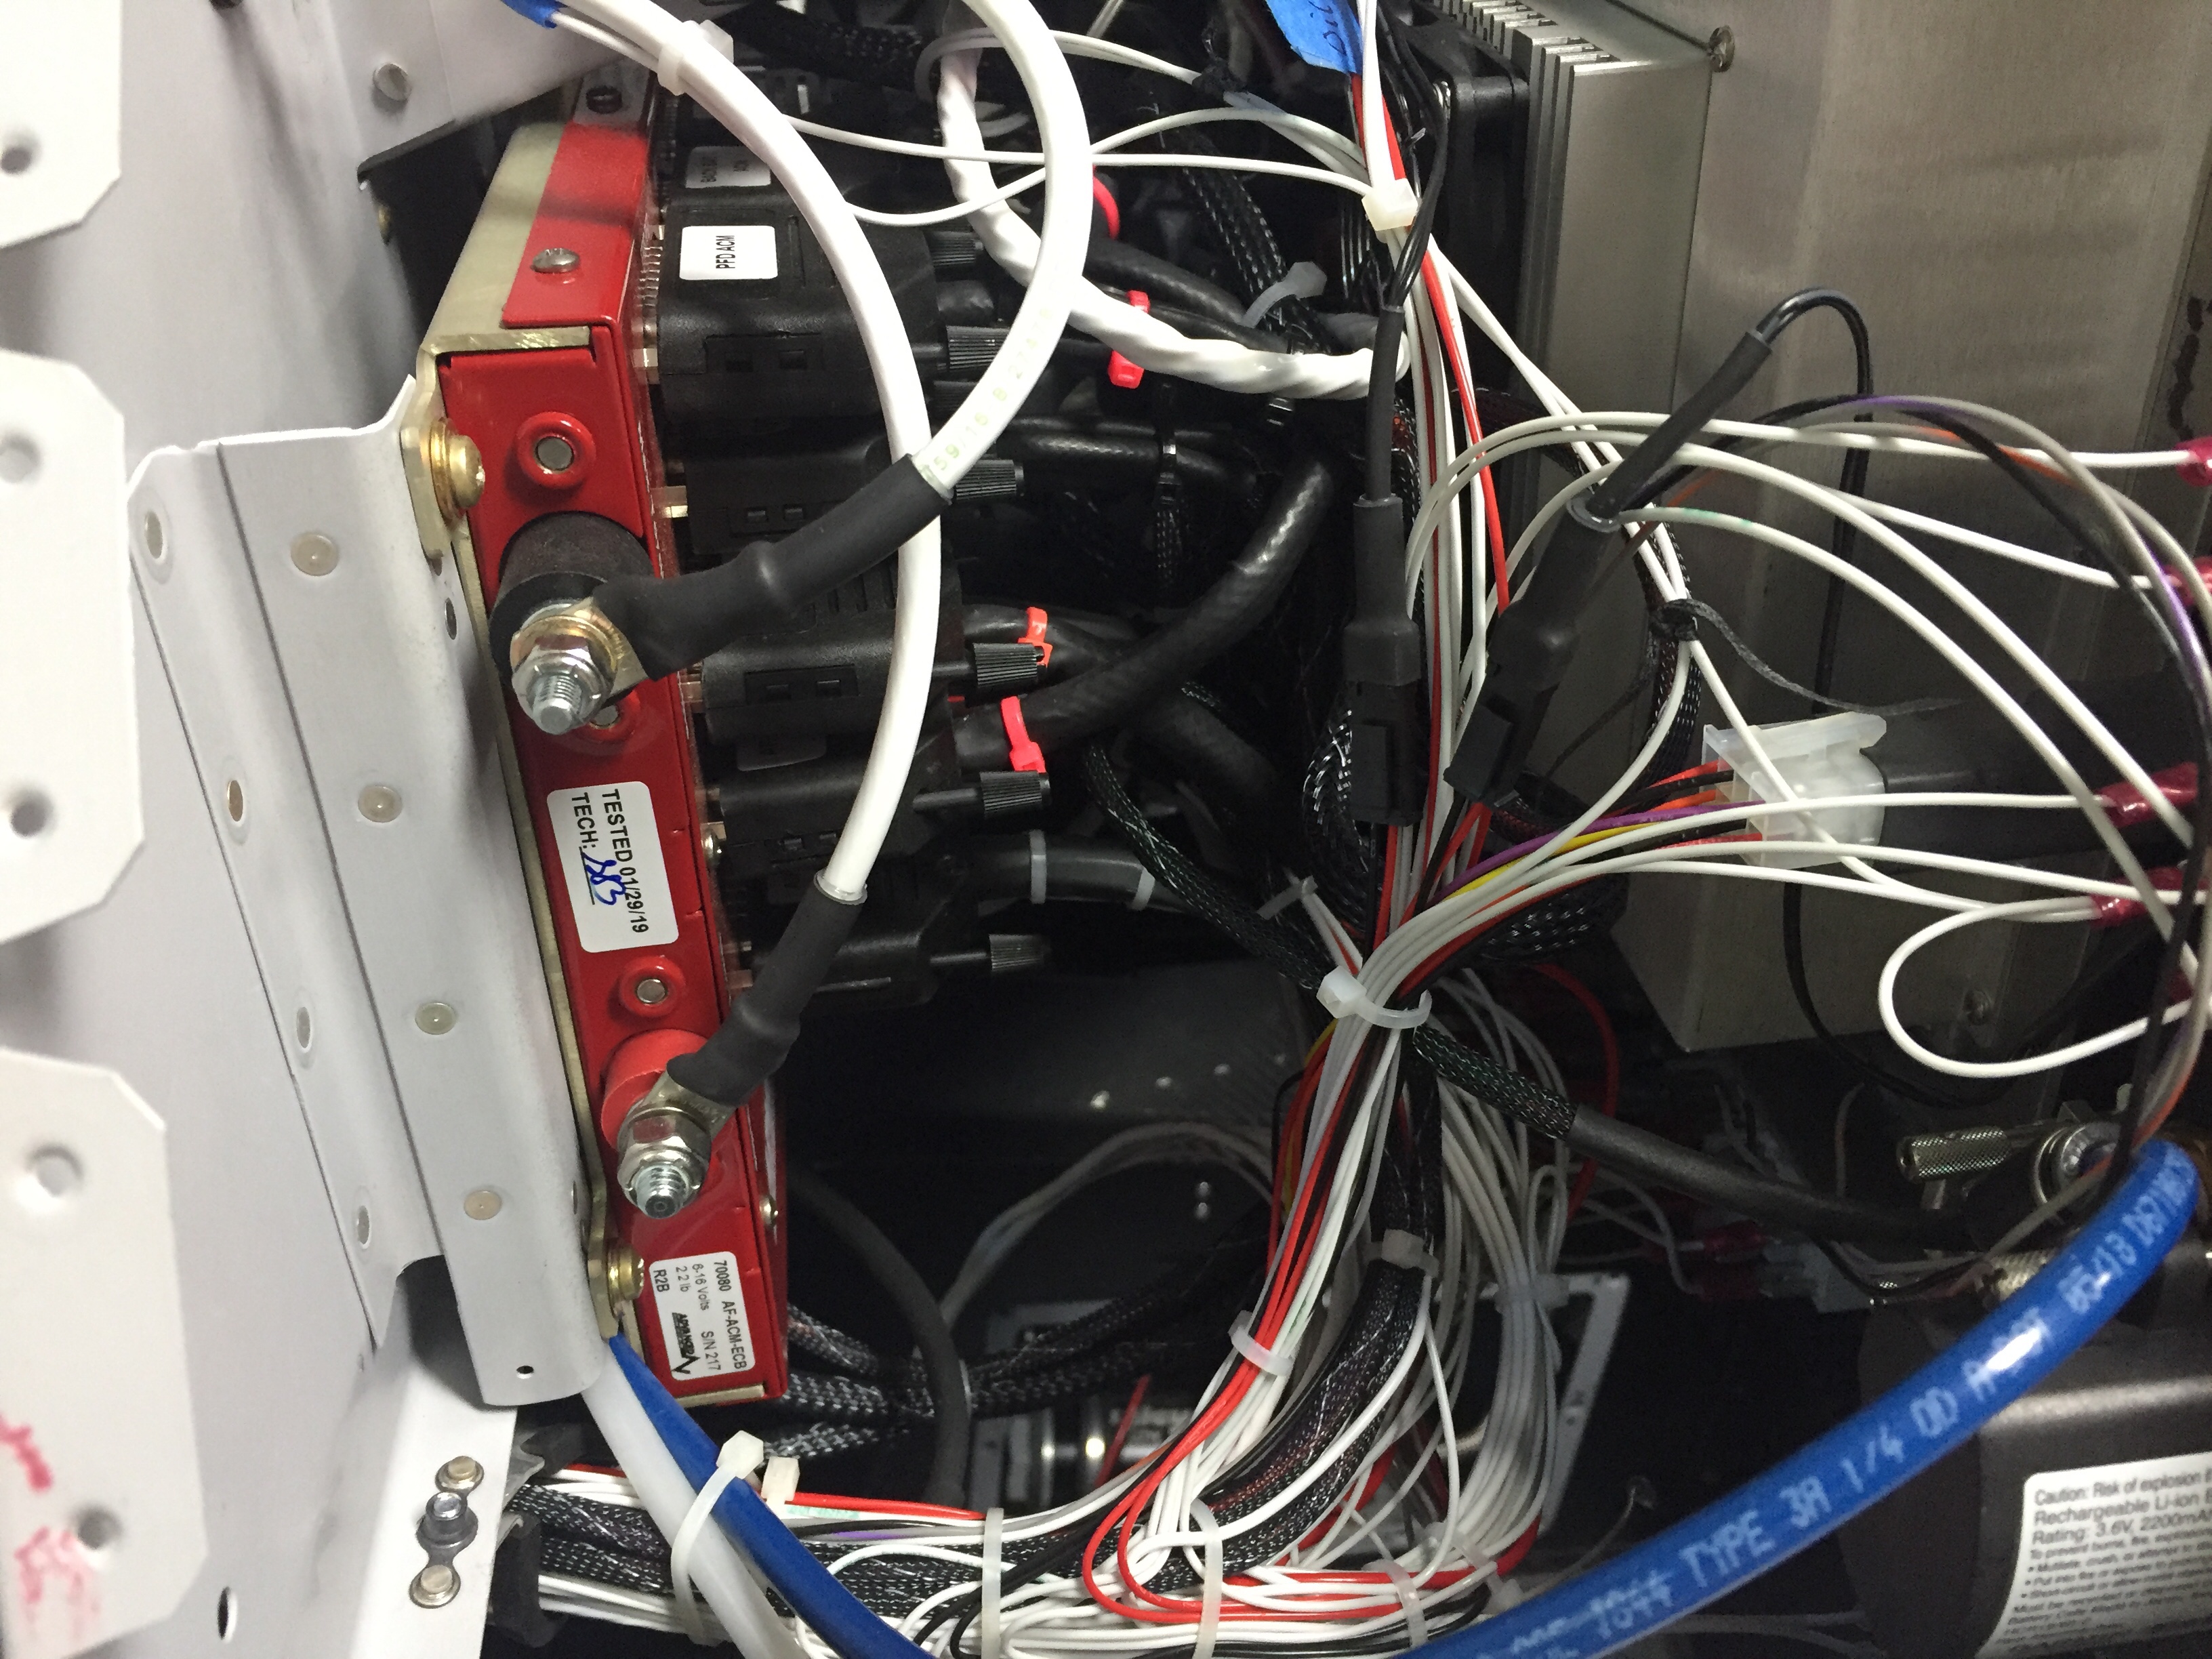
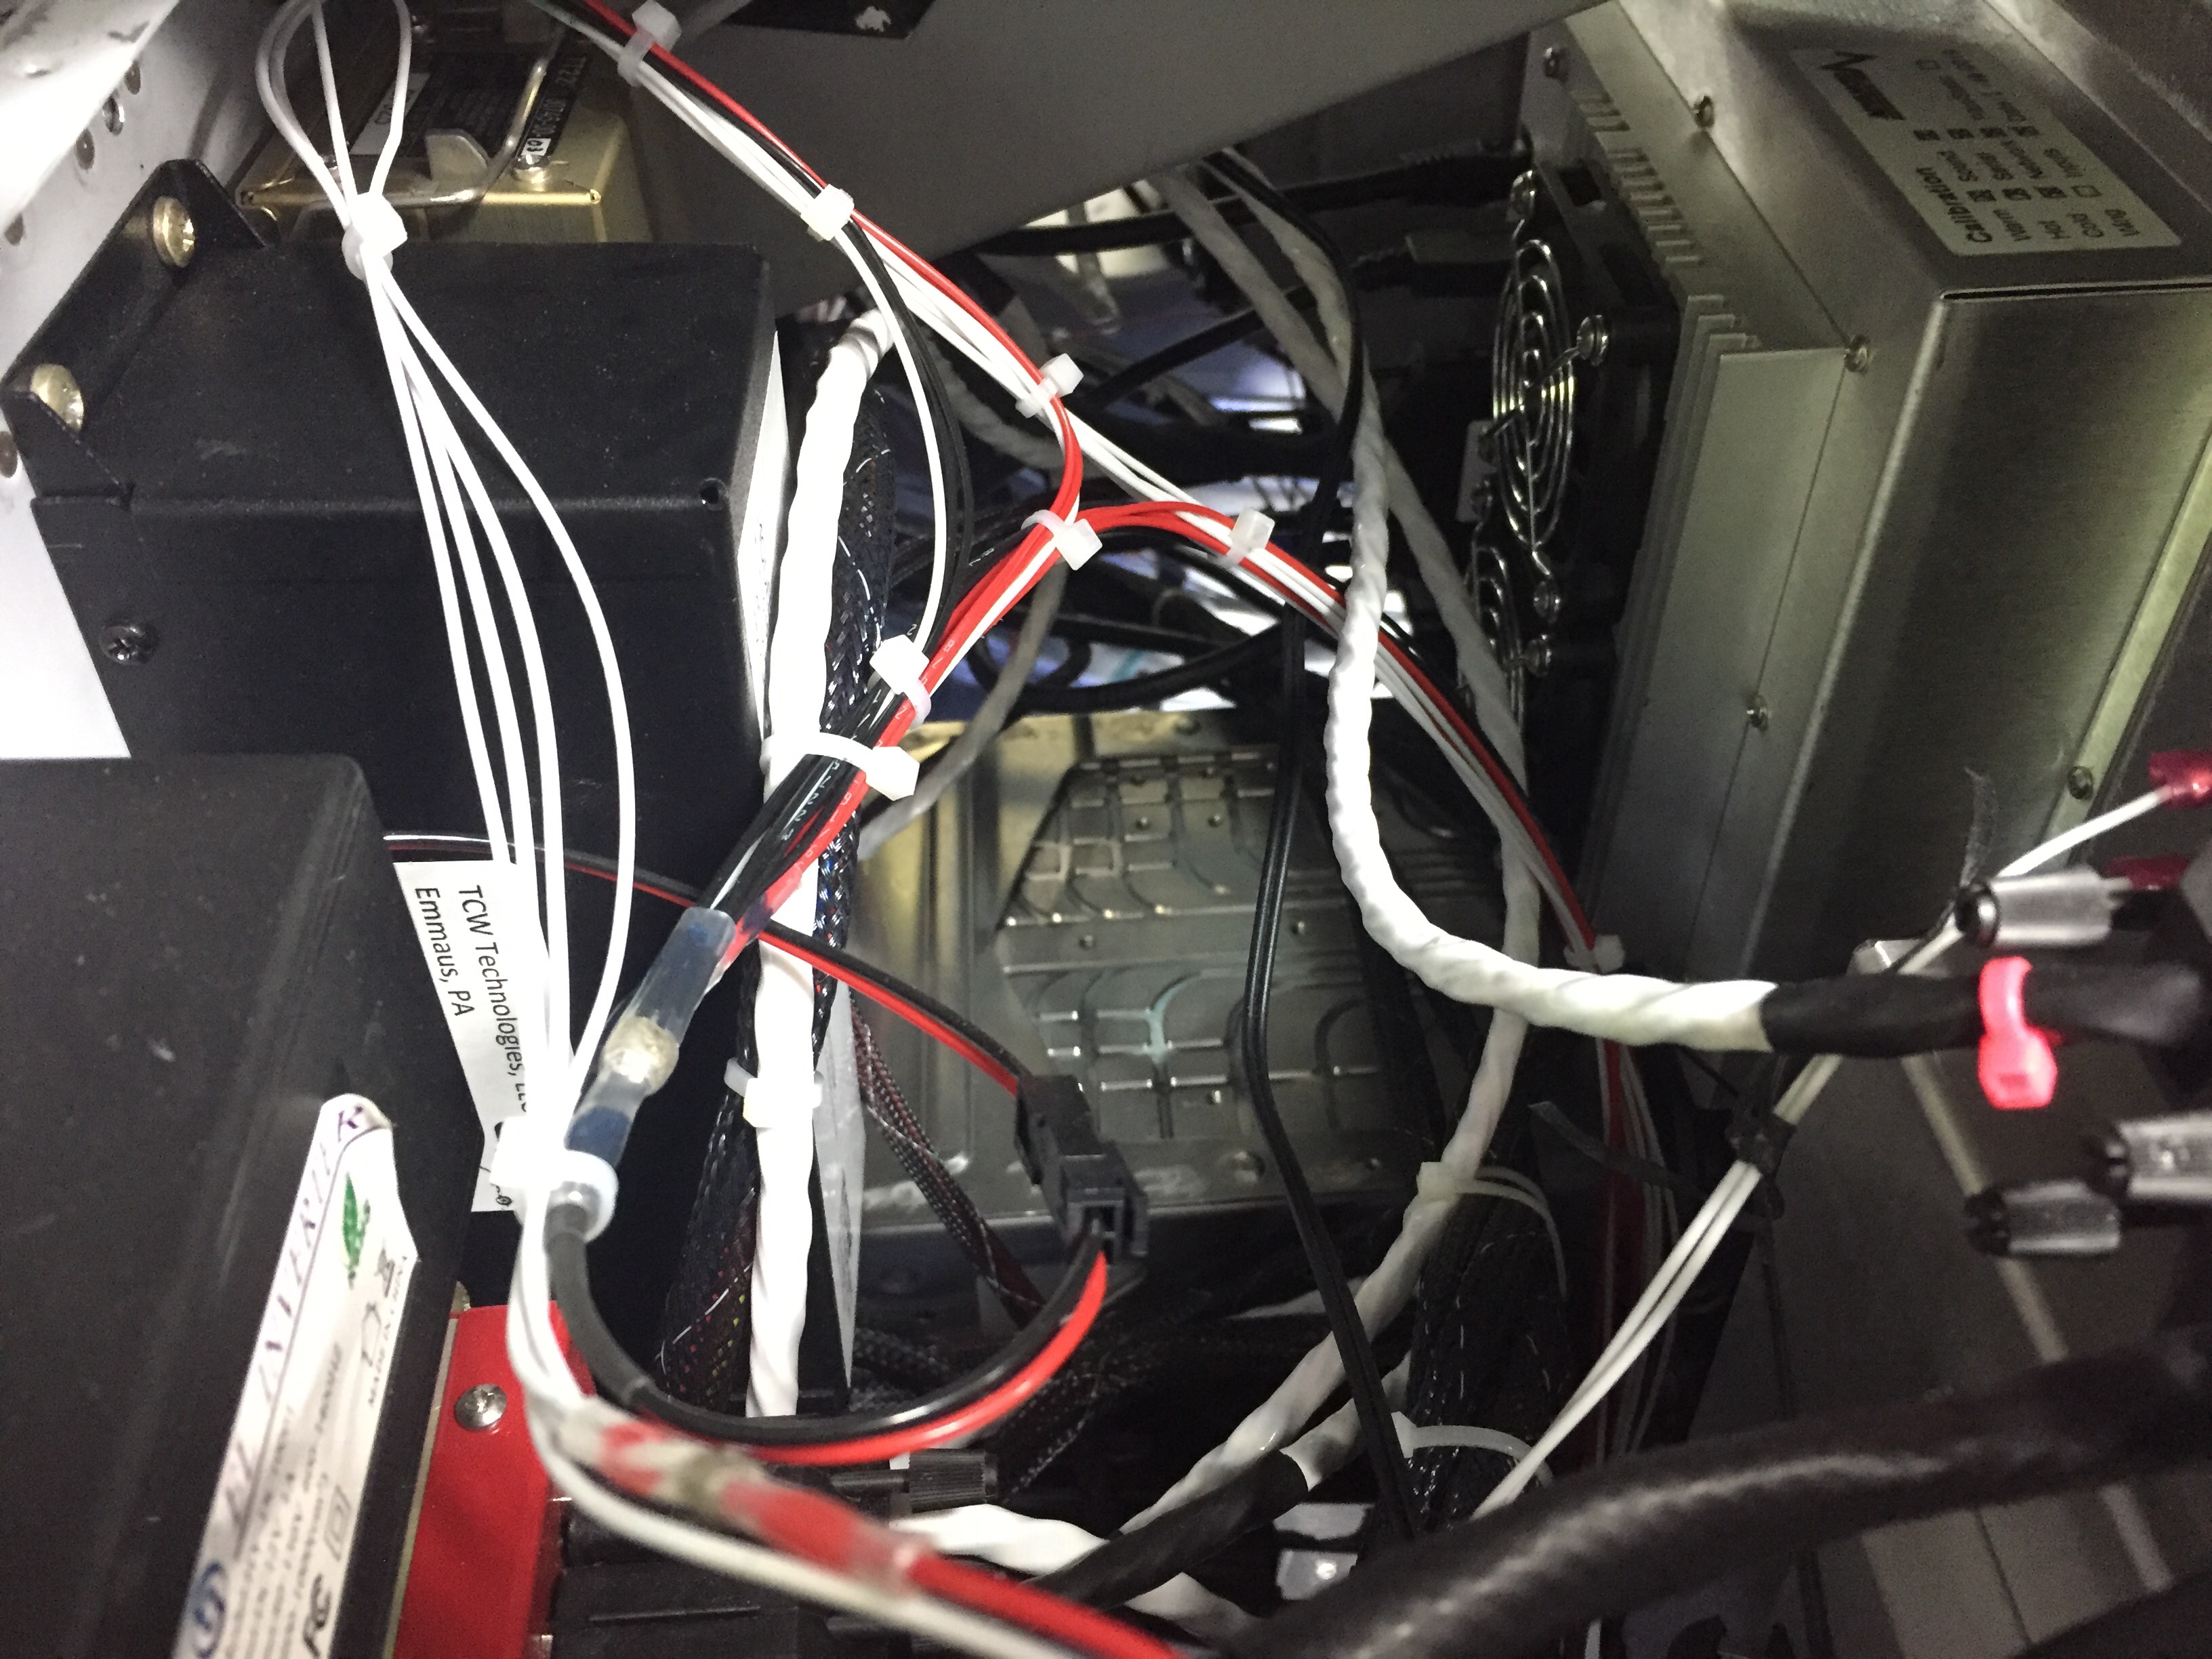
I can’t imagine spending days laying like that running wires, terminating connectors, and trying to bolt crap onto the subpanel.  I kept the structure and skin off as long as possible and was able to simple walk around the avionics bay to complete everything.  It would have taken me twice as long to complete the wiring if I had followed Van’s plans.  I took the opportunity while under the panel to add just a few more zip ties to the wiring runs that I had already permanently secured.  It’s not immaculate, but I’m very happy with my housekeeping and wiring runs.

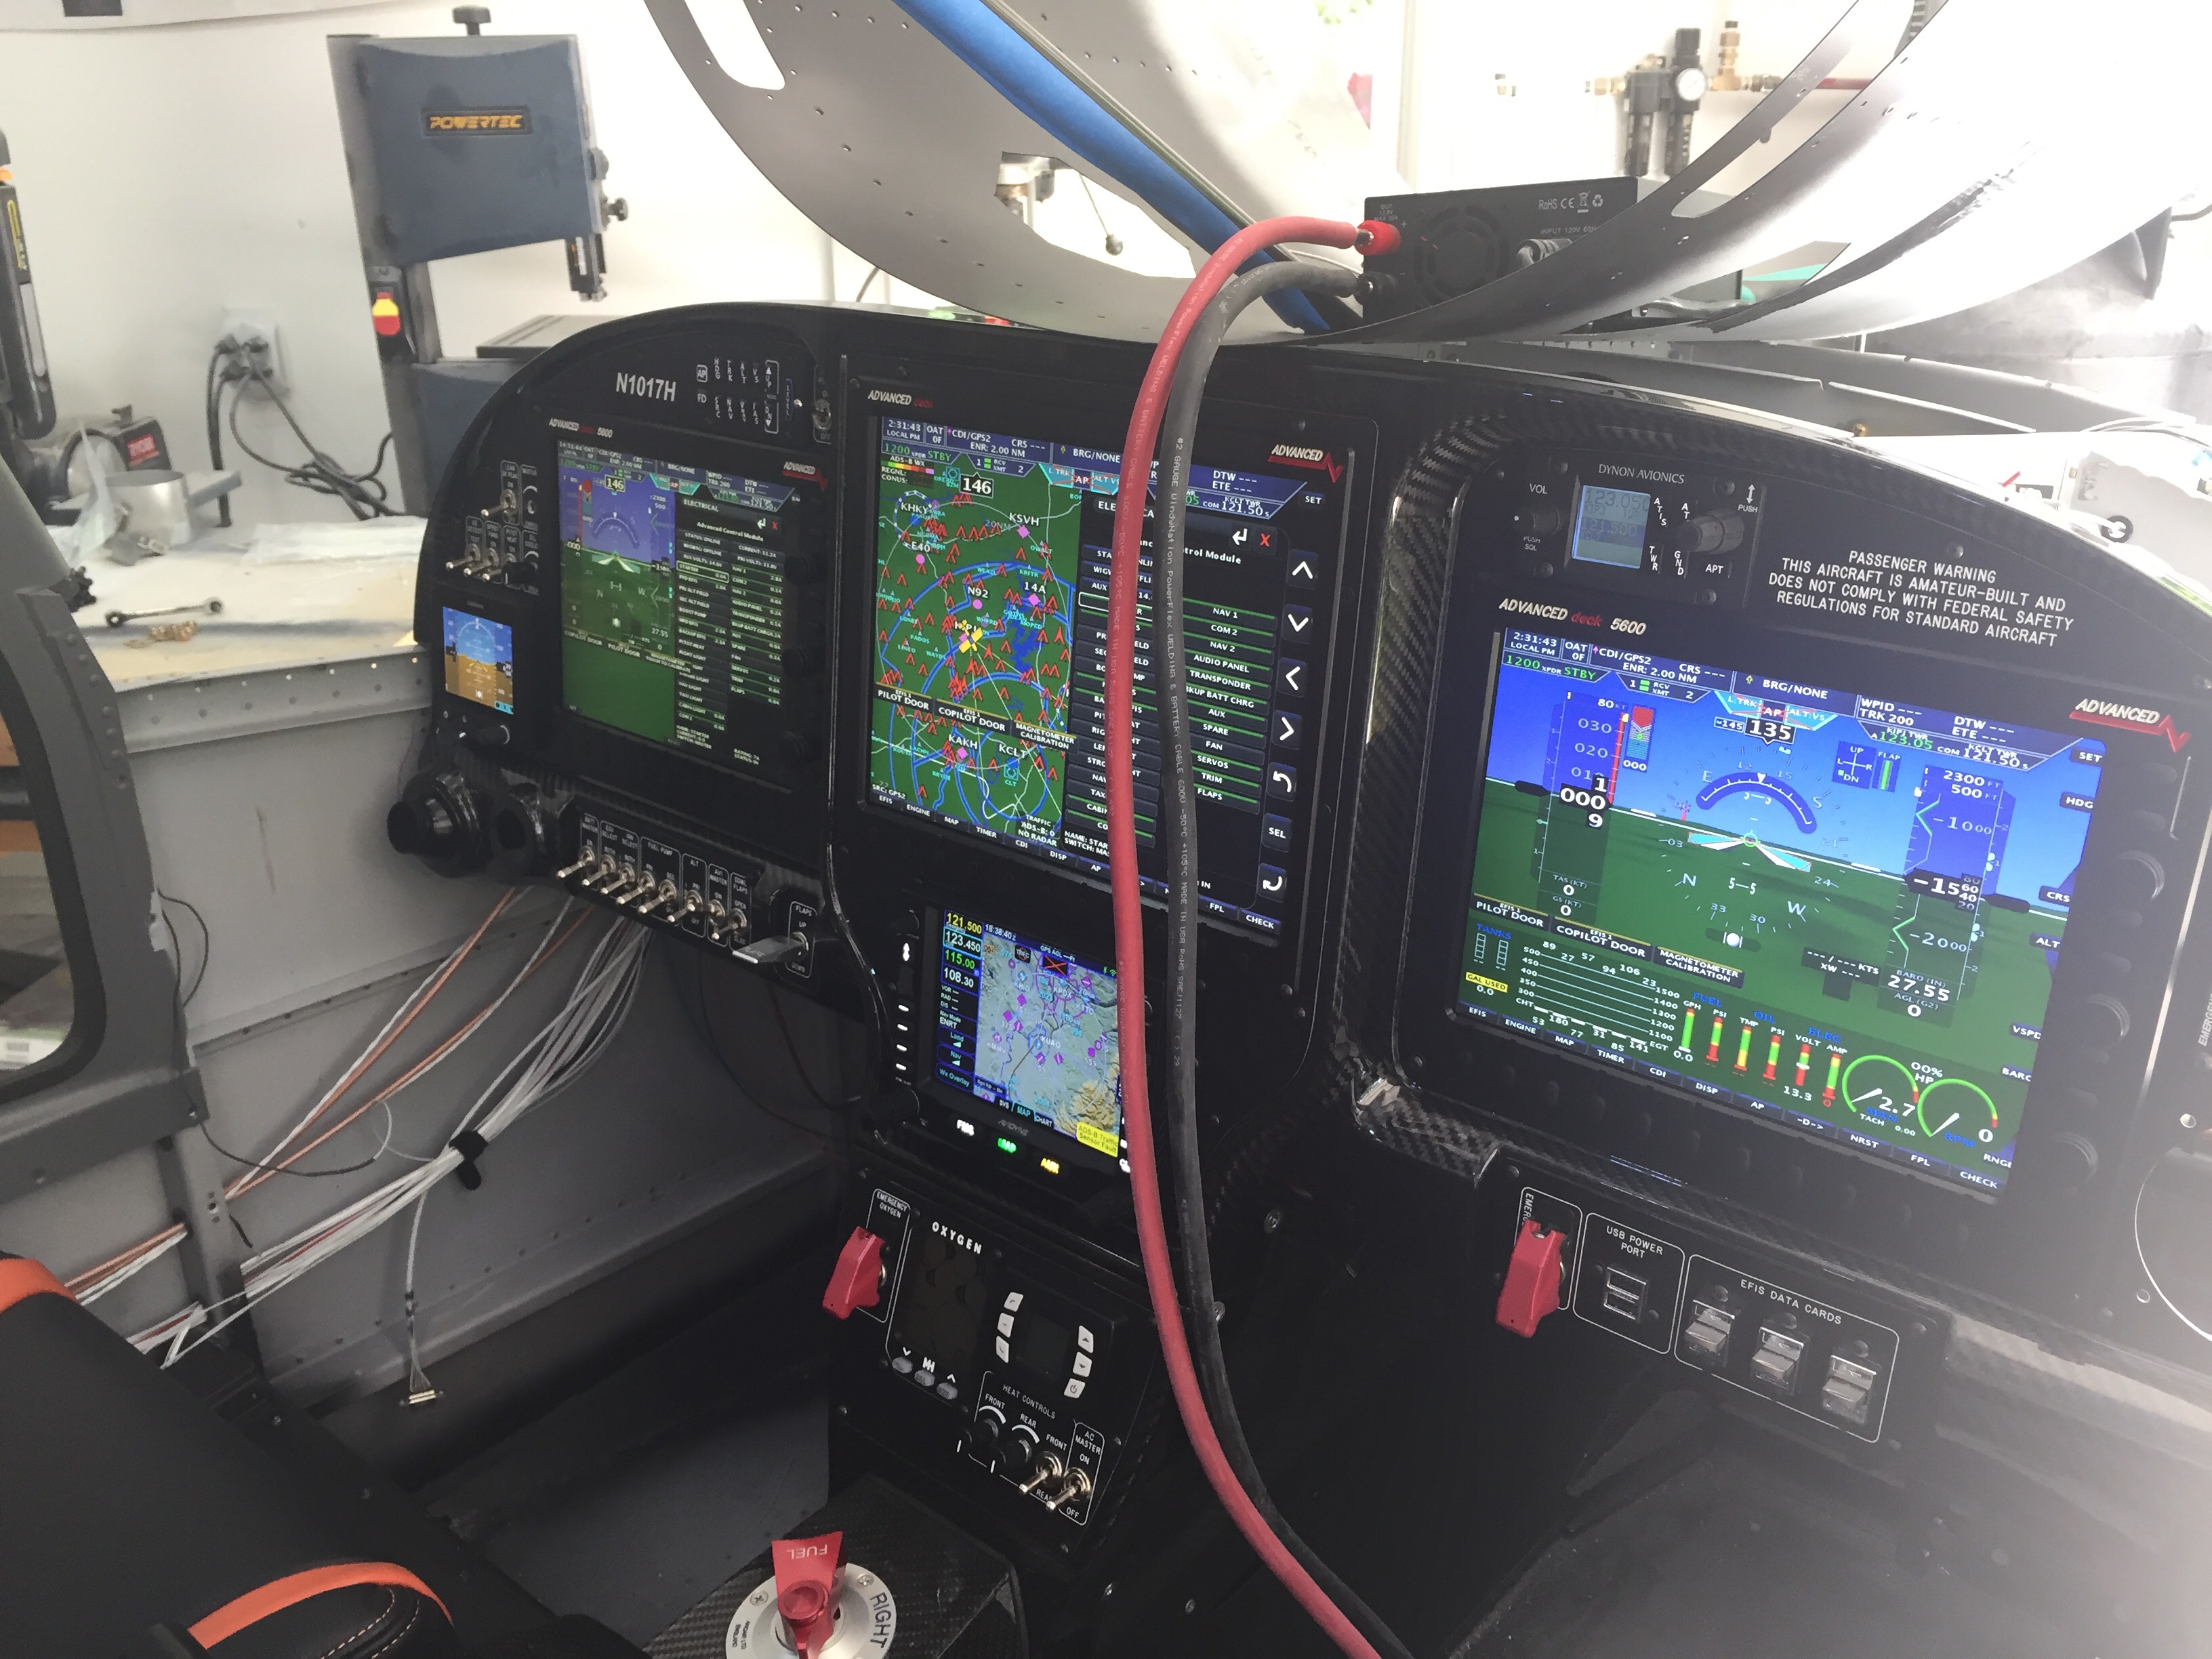
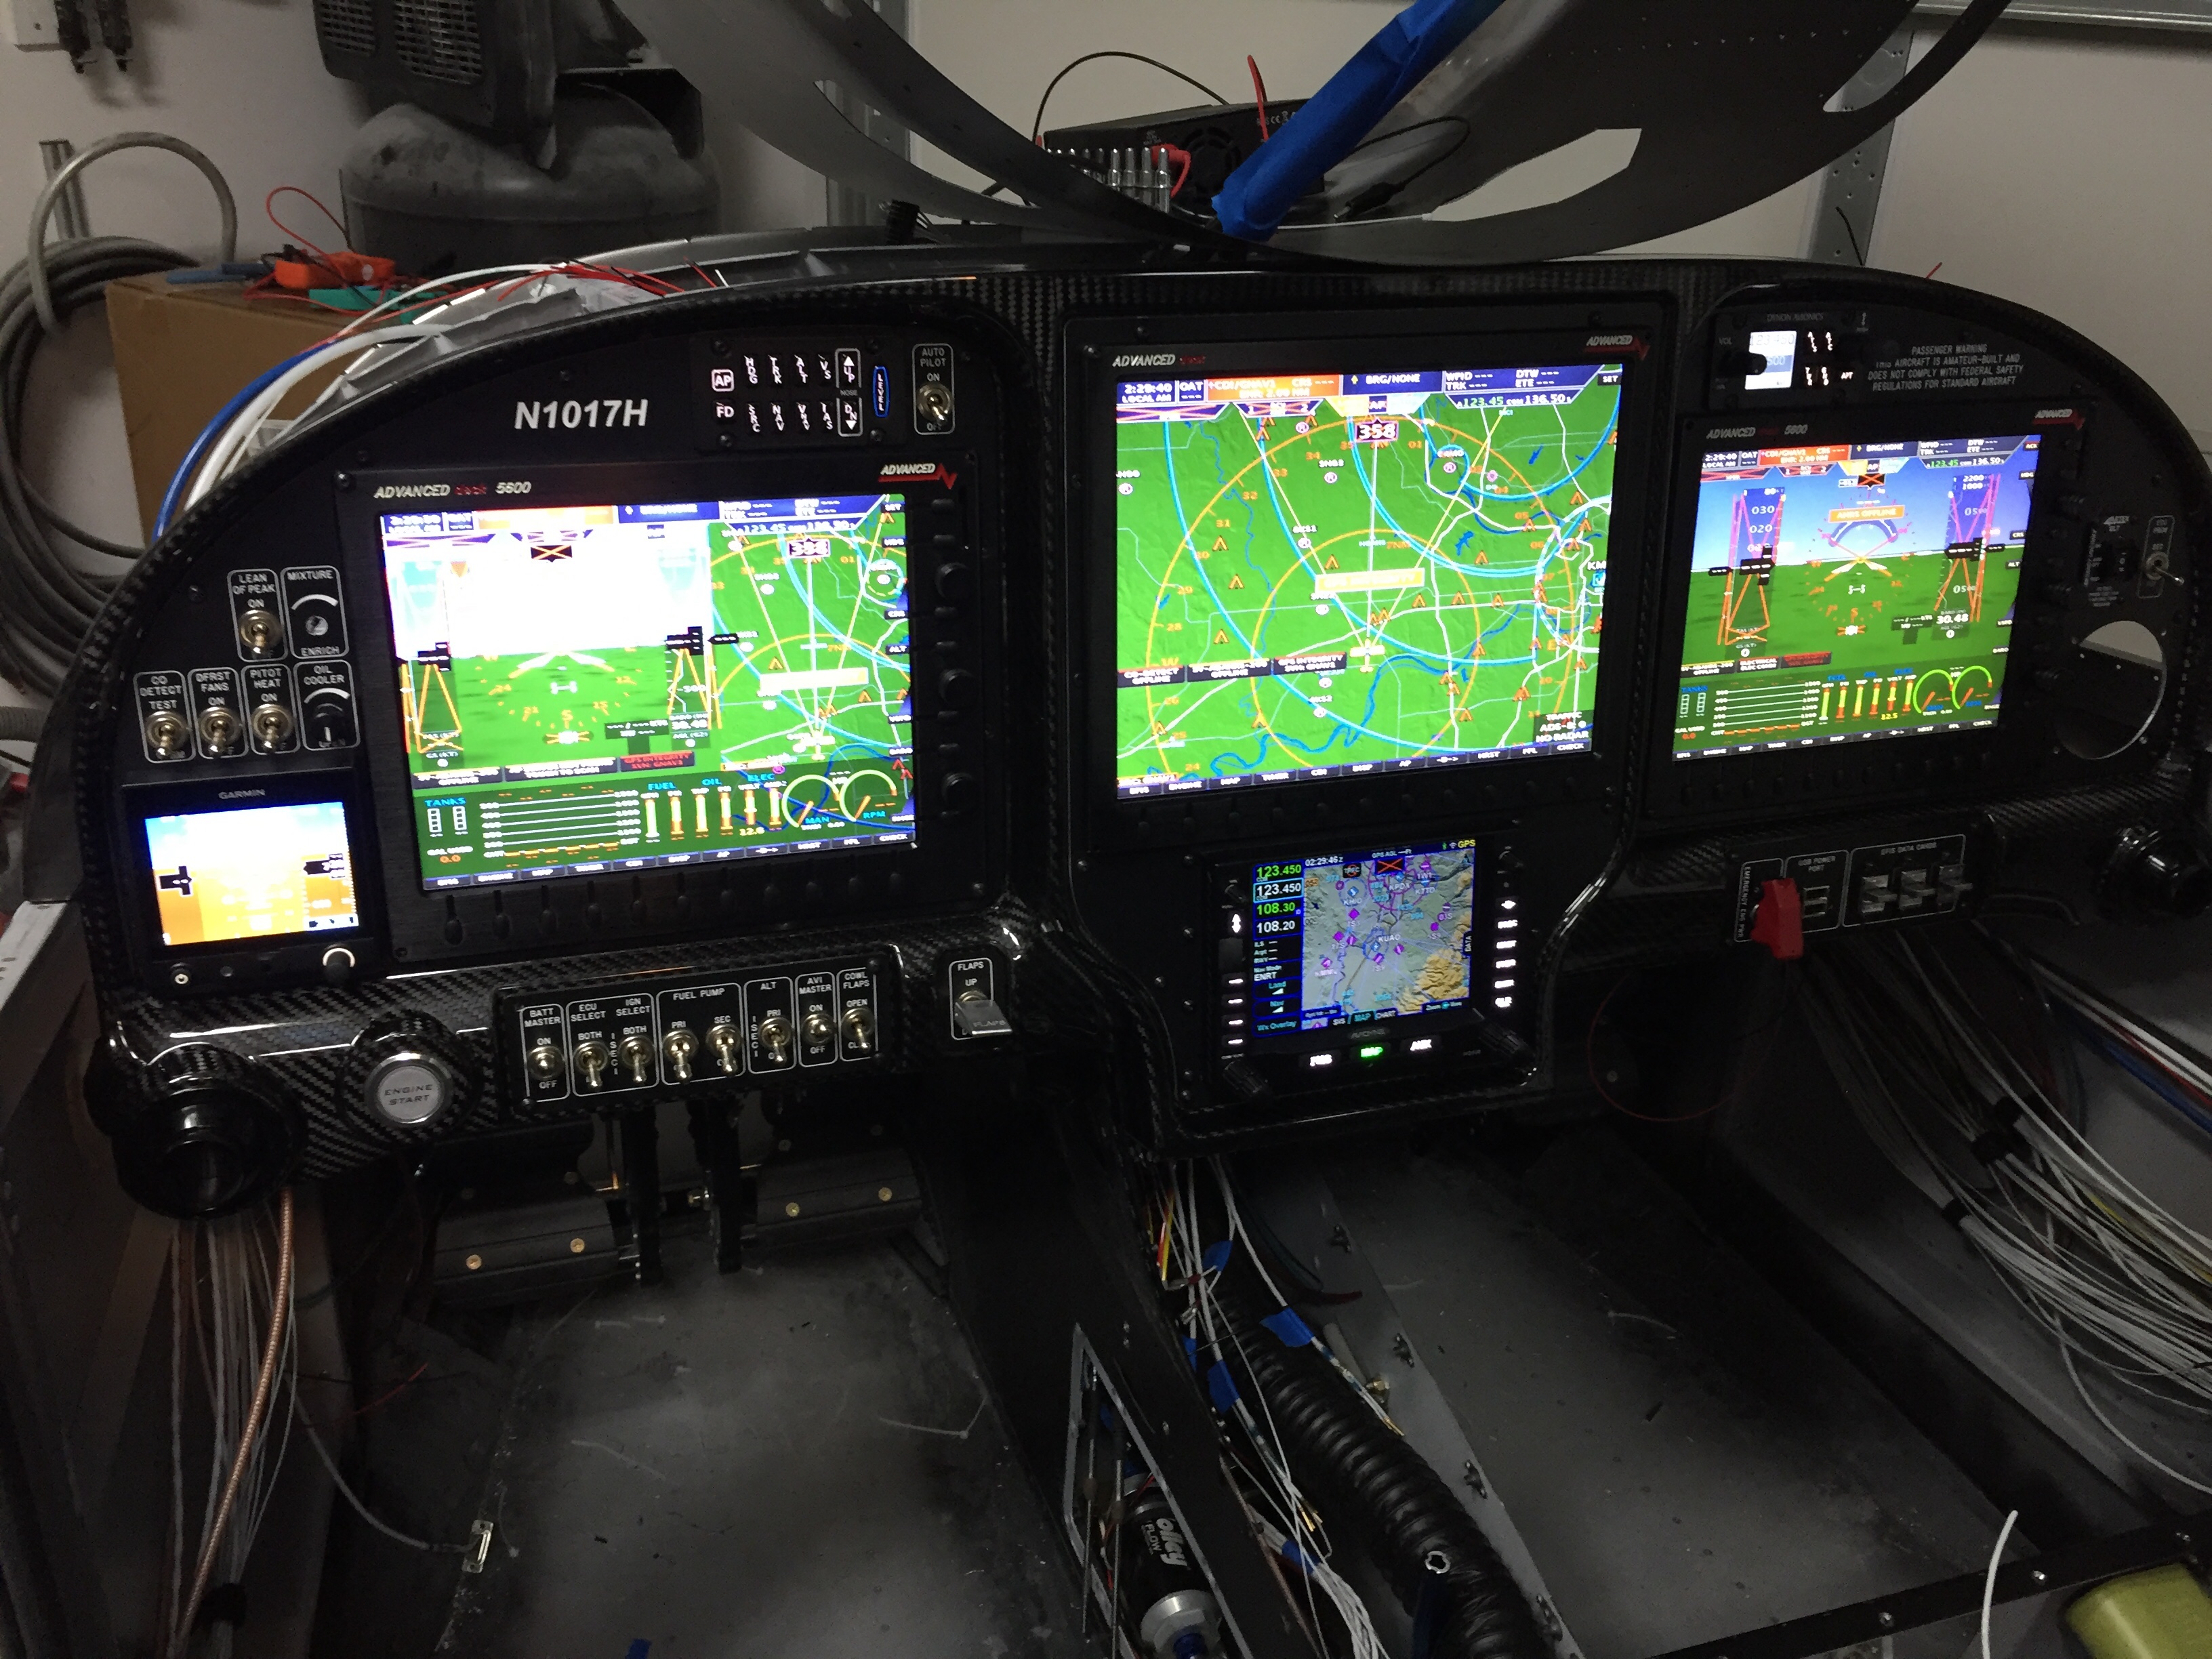
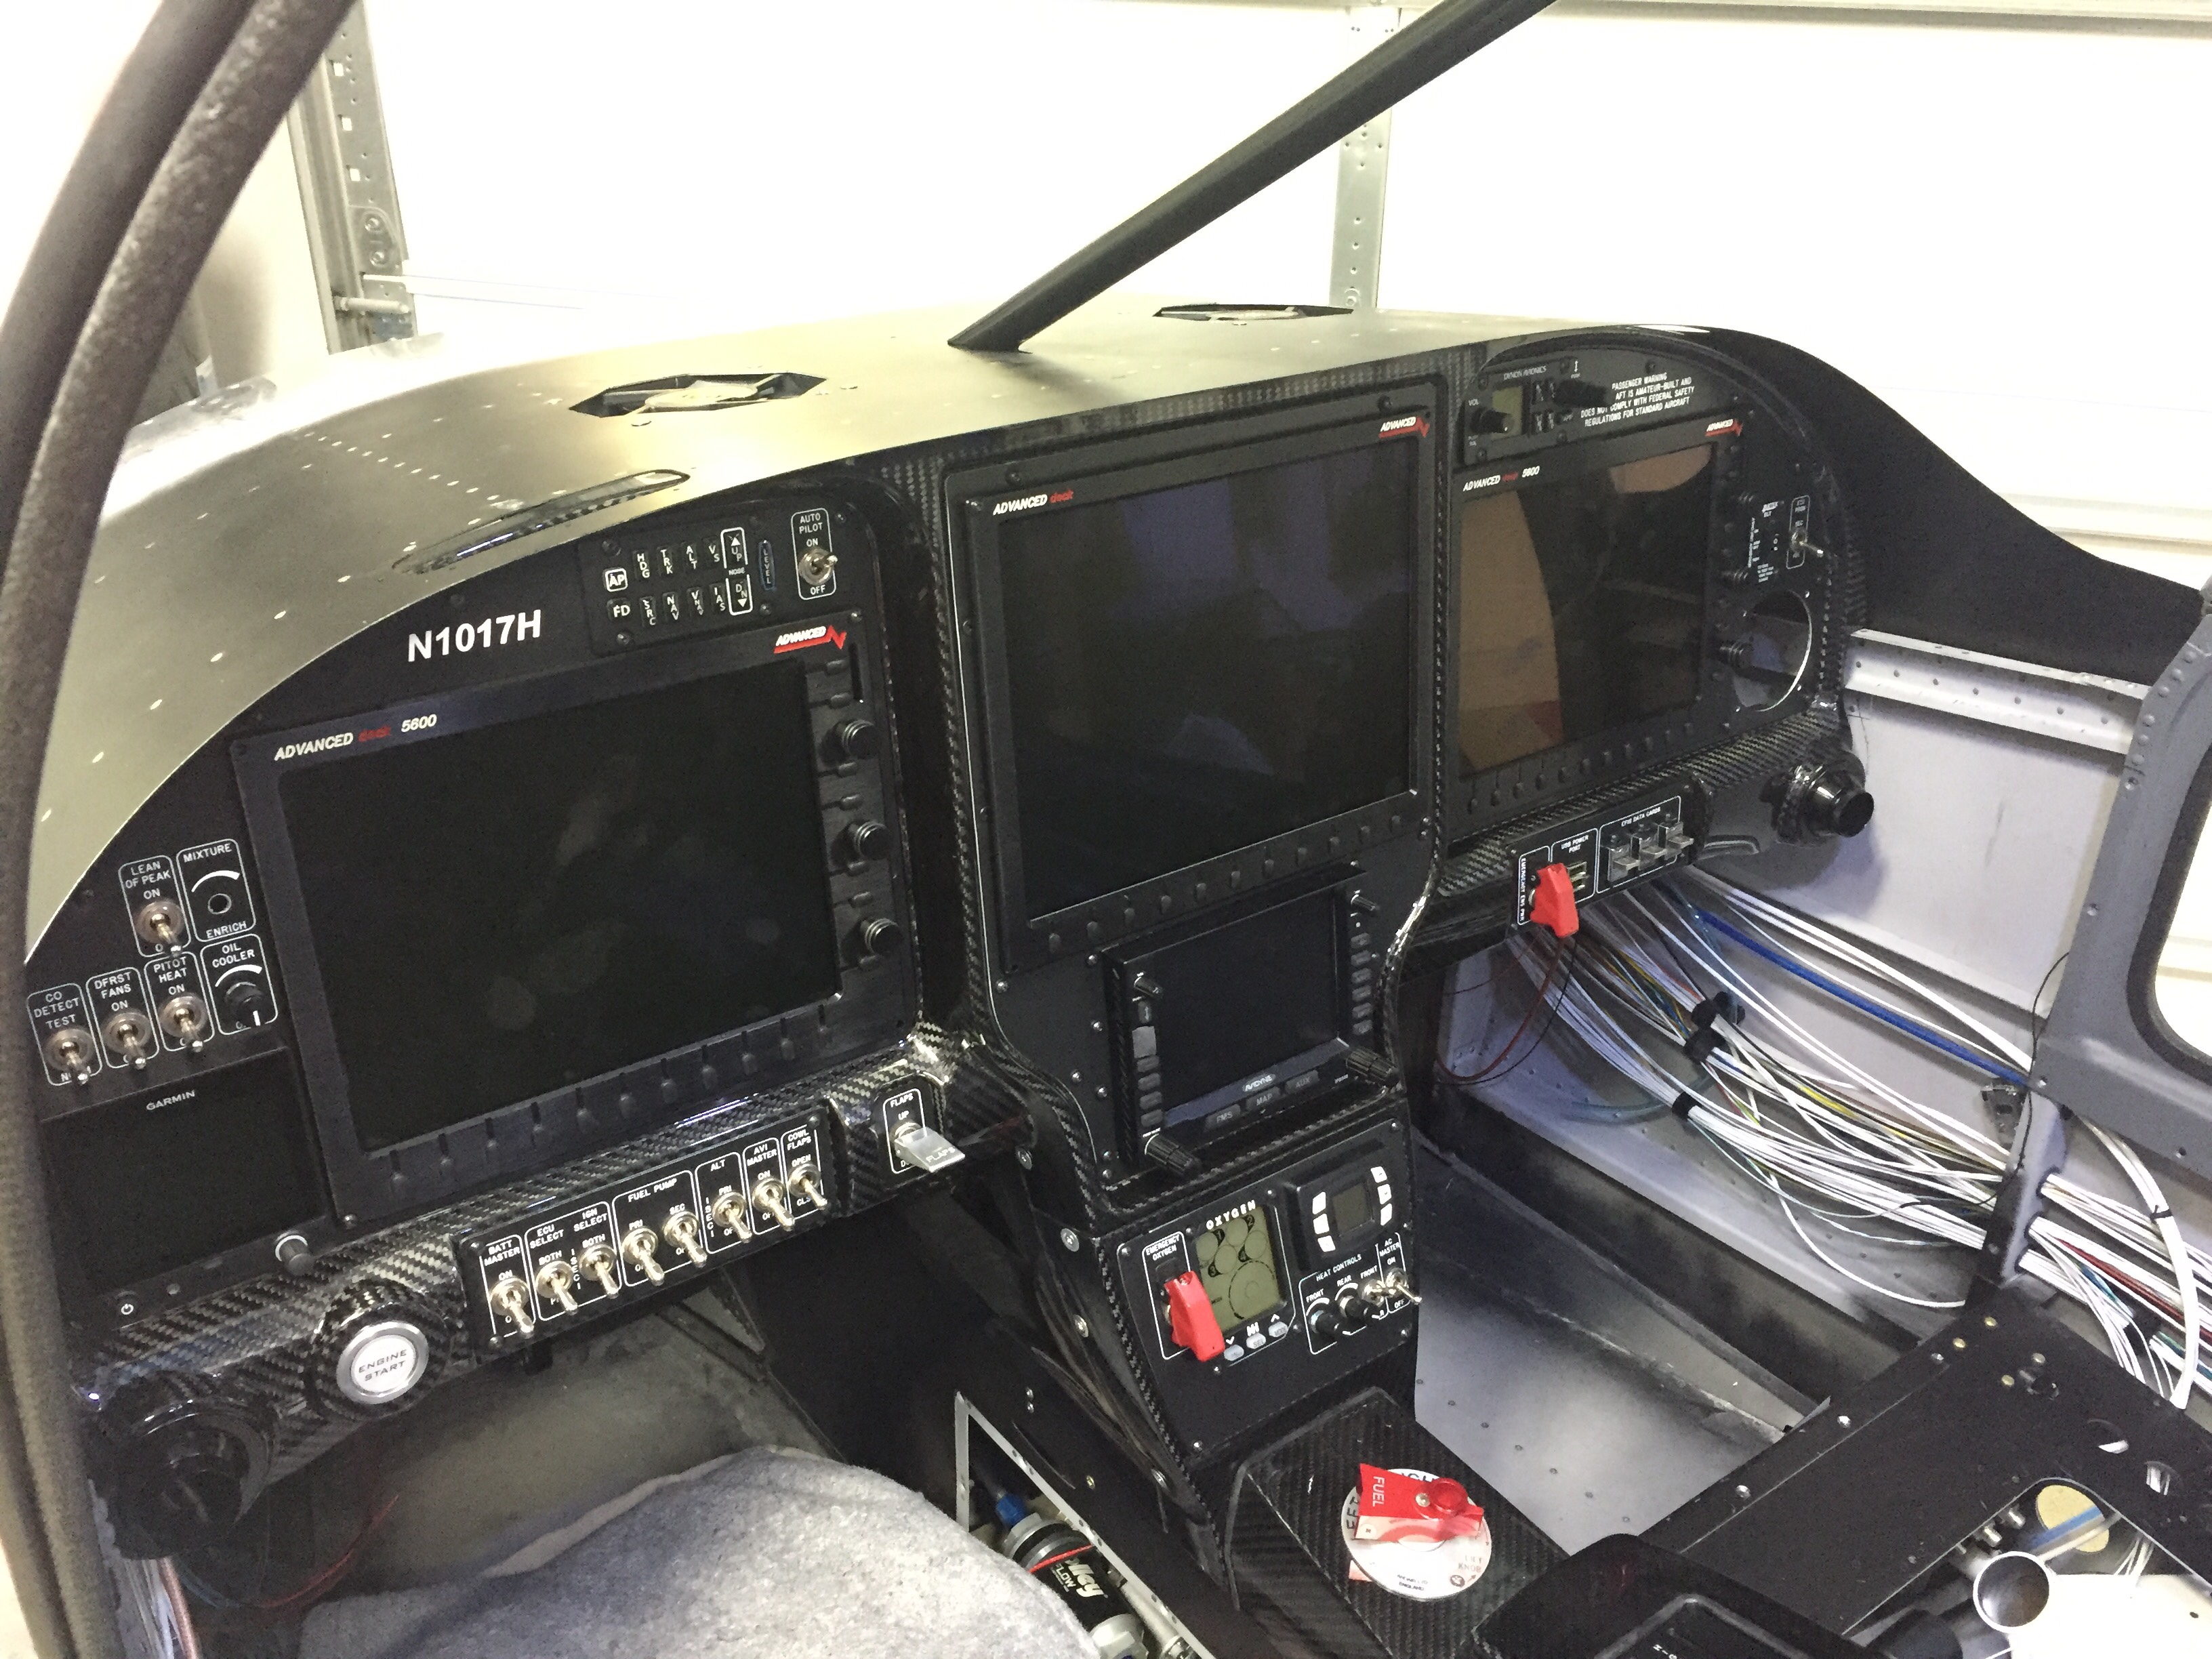
It’s cool to see the batwings gone now up front and the plane is really looking like a plane!  I put the PFD/MFD screens in and tidied up a few things which at this point completes the avionics.  All components have been installed and successfully tested sans the ECUs which will come with the engine in July.  I’m trying to minimize the time spent playing with avionics, because to be honest, I won’t get any building done if I’m swiping and experimenting with instrument approaches to JFK!

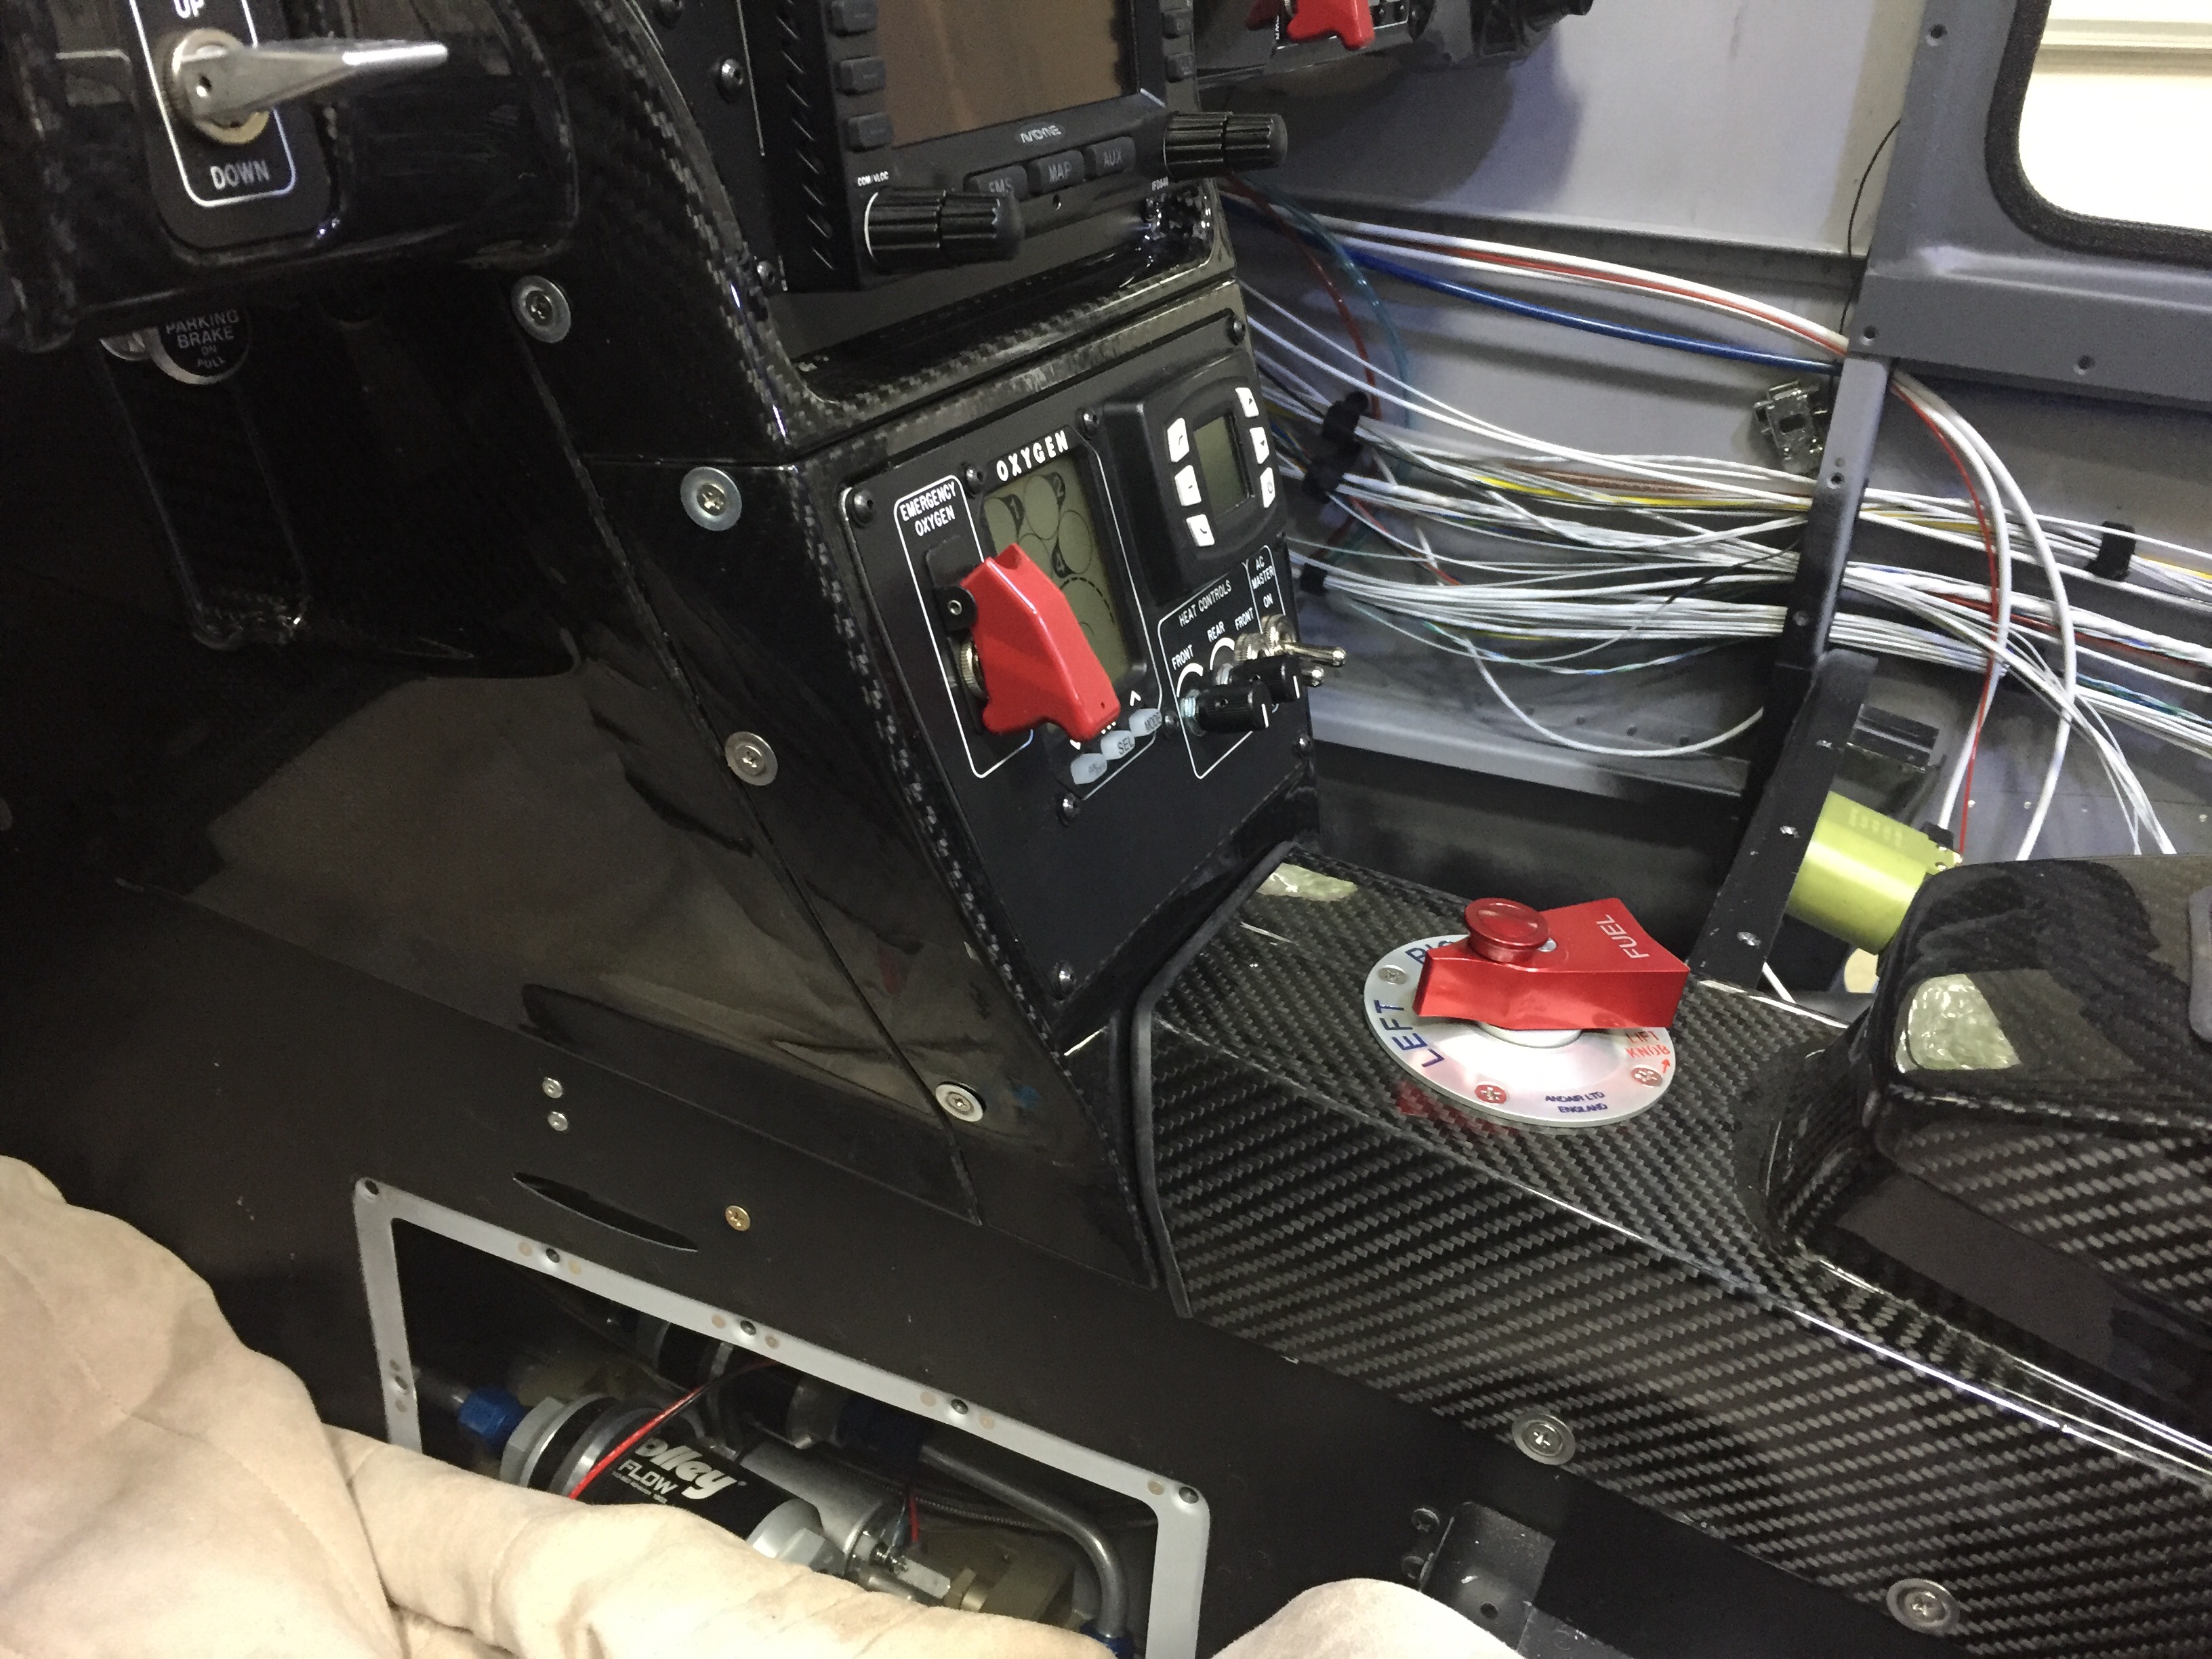
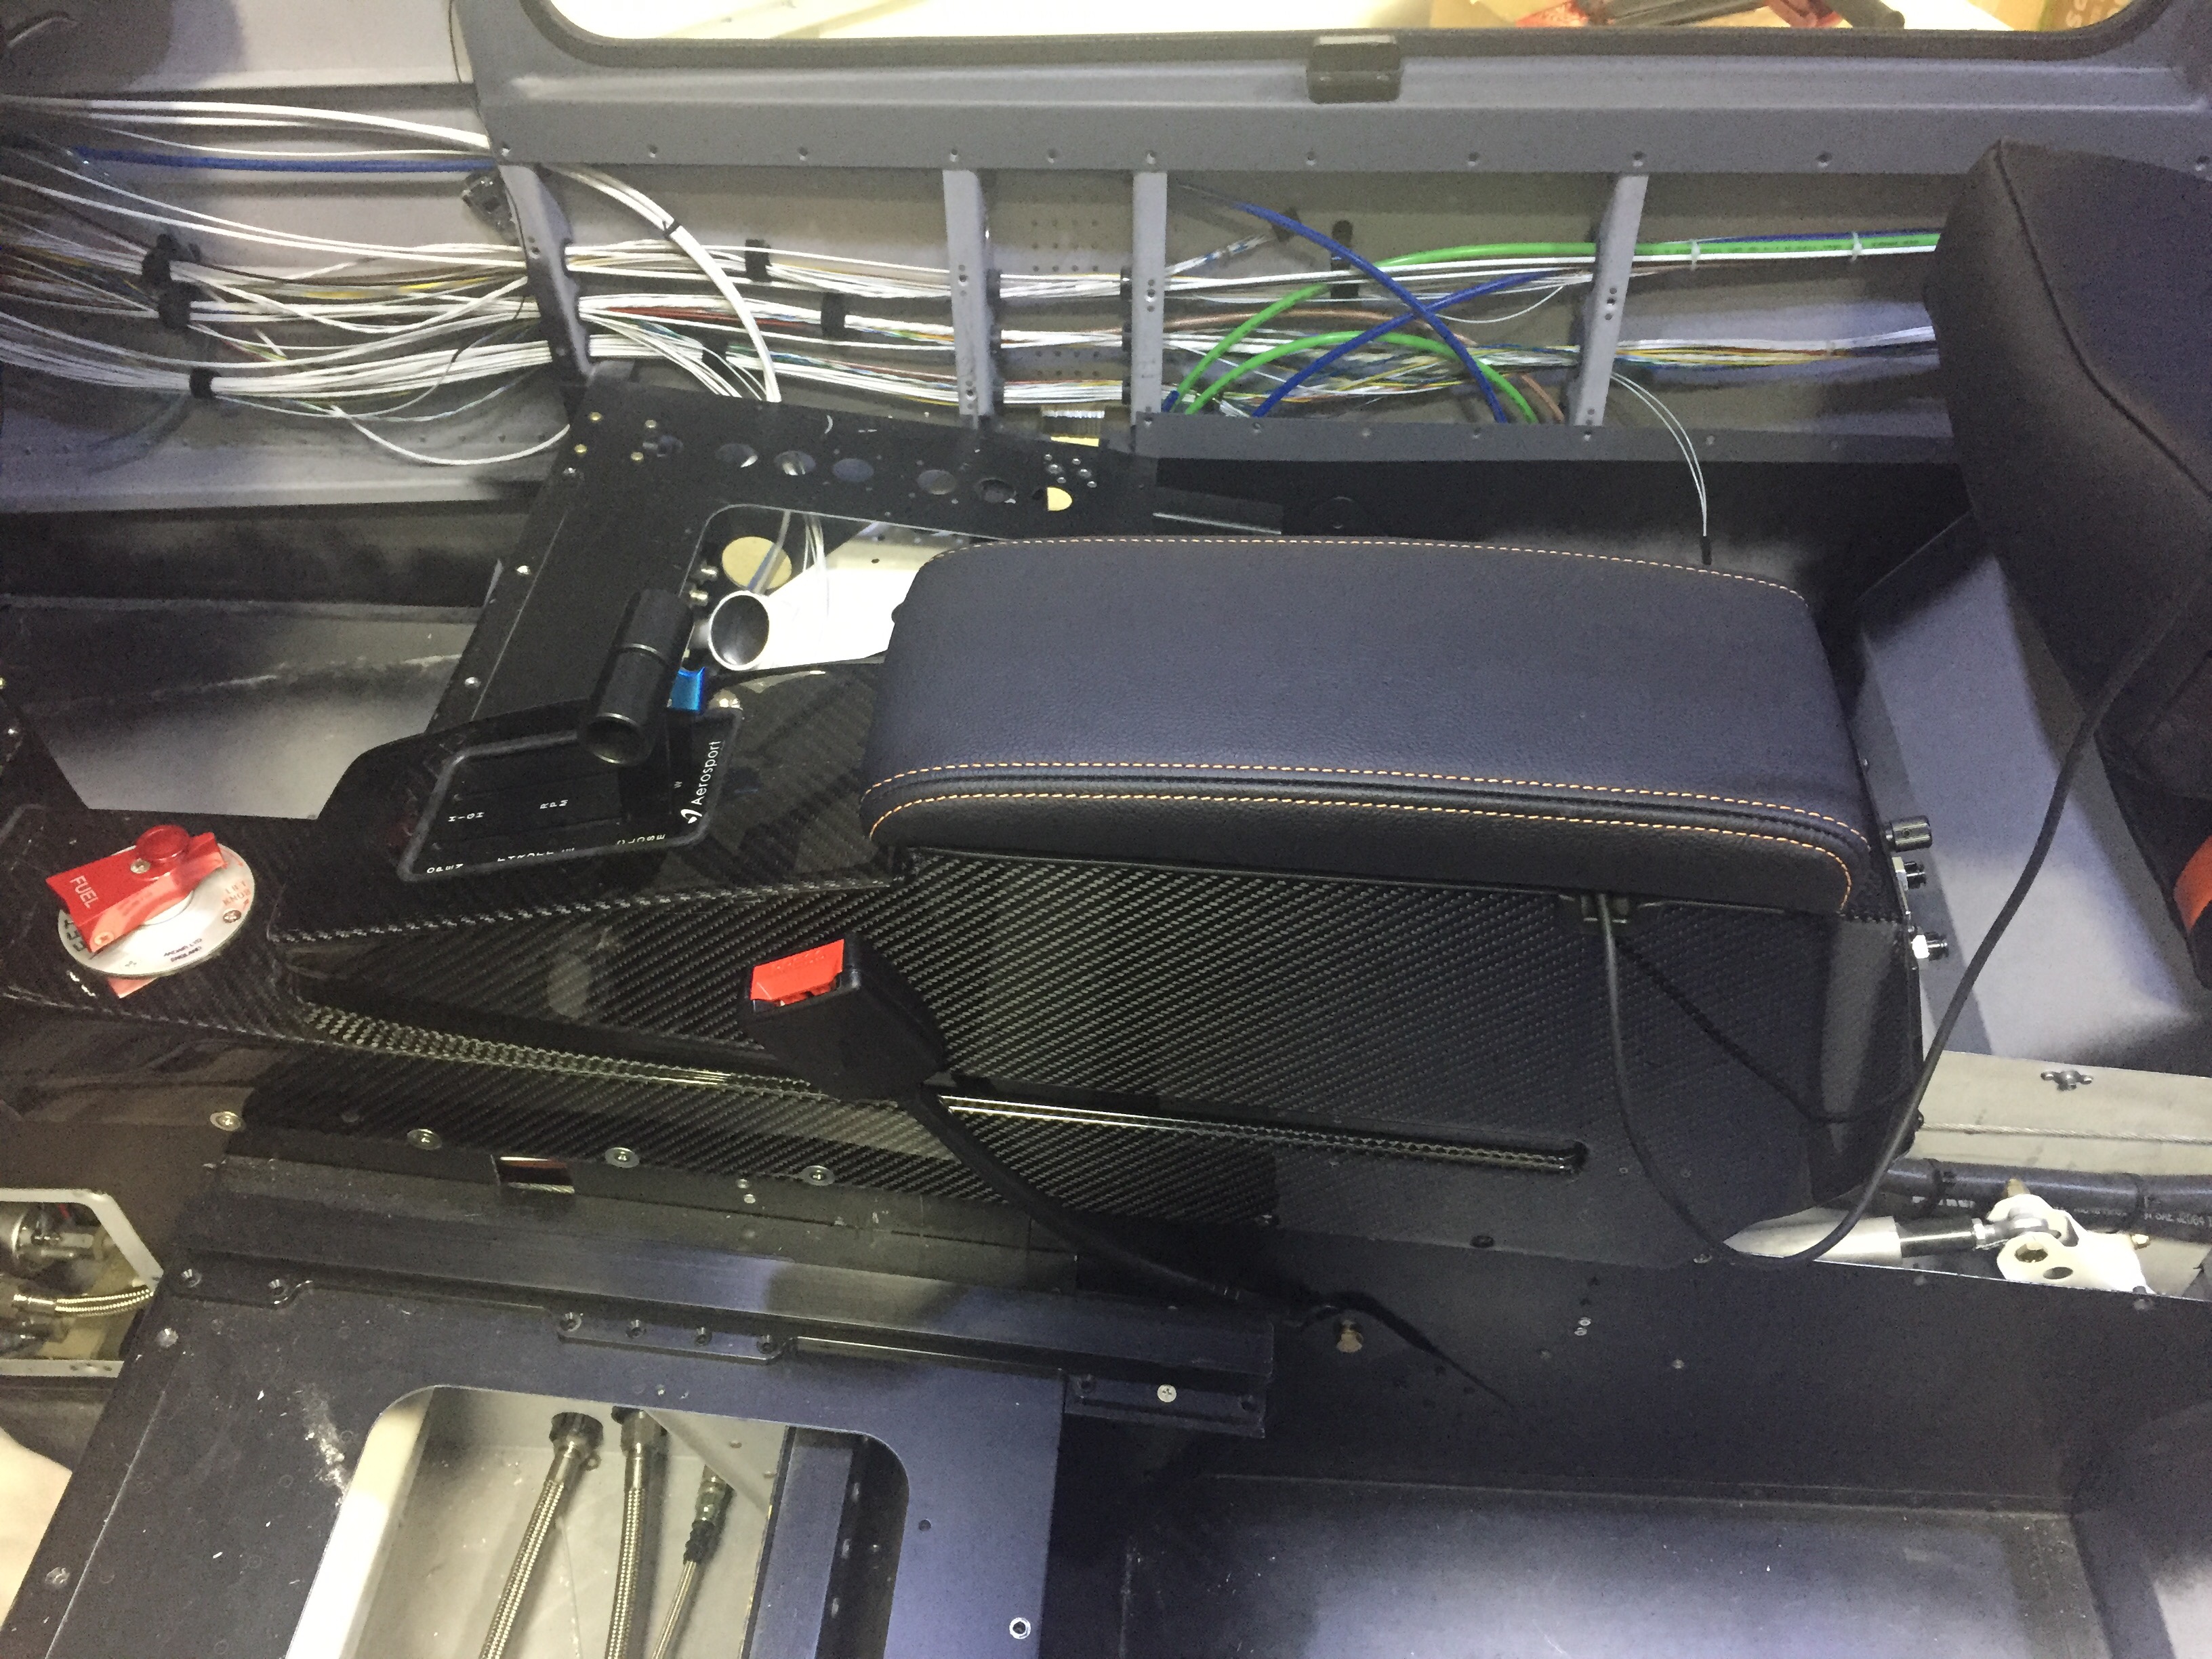
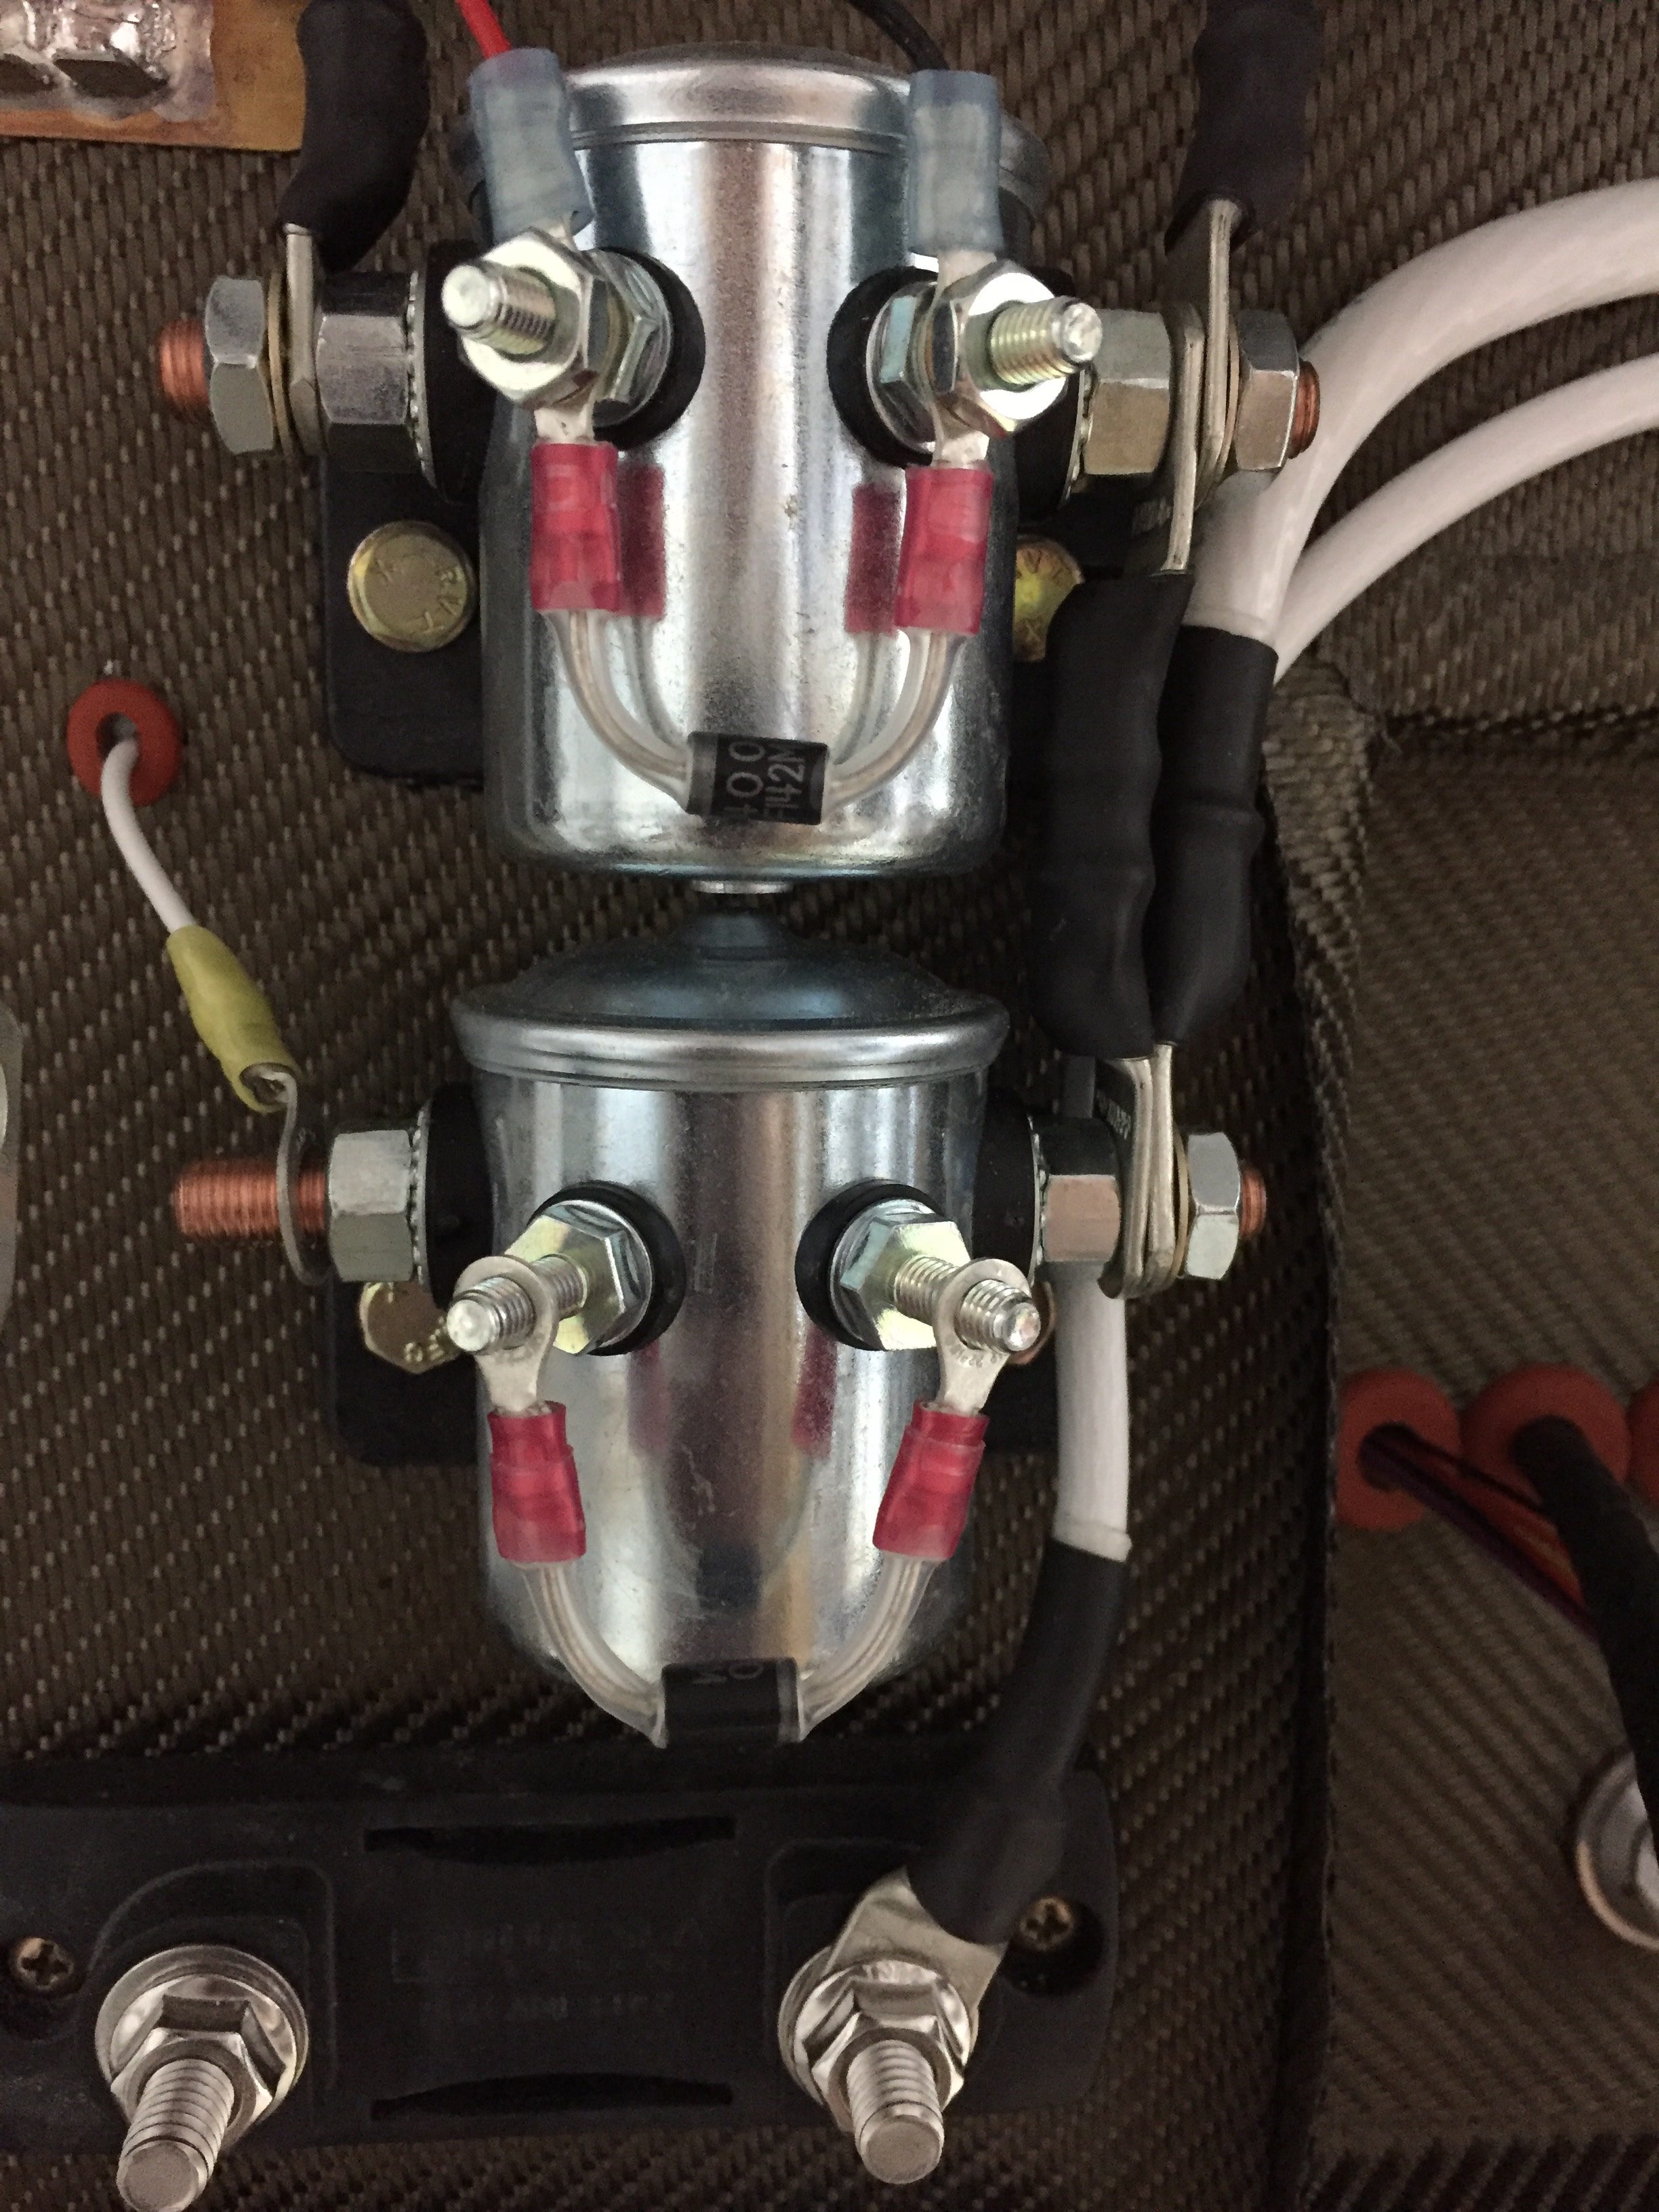
Finally, all of the aircon relays came in and I was able to properly test the system without the compressor, of course.  The condenser fan that I upgraded as part of the redesign really pumps some air and I’m really optimistic that it will produce good cooling for the condenser.  I installed an Aerosport headset hanger on the overhead console panel and reinstalled the panel to enclose the overhead.  With it all sealed up now, the cabin fan is very effective, even on low, at pushing air over the evaporator and throughout the cabin.  On high, it’s more air than I get through the vents in my car, so I’m again optimistic that the aircon is going to be very effective even on hot muggy days here in the south.

Next up will be the windscreen followed by getting the landing gear on.

Cool Colors

I have fully recovered from the traumatic smoke incident and have made progress on completing initial testing on all of the electrical components in the plane.  I buttoned up the tunnel and got the tunnel cover and lower panel console installed.  I am lucky but allowed JUST enough length in wiring for the components on the lower panel including O2, aircon, and cabin heat controls.

The center console was next to install and went in pretty easily all things considered.  I finished odd jobs with the audio jacks, USB power port, and the wiring runs on top of the tunnel cover to get it all cleaned up.  I also mounted the throttle quadrant for good and fabricated a bracket to route the throttle and prop cable to the quadrant.  All of the O2 lines were hooked up and the fuel selector was verified in the correct position corresponding to the selector.

I haven’t installed the front seat O2 ports, so can’t test the oxygen system completely, but the power and back light input functions properly as do the rear controllers, so I’m optimistic it will all check good.  The only item that gave me a bit of trouble was the aircon. I have the aircon fuse block (bus) powered via a 40 amp relay and master switch to allow for rapid load shedding should I need it.  The switch, relay, and control head all works but I wasn’t getting either fan to come on.  I double checked all connections and wiring runs were correct to include the drier, high pressure switch, and thermostats.  I should have at least gotten the cabin fan coming on but the 24v relay wasn’t clicking on for the selected speed.  That’s right, the 24 volt relay.  Not the 12 volt relay, the 24 volt relay that I’m expecting my 12 volt system to activate.  Dammit.  It took me sitting in the back reading voltages for about 15 minutes with Laura at the control head to figure out the error.  I never put two and two (or 12 and 12) together, so grabbed two spare 12 volt relays and swapped them out.  Sure enough, proper function of the cabin fan and condenser fan!  I ordered new relays and swapped them all a few days later.

Meanwhile, I received two big boxes full of leather upholstered seats and goodies from Aerosport!  Andrew has been pretty patient with me and man did it pay off!  The seats came out perfect and just what I had imagined.  The orange stitching looks great on the black and matches the leather I sourced perfectly.  They made up the side panel inserts as well as the stick covers and armrest pad, all looking very high end.  I couldn’t help but build up the front seats to see what they look and feel like.

The back seats came out just as awesome as the fronts and feel super comfortable for passengers.  I cannot say enough great things about Aerosport’s stuff, except for their prices!  You do get what you pay for, however, and this is an area that I didn’t want to go cheap on.  Andrew changed up the plan a bit on my front seat belt brackets by designing and 3D printing a cover for the bracket.  This worked out, as I had to open the bracket and widen the belt channel about 1/16″ to get the belt to retract easily.  If Aerosport had done the leather like I had asked, I would have had to pull the entire seat back cover off and I’m sure it would not go back on as well as they have done it.

The left rear seat bottom cushion was the only hiccup, as the seat belt receptacle doesn’t quite fit in the slot they sewed.  Andrew is already on it and I sent the cushion back for modification along with the rear bulkhead substrate after cutting the aircon return vent hole in it.  They then covered it in leather and embroidered the EXPERIMENTAL in matching orange which looks awesome.  The cushion, bulkhead, and new glare shield will be on the way to me in a few more weeks.

Next priority is to finish the remaining items up front and in the back so I can rivet the last skins on and keep the new interior furnishings clean as we finish the build.

The Magic Smoke

Aircraft avionics are powered by a mystical, magical smoke that is contained inside the fancy boxes and wires that make up the complete system in a little airplane.  This smoke is very precious to an aviator and should not be released out into the atmosphere under any condition.  Once it has escaped, the only way to recapture it is to spend many, many monies soaked in tears.  Therefore, it is imperative that when flipping the master switch on for the first time, all efforts to contain this magical smoke are made to avoid crying and empty bank accounts (again).

I spent each minute working on the wiring also tracing paths and double checking all of my runs and connections against the wiring schematic, manuals, and common sense.  I also dedicated an entire evening to looking everything over, pulling on connectors to ensure good crimps, tidying up the last little stragglers, and ensuring that all un-terminated wires were in that state for a good reason and properly labeled/protected from short circuiting.

Using the ACM means I can’t just pull all the breakers and turn one on at a time.  Unfortunately, I have to power up the whole system then get a screen going to electronically trip each breaker, by then a little late for an emergency.  I was confident that the expensive bits including screens and components were all fine, as they were bench tested from AFS.  But, there is always a chance that the extra stuff and main power distribution was wrong since I designed and built that.  Looking back, I could have disconnected the power wire to the ACM until after I confirmed the main distribution system worked, but I’m jumping ahead.

At long last, I ran out of excuses to delay the inevitable and decided tonight was the night to flip the switch and see what I had.  The plan was to have Laura help me monitor the plane and keep an eye out for that magic smoke.  I walked her through the plan to quickly flip the switch on and off, we talked about what we’d expect to hear and see, and the worst case scenario of a big spark or smoke.

I held my breath and flipped the master switch on and then quickly off, just as briefed.  We didn’t hear any notice, no clunk of the contactor, no fans, no screens flickering or anything.  Hmmmm.  Laura said maybe the flip was too fast.  Good point, maybe so.  Okay, I’ll try again for 1 second and then turn off for good if nothing powers on.  Master switch on……..

PPPPPPpppppppsssssssssssffffffffffftttttttt goes smoke!!!!!!

I heard it before I saw it.  None of the counseling says you hear the smoke before you see it and it made the experience that much more traumatic.  But as promised, a small, thick stream of the magic floated from the firewall towards the ceiling laughing at me and my meager attempt to contain it.  Well shit.

Needless to say, I flipped the switch off as soon as I heard/saw the smoke and quickly went into problem solving mode.  First question, what smoked?  It was pretty obvious from the melted dripping insulation the jumper wire on the main contactor had rode the lightning.  It connects the coil terminal to the hot terminal.  But why?

Take a look at the picture below and tell me where Waldo is.  The top contactor is the ground power receptacle contactor which is not hooked up at the time.  The bottom contactor is the master.

Did you notice the diodes?  Well good for you know it all smarty pants.  I sure as hell didn’t.  And why would I?  These came from B&C right out of the box!  It turns out the diode on the master contactor was installed by B&C backwards, essentially allowing a short to ground to happen when I turned the master switch on.  Power went through the diode the wrong way, through the switch, to ground and fortunately the jumper wire was the thinnest gauge so acted as a fuse and burned.  Since the power went the wrong direction, the contactor never closed and no power was delivered to the aircraft.

After confirming with Parish, I canned (cannibalized) the diode from the GPU contactor and installed a new jumper on the master to repeat the power on test.  I confirmed the polarity of the diode, checked continuity and voltage on all connections again, and decided to disconnect the ACM from the firewall pass through, limiting the exposure to the expensive bits until the magic smoke is stuffed back in where it belongs.

The third time was the charm, and the reassuring clunk of the contactor resulted in no smoke and positive voltage just where it should be.  I connected the ACM wire and saw the screen flicker to life with the AFS logo, what a beautiful sight!!!  I flipped the avionics master on to watch all of the other screens power up and soon we were basking in the warm glow of synthetic vision, calibration warnings, annunciations, and confused maps looking for GPS signals.

Each circuit was tested with the multi-meter or device if it was connected.  Some were just reading voltages, such as lights since the wings aren’t installed yet.  My only squwak was the strobe and nav switch wires being reversed, which I took care of by pulling the overhead panel and making the correction.

I cannot describe the joy of seeing all of this powered up and finally a working product.  I have spent years dreaming of having a setup like I have and a lot of work and money went into getting to this point.  I have a lot to learn, figure out, and get proficient at!  I am so excited to get behind these screens and put them to work on all kinds of adventures.

Most of all, I’m lucky that I only let a little bit of magic smoke escape and was miraculously able to stuff it back in where it belongs!