Back that light up

One of my most exciting side projects on the plane is to have a truly unique instrument panel.  From the start, I have wanted a back light system similar to fancier aircraft out there and to pretty much every car out there.  Glareshield lighting, post lights, or dome lights just don’t work or look the same, so I wanted something better.  Ed Krantz did a great job using LED strip lighting but had to do a lot of work to get it working.

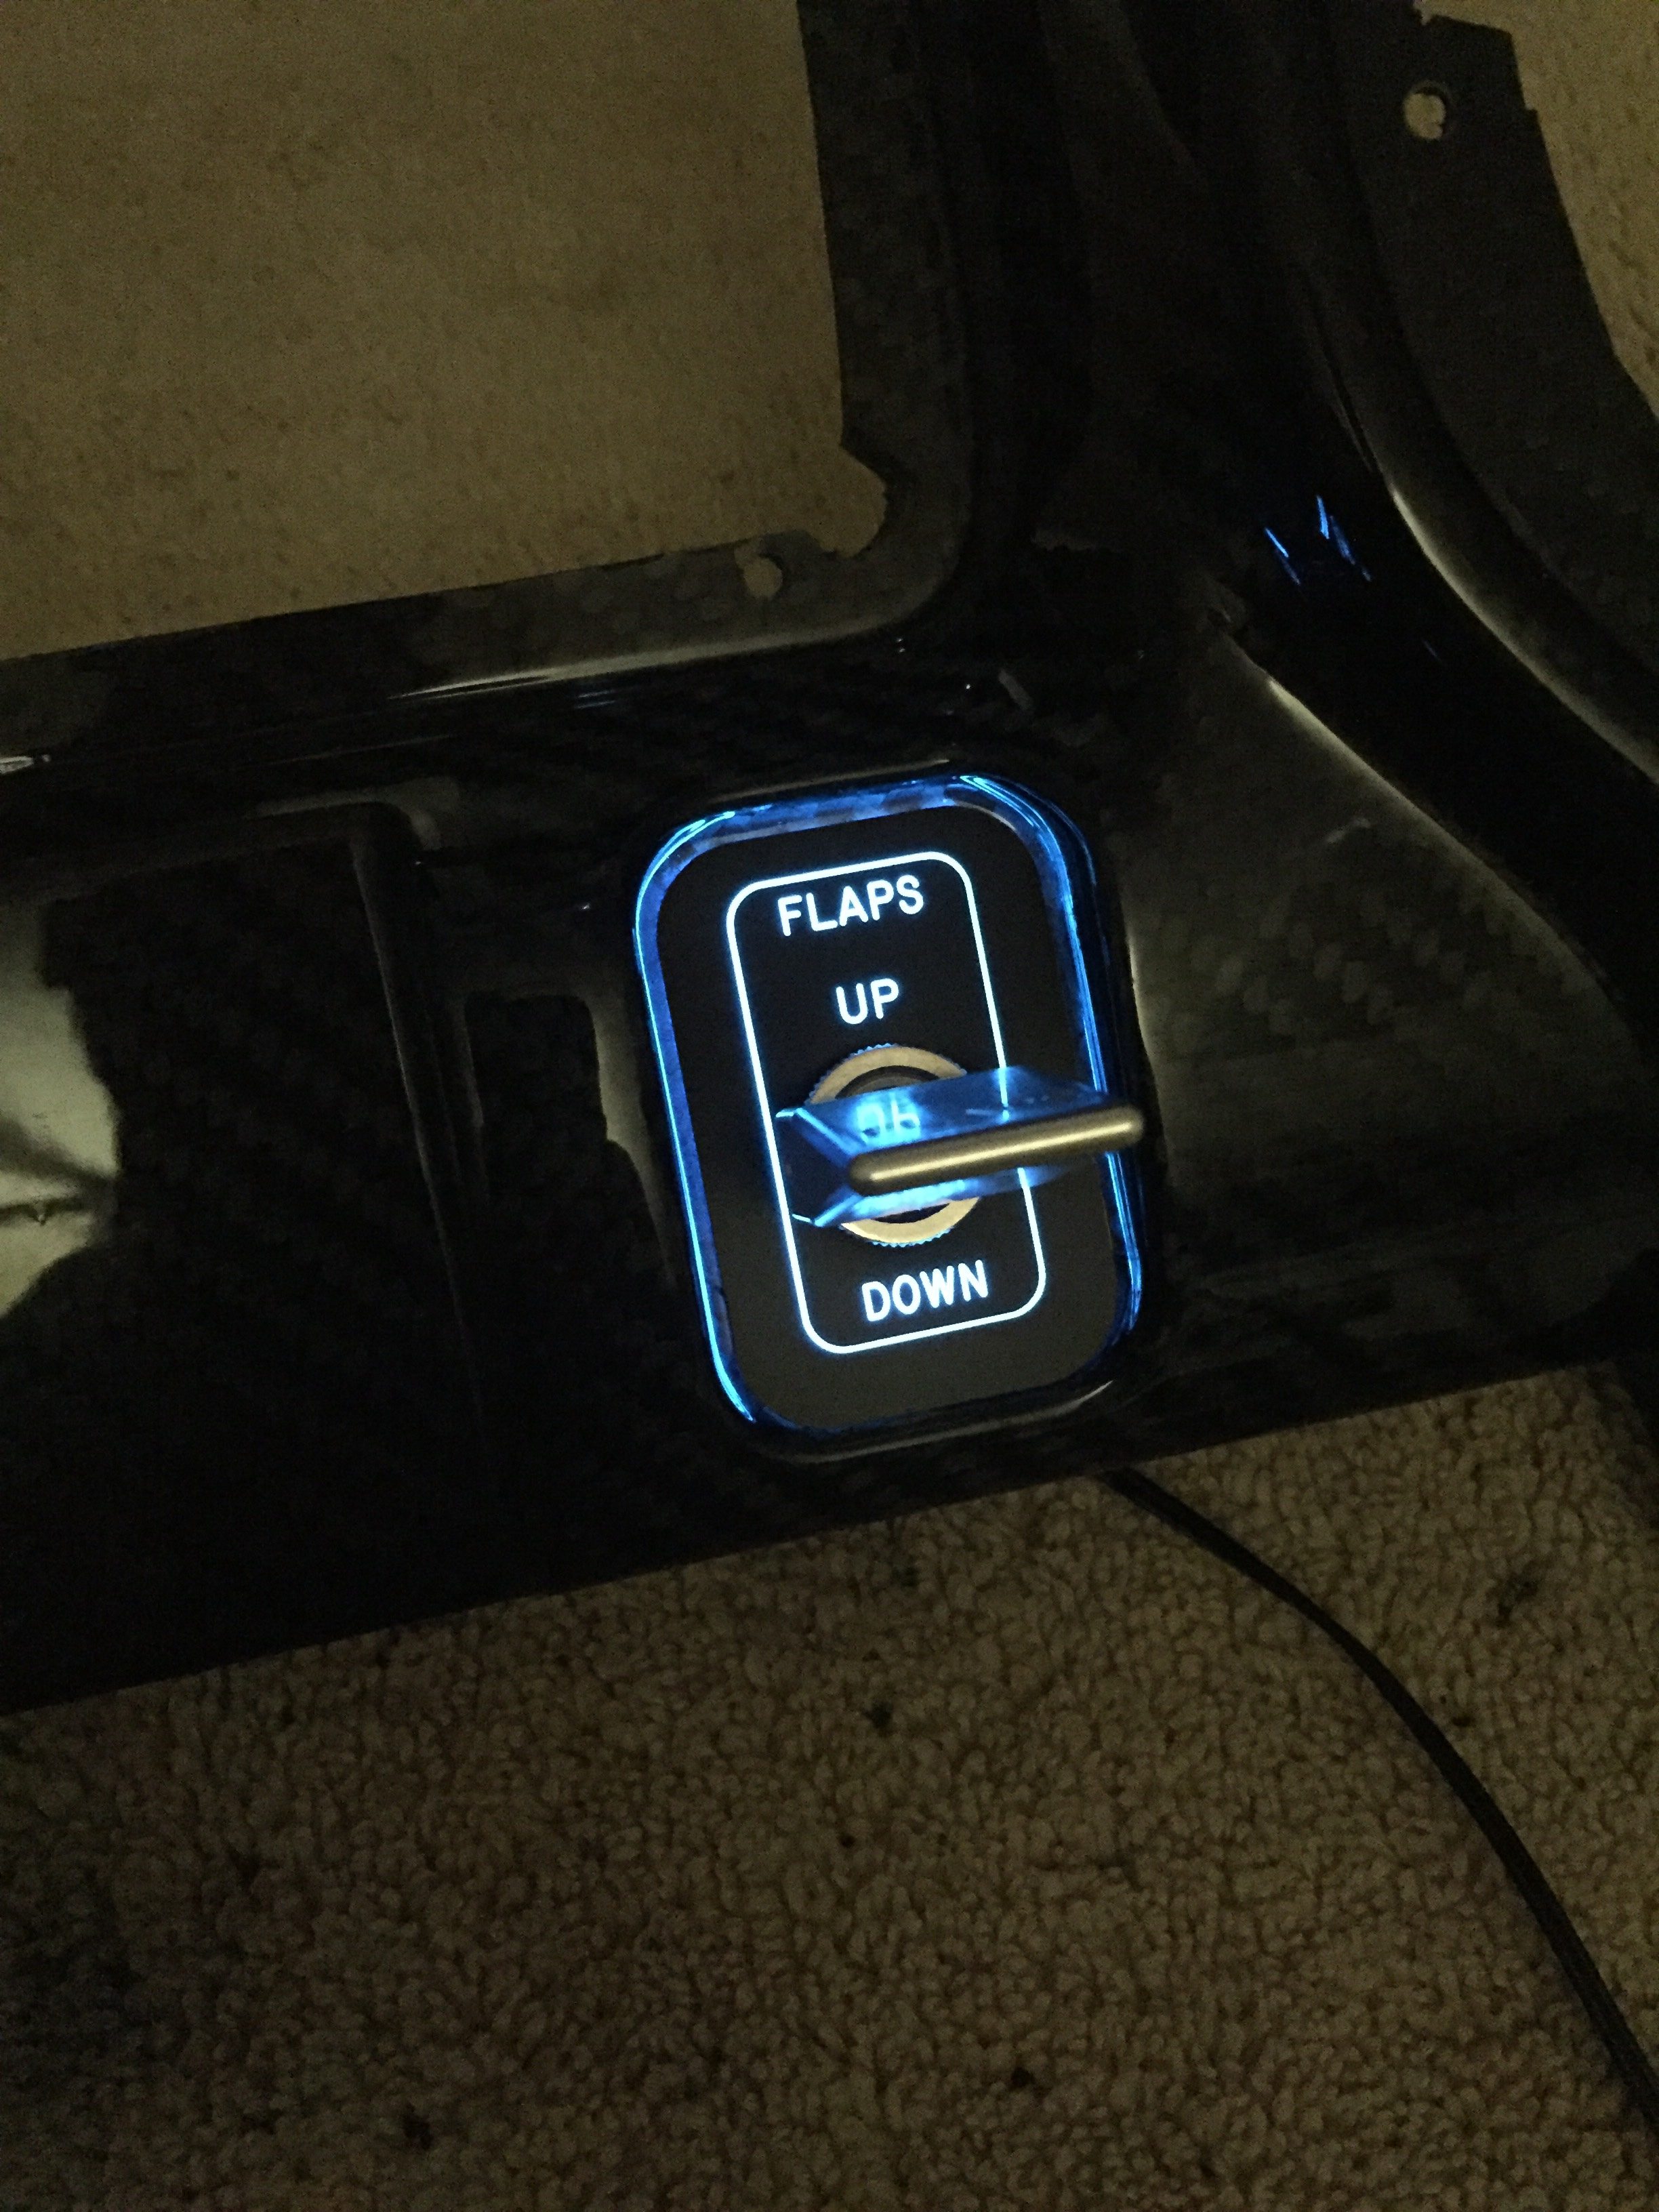
As briefly discussed in THE ART OF DESIGN, I decided to experiment with electroluminecent panels.  These EL panels are almost paper thin, flexible, and can be cut in all sorts of shapes.  Better yet, they are dimmable and have a uniform light output.  After a successful prototype on the overhead console panel, I pulled the trigger and ordered the full layout of the EL panels and the laser engraved acrylic overlays.

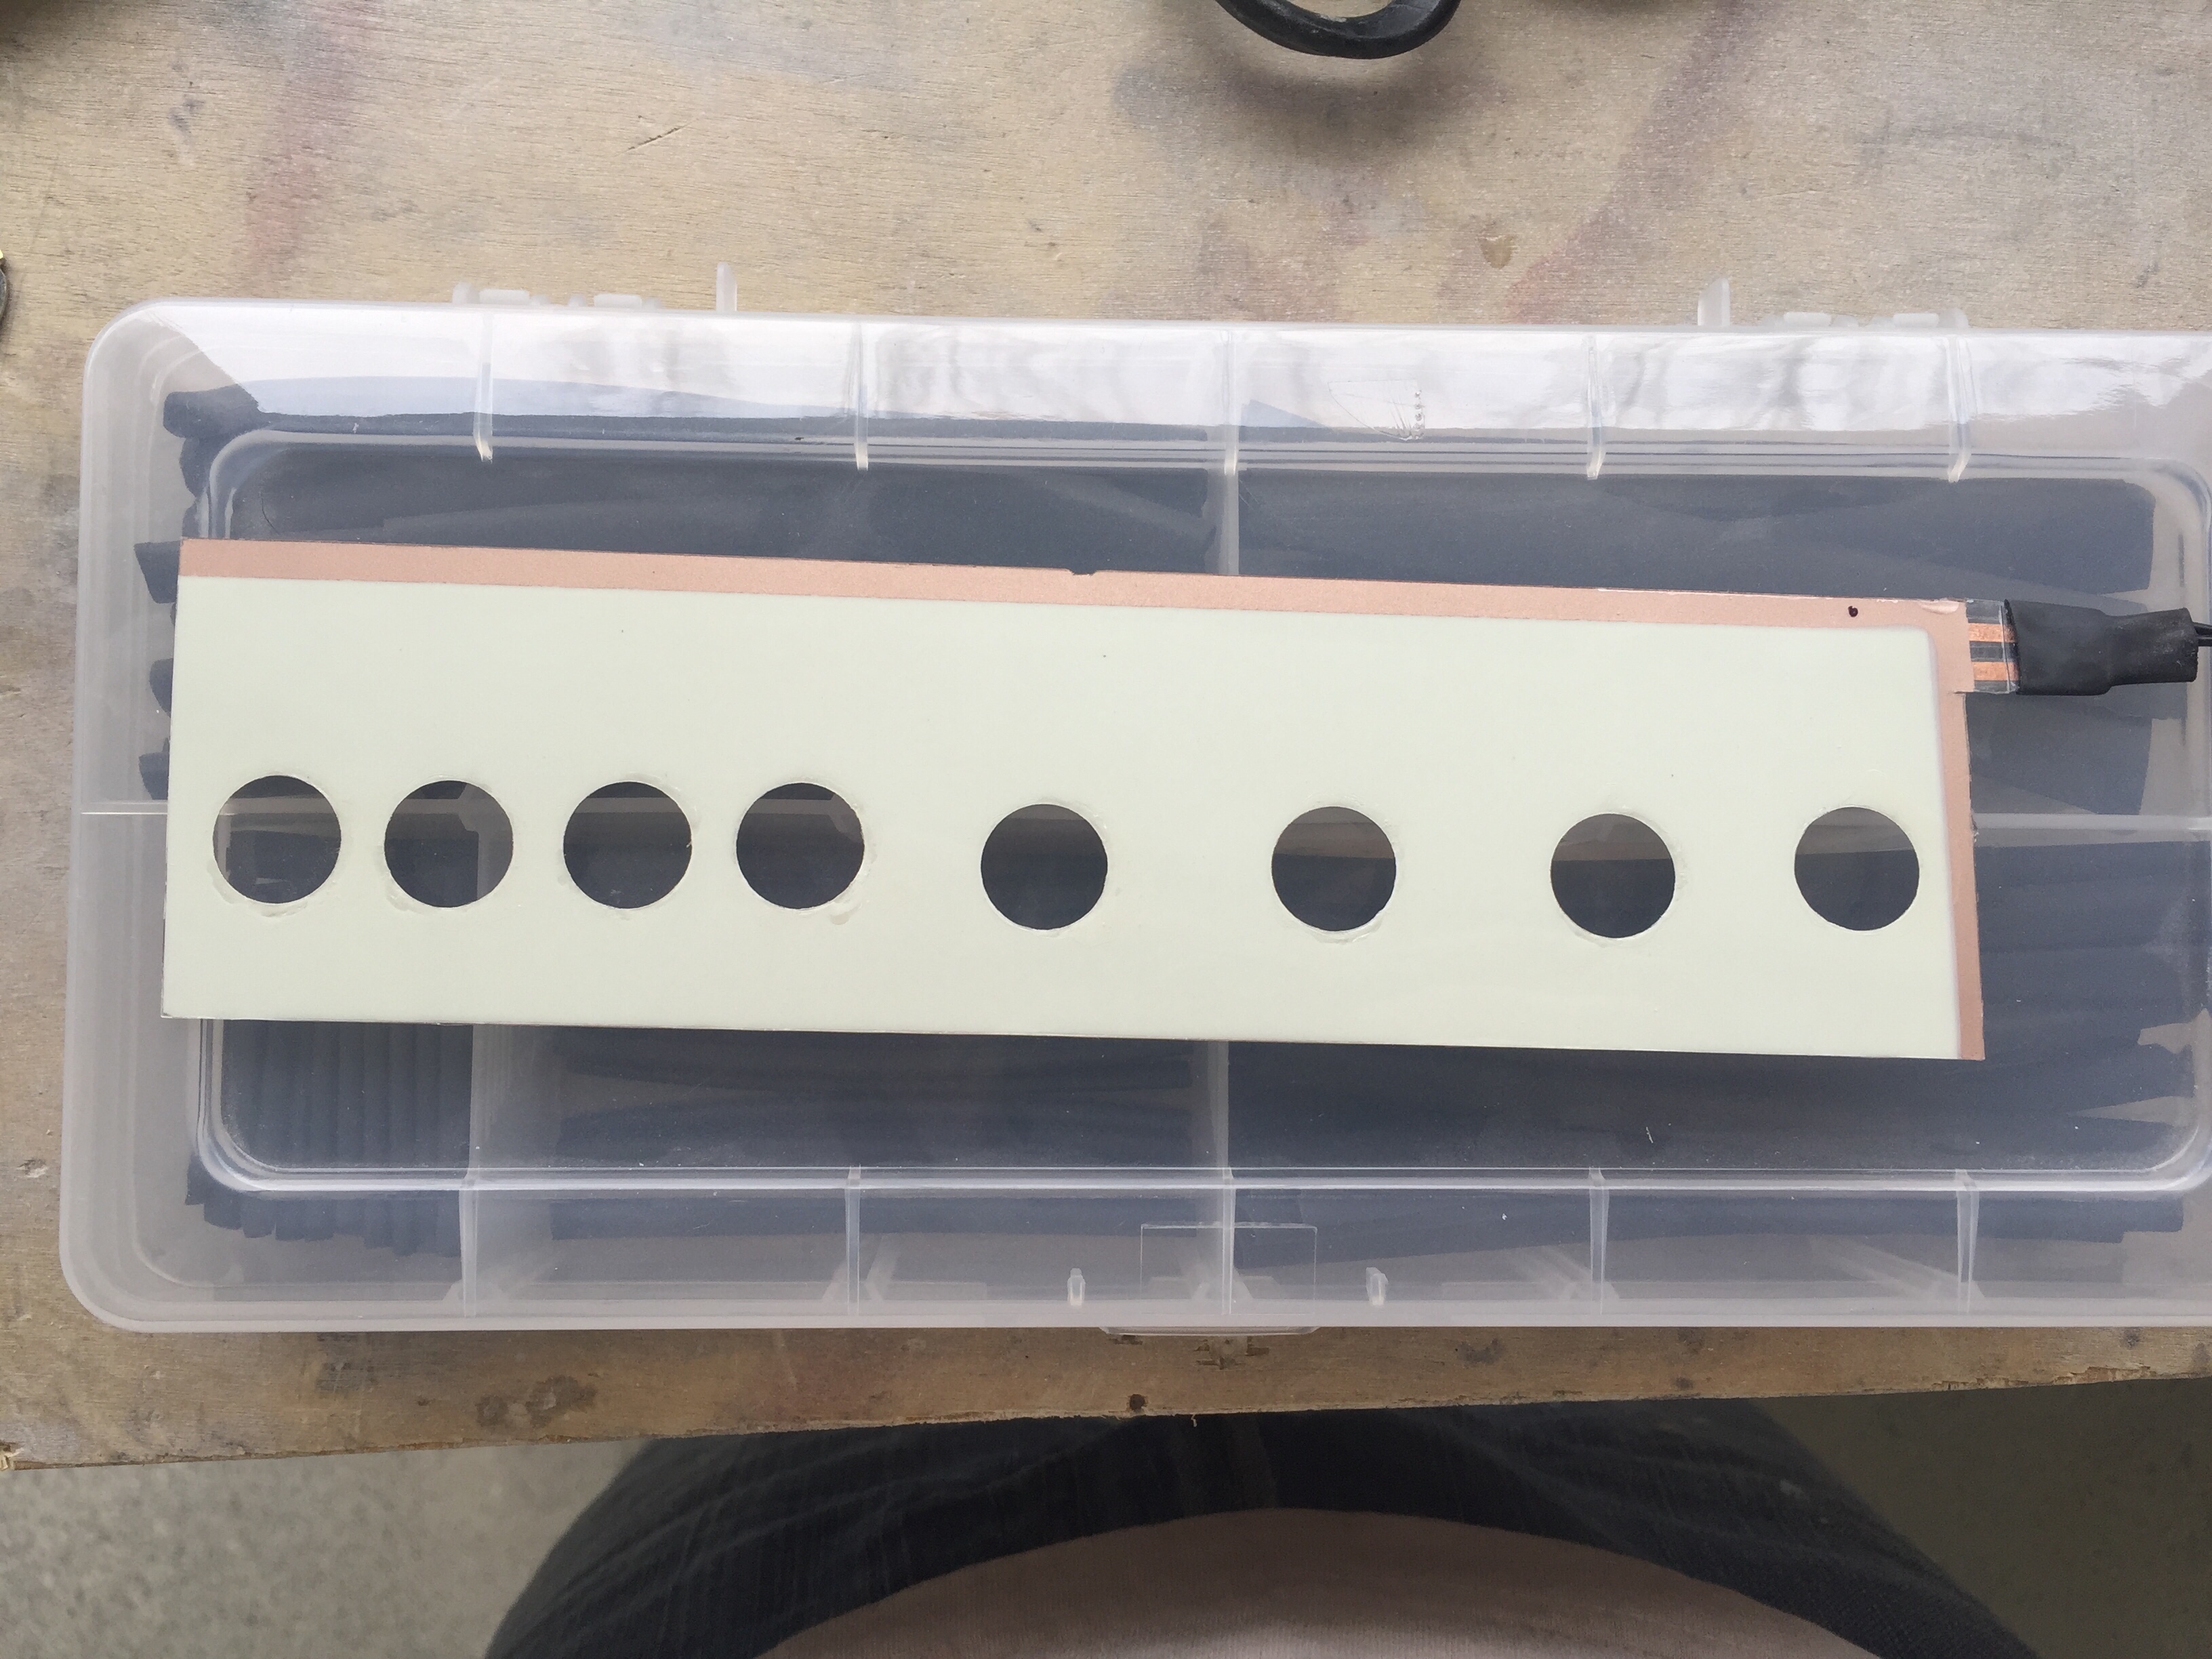
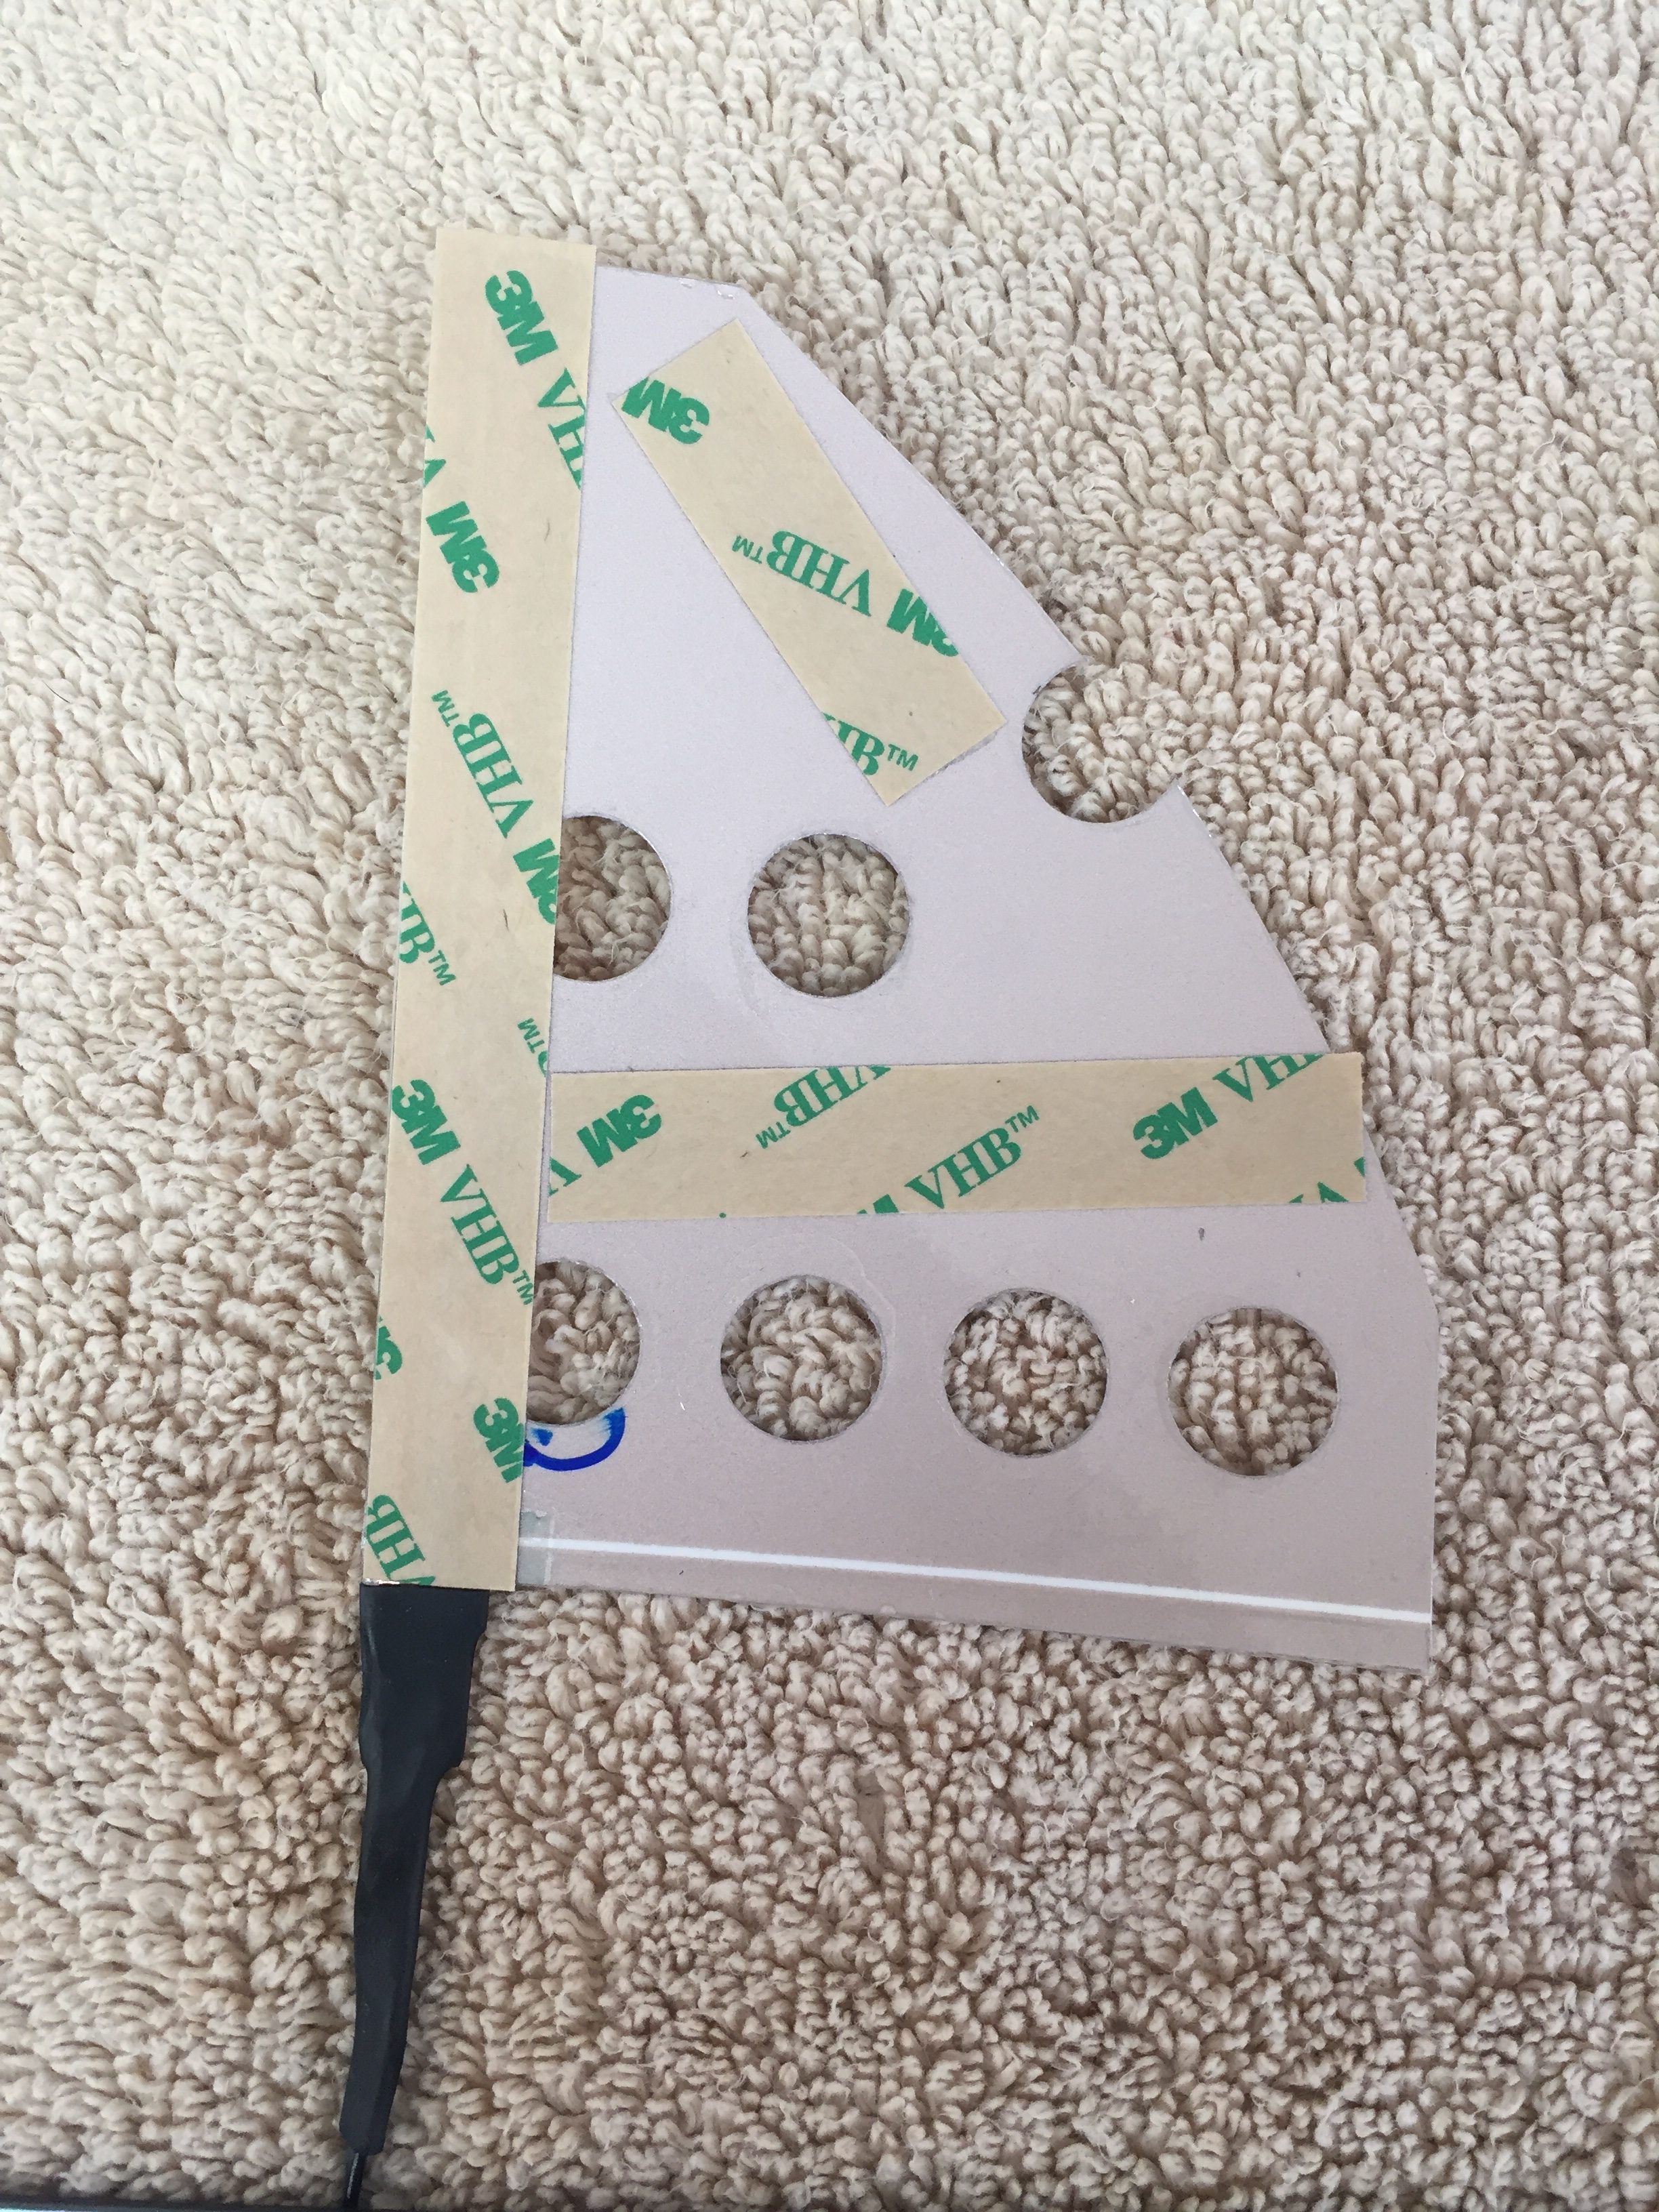
The EL panels came from Marc at Lightkraft via Etsy.  Marc was phenomenal to work with and took a personal interest in the project.  We had to iron out some dirty details on orientation, power leads, size constraints, etc.  I wound up taking his limfacs and finessing the panel layout a bit around the EL panels to make sure everything lit up as desired.  I also had to be strategic on where the power leads would be located along with the two edges that are unlit where the leads run.  On those two sides, it’s about 3/16″ that is unlit and cannot be cut, so positioning those correctly was key.  The other two edges could be cut and shaped in any way needed.  Finally, holes in pretty much any shape can be cut out of the middle to allow for switches or components without affecting the rest of the EL panel.  On any cut edge, the panel must be sealed to prevent oxygen from ruining the EL material.  Marc suggested clear acrylic nail polish which was easy and quick.  The prototype was done in white, but I wanted the final product in all blue.  Marc did a great job taking the 1:1 sized PDF I produced from my CAD design and producing the panels.  He provided a transformer based on the total surface area of the panels so all will be wired together and be on one dimmer.

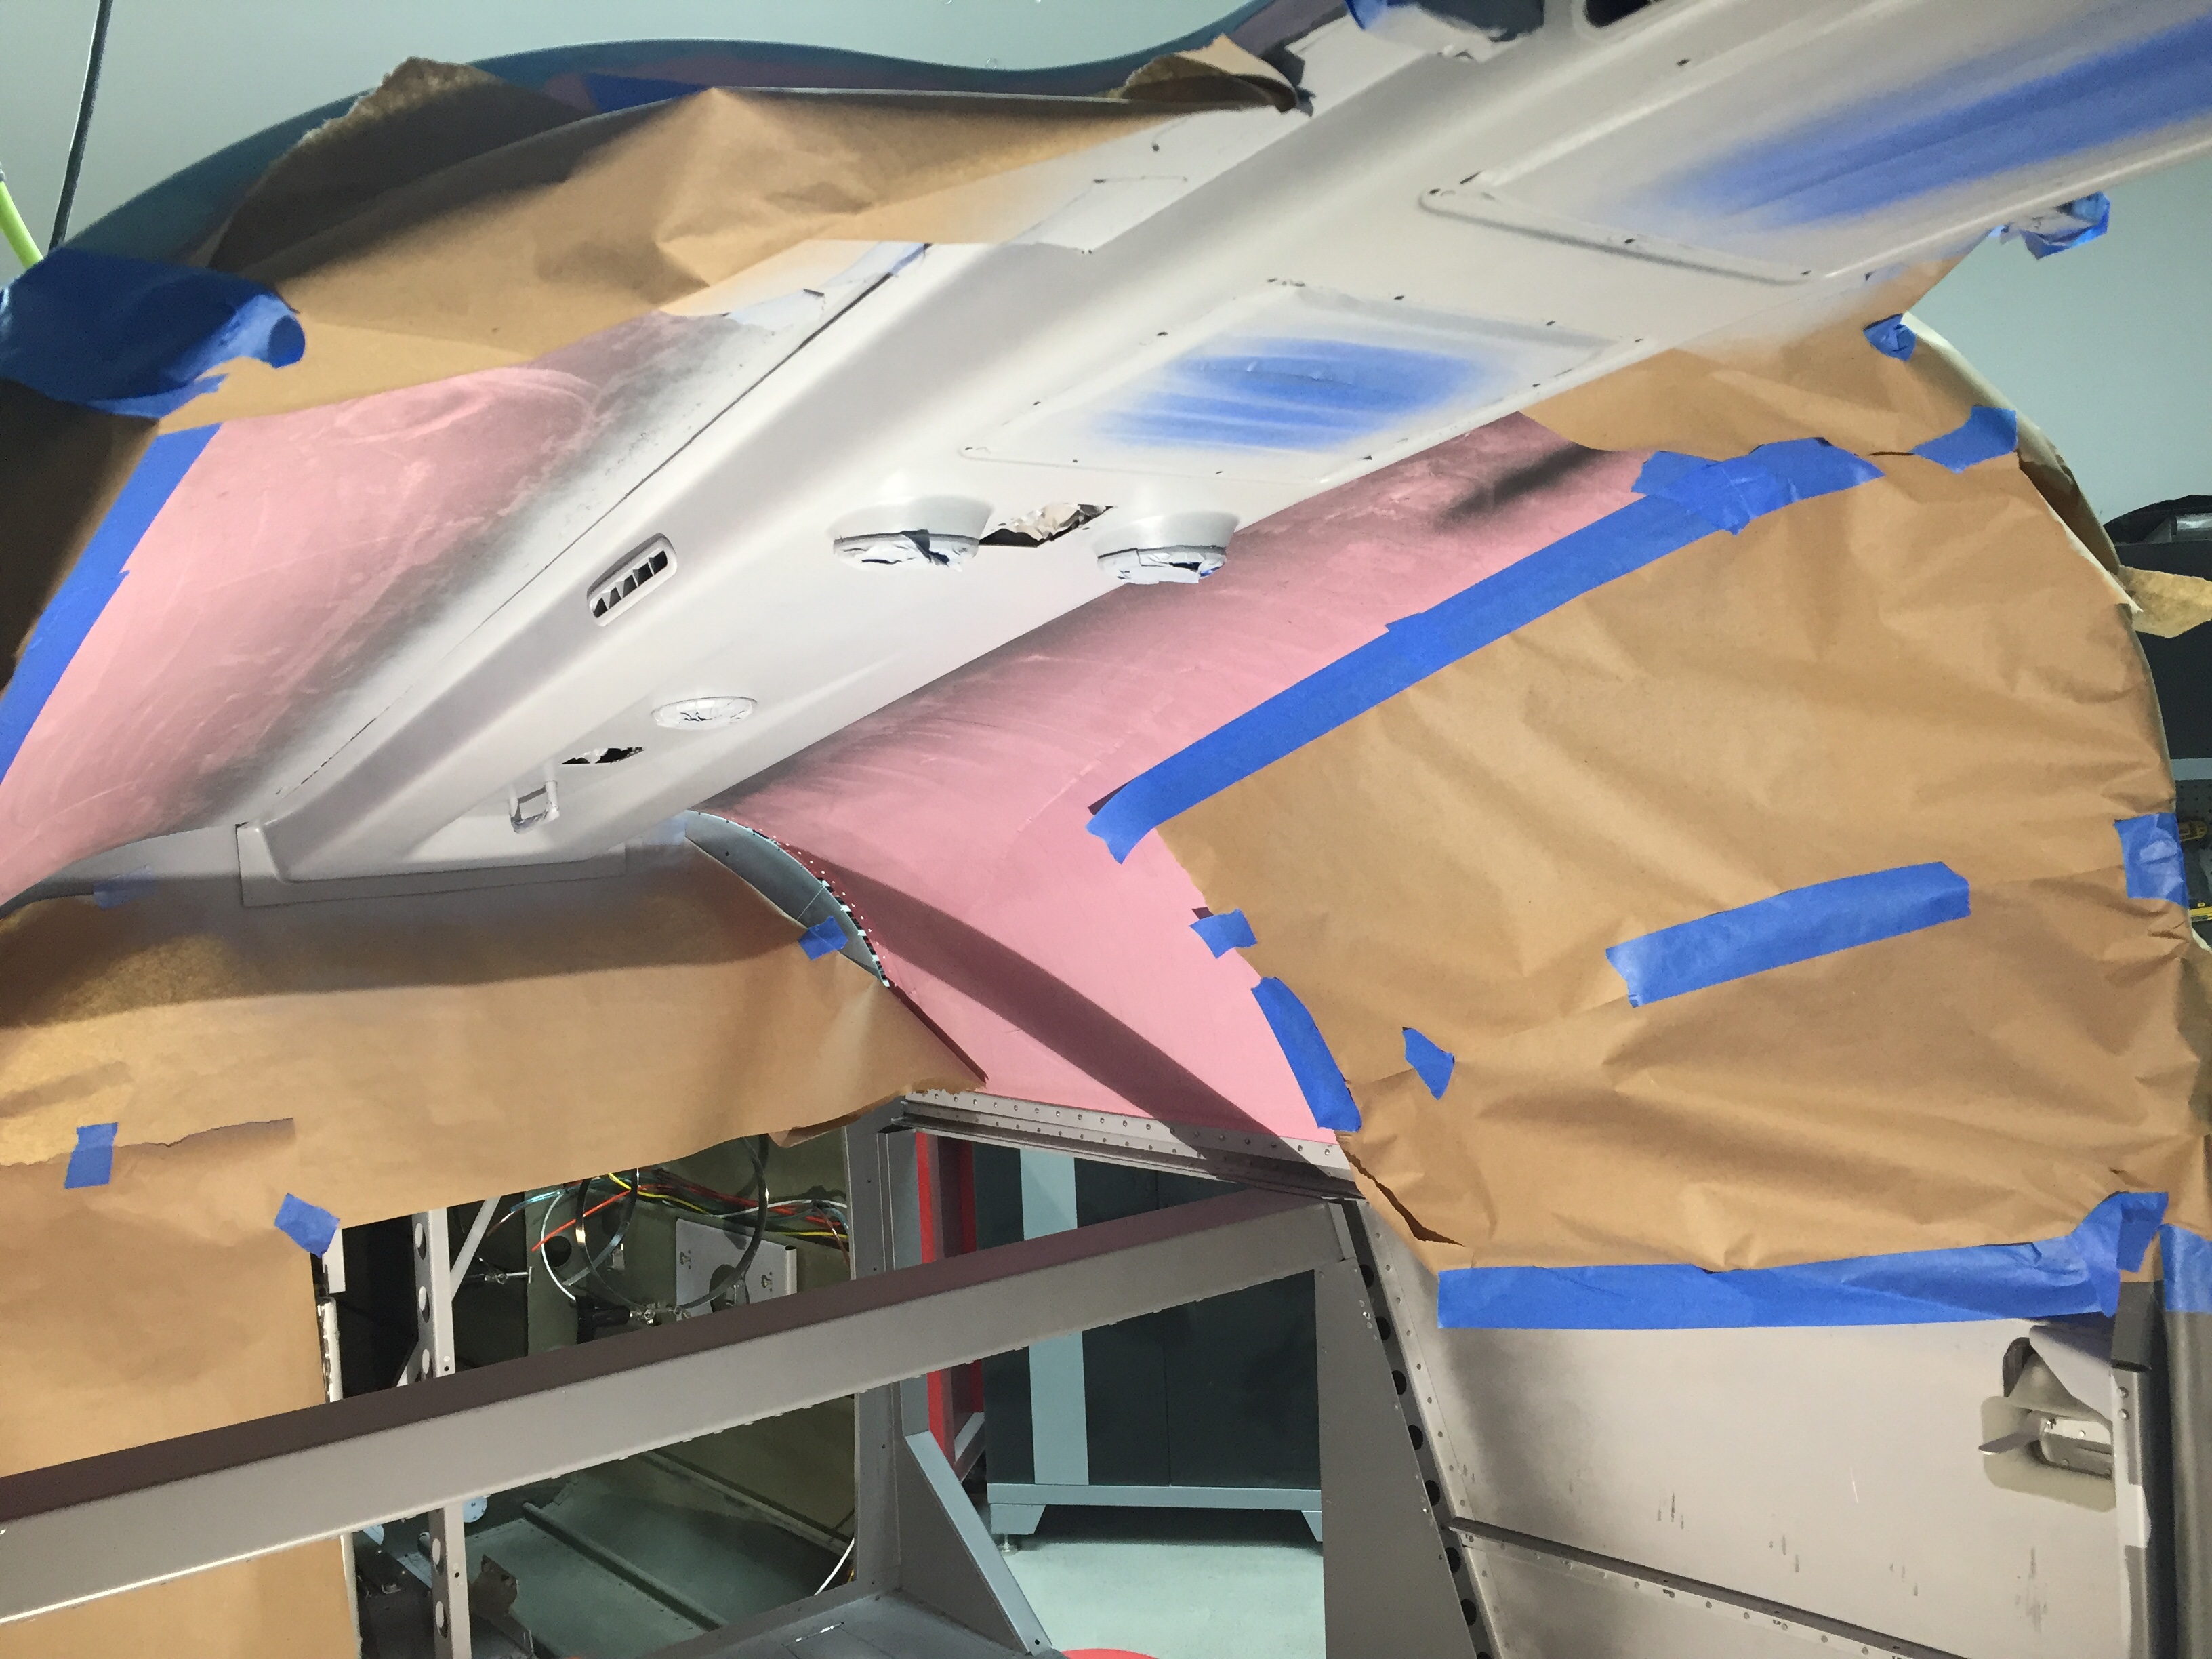
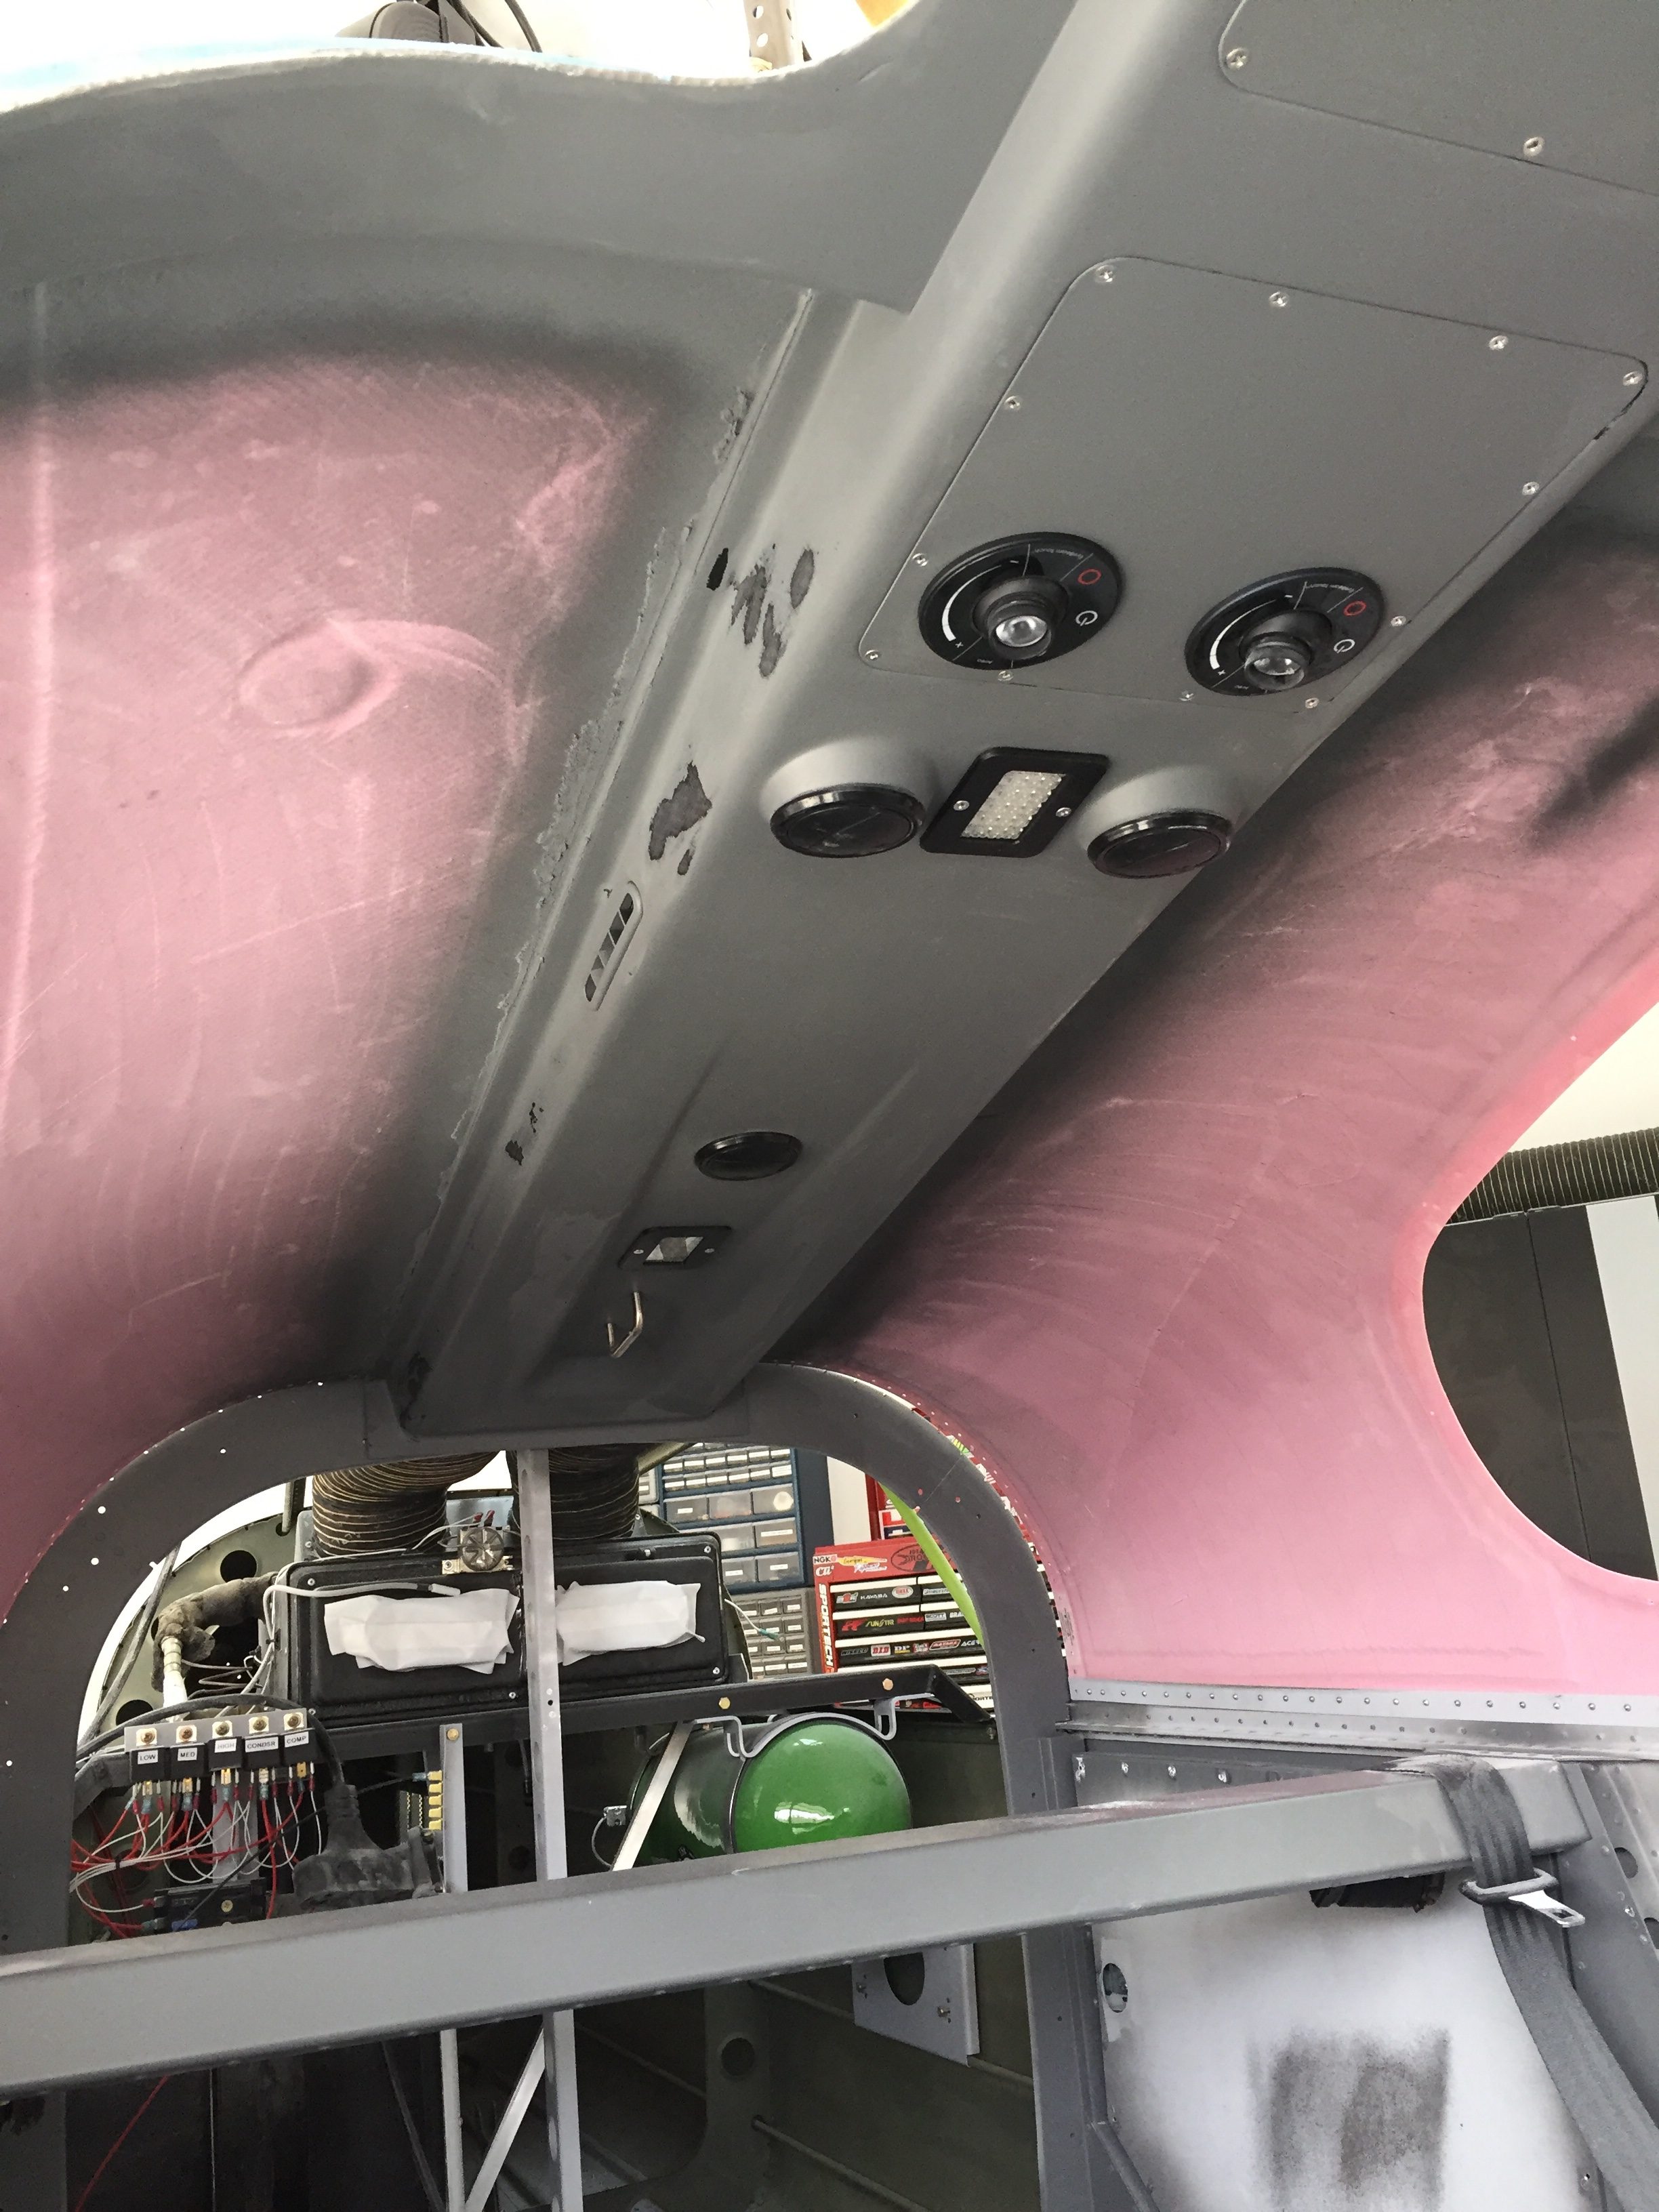
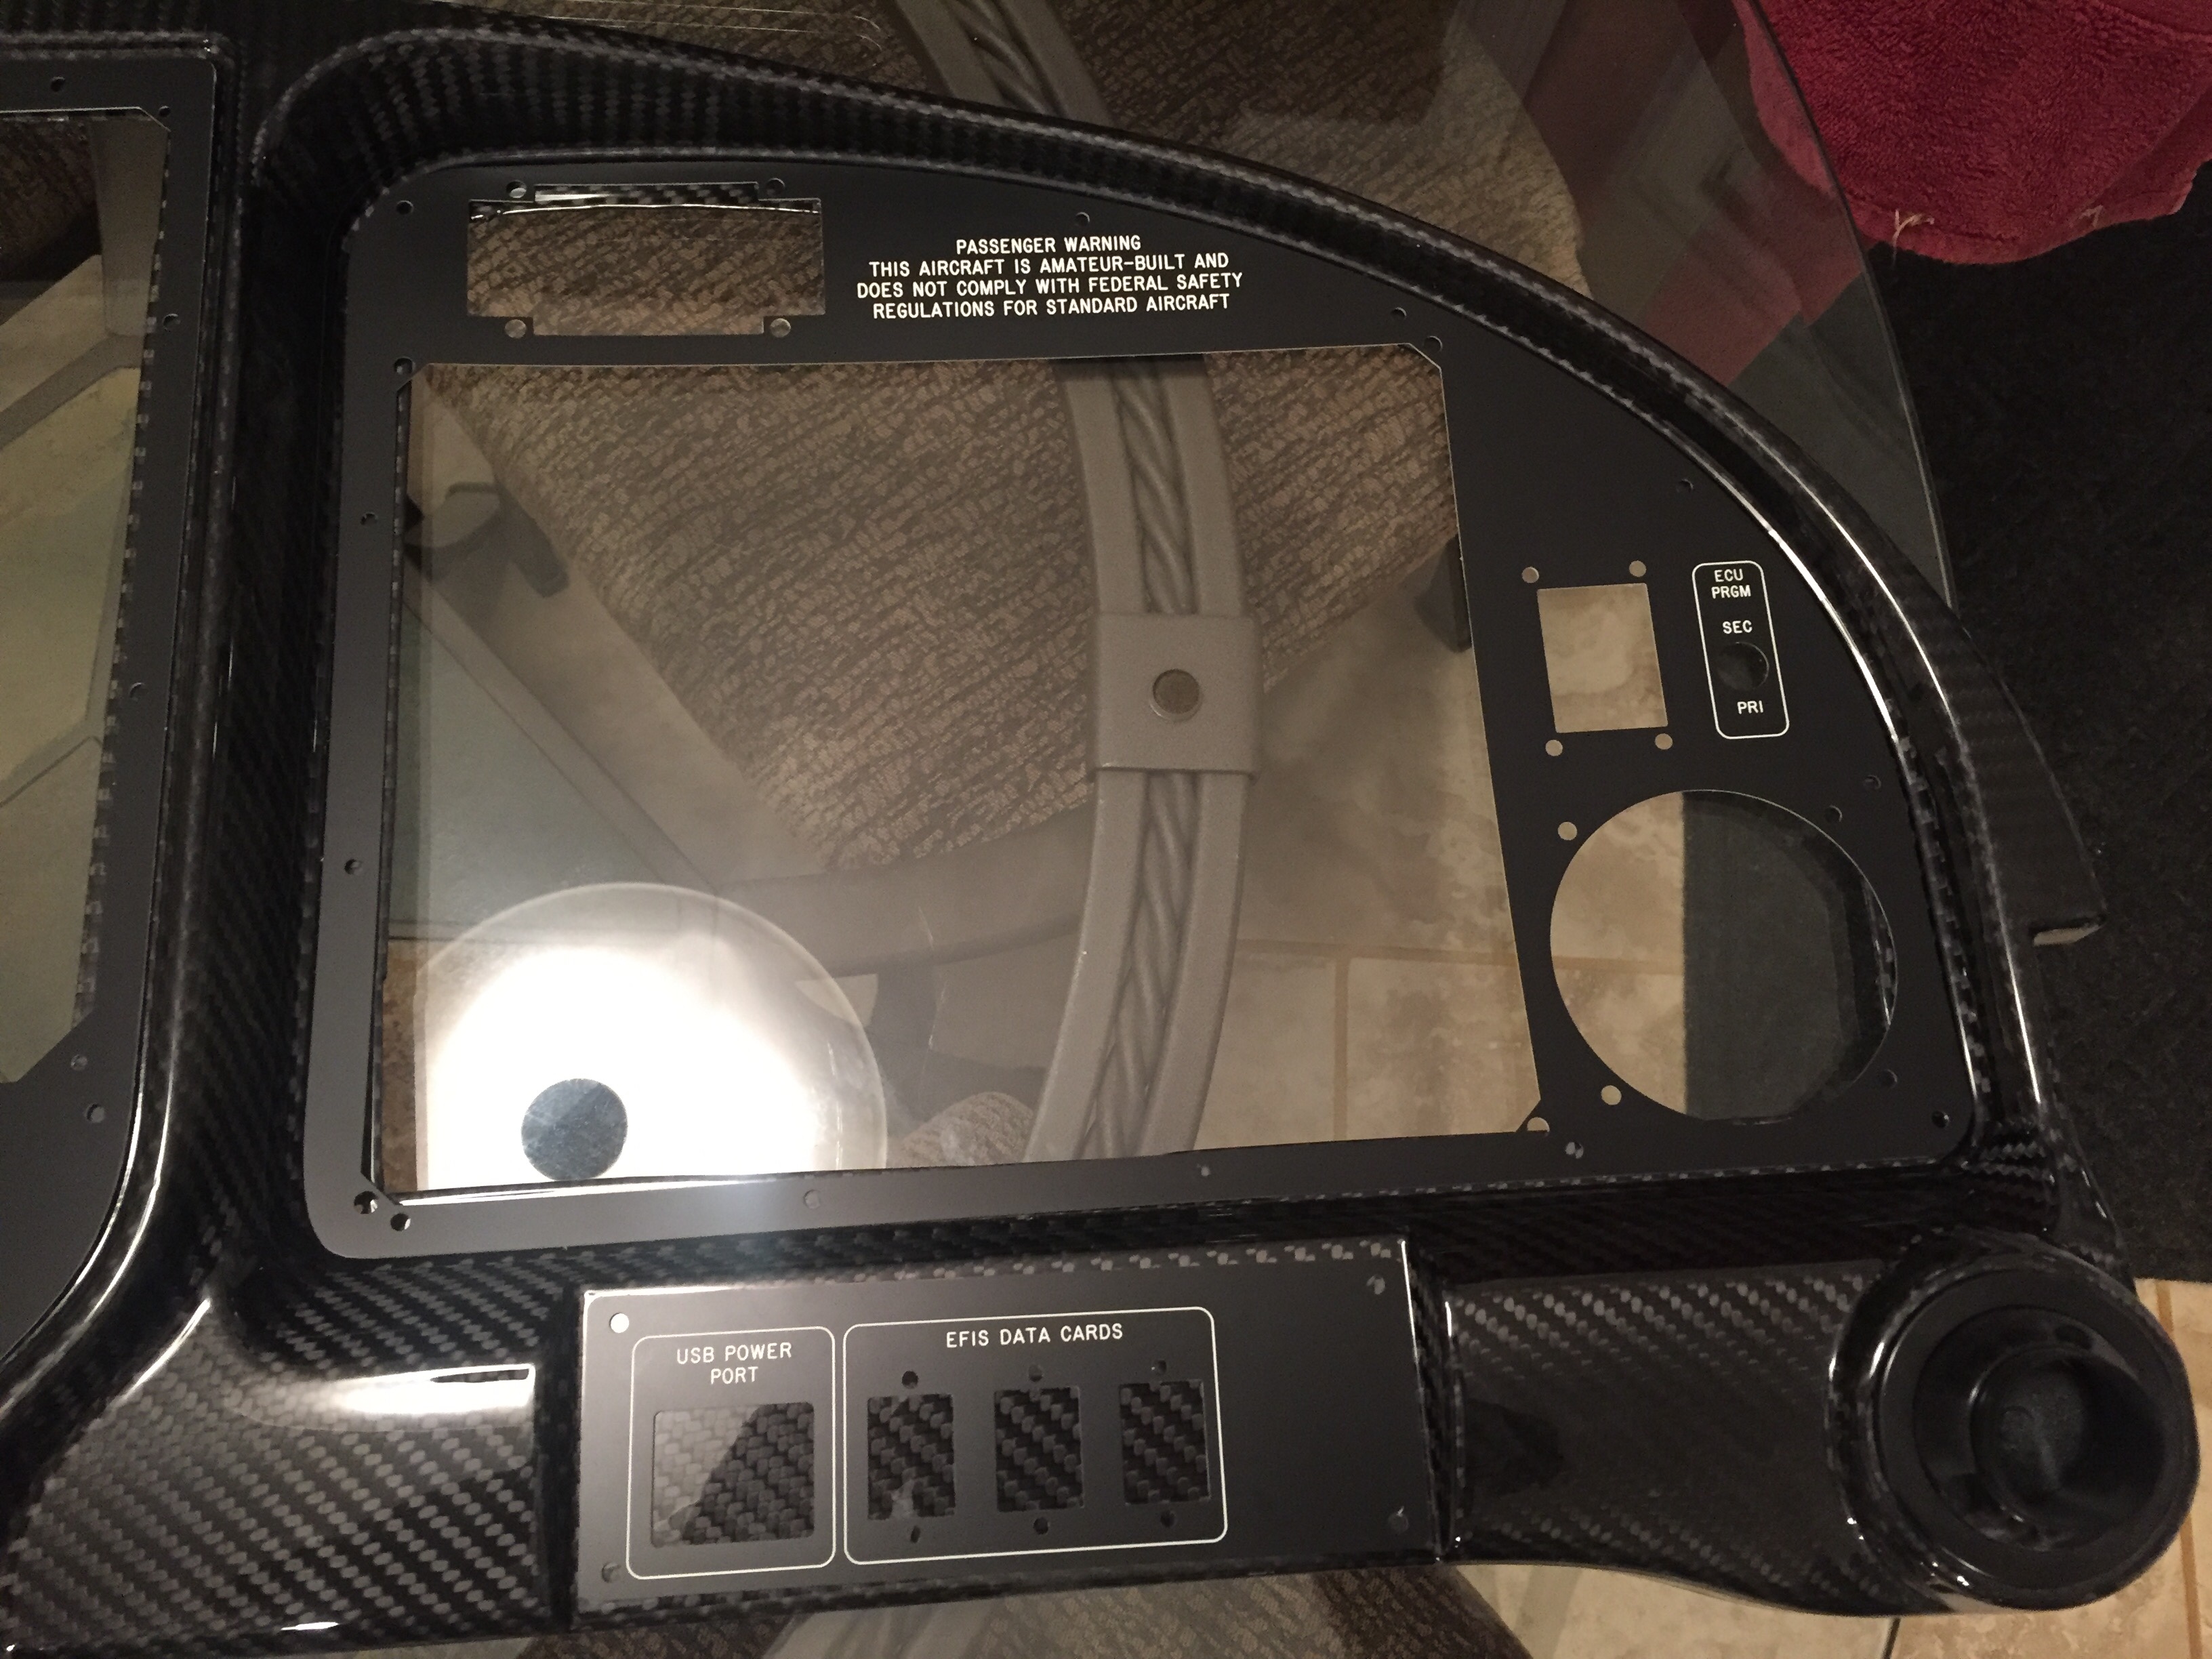
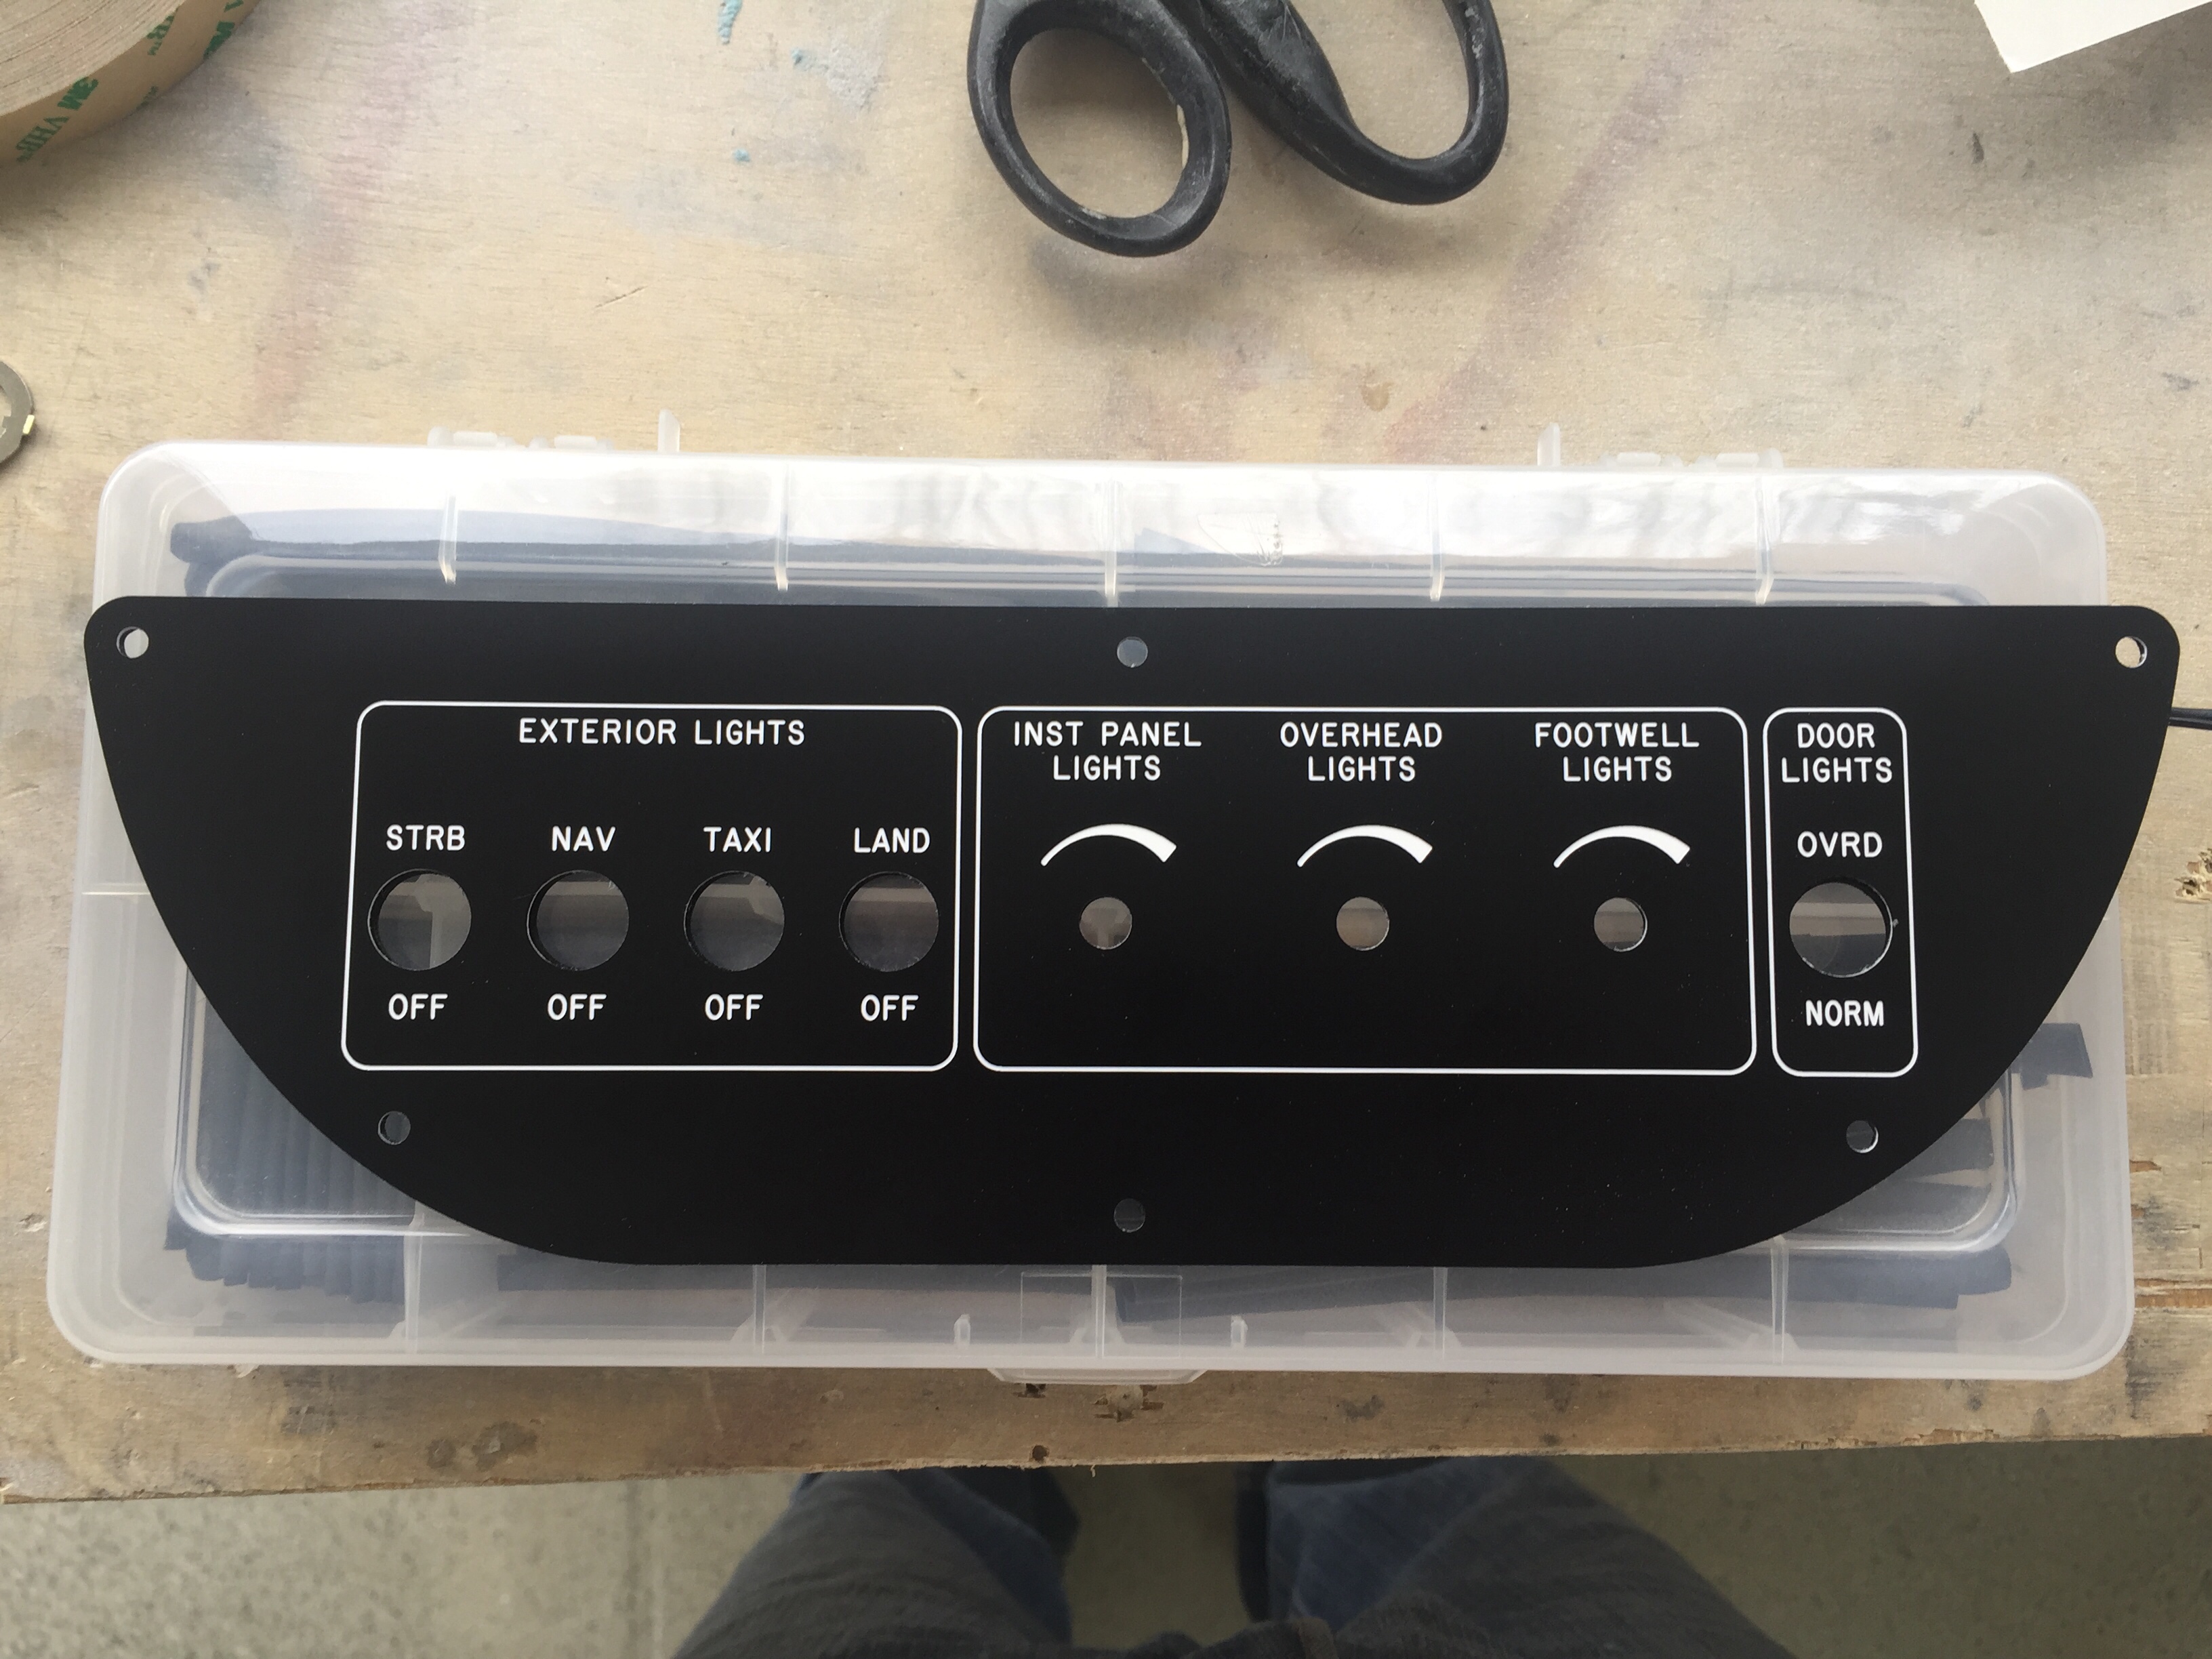
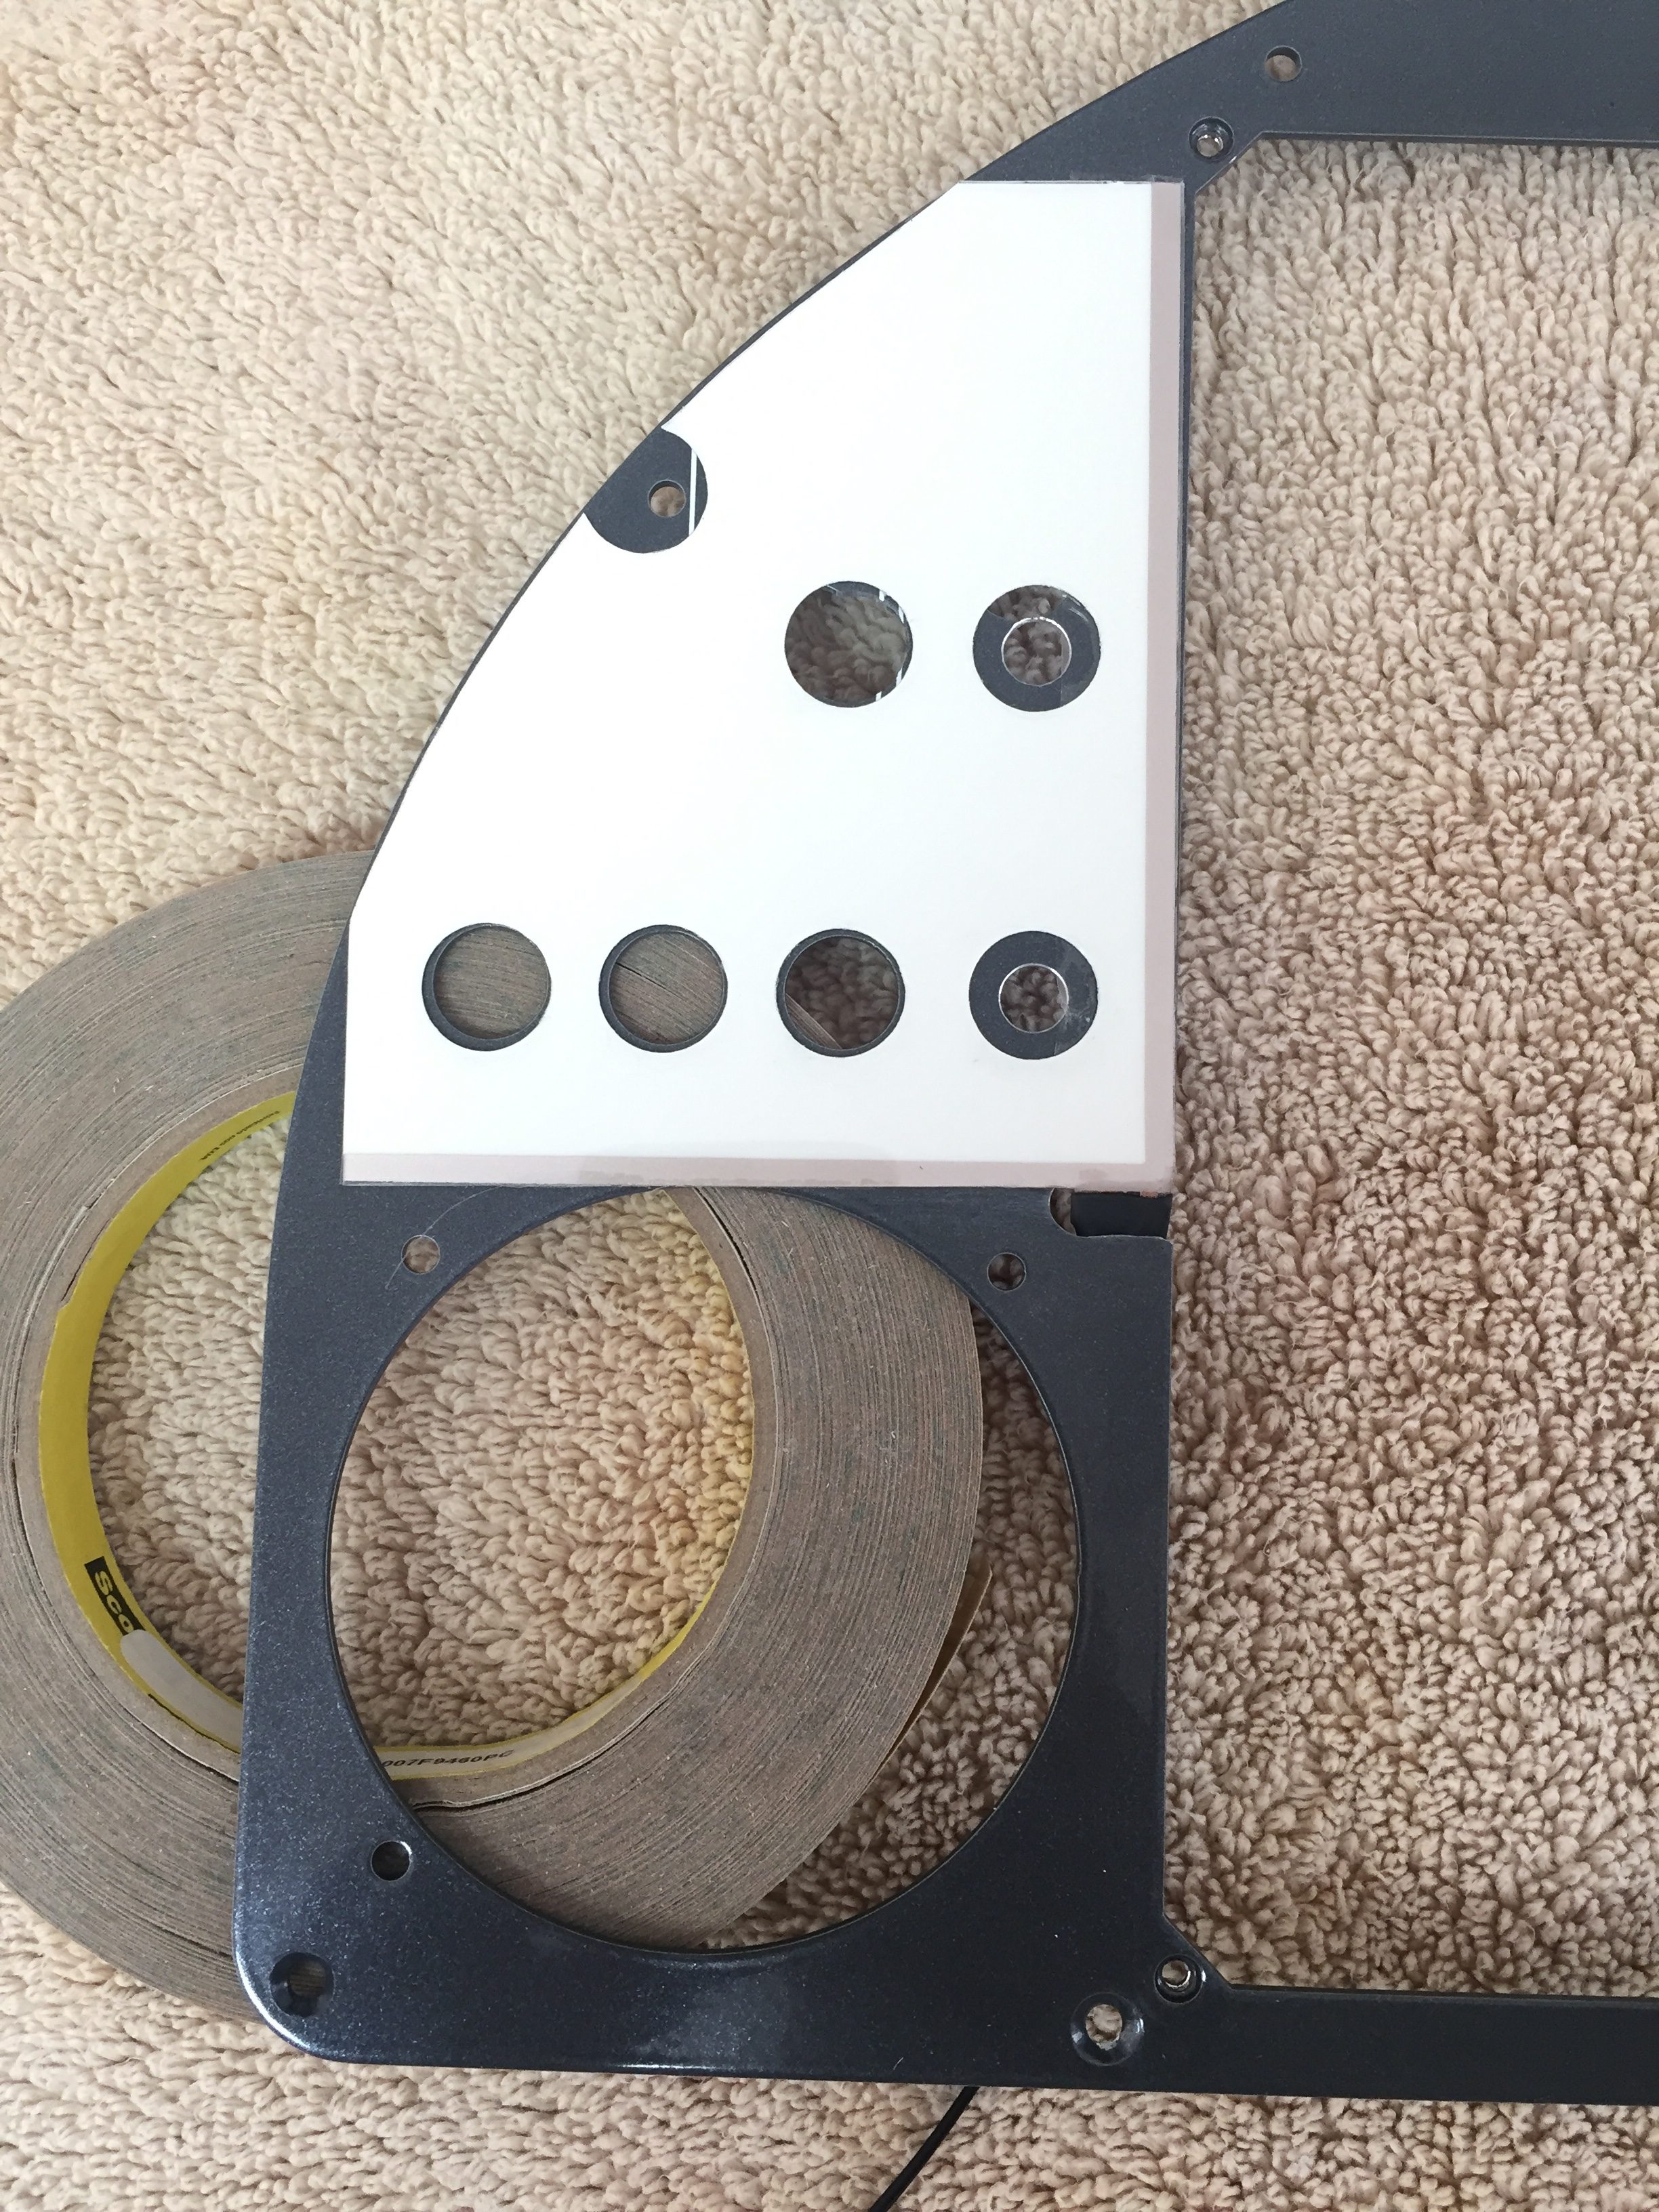
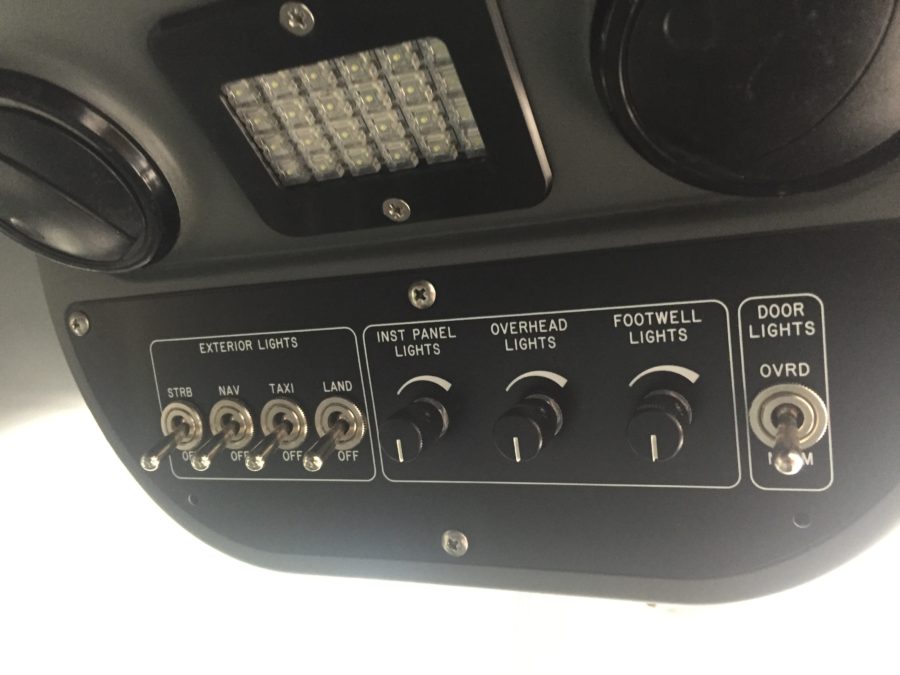
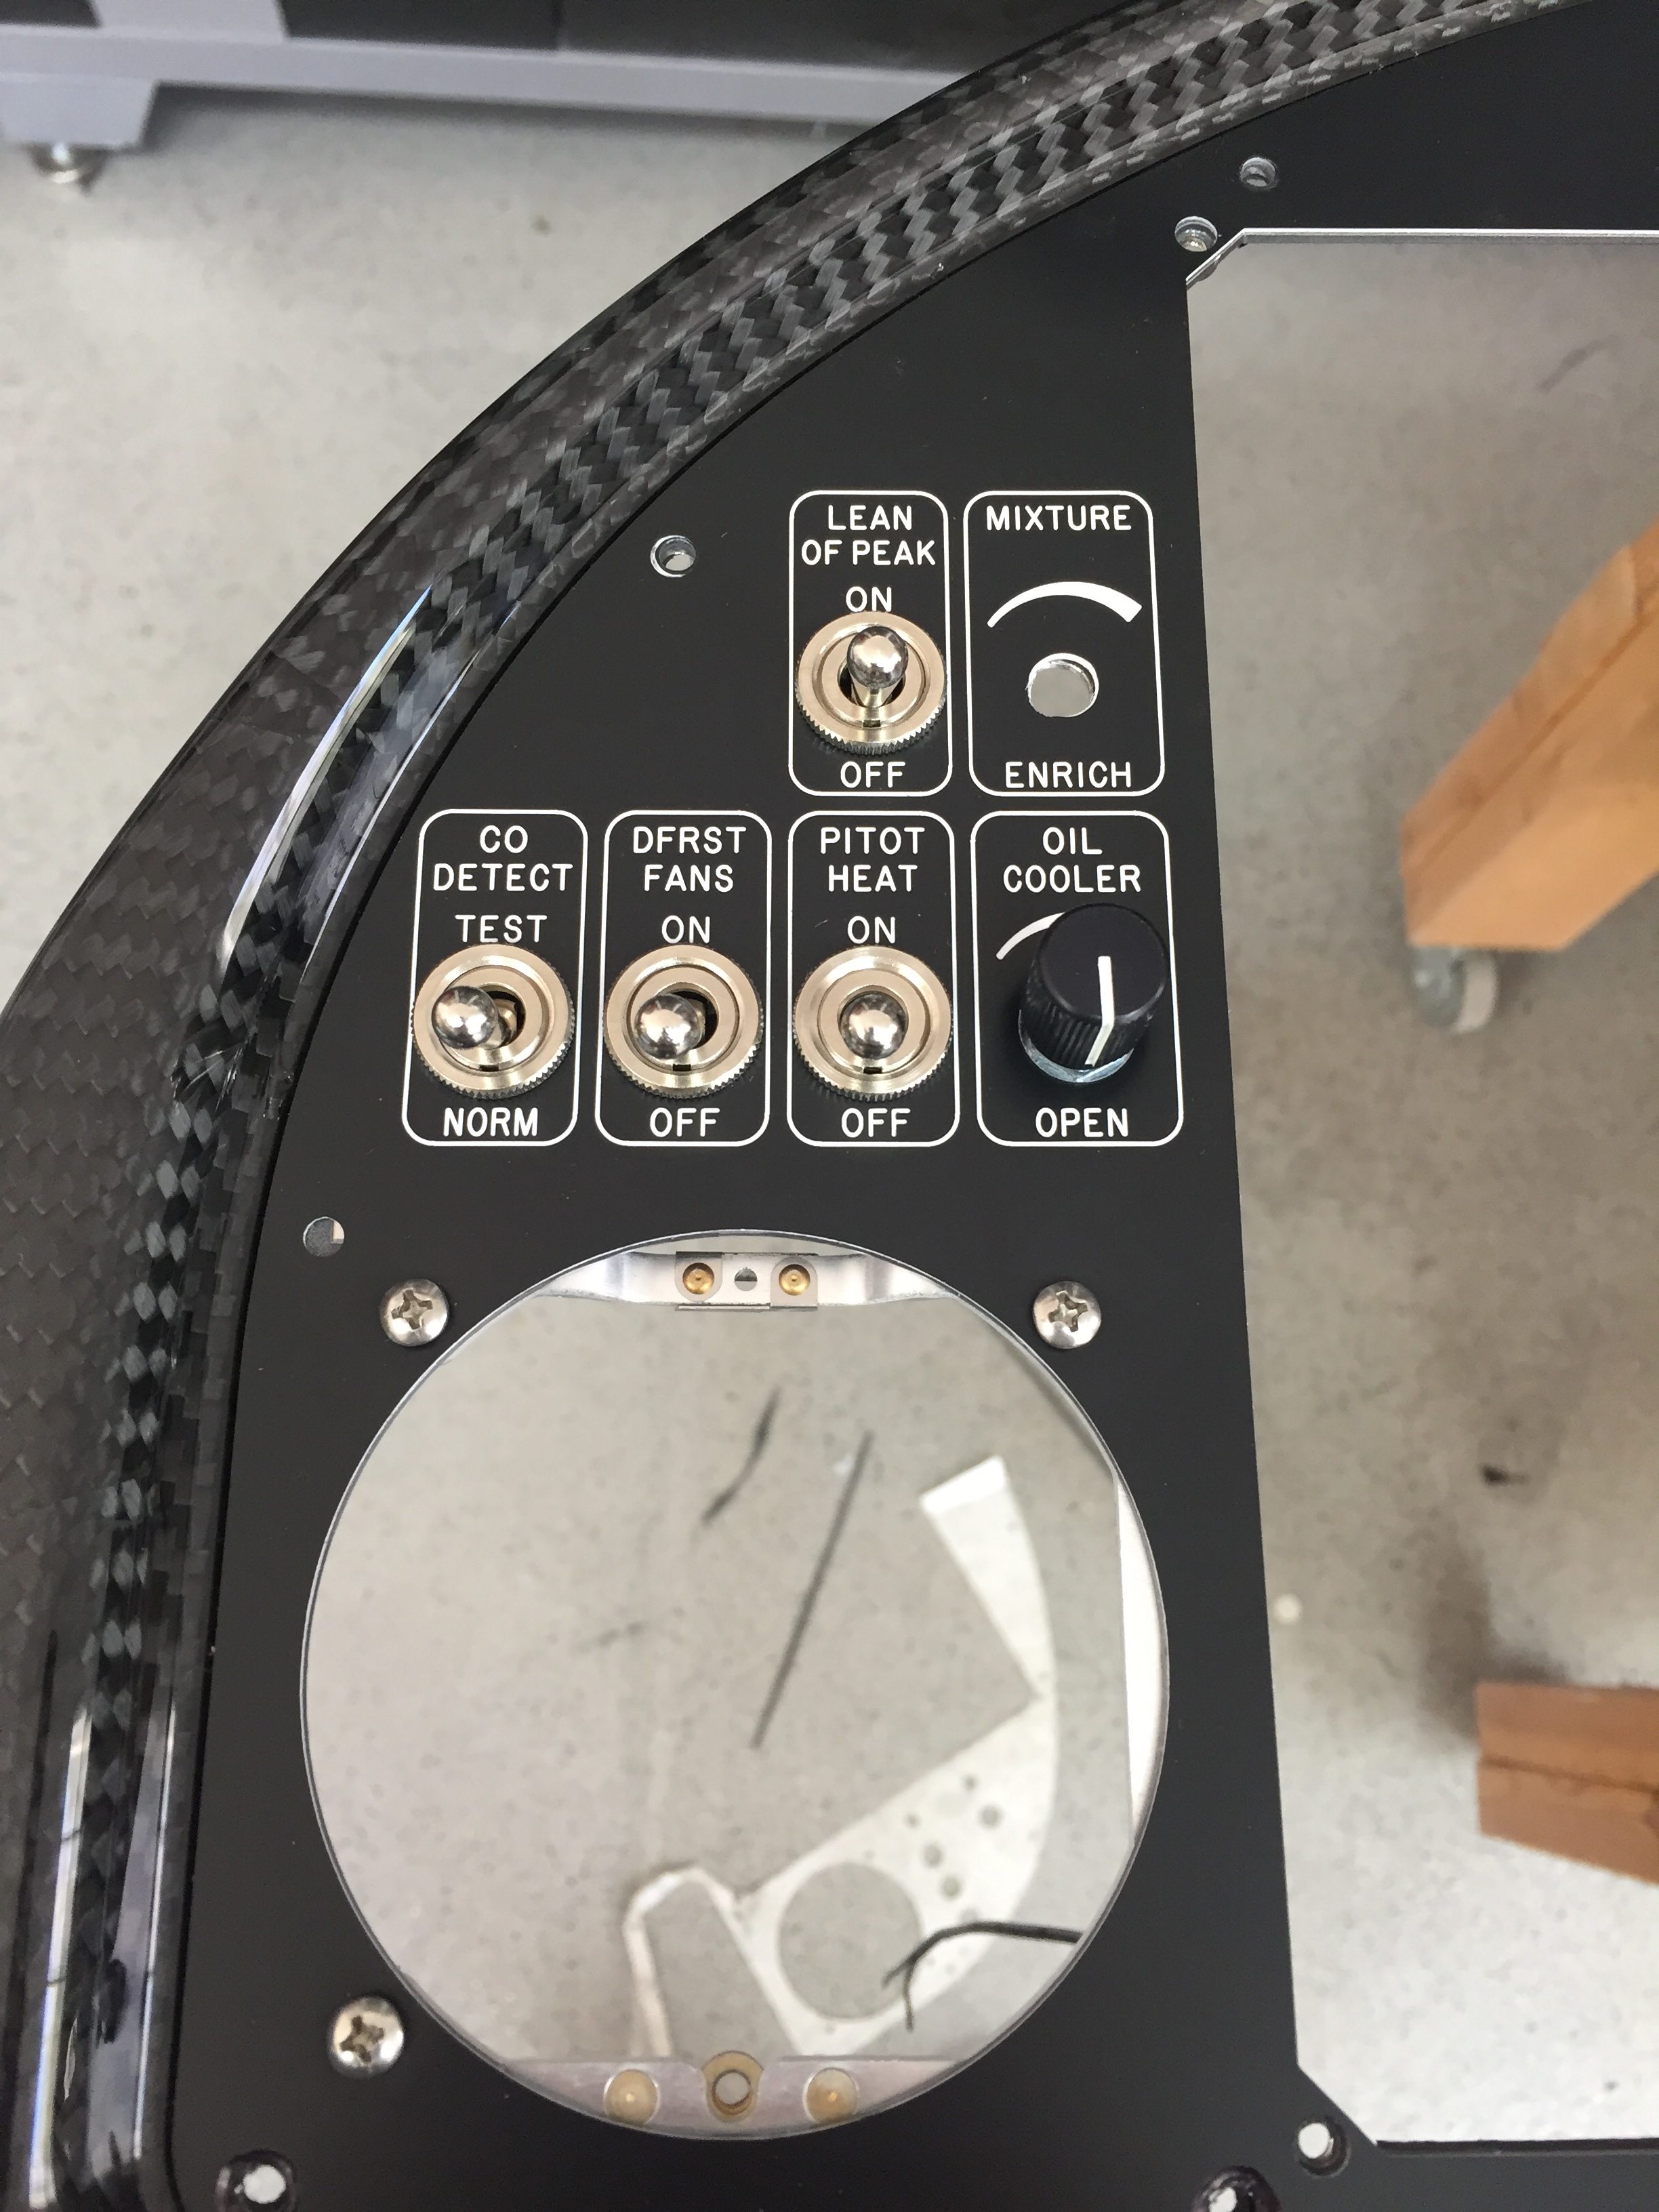
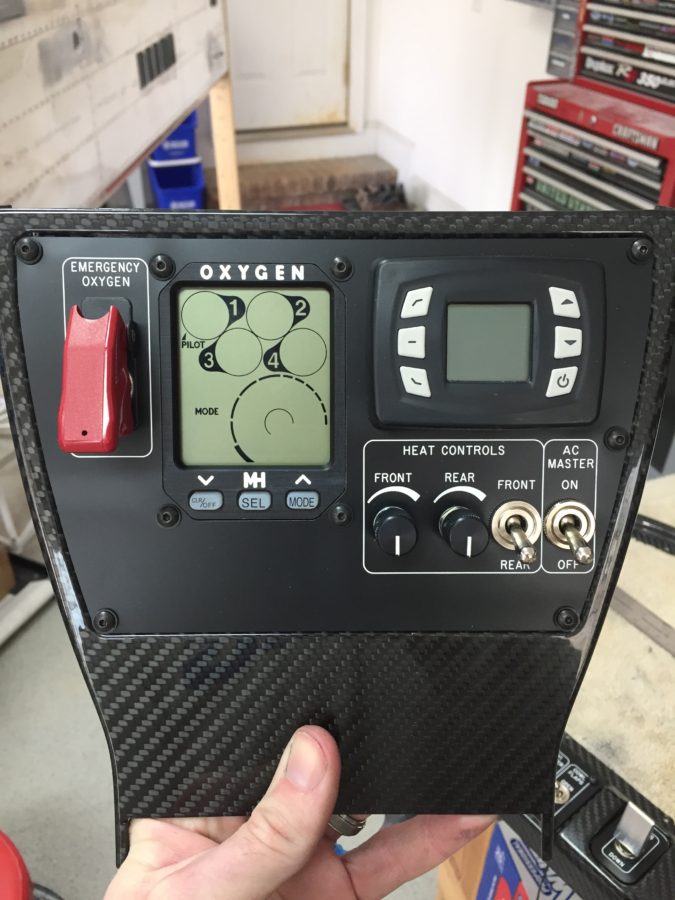
Since AFS helped design and is producing a quick panel for me, the metal inserts for the four major sections of the Aerosport 310 panel are being cut and silk screened by AFS.  I wanted that as a back up to the EL panels just in case those didn’t work out or fail and are not replaceable sometime down the road.  After finalizing the design with Stephan at AFS, I sent the same CAD design to Matthew at Aircraft Engravers and requested all the panels be cut from black on white acrylic, just the same as the overhead console test panel.  Matthew was able to cut all component, switch, and screw holes then laser engrave all of the markings.  The acrylic panels have a self sticking backing so applying them for good is as simple as pulling off the backing and sticking them on the metal panel!

I took some time to ensure each EL panel fit the area needing back light and trimmed a few spots to clean it up.  I used a 5/8″ punch to punch holes for switches and dimmers in the EL panels.  The idea was to avoid the EL panel contacting any metal avoiding shorting and any interference noise the panels may translate to the air frame.  From what I can tell, neither is necessary as metal doesn’t seem to bother the EL panel and test flying the prototype in the Diamond yielded quiet radios and headsets.  After all of the holes were cut and trimming was completed, I turned into a little kid and played with everything in the dark to make sure all engraving was properly lit.

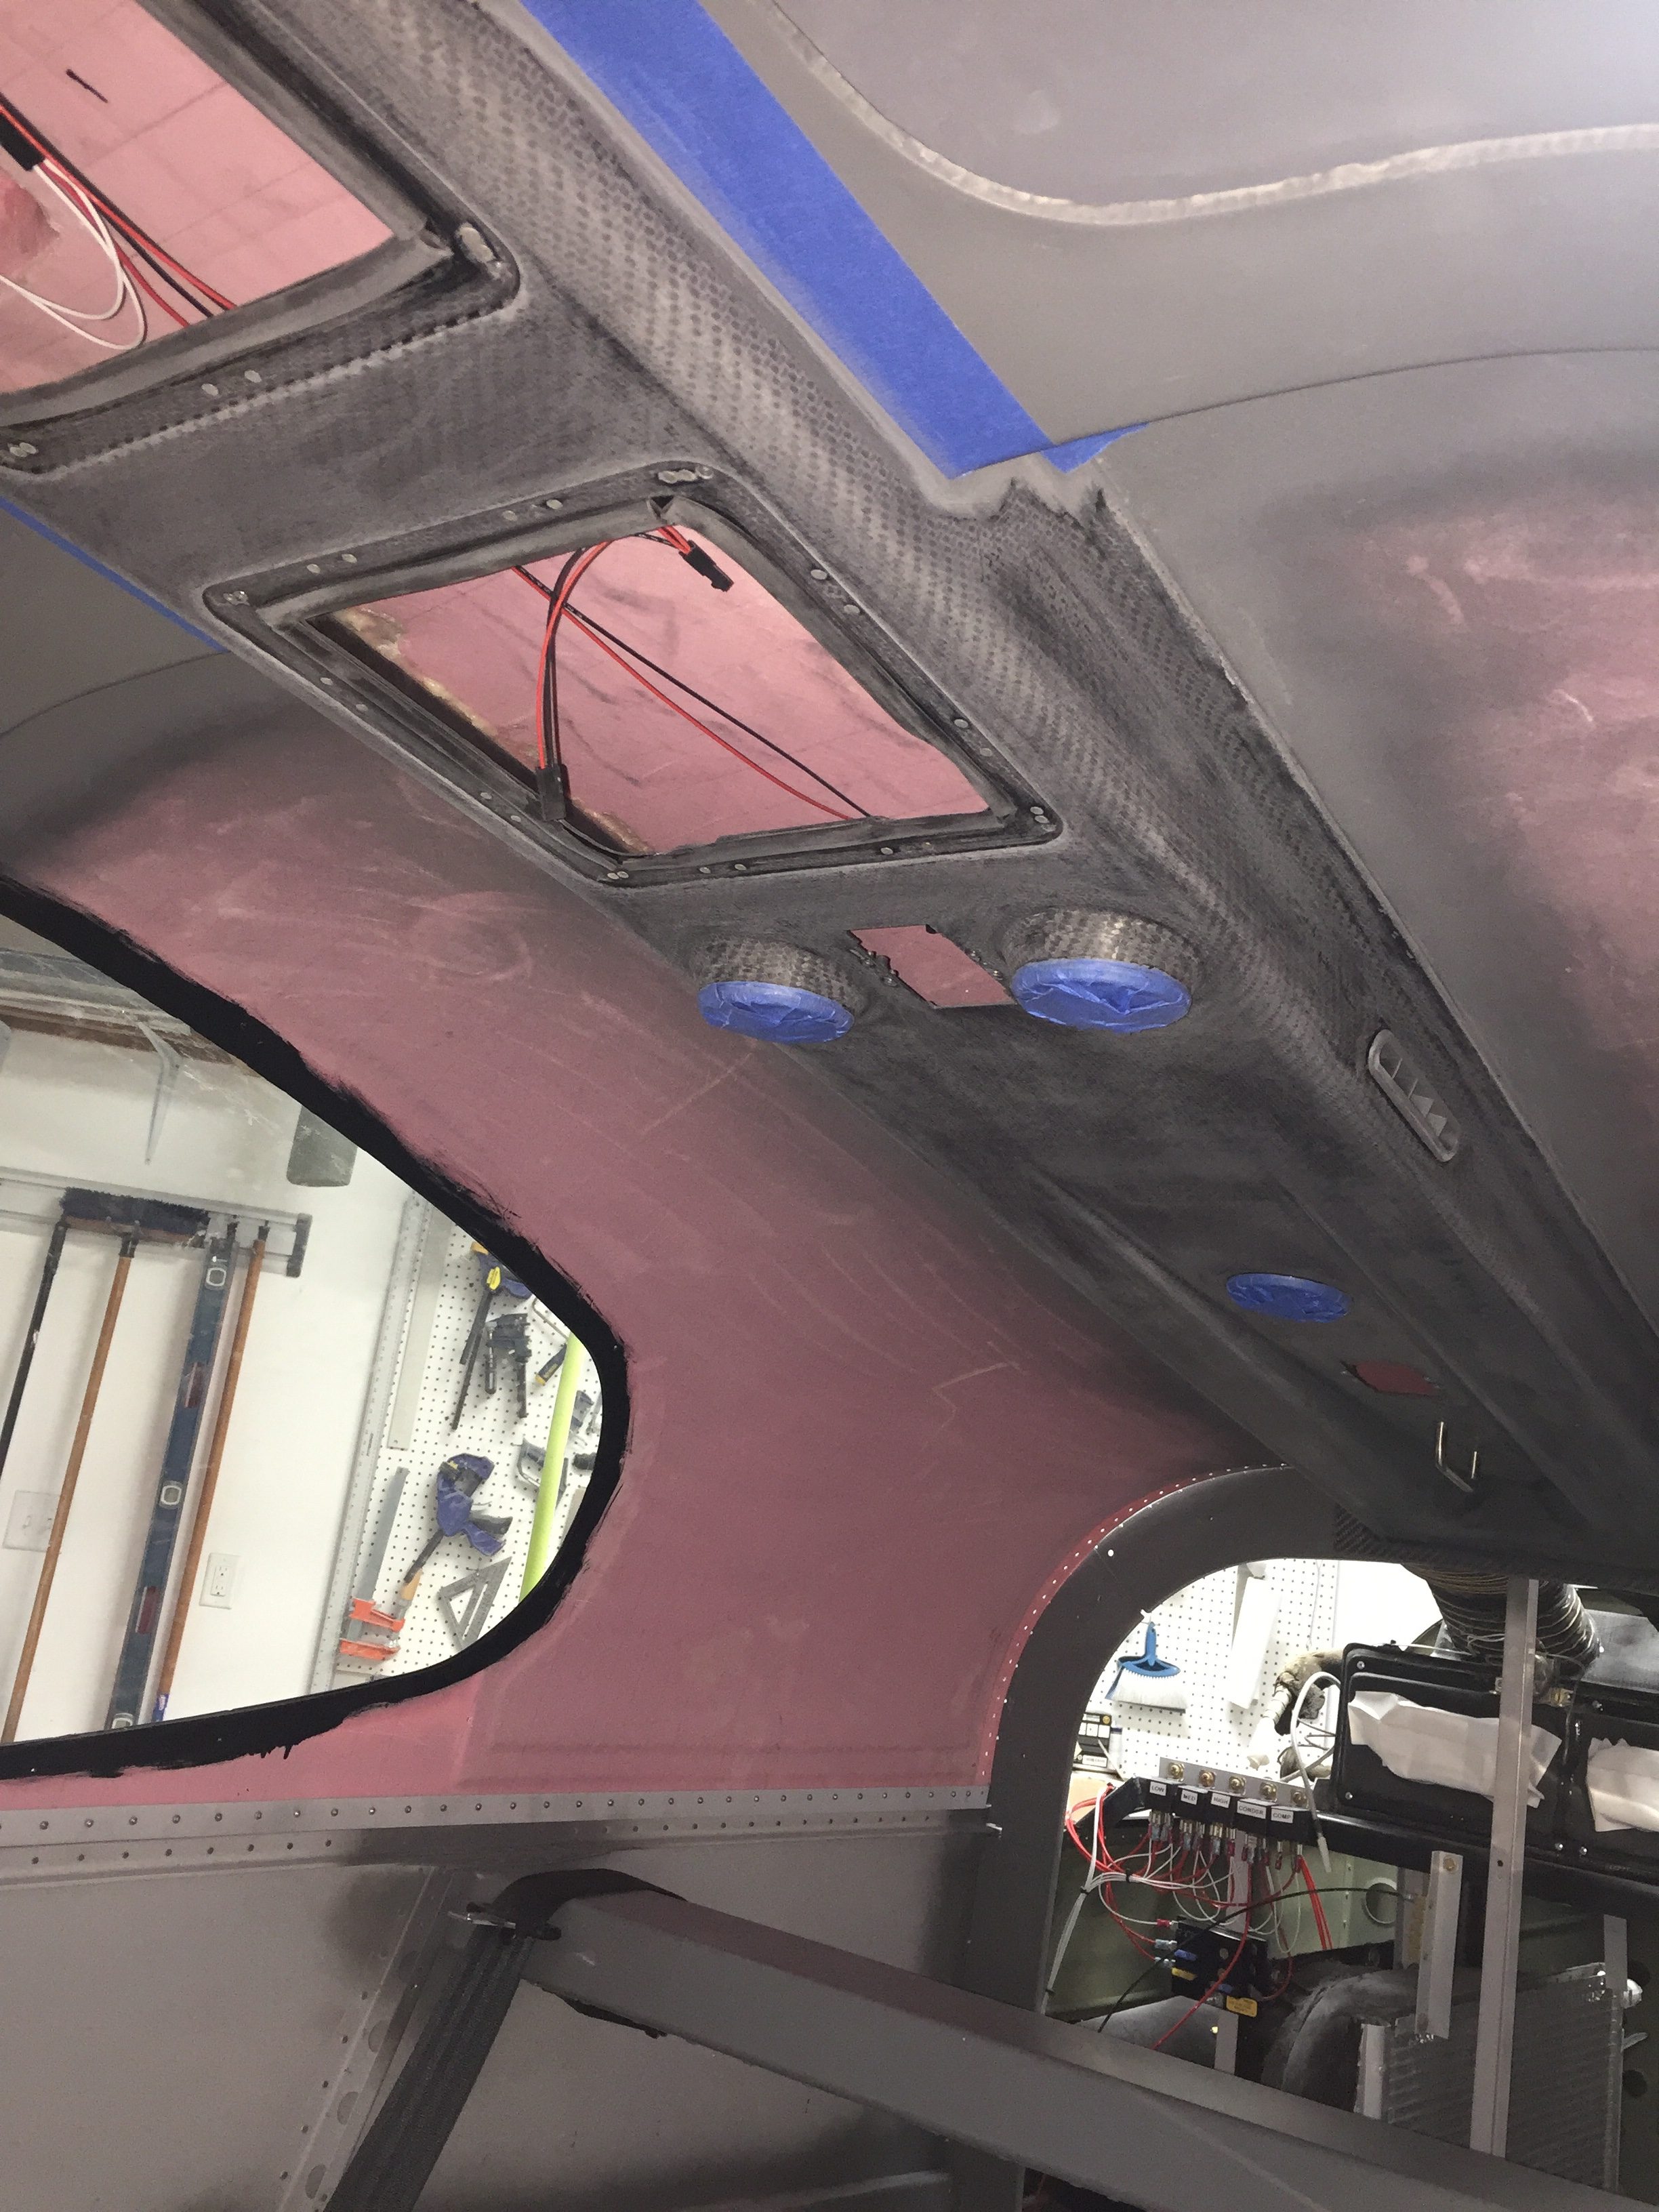
Next task is to cut a relieve for the power leads to rest in.  Since the wire is soldered onto the EL panel, it needs to slip either to the edge or behind the metal panel so that it is all flat once completed.  The areas where EL panels are not near and edge, I cut a slot for the leads to fit through ensuring no exposed lead touches the aluminum.  Several locations will require the leads coming out from the side of the acrylic panel and going into the carbon fiber structure through a slot.  Those are a bit tough to cut out but with patience and a lot of though prior to cutting, it works just fine.  The main switch panel and flap switch panel were the toughest ones.

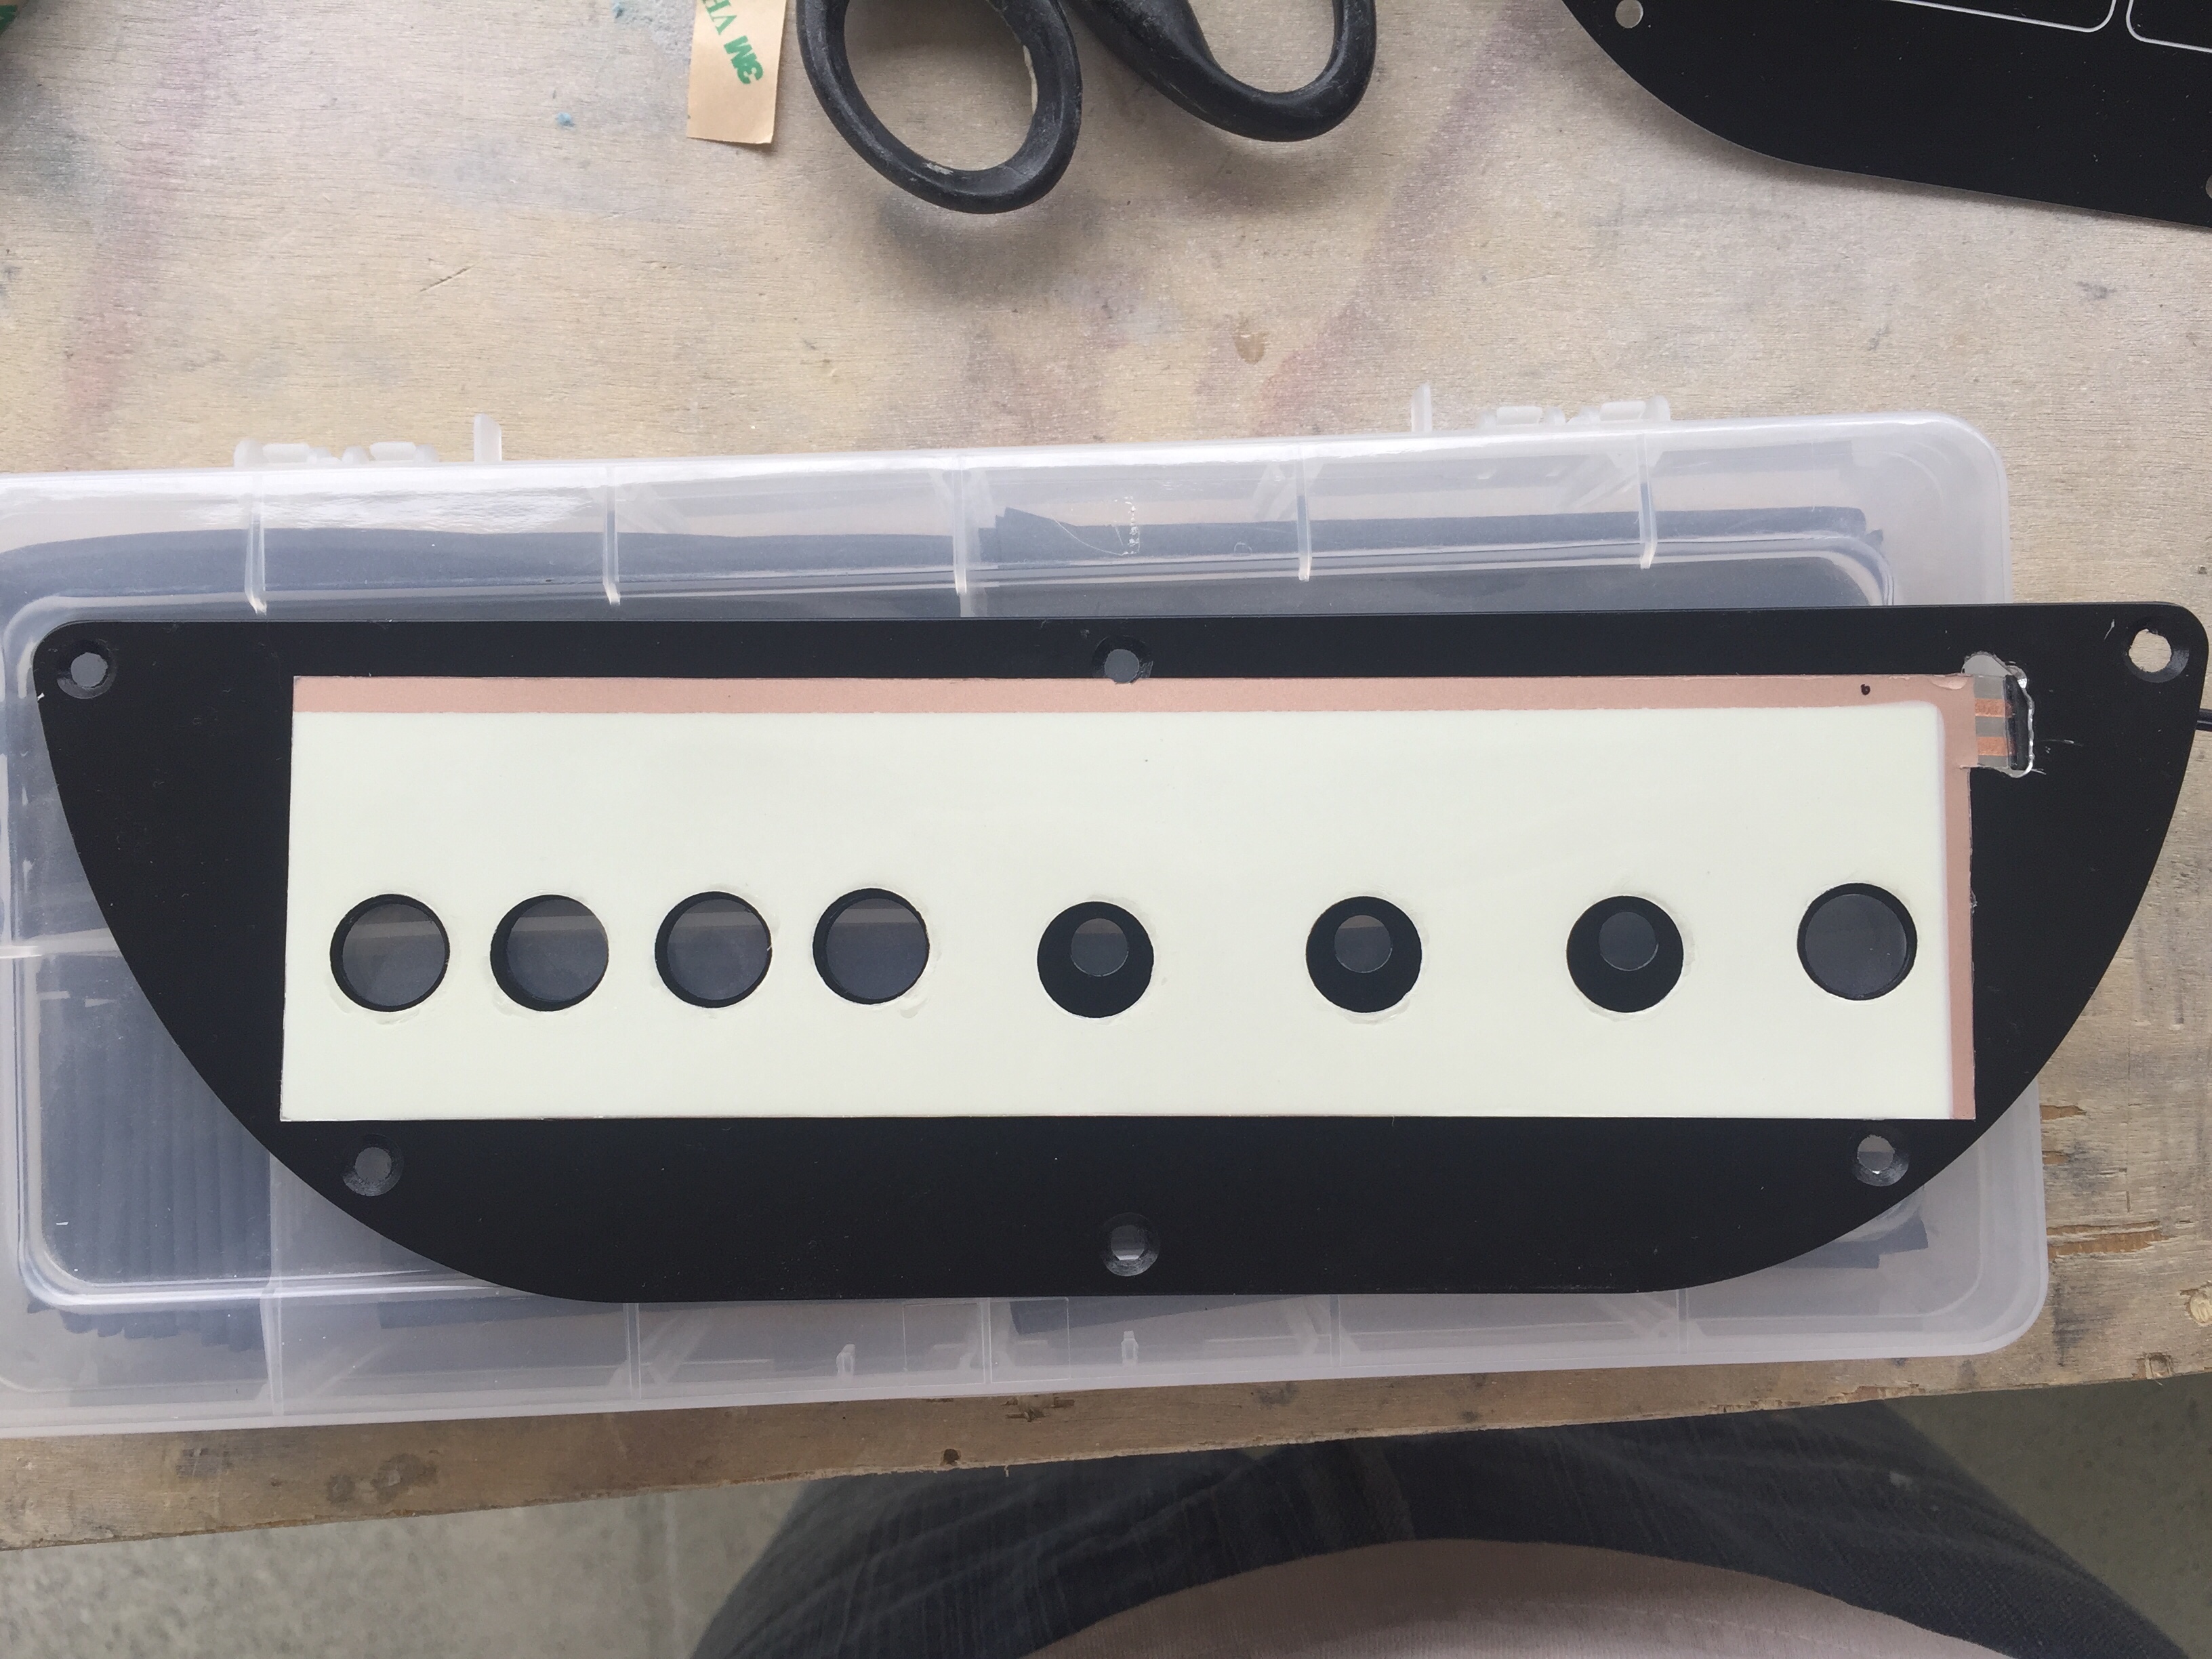
To install it permanently, I cleaned the metal backing panel and positioned the EL panel with 3M clear double sided tape (the same stuff Van’s recommends for trailing edges).  This is really just to hold it while placing the acrylic overlay on top.  The backing is removed from a small section of the acrylic overlay so that I have some adjustment playing the overlay on the metal panel.  Once everything is lined up just right, I removed the rest of the backing and pressed the acrlyic down evenly.

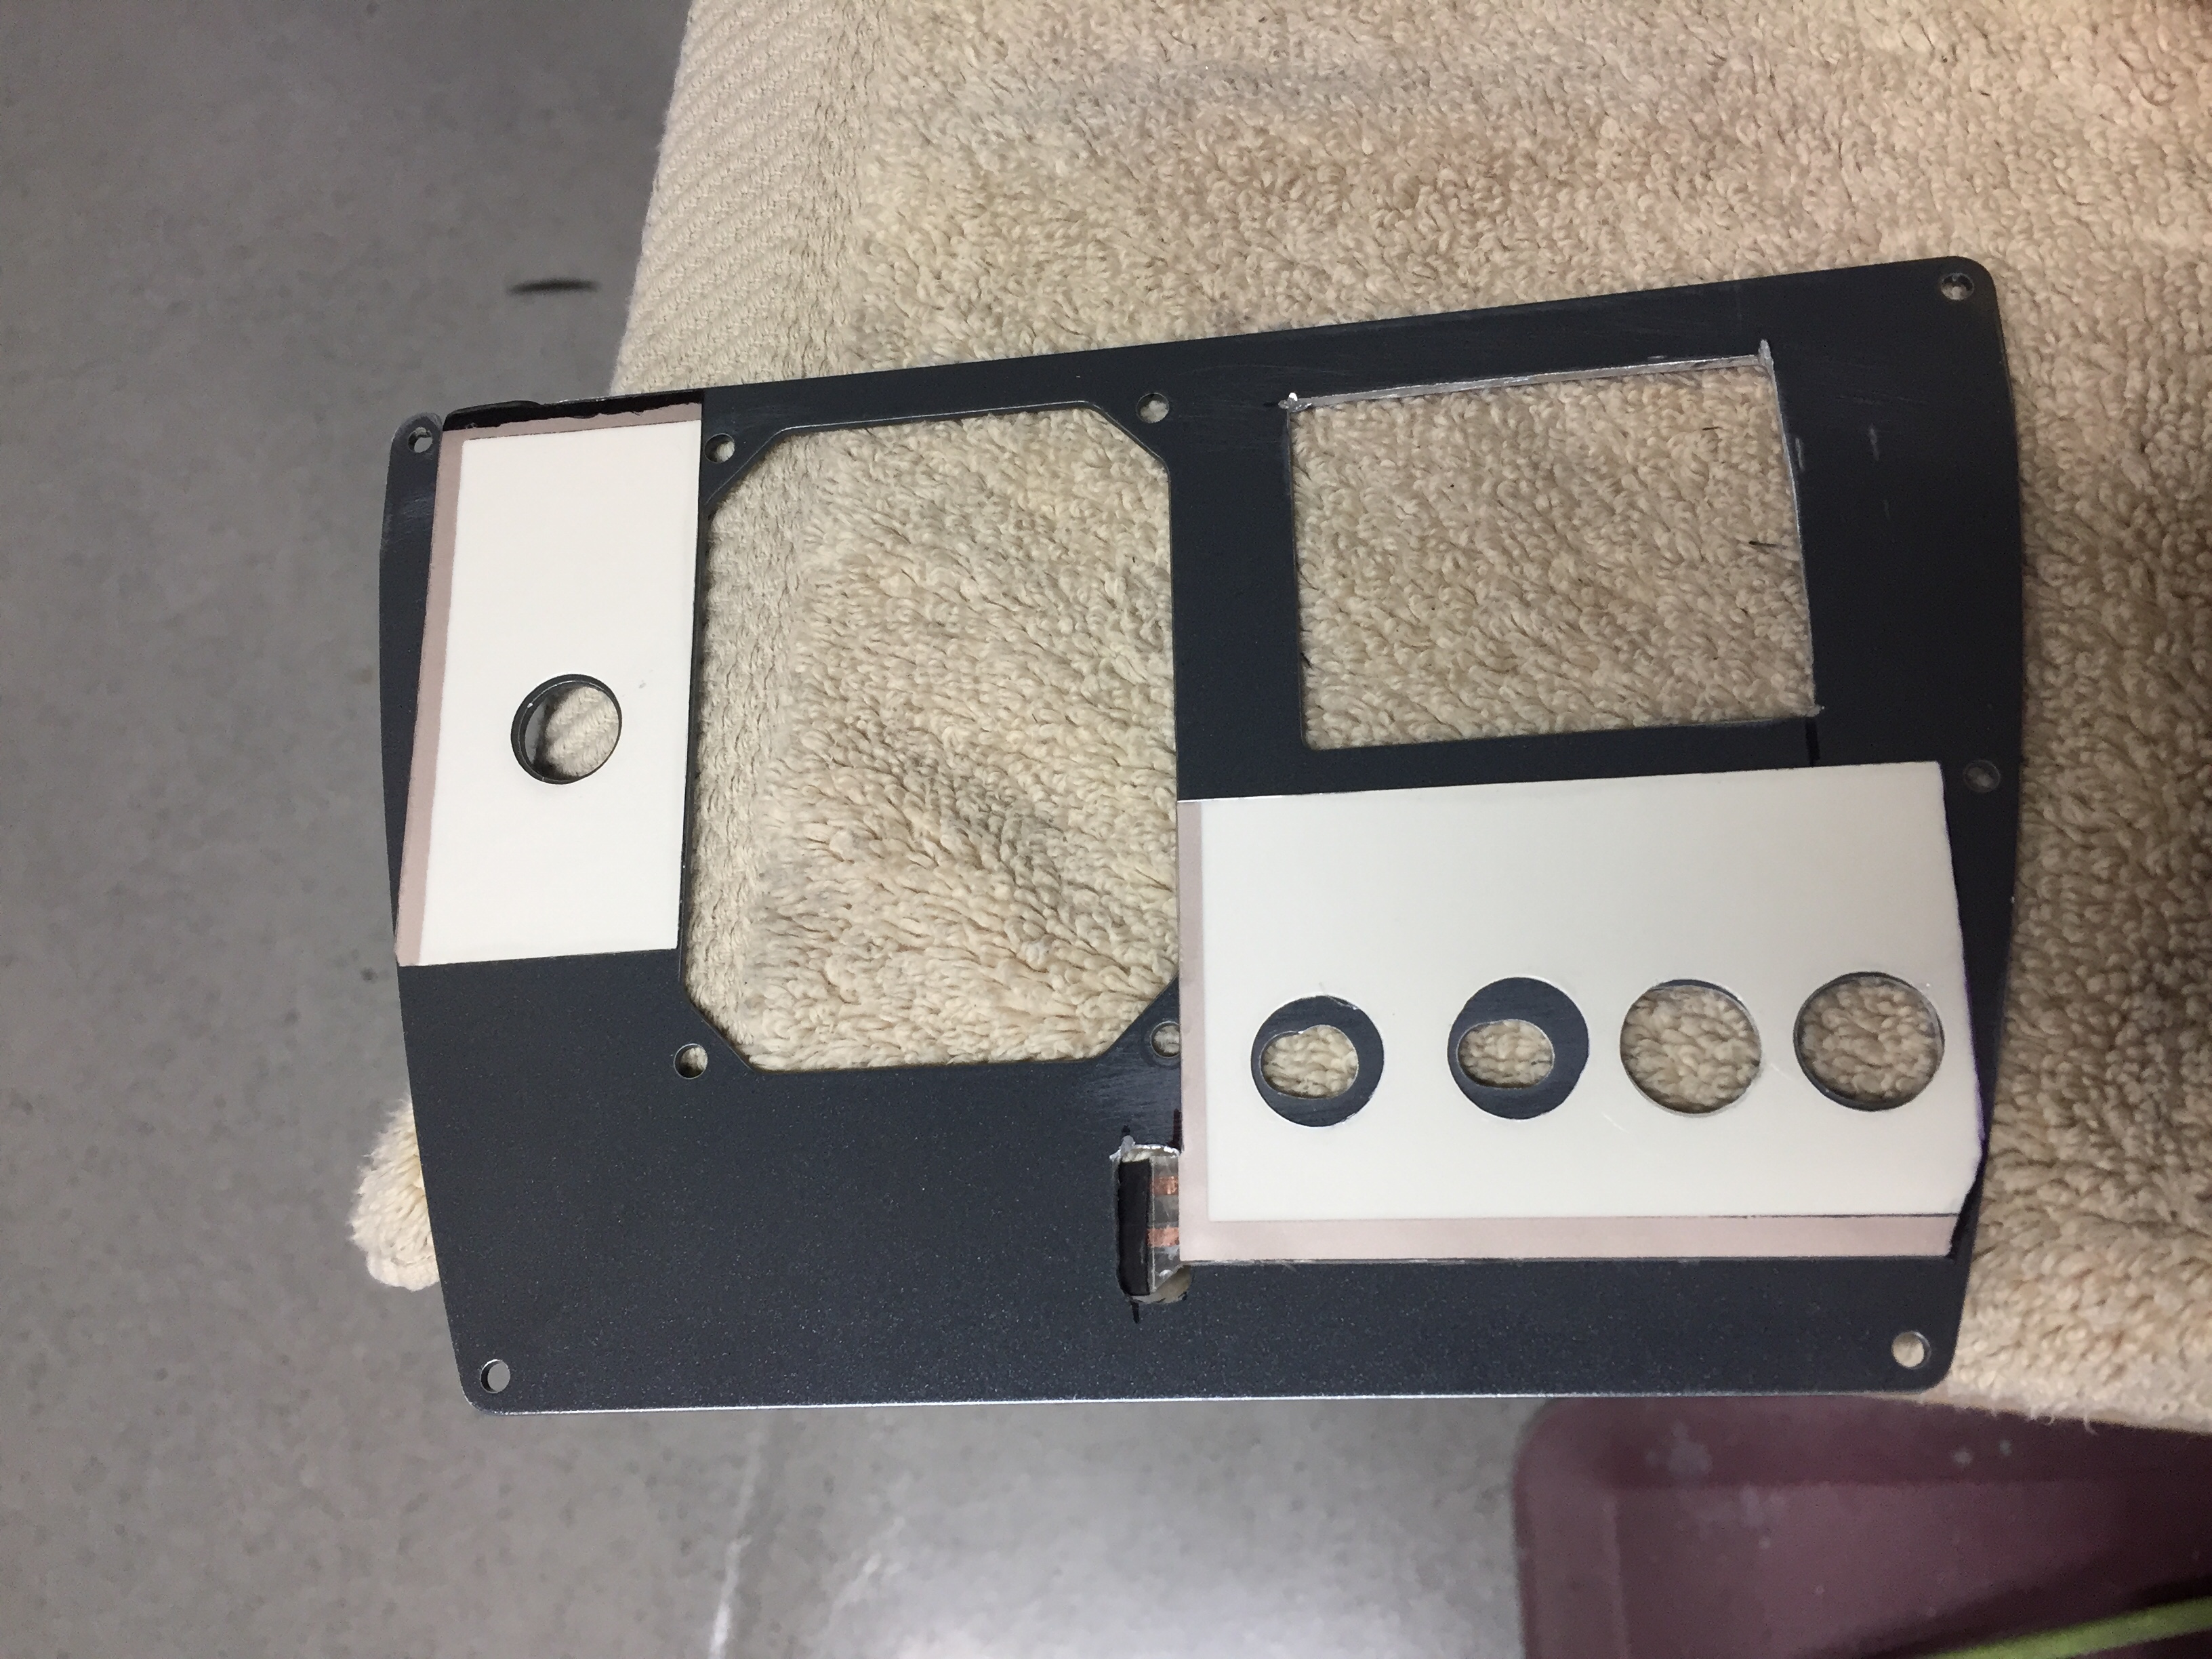
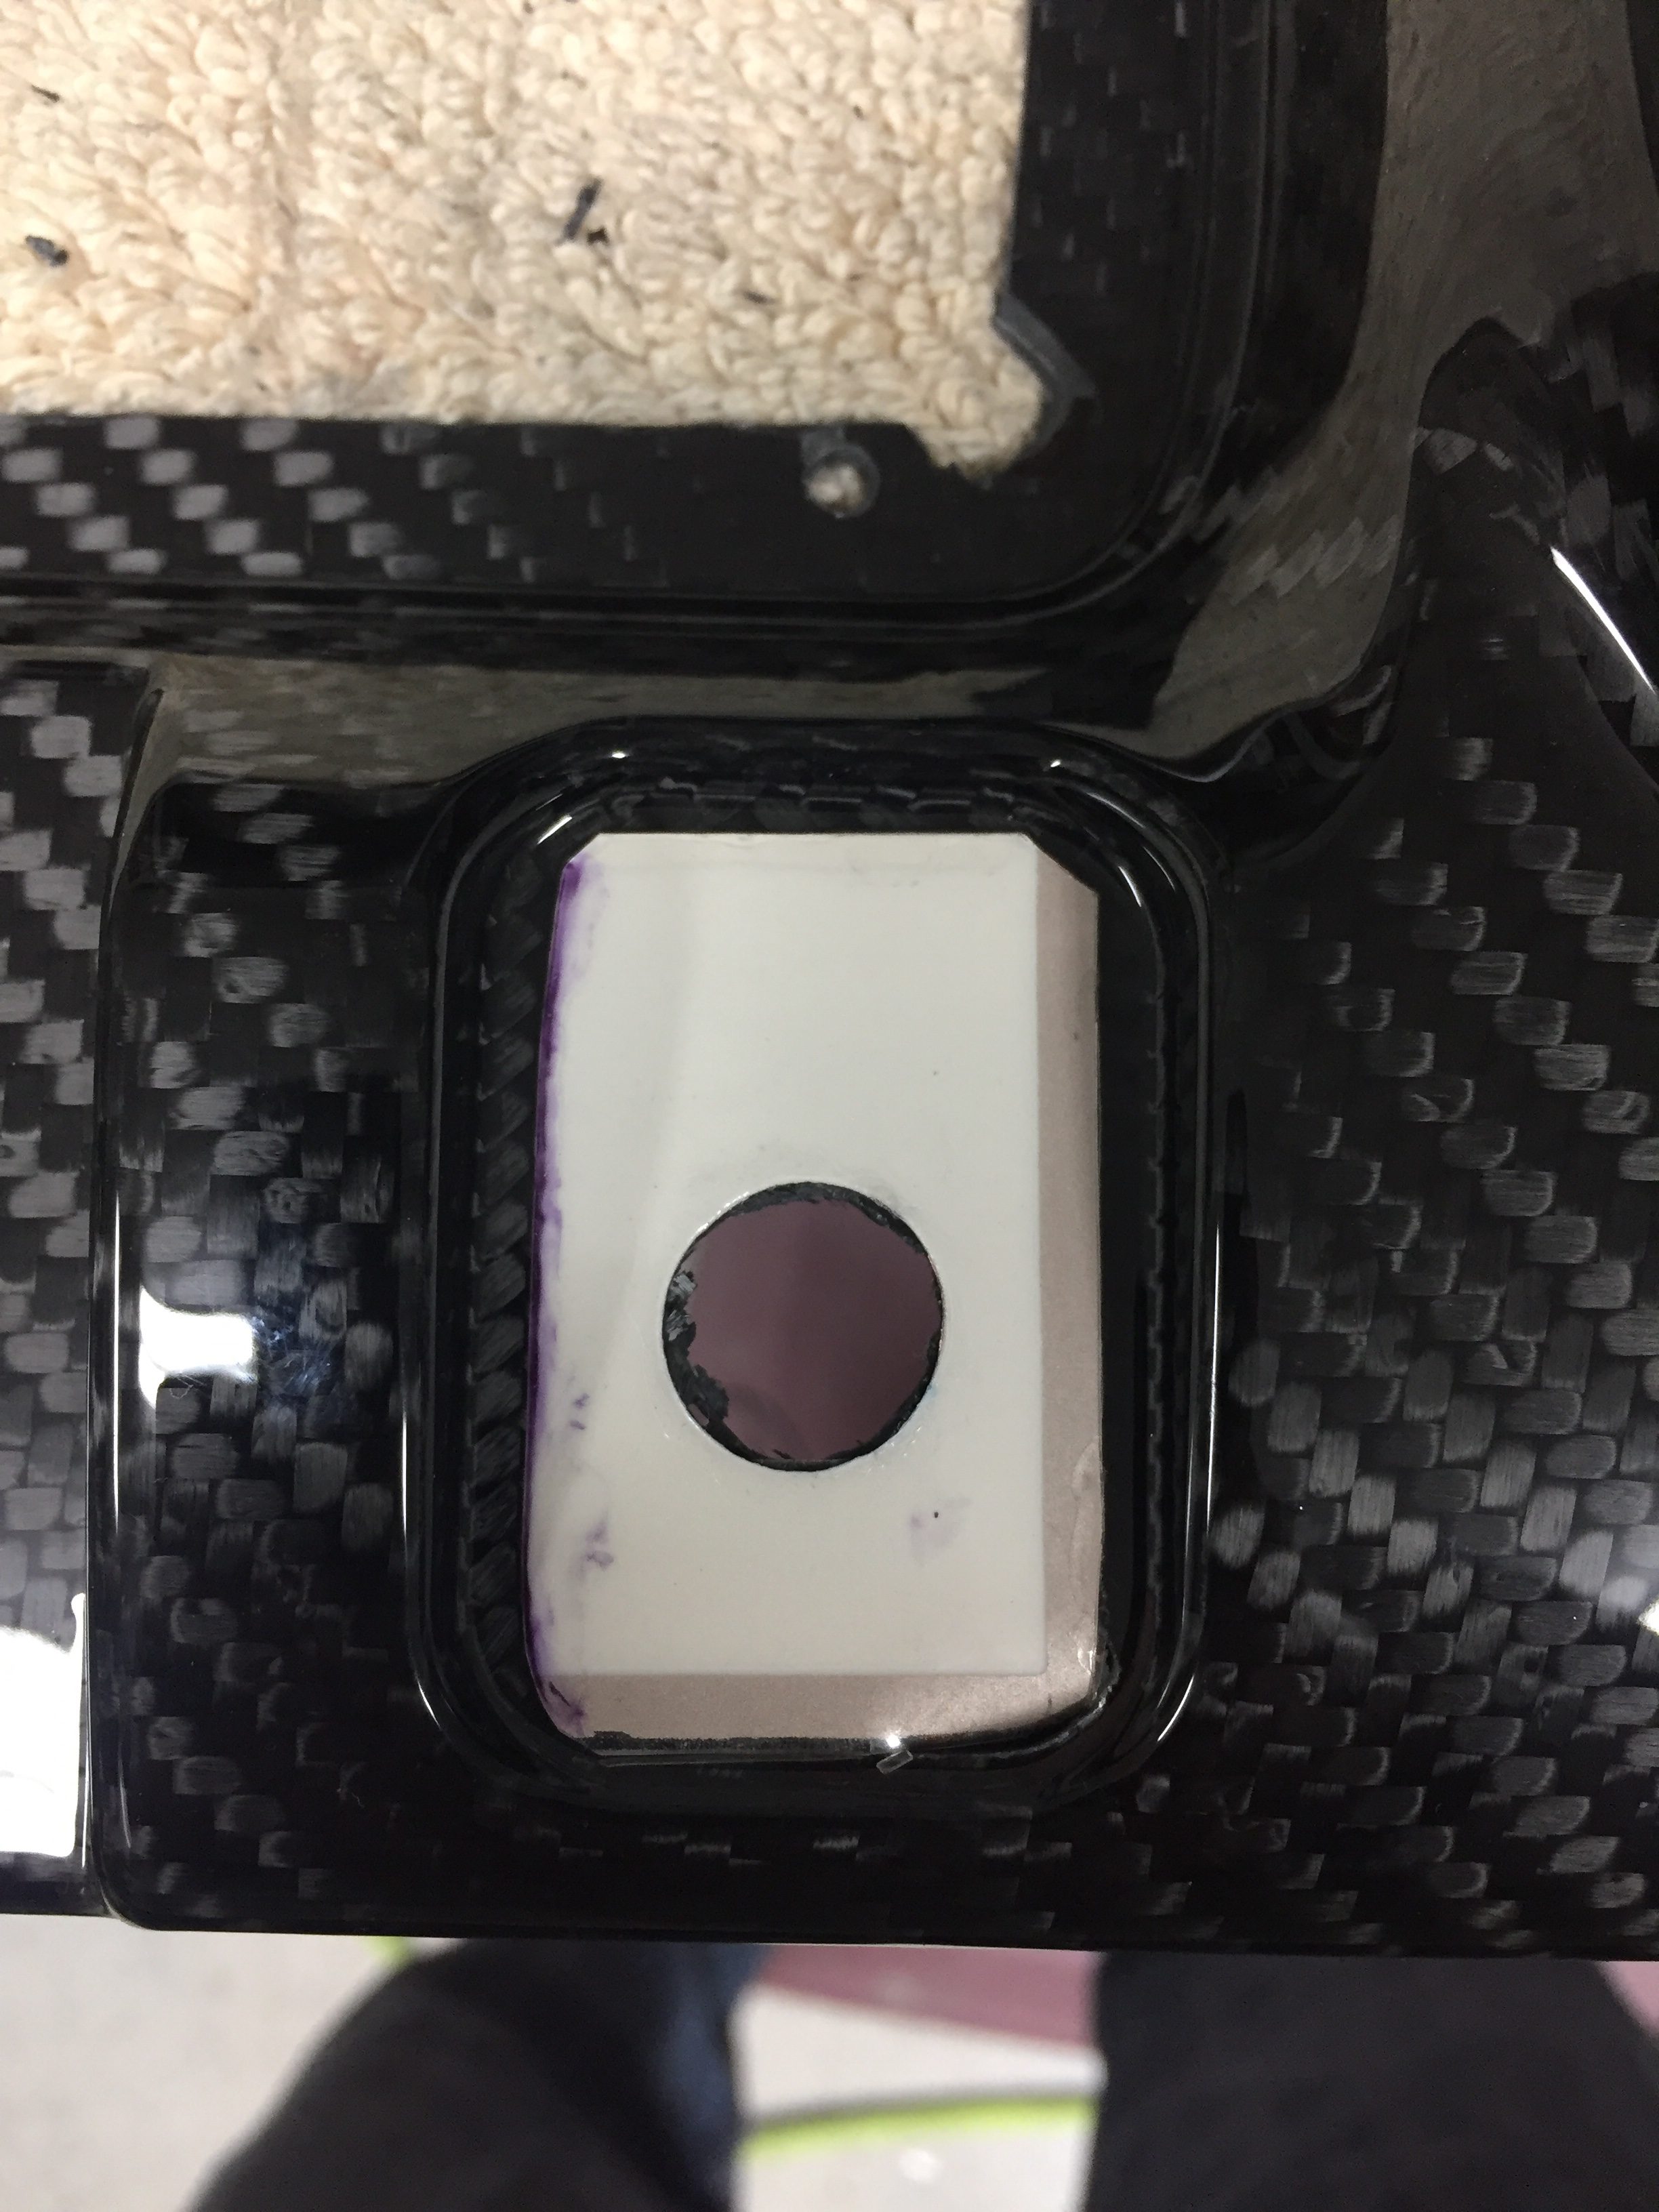
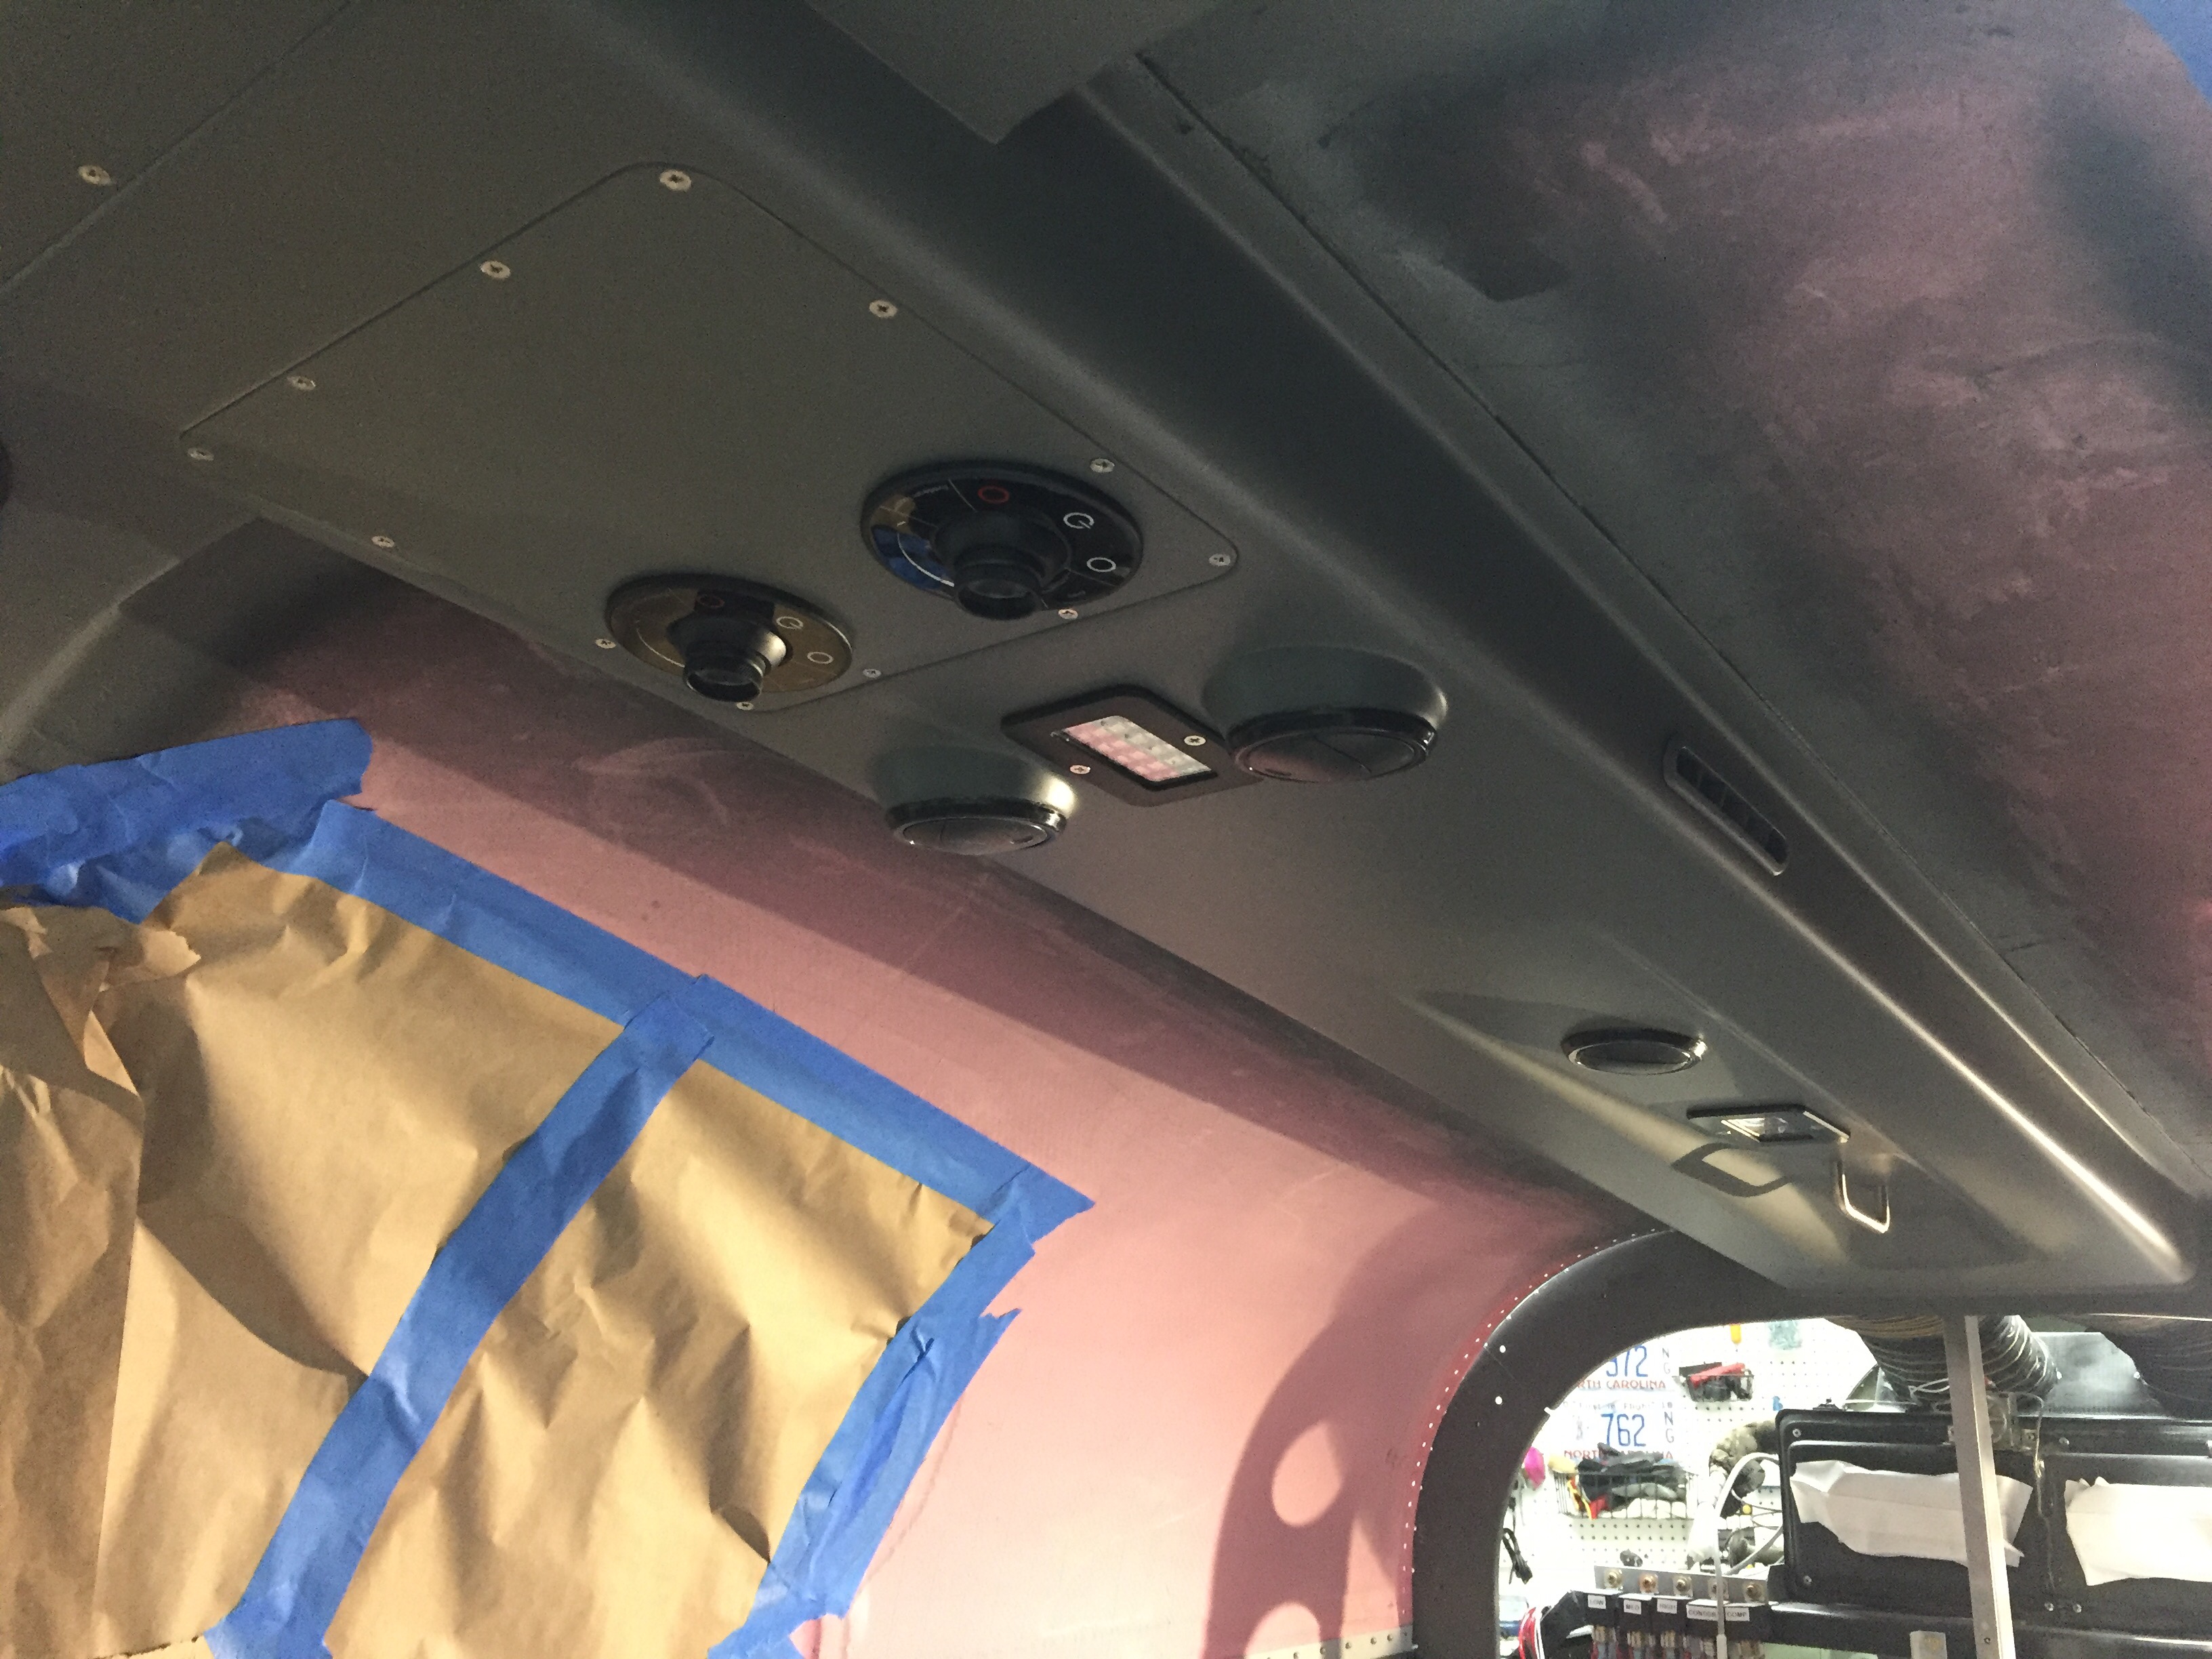
The end result is a sandwich with the acrylic on top, EL panel, then metal panel at the back.  There is just a slight thickness difference over the EL panel, but not enough to be noticeable without really inspecting up close.  If you’re doing that, keep your judgments to yourself!  Switches and dimmers are installed just like you would anything else and before you know it, I was able to screw the panel on the overhead console and fire it up.  I went ahead and wired all of the switches and had the dimmer pots ready to go, so the overhead console and panel is now complete pending black screws coming from AFS!

Overall, I am really impressed with the result and happy I did the project.  It wasn’t cheap, costing about $1000 with most of that coming from the engraved acrylic overlays.  The EL panels were about $200 after all said and done.  The acrylic would have been much cheaper if I had only done the areas around each switch or back light panel, but I wanted a uniform look across the cockpit.  I would absolutely recommend it to anyone wanting a little extra light and wow factor on their build.  The CAD work was fairly simple and fun as was putting it all together.  I can’t wait to get the rest of the avionics and get the whole thing fired up.  She is going to look stunning in the dark!

Shutting the door on the doors!

Doing things better the second time seems to be a driving motto for my project.  The paint on the overhead console is a great example.  With it properly prepped, I sprayed primer on it using the adhesion promoter and instantly saw improvement.  Once the primer cured, I did some test scrapes and the stuff stuck like epoxy!  After that, the color was easy, again using adhesion promoter after a good wipe down with tac free.  I followed all of that up with two coats of the satin clear on the entire painted interior.  It’s about time I replace the cartridges on my respirator.

I also fixed the rear foot well spar paint after cleaning the old stuff off and re-scuffing and priming the surface.  I wound up test fitting a few pieces of the carpet just to get an idea of how much metal is exposed and what actually needs to be painted.  The Aerosport carpet is nice, I couldn’t have done a better job myself, but they aren’t an exact fit which is a bit irritating especially for how much it costs.  Not sure if all of the patterns are like that, but the floor carpet for the rear foot well is about 1/2″ too big on length and width, so one side or both will need to curl up a bit.  Never noticeable once it’s flying, just being picky I guess.

The doors are finally done!!!!  The last coat of color and clear went on smoothly and I’m calling them fully baked.  What a royal pain in the ass they were.  I am very happy with how they turned out, though.  I put the Aerosport handle covers on and got the Plane Around center cam final installed with the roll pin.  The door lights went in for good as well. I took my time putting the final door seal on from McMaster Carr and made the seam hidden by the strut and strut bracket.  I used a bit of E6000 glue to ensure no gap in the seal lets water in up there.  Holding my breath, I closed the door and much to my surprise, both closed with the seal on smoothly!  The right side door is a bit more firm on the handle motion, but the wife is happy with it which is all that matters.

Now that the paint is all complete on the inside, I was ready to install the front windows.  Repeating the process from the rears, the right window went in very smoothly and thanks to good prep work and patience, the inside finish is nearly perfect.  I wound up with a very nice fillet of adhesive creating a nice finish around the perimeter of the door cutout transitioning to the window.  I did notice that the strut now feels much better with the extra weight and doesn’t cause the door to fly open violently.  If anything, it needs a bit of encouragement to go all the way up but has no problem keeping the door open once it’s there.

It took one more evening of work to get the left window in which again went very smoothly.  One additional piece of prep was to put masking tape on the outside of both front windows to help clean excess adhesive from the gap.  It will just make paint prep a bit easier and quicker.  Again, that gap gets filled in with more adhesive after paint for a flush clean look and finish.

I’m back to cleaning up the inside, yet again, of dust and debris since the windows are now in and I can control what goes into the cabin.  The seat belts and receptacles were bolted back in and I riveted on the baggage door panel and gas strut (which I keep forgetting is on when the damn door hits me in the stomach).  Avionics are shipping soon so I need to get the wing root wiring harness complete to be ready to put the expensive boxes in next.

In Over(my)head

Just when I thought I was nearing the work on the inside, all hell breaks loose.  As I had put masking tape on the overhead console to protect the paint from scratches caused by fitting the headliner base, I wound up setting myself pretty far back by ripping off chunks of paint with the tape.  Now we all know it’s probably not the paint’s fault.  It’s mine.  Why do I do stupid things like not properly prep the surface and not prime?  Seriously.  WTF Tim?  Get your crap together.

Bottom line, I knew as soon as I painted the overhead it was fragile.  The paint had already chipped off a few spots around the metal insert panels and I was concerned that it wouldn’t hold up to normal wear and tear.  I chewed on having a professional painter take it and strip the entire interior but then decided against it, not wanting to give up control.  On the surfaces where I properly prepped and applied the paint, I was very happy with it.  I like the idea of being able to do spot touch ups with a spray can down the road.  All of the interior matches.  All those plus the thought of someone inadvertently sanding through filler while trying to remove the current paint helped me climb in with a razor blade, pile of sand paper, and a neck brace to start working overhead.

After about three hours of work, all the paint was off the overhead and everything had been sanded down with 120 grit.  Even though Aerosport says 320, I found that it wasn’t really marking the surface much, and I want the paint to stick this time!  I took my time around the vents and areas of the cabin top where I knew the paint/primer was strong such as the door frames and switch panel.  As I was removing the paint, I could obviously tell where areas were better than others.  Around the door frames that had been scuffed and near the switch console where I had primed, the paint was a real bear to remove.  That gives me hope I can do it right.

This time, I’ll use tack-free to wipe down the entire surface very well and remove any contaminants (something I didn’t really do before) then use an adhesion promoter while putting the primer on.  I have the fuselage all cleaned out from dust (again) and need to finish the touch ups on the door at the same time.  I’ll also spray the baggage door panel.  I’m not going to jinx myself and say that will finish the interior this time.

Meanwhile, my first two very expensive boxes of avionics have arrived!  The lesser of the two from Tosten had my two stick grips in it which led to lots of button pushing, trigger pulling, couch flying while making airplane, gun, and missile noises!  I’ll try to get a video sometime.

The big box was from Advanced Flight Systems as a prelude to the full panel being shipped in a week or two.

They were nice enough to ship me some advance components and harnesses such as the ADAHRS, servos, and EMS among a few other things.  I first ran the autopilot servo wire harnesses and already appreciate the value of having AFS wire the majority of the avionics.  I pulled 21 wires in about 10 minutes that are already pinned on one end.  That task alone would have taken a day to measure, cut, label, pull, and pin all of that.  Once the servos are in place, I’ll use the supplied pins to finish the connections.  I also pulled the SV network cable that will run to the ADAHRS in the tail cone.  I essential tripled the amount of wiring in the aircraft in less than 30 minutes!

My yaw damper mount arrived from Van’s so I set about installing the pitch servo mount and yaw servo mount back in the tail cone.  Woof, what a pain in the ass to get to at this point.  Future builders, buy this stuff early and put it in when building the tail cone!  By sheer luck or divine intervention, the AC condenser clears the pitch AP servo by about 1/8″.  I really lucked out, because I had no idea how it would all fit when I redid the AC.

I do not enjoy laying in the tail cone so I made a list of everything needed to be done for the next and final time during the build getting back there.  I decided to remove the O2 tank to make more room and was able to mount the ADAHRS tray fairly easily.  I managed to get it within .75 degrees on all axis by sheer luck, again, but I’ll take it.  I routed all the tubing and installed the pins on the wiring to hook the splitter up to the harness from the front.  I took the time to lace all the wiring and installed a few grommets back there.  It all cleaned up very nicely in the end and I’ll just need to shimmy back again to hook the rudder cables up to the yaw servo once the tail is installed.